SAML using Azure AD and AD identities for Workspace authentication
This article describes how you can configure SAML for workspace authentication using Active Directory (AD) identities. The default behavior for Citrix Cloud and SAML authentication to Citrix Workspace or Citrix Cloud, regardless of the SAML provider used, is to assert against an AD user identity. For the configuration described in this article, using Azure AD Connect to import your AD identities to your Azure AD is required.
Important:
It is crucial to determine the appropriate SAML flow for your Workspace end users, as it directly impacts their sign-in process and resource visibility. The chosen identity influences the types of resources accessible to a Workspace end user. There is an associated article that provides instructions on utilizing Azure AD as the SAML provider for authenticating into Workspace using AAD identities. You can find detailed instructions in SAML using Azure AD and AAD identities for workspace authentication. Usually, Workspace end users typically need to open apps and desktops provided by AD domain joined VDAs. It is essential to carefully review the use cases outlined in both articles before deciding on the most suitable SAML flow for your organization. If uncertain, Citrix recommends using the AD SAML flow and following the instructions in this article, as it aligns with the most common DaaS scenario.
Feature scope
This article applies to users who use the following combination of Citrix Cloud and Azure features:
- SAML for workspace authentication using AD identities
- SAML for Citrix Cloud admin login using AD identities
- Citrix DaaS and HDX resource enumeration of resources published using AD domain-joined VDAs
- AD domain-joined VDA resource enumeration
What’s best: AD identities or Azure AD identities?
To determine whether your workspace users should authenticate using either SAML AD or SAML Azure AD identities:
- Decide which combination of resources you intend to make available to your users in Citrix Workspace.
-
Use the following table to determine which type of user identity is appropriate for each resource type.
Resource type (VDA) User identity when signing in to Citrix Workspace Needs SAML identity using Azure AD? FAS provides single sign-on (SSO) to VDA? AD joined AD, Azure AD imported from AD (contains SID) No. Use default SAML. Yes
Configure the custom Azure AD Enterprise SAML application
By default, the behavior for SAML sign-in to workspaces is to assert against an AD user identity.
- Sign in to the Azure portal.
- From the portal menu, select Azure Active Directory.
- From the left pane, under Manage, select Enterprise Applications.
-
In the search box, enter
Citrix Cloud SAML SSOto locate the Citrix SAML application template.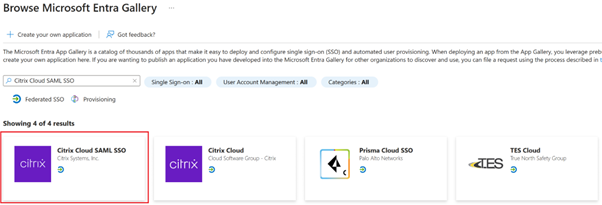
-
Enter a suitable name for the SAML application such as
Citrix Cloud SAML SSO Production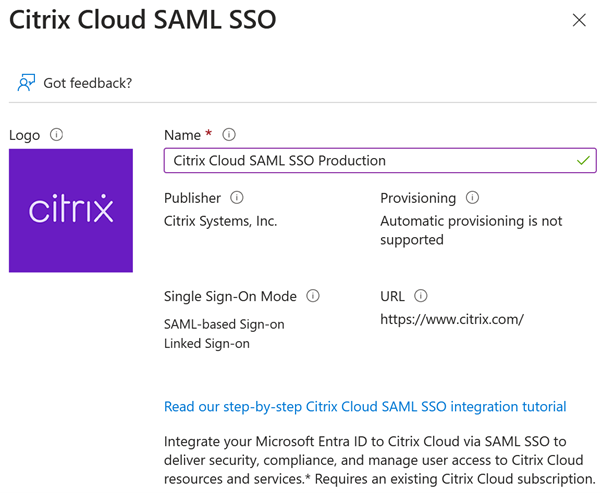
- From the left navigation pane, select Single sign-on and from the working pane, click SAML.
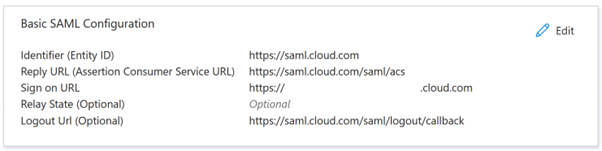
- In the Basic SAML Configuration section, click Edit and configure the following settings:
- In the Identifier (Entity ID) section, select Add identifier and then enter the value associated with the region in which your Citrix Cloud tenant is located:
- For Europe, United States, and Asia-Pacific South regions, enter
https://saml.cloud.com. - For the Japan region, enter
https://saml.citrixcloud.jp. - For the Citrix Cloud Government region, enter
https://saml.cloud.us.
- For Europe, United States, and Asia-Pacific South regions, enter
- In the Reply URL (Assertion Consumer Service URL) section, select Add reply URL and then enter the value associated with the region in which your Citrix Cloud tenant is located:
- For Europe, United States, and Asia-Pacific South regions, enter
https://saml.cloud.com/saml/acs. - For the Japan region, enter
https://saml.citrixcloud.jp/saml/acs. - For the Citrix Cloud Government region, enter
https://saml.cloud.us/saml/acs.
- For Europe, United States, and Asia-Pacific South regions, enter
- In the Sign on URL section, enter your Workspace URL.
- In the Logout URL (Optional) section, enter the value associated with the region in which your Citrix Cloud tenant is located:
- For Europe, United States, and Asia-Pacific South regions, enter
https://saml.cloud.com/saml/logout/callback. - For the Japan region, enter
https://saml.citrixcloud.jp/saml/logout/callback. - For the Citrix Cloud Government region, enter
https://saml.cloud.us/saml/logout/callback.
- For Europe, United States, and Asia-Pacific South regions, enter
- From the command bar, click Save. The Basic SAML Configuration section appears as follows:
- In the Identifier (Entity ID) section, select Add identifier and then enter the value associated with the region in which your Citrix Cloud tenant is located:
-
In the Attributes & Claims section, click Edit to configure the following claims. These claims appear in the SAML assertion within the SAML response. After SAML app creation, configure the following attributes.
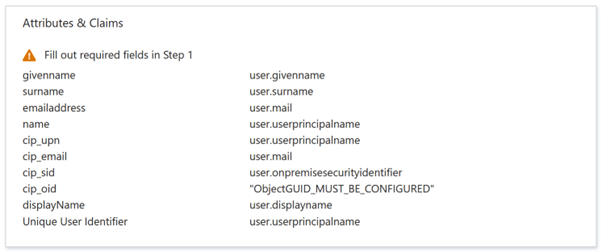
- For the Unique User Identifier (Name ID) claim, leave the default value of
user.userprincipalname. - For cip_upn claim, leave the default value of
user.userprincipalname. - For cip_email claim, leave the default value of
user.mail. - For cip_sid claim, leave the default value of
user.onpremisesecurityidentitier. - For cip_oid claim, edit the existing claim and select Source attribute. Search for the string
objectand selectuser.onpremisesimmutableid.
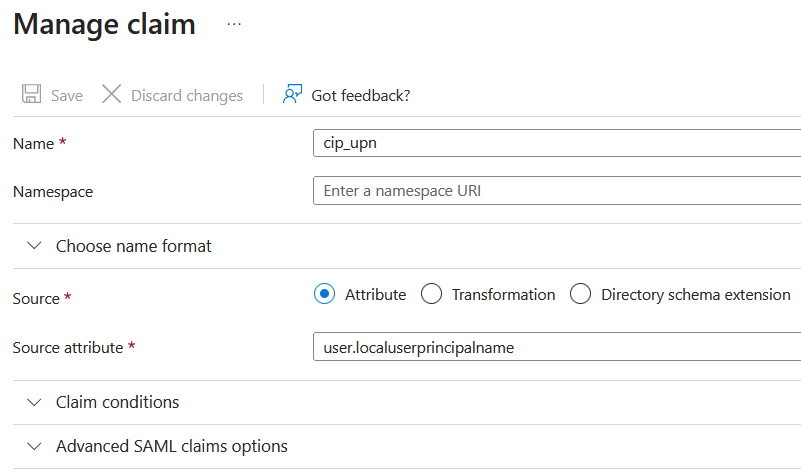
- For displayName, leave the default value of
user.displayname. - In the Additional claims section, for any remaining claims with the
http://schemas.xmlsoap.org/ws/2005/05/identity/claimsnamespace, click the ellipsis (…) button and click Delete. No need to include these claims as they are duplicates of the above user attributes.
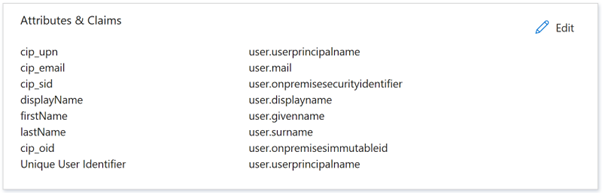
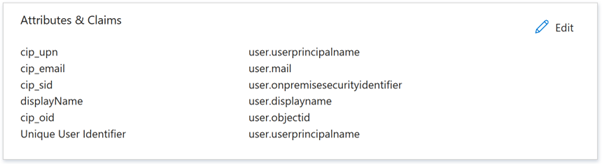
When finished, the Attributes & Claims section appears as illustrated below:
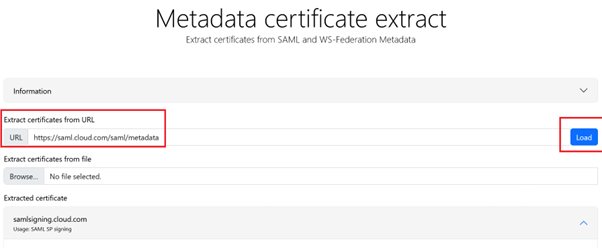
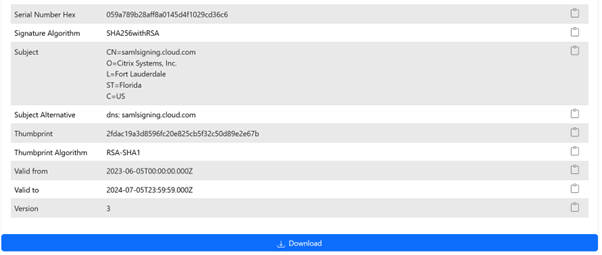
- Obtain a copy of the Citrix Cloud SAML signing certificate using this third party online tool.
- Enter
https://saml.cloud.com/saml/metadatain the URL field and click Load.
- For the Unique User Identifier (Name ID) claim, leave the default value of
-
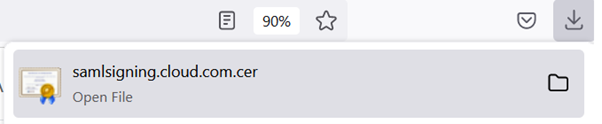
Scroll to the bottom of the page and click Download.
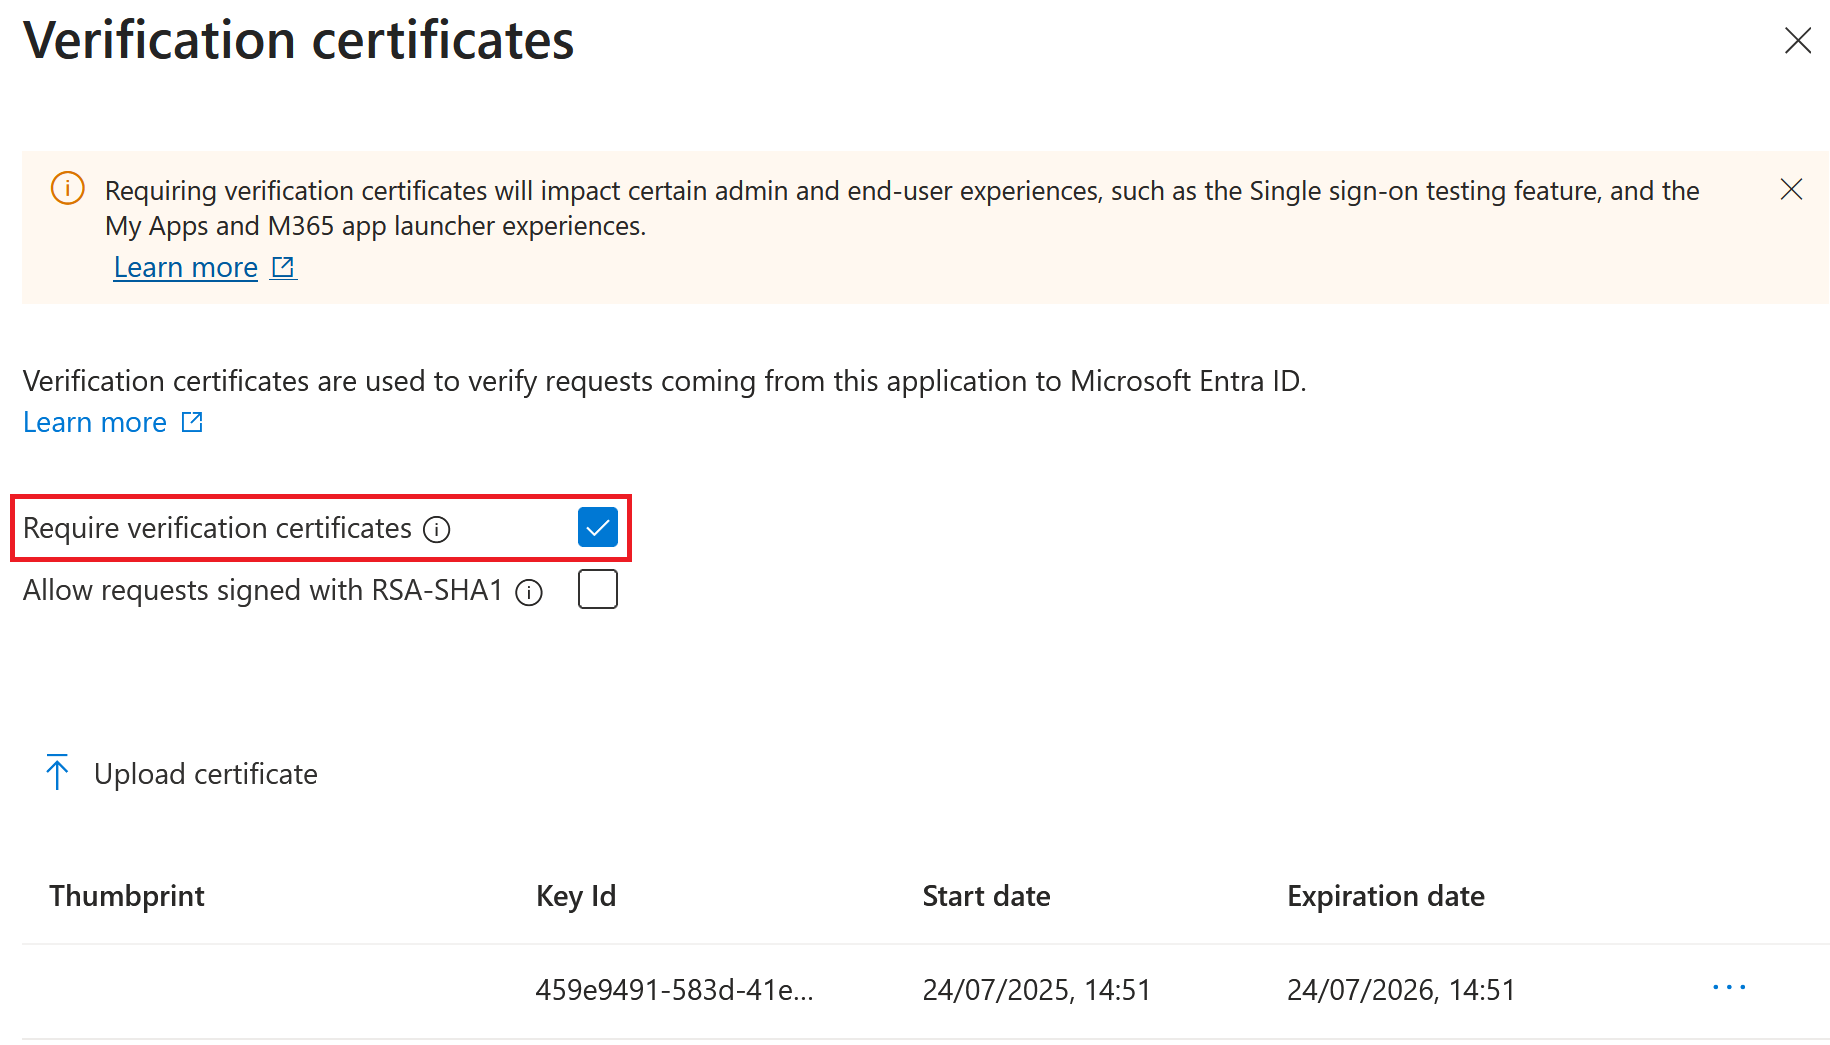
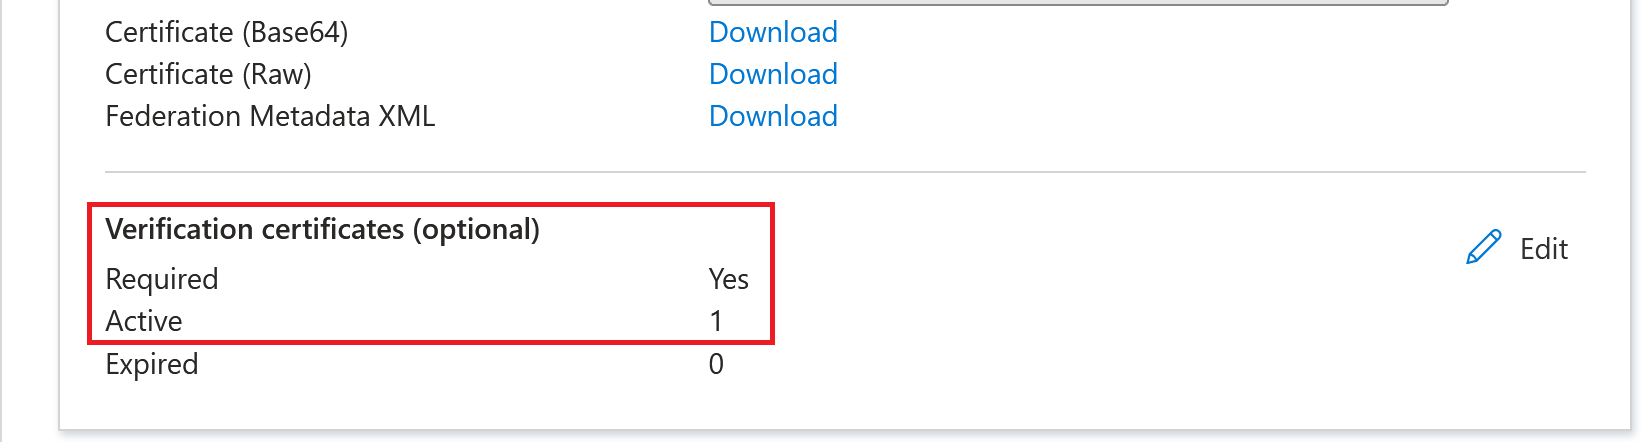
- Configure the Azure Active Directory SAML application Signing Settings.
- Upload the production SAML signing certificate obtained in step 10 within the Azure Active Directory SAML application
- Enable Require verification certificates.
Troubleshooting
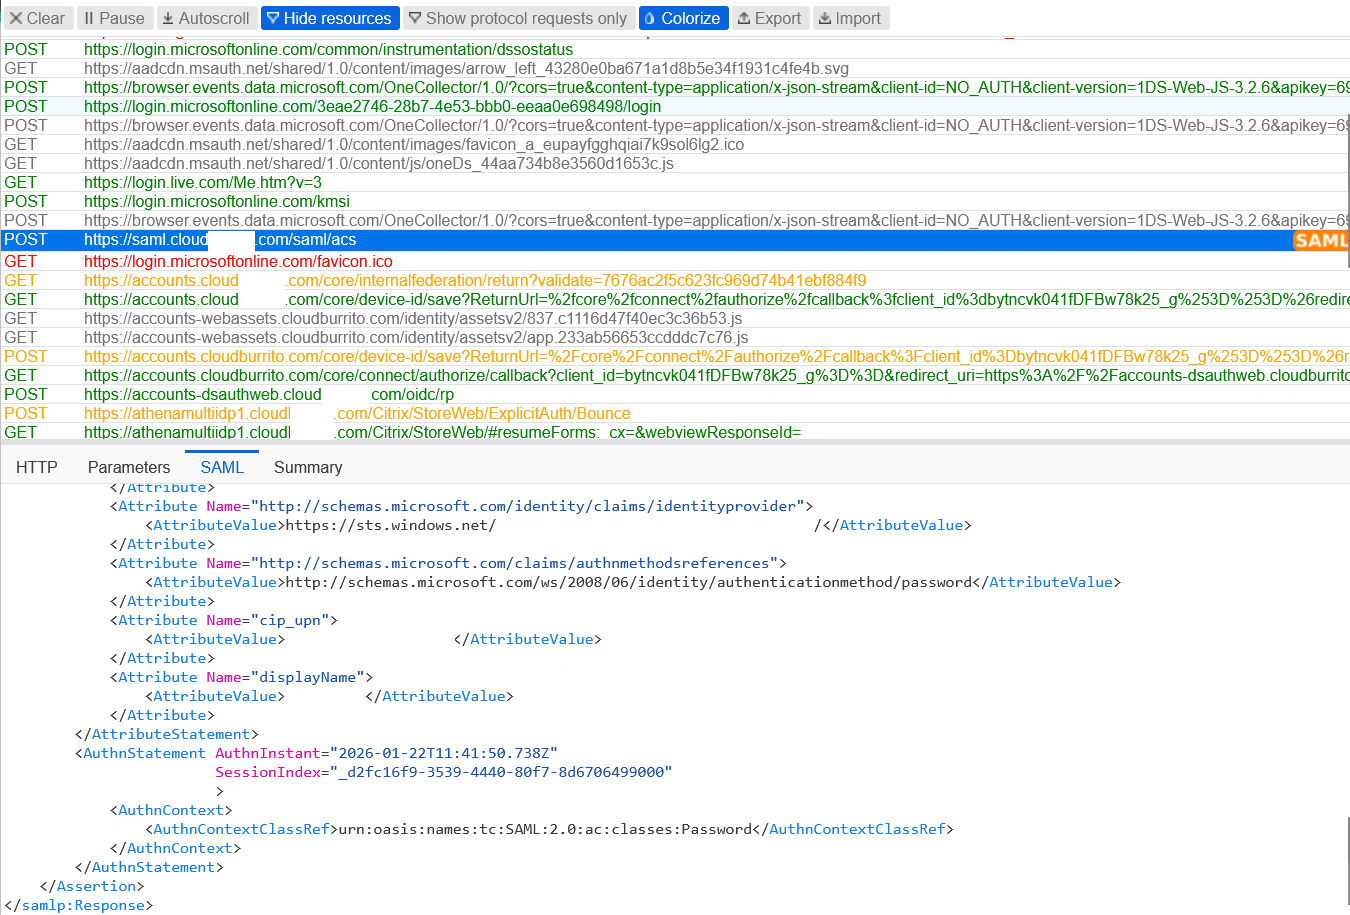
- Verify your SAML assertions contain the correct user attributes using a SAML networking tool, such as the SAML-tracer browser extension.
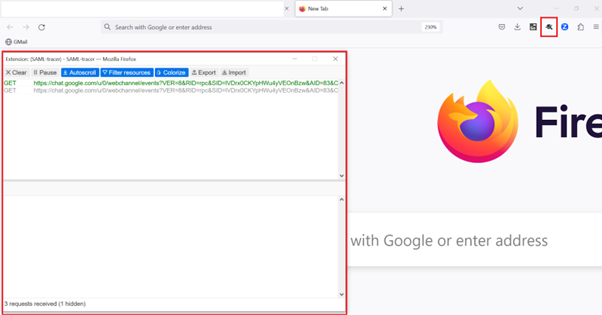
-
Locate the SAML response shown in yellow and compare to this example:

- Click on the SAML tab in the bottom pane to decode the SAML response and view as XML.
-
Scroll to the bottom of the response and verify that the SAML assertion contains the correct SAML attributes and user values.
If your subscribers still can’t sign in to their workspace or they can’t see their Citrix HDX Plus for Windows 365 desktops, contact Citrix Support and provide the following information:
- SAML-tracer capture
- Date and time the sign-in to Citrix Workspace failed
- The affected user name
- The caller IP address of the client computer that you used to sign in to Citrix Workspace. You can use a tool like https://whatismyip.com to get this IP address.