 View PDF


Manually match managed applications with imported applications
Aug 14, 2017
You can also manually link managed applications with applications that have already been imported into AppDNA.
-
From the AppDNA menus, choose Configure > AD & ConfigMgr > Link Managed Applications.
-
Towards the center of the left side of the Link Managed Applications screen, drag the Installation box to between the Package and Manufacturer column headings.
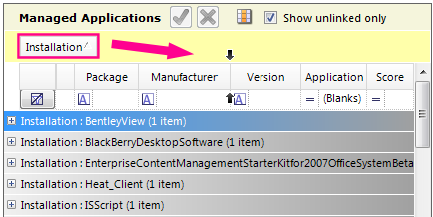
This presents the list of managed applications as a flat list.
-
In the Matching section near the top, select Match: Managed to Imported in the Mode drop-down box.
-
In the list of managed applications, select the check box next to the managed application that you want to match. If the application has multiple installations, select the check box next to all of them.
-
In the list of imported applications, click the application that you want to match with the selected managed application.
-
To make the association, click the green checkmark
 on the toolbar in the Managed Applications side of the screen.
If the Show unlinked only check box is selected, the managed application and imported application both disappear from the list after you match them.
-
To bring them back, clearing the Show unlinked only check box on both sides of the screen.

You can now see the managed application and the imported application that you matched. Notice that the Application column for the managed application shows the name of the matched application.
-
To remove an association, select the managed application, and click the red cross
 on the toolbar above.
This removes the linking and the name of the matched application from the Application column.
-
To save the changes, click Save Associations at the top of the screen.