Secure configuration
This article contains the procedures required to ensure that Self-Service Password Reset components are securely deployed and configured.
- Create a Domain user account to reset user password and unlock user account permission
- Configure the firewall settings
Create a Self-Service Account
If you are using the Password Reset or Account Unlock features of Self-Service Password Reset, specify a Self-Service account during Service Configuration that is used by the self-service module to execute Password Reset and Account Unlock. Ensure that the account has sufficient privilege, but we do not recommend using an account in the Domain Admins group for production deployments. The recommended account privileges are:
- Member of the domain
- Password reset and account unlock permission for the relevant domain users
In Active Directory Users and Computers, create the group or user account to have the rights to reset the user password and unlock user accounts.
- In Active Directory Users and Computers, right-click the domain, and then click Delegate Control from the menu.
- The Delegation of Control wizard displays. On the Welcome dialog box, click Next.
- On the Users and Groups dialog box, click Add. Select the group in the list that you want to give the right to unlock accounts, and then click OK. On the Users and Groups dialog box, click Next.
- On the Tasks to Delegate dialog box, click Create a custom task to delegate, and then click Next.
- On the Active Directory Object Type dialog box, click Only the following objects in the folder > User objects, and then click Next.
- On the Permissions dialog box, select the General and Property-specific check boxes. In the Permissions list, select the Read lockoutTime , Write lockoutTime, Reset Password, Change Password, Read userAccountControl, Write userAccountControl, Read pwdLastSet, and Write pwdLastSet check boxes, and then click Next.
- On the Completing the Delegation of Control wizard dialog box, click Finish.
Configure the firewall settings
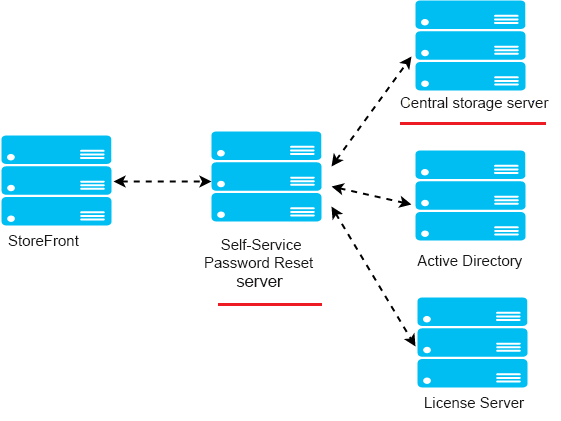
Because the Self-Service Password Reset server and the central storage server components manage user passwords, we strongly recommend that you deploy these components on a trusted network and that they are reachable only by specific trusted components. This section describes the steps to ensure that you correctly configure the Windows firewall for these servers. We also recommend that you configure existing network infrastructure to ensure that these servers are isolated from untrusted network traffic.
After you complete those configurations in the deployment, the Self-Service Password Reset central store servers can be accessed only from Self-Service Password Reset servers using Server Message Block (SMB). And the Self-Service Password Reset servers are accessed only from the StoreFront™ servers with HTTPS connections.
Remote file share deployment for Windows 2012 R2
Environment
- Deploy the Self-Service Password Reset components on dedicated servers. Do not deploy them on the same servers as the existing StoreFront or Delivery Controller™ components. Otherwise, the firewall configuration shown below might block the Storefront or controller traffic.
- There is no non-transparent HTTP/HTTPS proxy between StoreFront and Self-Service Password Reset server.
If any non-transparent proxy exists between StoreFront and the Self-Service Password Reset server, configure the Self-Service Password Reset server to be accessed only from the proxy server in the firewall rules.
- The configurations in these procedures are based on the windows default firewall rules.
Configure the firewall for Self-Service Password Reset central store
After completing the configuration, the SMB service provided by the Self-Service Password Reset central store can be accessed only from the Self-Service Password Reset servers on the inbound. And the Self-Service Password Reset central store server can access service located on the corporate network only on the outbound.
1. Open the Server Manager, and from the Tools menu on the top navigation bar, select Windows Firewall with Advanced Security.
2. On Windows Firewall with Advanced Security, select Windows Firewall Properties in the middle pane. There are three firewall profiles - Domain, Private, and Public. Select the Domain Profile tab. Ensure that the Firewall state is set to On, the Inbound connections are set to Block, and the Outbound connections are set to Allow.
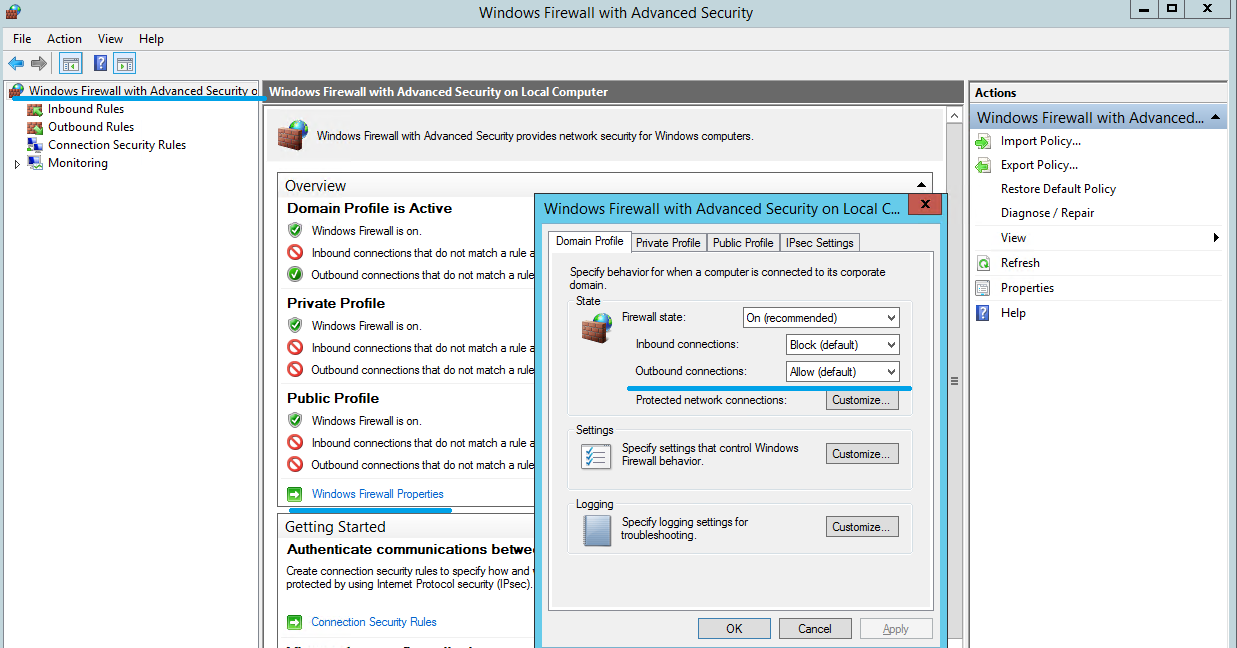
3. Select the Private Profile and Public Profile tabs. Ensure that the Firewall state is set to On, and both the Inbound connections and Outbound connections are set to Block. Apply and save the changes.
4. From the Inbound Rules, choose File and Printer Sharing (SMB-In) and ensure that this rule is Enabled and the Action is set to Allow the connection.
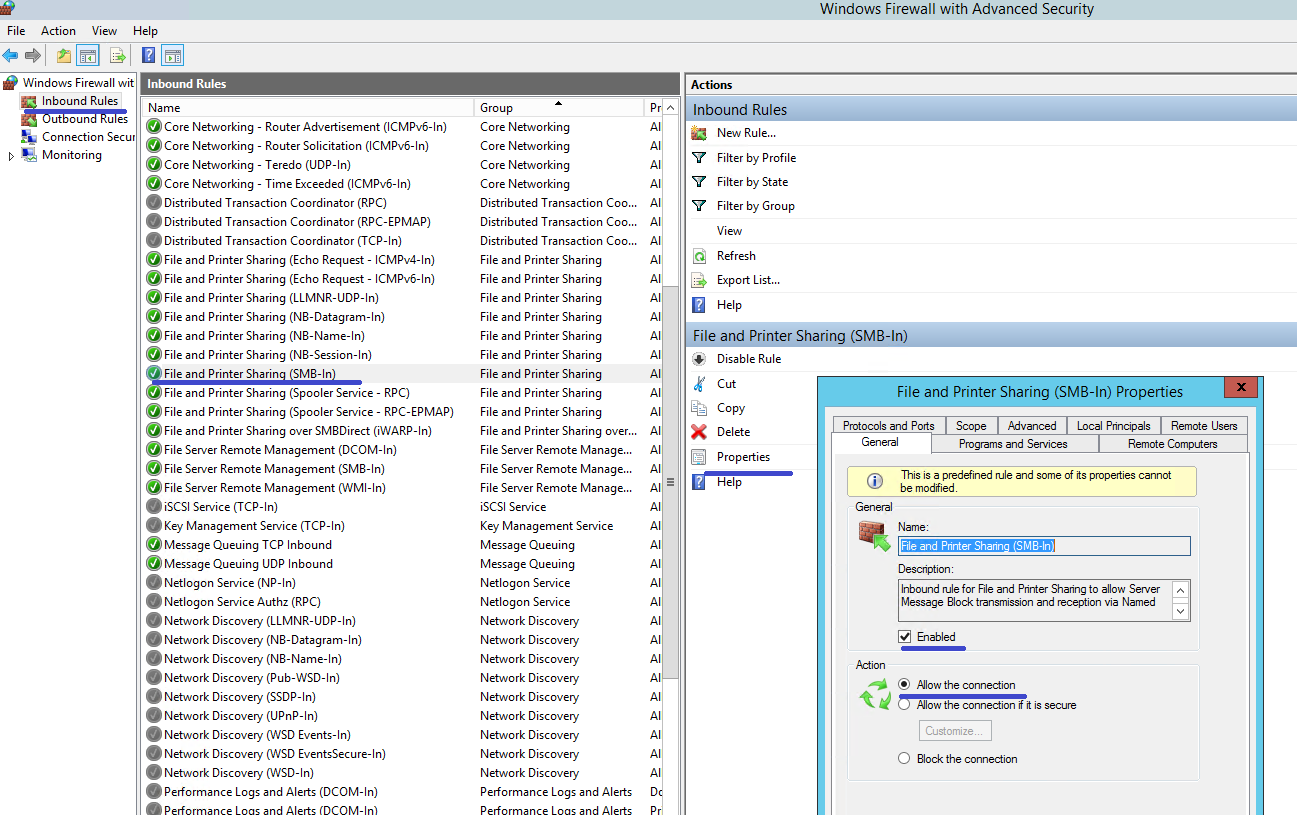
5. On File and Printer Sharing (SMB-In) Properties, change to the Scope tab. Choose These IP addresses and add all Self-Service Password Reset server IP addresses into the list. For example, Self-Service Password Reset server A (192.168.1.10) and Self-Service Password Reset server B (192.168.1.11).
6. On File and Printer Sharing (SMB-In) Properties, change to the Advanced tab, select the profiles Domain, Private, and Public, and save the changes of this rule.
7. Repeat this procedure on the Inbound rules for File Server Remote Management (SMB-In) and File and Printer Sharing (NB-Session-In).
Configure the firewall for the Self-Service Password Reset server
After completing the configuration, the web service provided by the Self-Service Password Reset servers can be accessed only by the StoreFront servers using HTTPS. And the Self-Service Password Reset servers can access service located on the corporate network.
1. Open the Server Manager, and from the Tools menu on the top navigation bar, select Windows Firewall with Advanced Security.
2. On Windows Firewall with Advanced Security, select Windows Firewall Properties in the middle pane. There are three firewall profiles - Domain, Private, and Public. Select the Domain Profile tab. Ensure that the Firewall state is set to On, the Inbound connections are set to Block, and the Outbound connections are set to Allow.
3. Select the Private Profile and Public Profile tabs and ensure that the Firewall state is set to On. And both the Inbound connections and Outbound connections are set to Block. Apply and save the changes.
4. From the Inbound Rules, choose World Wide Web Services (HTTP Traffic-In). And ensure that this rule is Enabled and the Action is set to Block the connection.
5. On World Wide Web Services (HTTP Traffic-In) Properties, change to the Advanced tab. Select the profiles Domain, Private, and Public, and save the changes of this rule.
6. From the Inbound Rules, choose World Wide Web Services (HTTPS Traffic-In). Ensure that this rule is Enabled and the Action is set to Allow the connection.
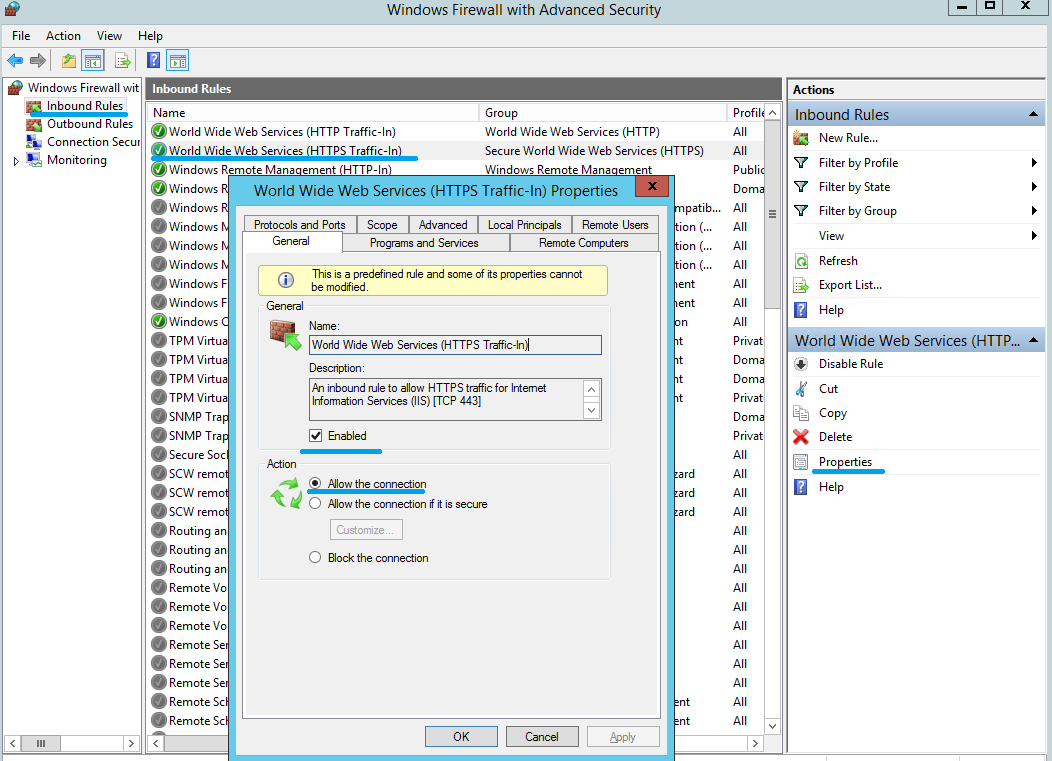
7. On World Wide Web Services (HTTPS Traffic-In) Properties, change to the Scope tab. Choose These IP addresses, and add all StoreFront server IP addresses into the list. For example, StoreFront A (192.168.1.50) and StoreFront B (192.158.1.51).
8. On World Wide Web Services (HTTPS Traffic-In) Properties, change to the Advanced tab. Select the profiles Domain, Private, and Public, and save the changes of this rule.