Domain or domain plus security token authentication
XenMobile® supports domain-based authentication against one or more directories that are compliant with the Lightweight Directory Access Protocol (LDAP). You can configure a connection in XenMobile to one or more directories and then use the LDAP configuration to import groups, user accounts, and related properties.
LDAP is an open-source, vendor-neutral application protocol for accessing and maintaining distributed directory information services over an Internet Protocol (IP) network. Directory information services are used to share information about users, systems, networks, services, and applications available throughout the network.
A common usage of LDAP is to provide single sign-on (SSO) for users, where a single password (per user) is shared among multiple services. Single sign-on enables a user to log on one time to a company website, for authenticated access to the corporate intranet.
A client starts an LDAP session by connecting to an LDAP server, known as a Directory System Agent (DSA). The client then sends an operation request to the server, and the server responds with the appropriate authentication.
Important:
XenMobile doesn’t support changing the authentication mode from domain authentication to a different authentication mode after users enroll devices in XenMobile.
To add LDAP connections in XenMobile
-
In the XenMobile console, click the gear icon in the upper-right corner of the console. The Settings page appears.
-
Under Server, click LDAP. The LDAP page appears. You can add, edit, or delete LDAP-compliant directories, as described in this article.
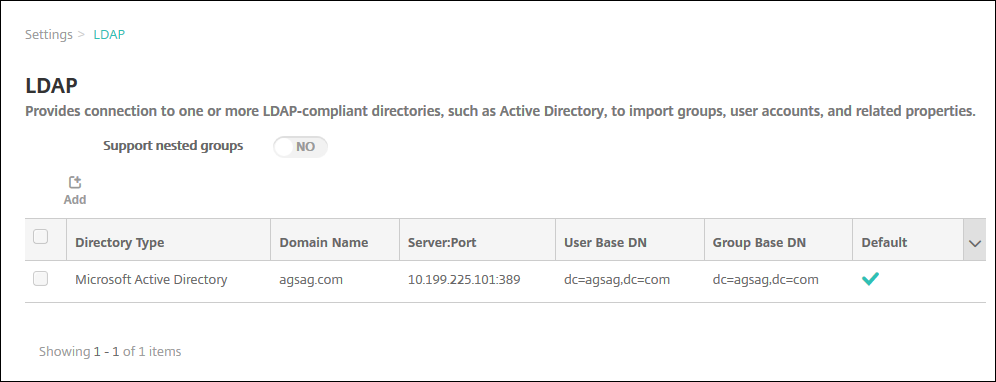
To add an LDAP-compliant directory
-
On the LDAP page, click Add. The Add LDAP page appears.
-
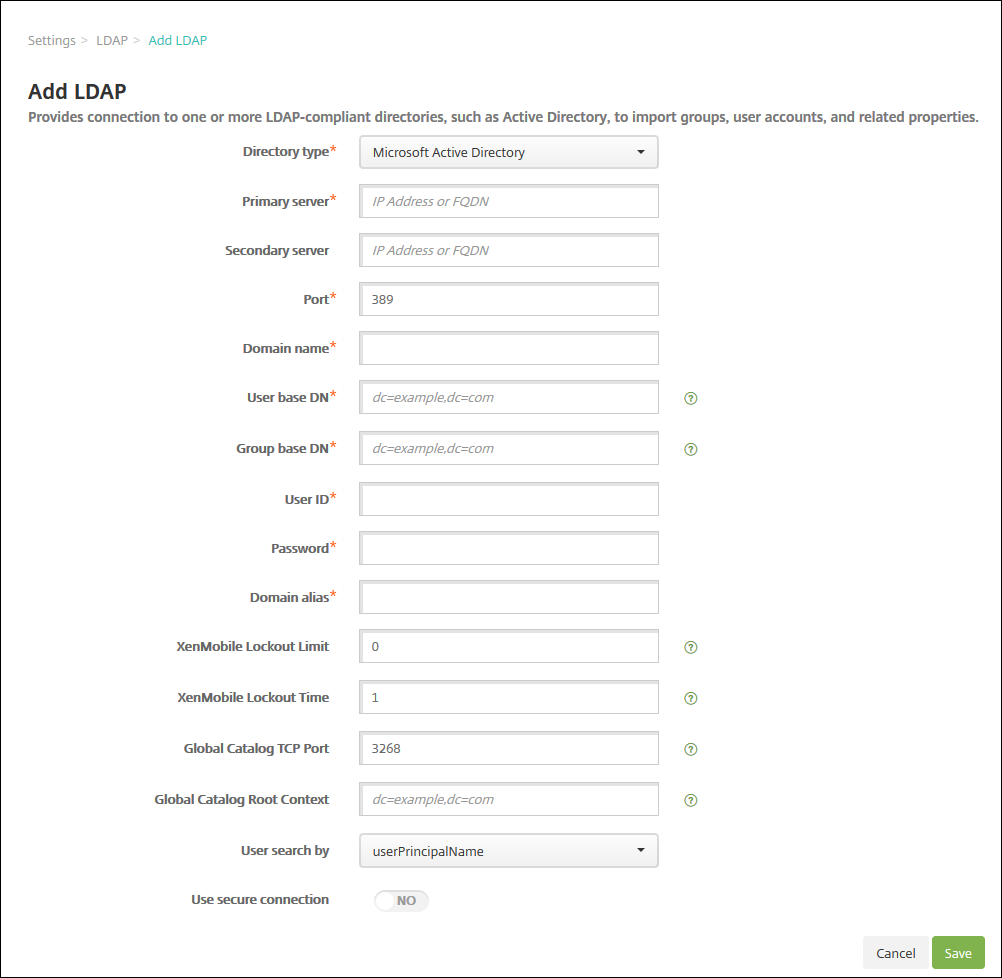
Configure these settings:
- Directory type: In the list, click the appropriate directory type. The default is Microsoft Active Directory.
- Primary server: Type the primary server used for LDAP; you can enter either the IP address or the fully qualified domain name (FQDN).
- Secondary server: Optionally, if a secondary server has been configured, enter the IP address or FQDN for the secondary server. This server is a failover server used if the primary server cannot be reached.
- Port: Type the port number used by the LDAP server. By default, the port number is set to 389 for unsecured LDAP connections. Use the port number 636 for secure LDAP connections, use 3268 for Microsoft unsecure LDAP connections, or 3269 for Microsoft secure LDAP connections.
- Domain name: Type the domain name.
-
User base DN: Type the location of users in the Active Directory through a unique identifier. Syntax examples include:
ou=users,dc=example, ordc=com. -
Group base DN: Type the location of groups in the Active Directory. For example,
cn=users, dc=domain, dc=netwherecn=usersrepresents the container name of the groups anddcrepresents the domain component of Active Directory. - User ID: Type the user ID associated with the Active Directory account.
- Password: Type the password associated with the user.
- Domain alias: Type an alias for the domain name. If you change the Domain alias setting after enrollment, users must re-enroll.
- XenMobile Lockout Limit: Type a number between 0 and 999 for the number of failed logon attempts. A value of 0 means that XenMobile never locks out the user based on failed logon attempts.
- XenMobile Lockout Time: Type a number between 0 and 99999 representing the number of minutes a user must wait after exceeding the lockout limit. A value of 0 means that the user isn’t forced to wait after a lockout.
- Global Catalog TCP Port: Type the TCP port number for the Global Catalog server. By default, the TCP port number is set to 3268; for SSL connections, use port number 3269.
- Global Catalog Root Context: Optionally, type the Global Root Context value used to enable a global catalog search in the Active Directory. This search is in addition to the standard LDAP search, in any domain without the need to specify the actual domain name.
- User search by: In the list, click either userPrincipalName, or sAMAccountName. The default is userPrincipalName. If you change the User search by setting after enrollment, users must re-enroll.
- Use secure connection: Select whether to use secure connections. The default is NO.
-
Click Save.
To edit an LDAP-compliant directory
-
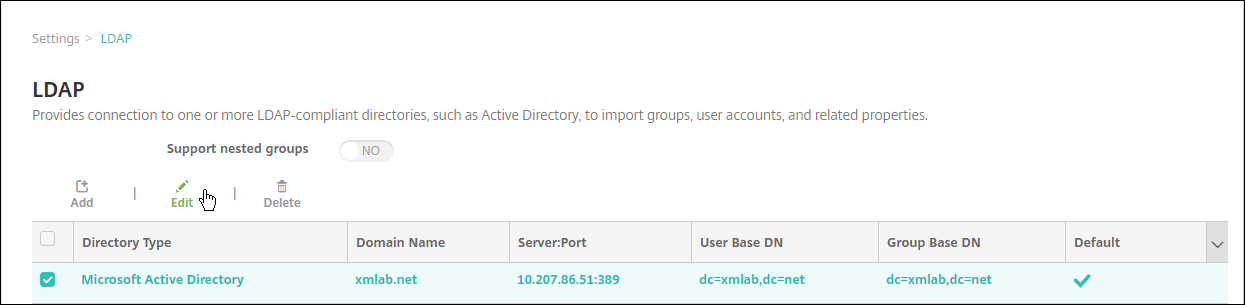
In the LDAP table, select the directory to edit.
When you select the checkbox next to a directory, the options menu appears above the LDAP list. Click anywhere else in the list and the options menu appears on the right side of the listing.
-
Click Edit. The Edit LDAP page appears.
-
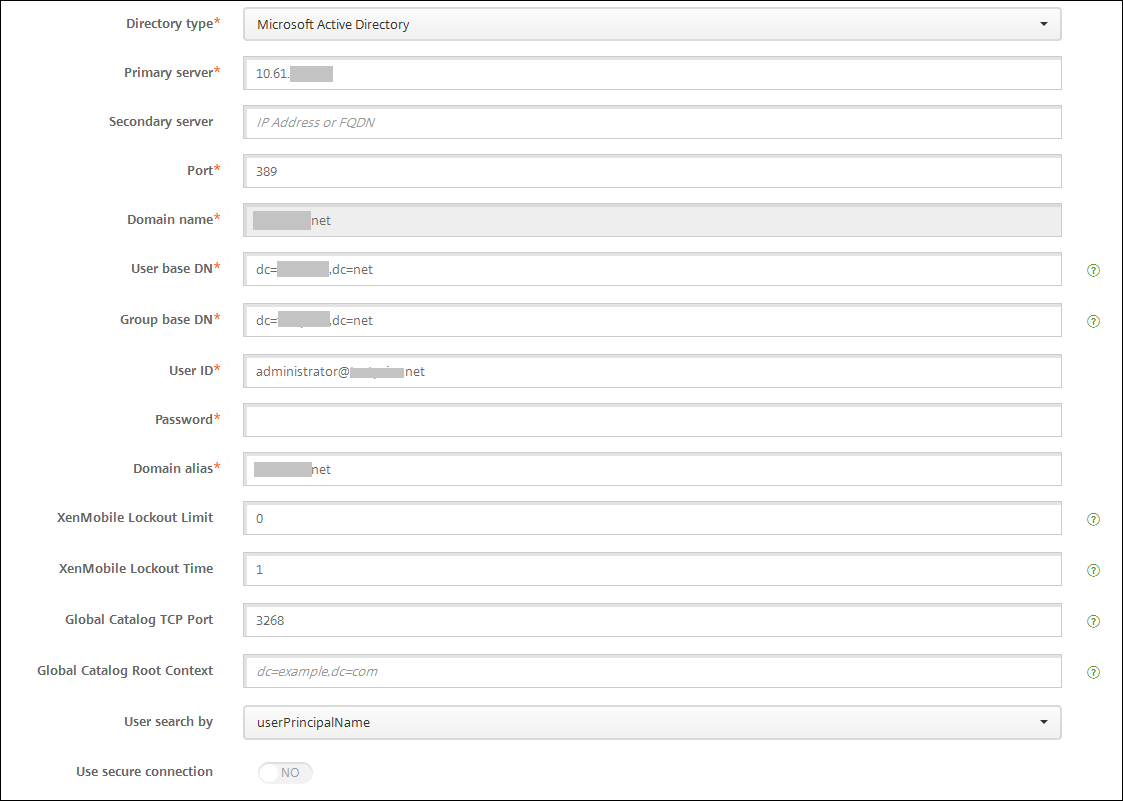
Change the following information as appropriate:
- Directory type: In the list, click the appropriate directory type.
- Primary server: Type the primary server used for LDAP; you can enter either the IP address or the fully qualified domain name (FQDN).
- Secondary server: Optionally, type the IP address or FQDN for the secondary server (if one has been configured).
- Port: Type the port number used by the LDAP server. By default, the port number is set to 389 for unsecured LDAP connections. Use the port number 636 for secure LDAP connections, use 3268 for Microsoft unsecure LDAP connections, or 3269 for Microsoft secure LDAP connections.
- Domain name: You cannot change this field.
-
User base DN: Type the location of users in the Active Directory through a unique identifier. Syntax examples include:
ou=users,dc=example, ordc=com. -
Group base DN: Type the group base DN group name specified as
cn=groupname. For example,cn=users, dc=servername, dc=netwherecn=usersis the group name.DNandservernamerepresent the name of the server running the Active Directory. - User ID: Type the user ID associated with the Active Directory account.
- Password: Type the password associated with the user.
- Domain alias: Type an alias for the domain name. If you change the Domain alias setting after enrollment, users must re-enroll.
- XenMobile Lockout Limit: Type a number between 0 and 999 for the number of failed logon attempts. A value of 0 means that XenMobile never locks out the user based on failed logon attempts.
- XenMobile Lockout Time: Type a number between 0 and 99999 representing the number of minutes a user must wait after exceeding the lockout limit. A value of 0 means that the user isn’t forced to wait after a lockout.
- Global Catalog TCP Port: Type the TCP port number for the Global Catalog server. By default, the TCP port number is set to 3268; for SSL connections, use port number 3269.
- Global Catalog Root Context: Optionally, type the Global Root Context value used to enable a global catalog search in the Active Directory. This search is in addition to the standard LDAP search, in any domain without the need to specify the actual domain name.
- User search by: In the list, click either userPrincipalName, or sAMAccountName. If you change the User search by setting after enrollment, users must re-enroll.
- Use secure connection: Select whether to use secure connections.
-
Click Save to save your changes or Cancel to leave the property unchanged.
To delete an LDAP-compliant directory
-
In the LDAP table, select the directory you want to delete.
You can select more than one property to delete by selecting the checkbox next to each property.
-
Click Delete. A confirmation dialog box appears. Click Delete again.
Configure authentication for multiple domains
To configure XenMobile Server to use multiple domain suffixes in an LDAP configuration, see the procedure in the Citrix Endpoint Management documentation, Configure authentication for multiple domains. The steps are the same in the on-premises version of XenMobile Server and the Endpoint Management cloud release.
Configure domain plus security token authentication
You can configure XenMobile to require users to authenticate with their LDAP credentials plus a one-time password, using the RADIUS protocol.
For optimal usability, you can combine this configuration with Citrix PIN and Active Directory password caching. With that configuration, users don’t have to enter their LDAP user names and passwords repeatedly. Users enter user names and passwords for enrollment, password expiration, and account lockout.
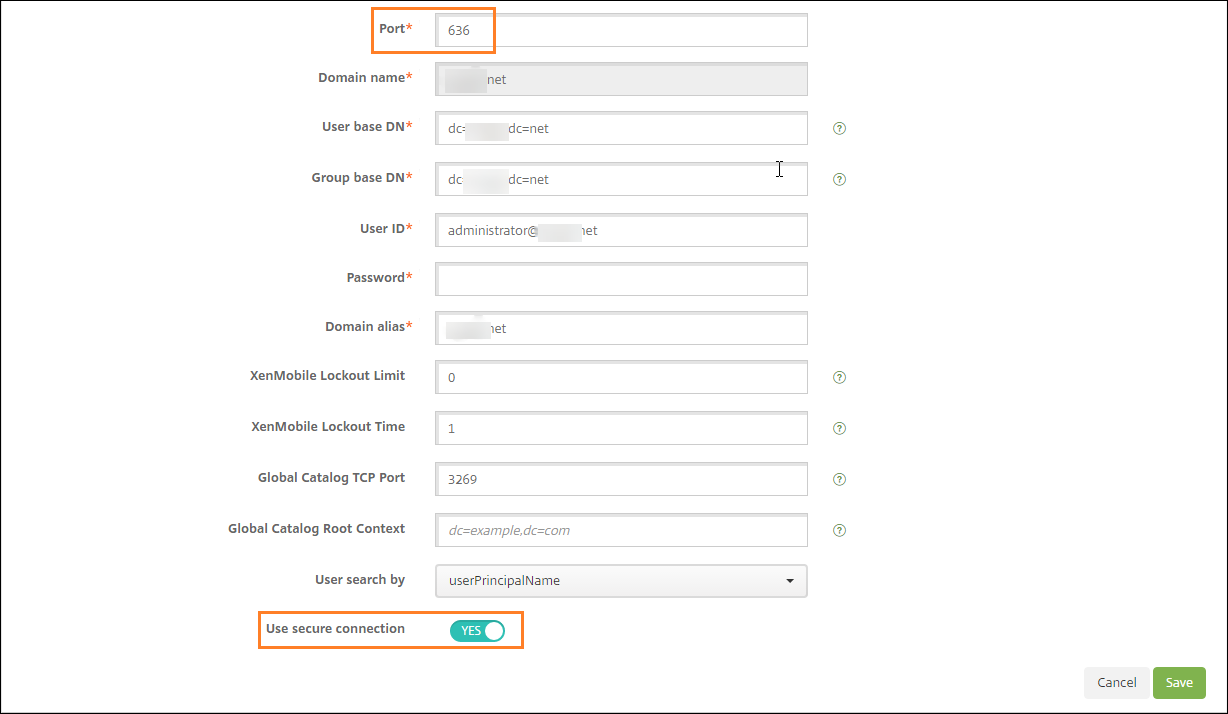
Configure LDAP settings
Use of LDAP for authentication requires that you install an SSL certificate from a Certificate Authority on XenMobile. For information, see Uploading certificates in XenMobile.
-
In Settings, click LDAP.
-
Select Microsoft Active Directory and then click Edit.
-
Verify that the Port is 636, which is for secure LDAP connections, or 3269 for Microsoft secure LDAP connections.
-
Change Use secure connection to Yes.
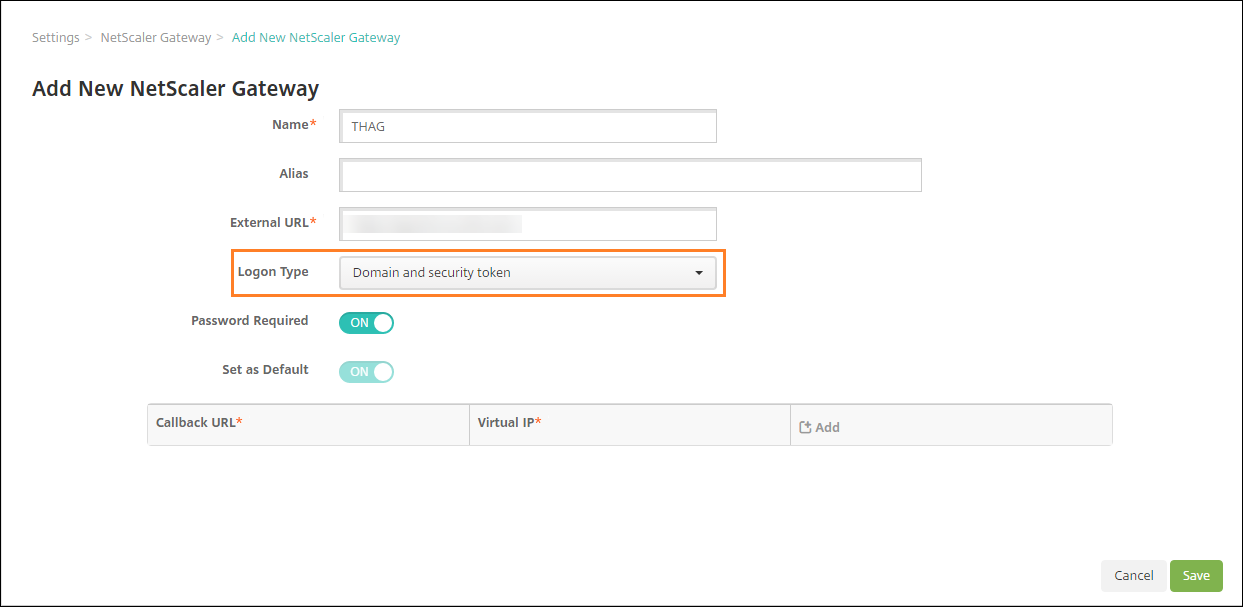
Configure Citrix Gateway settings
The following steps assume that you already have added a Citrix Gateway instance to XenMobile. To add a Citrix Gateway instance, see Add a Citrix Gateway instance.
-
In Settings, click Citrix Gateway.
-
Select the “Citrix Gateway and then click Edit.
-
From Logon Type, select Domain and security token.
Enable Citrix PIN and user password caching
To enable Citrix PIN and user password caching, go to Settings > Client Properties and select these checkboxes: Enable Citrix PIN Authentication and Enable User Password Caching. For more information, see Client properties.
Configure Citrix Gateway for domain and security token authentication
Configure Citrix Gateway session profiles and policies for your virtual servers used with XenMobile. For information, see the Citrix Gateway documentation.