This content has been machine translated dynamically.
Dieser Inhalt ist eine maschinelle Übersetzung, die dynamisch erstellt wurde. (Haftungsausschluss)
Cet article a été traduit automatiquement de manière dynamique. (Clause de non responsabilité)
Este artículo lo ha traducido una máquina de forma dinámica. (Aviso legal)
此内容已经过机器动态翻译。 放弃
このコンテンツは動的に機械翻訳されています。免責事項
이 콘텐츠는 동적으로 기계 번역되었습니다. 책임 부인
Este texto foi traduzido automaticamente. (Aviso legal)
Questo contenuto è stato tradotto dinamicamente con traduzione automatica.(Esclusione di responsabilità))
This article has been machine translated.
Dieser Artikel wurde maschinell übersetzt. (Haftungsausschluss)
Ce article a été traduit automatiquement. (Clause de non responsabilité)
Este artículo ha sido traducido automáticamente. (Aviso legal)
この記事は機械翻訳されています.免責事項
이 기사는 기계 번역되었습니다.책임 부인
Este artigo foi traduzido automaticamente.(Aviso legal)
这篇文章已经过机器翻译.放弃
Questo articolo è stato tradotto automaticamente.(Esclusione di responsabilità))
Translation failed!
File upload protection
Many attackers try to upload malicious code, virus, or malware as file attachments during multi-form submission. It is important to protect our network and overcome such threats. To prevent such malicious file uploads, a Citrix ADC admin configures a set of allowable file upload formats in the WAF profile. By doing this, you restrict file uploads to specific formats and protect the appliance against malicious file uploads. The protection works only when you disable the ExcludeFileUploadFormChecks option in the WAF profile.
How file upload works
When you configure allowable file upload formats, the component interaction is as follows:
- Client request has a form submission with a file upload type, for example PDF.
- As part of the security check, WAF inspects the request payload and validates the file type (based on magic signature numbers).
- If the file type is not in a supported format, the corresponding action based on file type binding is applied.
- To validate the file type the appliance inspects the payload and checks for the known magic numbers at known offsets. Each file type has a sequence of magic numbers that validates the file type.
Configure file type upload by using Citrix ADC CLI
To configure allowable file formats, the appliance uses a WAF profile that is bound to the file upload parameters.
- Configure Web Application Firewall profile
At the command prompt, type:
set appfw profile <profile_name> [-fileUploadTypesAction <fileUploadTypesAction>]<fileUploadTypesAction> = ( none | block | log | stats )
Example
set appfw profile profile1 –fileUploadTypesAction block
- Bind Web Application Firewall profile with file upload parameters. The command binds the specified exemption (relaxation) or rule to the specified application firewall profile.
At the command prompt, type:
bind appfw profile <profile_name> - fileUploadType <form_field> <formAction_url> [-isNameRegex ( REGEX | NOTREGEX )] -fileType <fileType> ( pdf | msdoc | text | image | any)
Note:
The form field name is a regular expression type. The default value is
NOTREGEX.
Example
> bind appfw profile test -fileuploadType file "http://10.10.10.10/fileupload_sample/upload.php" -isNameRegex NOTREGEX -filetype image
Configure file upload security protection by using Citrix ADC GUI
- In the navigation pane, navigate to Security > Citrix Web App Firewall > Profiles.
- In the Profiles page, click Add.
- In the Citrix Web App Firewall Profile page, click Security Checks under Advanced Settings.
- In the Security Checks section, select File Upload Types and click Action Settings.
- In the File Upload Types Settings page, set the file upload action.
- Click OK.
- In the Citrix Web App Firewall Profile page, click OK and Done.
Configure file upload relaxation rule by using Citrix ADC GUI
You can relax a file upload security protection to avoid false positives. For example, the appliance might block file uploads but you can add a relaxation rule to allow file uploads from specific websites. By doing this, the appliance bypasses security inspection for the specified form field and allow users to upload files from the website mentioned in the action URL.
Note:
The file upload validation fails if the File Upload Types Rexalation Rule is not enabled.
Perform the following procedure to create a relaxation rule.
- In the navigation pane, navigate to Security > Citrix Web App Firewall > Profiles.
- In the Profiles page, click Add.
- In the Citrix Web App Firewall Profile page, click Relaxation Rules under Advanced Settings.
-
In the Relaxation Rules section, select File Upload Types and click Edit.
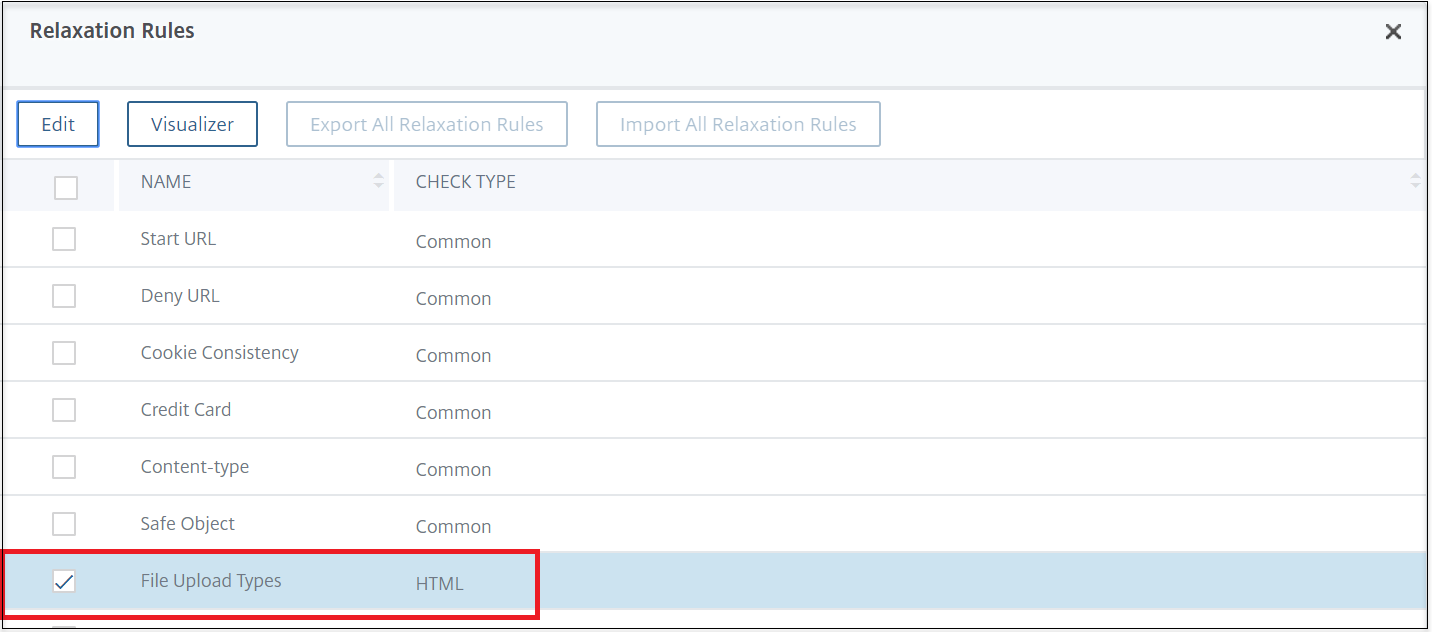
- In the File Upload Types Rexalation Rules page, click Add.
-
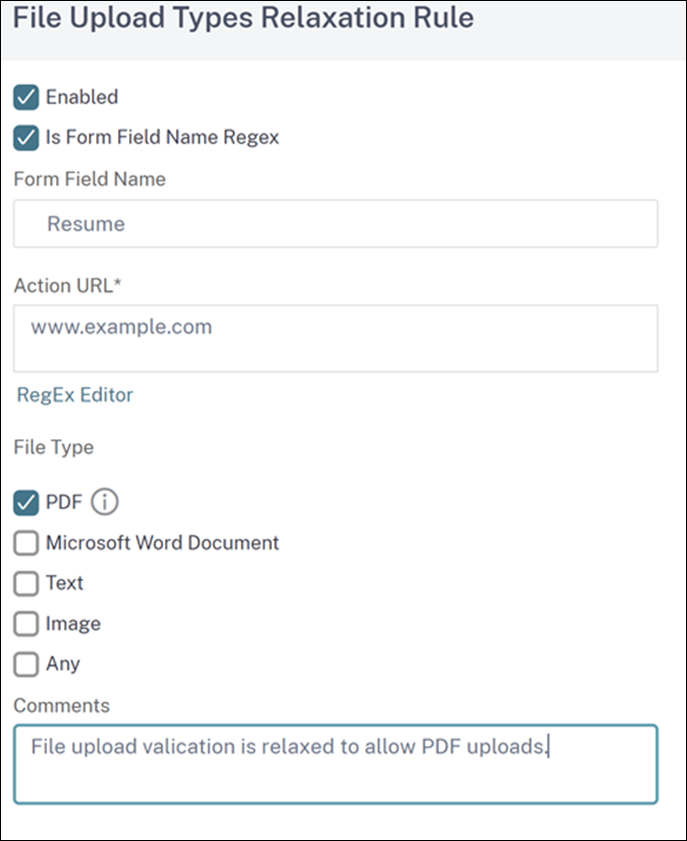
In the File Upload Types Relaxation Rule page, set the following parameters:
- Enabled - Select to enable the relaxation rule.
- Is Form Field Name Regex - Select to update a regex pattern for the form field name.
- Form Field Name - Enter the file name that does not require a security check.
- Action URL - The form submission URL that must be exempted from security checks.
- File Type - Supported file format that can be uploaded.
- Comments - A brief description about the file upload.
-
Click Create.
- In the Citrix Web App Firewall Profile page, click OK and Done.
Share
Share
This Preview product documentation is Cloud Software Group Confidential.
You agree to hold this documentation confidential pursuant to the terms of your Cloud Software Group Beta/Tech Preview Agreement.
The development, release and timing of any features or functionality described in the Preview documentation remains at our sole discretion and are subject to change without notice or consultation.
The documentation is for informational purposes only and is not a commitment, promise or legal obligation to deliver any material, code or functionality and should not be relied upon in making Cloud Software Group product purchase decisions.
If you do not agree, select I DO NOT AGREE to exit.