Configure SAML followed by LDAP or certificate authentication based on SAML attribute extraction in nFactor authentication
The following section describes the use case of LDAP or certificate authentication based on SAML attribute extraction in nFactor authentication.
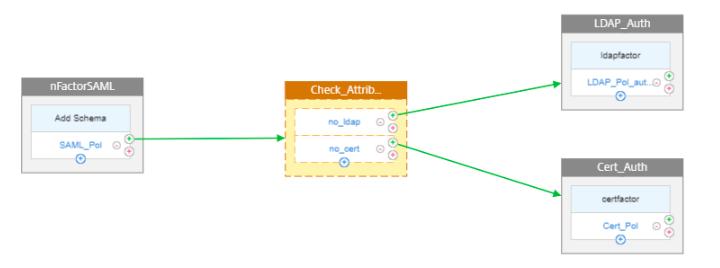
SAML authentication in first factor with attribute extraction from SAML assertion
Assume a use case where, admins configure SAML authentication in a first factor with attribute extraction from SAML assertion. Based on the attributes extracted during the first factor, you can configure next factors, which can either have LDAP authentication or certificate authentication.
-
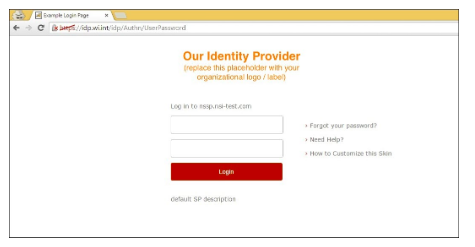
Once you access the traffic management virtual server, you are redirected to the external SAML IdP for login (in this case, Shibboleth, as shown in the figure). Enter your login credentials. If logon is successful, SAML IdP sends the SAML response containing the attributes.
-
When the SAML response is received at NetScaler appliance, it parses and extracts the attributes as configured in the SAML Action. The SAML assertion is verified, and you move to the second factor.
-
The second factor is configured as passthrough (there is no logon page for this factor) with 2 NO_AUTHN policies. Based on the policy evaluation, you have configured a jump to either LDAP authentication factor or certificate authentication factor.
Note
NO_AUTHN policy means that in case the rule configured for this policy evaluates to true, then the NetScaler appliance does not perform any authentication. It points to the next factor that is configured.
-
For example, say the SAML Action is configured to extract the UPN as attribute1, and the value of UPN is
john@example.com. Now, one of the NO_AUTHN policy rules is configured to verify for the presence of string “example.com”. If the policy evaluates to true, you can configure jump to the next factor having LDAP authentication. Similarly, policy can be configured for having next factor as certificate. -
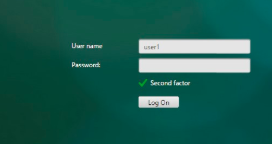
When the LDAP factor is selected after SAML authentication, the logon page is displayed.
Note
The user name value is pre-filled using the expression ${http.req.user.name}, which extracts the user name from the first factor. Other fields such as, labels for user name and password can also be customized.
-
The following image shows an example used for this representation of logon form.
Note
Based on the requirement, admins can modify the values of logon form.
-
If the certificate factor is selected after SAML, the select certificate page is displayed.

Note
The setup can also be created through the nFactor Visualizer available in NetScaler version 13.0 and later.
Perform the following by using the CLI
-
Configure traffic management virtual server and authentication server.
add lb vserver lb_ssl SSL 10.217.28.166 443 -persistenceType NONE -cltTimeout 180 -AuthenticationHost auth.nsi-test.com -Authentication ON -authnVsName avnadd authentication vserver avn SSL 10.217.28.167 443 -AuthenticationDomain nsi-test.com
-
Configure a SAML policy with attribute extraction bound to authentication virtual server.
add authentication samlAction shibboleth -samlIdPCertName shib-idp-242 -samlSigningCertName nssp-cert -samlRedirectUrl "https://idp.wi.int/idp/profile/SAML2/POST/SSO" -samlUserField samaccountname -samlRejectUnsignedAssertion OFF -samlIssuerName nssp.nsi-test.com -Attribute1 UserPrincipalName –Attribute2 departmentadd authentication Policy saml -rule true -action shibbolethbind authentication vserver avn -policy saml -priority 1 -nextFactor label1 -gotoPriorityExpression NEXT
-
Configure a second factor.
add authentication loginSchema login2 -authenticationSchema noschemaadd authentication Policy no_ldap -rule "http.req.user.attribute(1).contains(\"example.com\")" -action NO_AUTHNadd authentication Policy no_cert -rule "http.req.user.attribute(2).contains(\"Sales\")" -action NO_AUTHNadd authentication policylabel label1 -loginSchema login2bind authentication policylabel label1 -policyName no_ldap -priority 1 -gotoPriorityExpression NEXT -nextFactor ldapfactorbind authentication policylabel label1 -policyName no_cert -priority 2 -gotoPriorityExpression NEXT -nextFactor certfactor
-
Configure an LDAP authentication factor.
add authentication loginSchema login3 -authenticationSchema login1.xmladd authentication policylabel ldapfactor -loginSchema login3bind authentication policylabel ldapfactor -policyName <LDAP Auth Policy> -priority 10 -gotoPriorityExpression END
-
Configure a certificate factor authentication.
add authentication loginSchema login4 -authenticationSchema noschemaadd authentication policylabel certfactor -loginSchema login4bind authentication policylabel certfactor -policyName <Certificate Auth Policy> -priority 10 -gotoPriorityExpression END
-
Bind the root certificate to the virtual server and enable Client Authentication.
bind ssl vserver avn -certkeyName <root cert name>-CA -ocspCheck Optionalset ssl vserver avn -clientAuth ENABLED -clientCert Optional
Configuring by using the nFactor Visualizer
-
Navigate to Security > AAA-Application Traffic > nFactor Visualizer > nFactor Flows and click Add.
-
Click + to add the nFactor flow.
-
Add a factor. The name that you enter is the name of the nFactor flow.
-
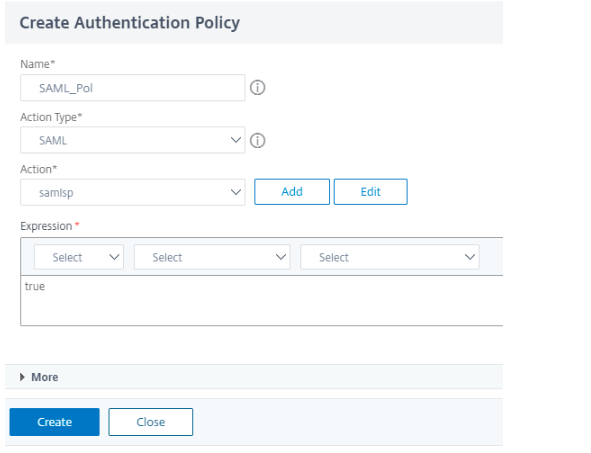
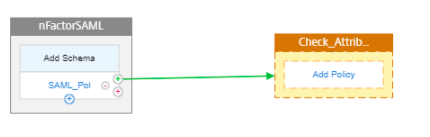
No Schema is needed for SAML authentication. Click Add Policy to create SAML policy for the first factor.
Note: For more information on SAML as SP, see NetScaler as a SAML SP.
-
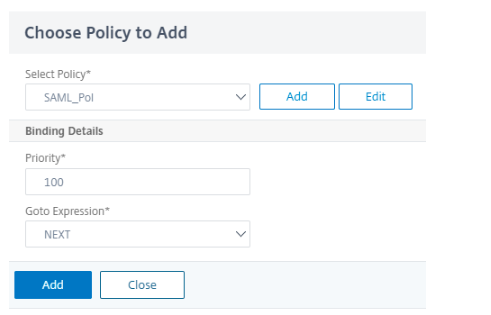
Add the SAML policy.
-
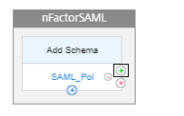
Click green + to add the next factor.
-
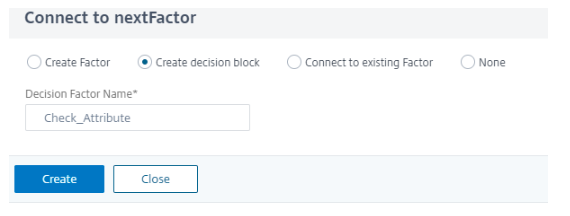
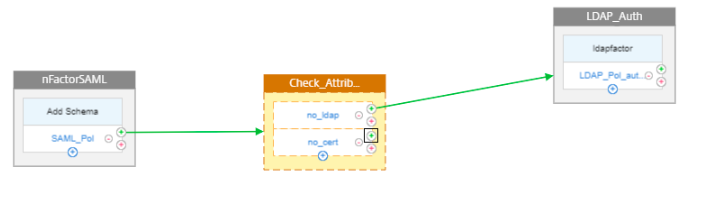
Create a decision box to check for the SAML attributes.
-
Click Add Policy to create a policy.
-
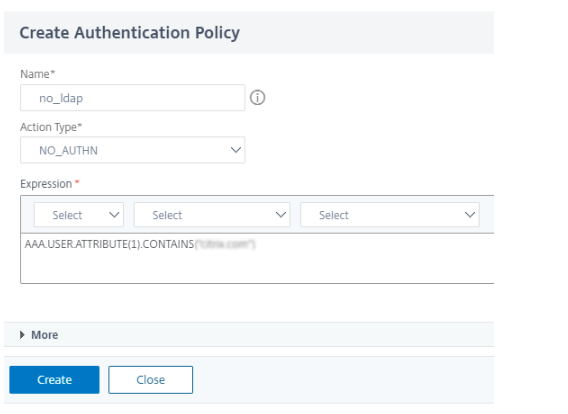
Create a policy to check for the attribute “example.com” with action NO_AUTHN.
-
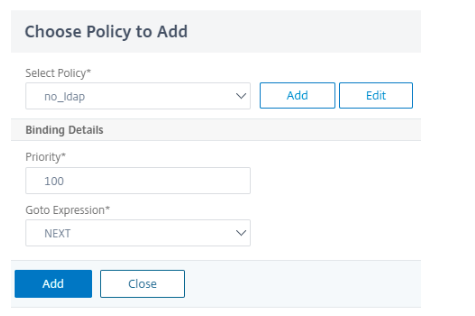
Select the previously created policy and click Add.
-
Click green + sign to add a second policy.
-
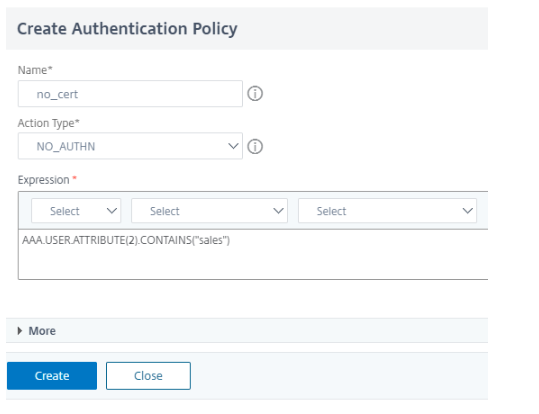
Follow steps 9 and 10. Bind the policy to check for attribute sales.
-
To add the second factor for the attribute “example.com,” Click the green + sign next to no_ldap policy.
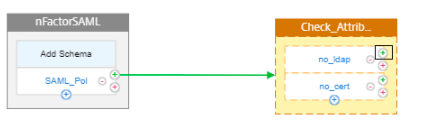
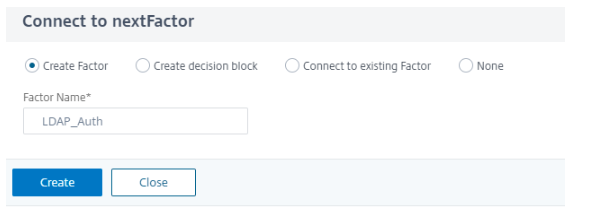
-
Create a next factor for LDAP authentication.
-
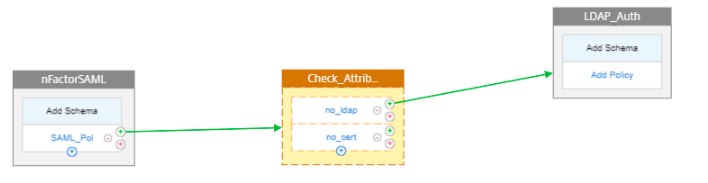
Click Add Schema for the second factor.
-
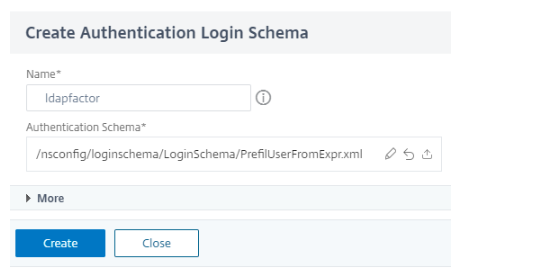
Create an authentication login schema with schema “PrefilUserFormExpr.xml” for the second factor that has prefilled user name.
-
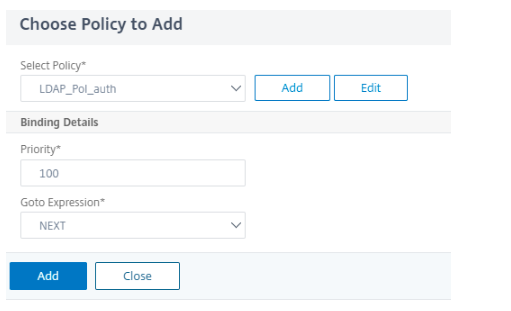
Click Add Policy to add the LDAP policy.
Note
For more information on creating LDAP authentication, see To configure LDAP authentication by using the configuration utility.
-
Follow step 13. To add second factor for attribute sales, click green + sign next to no_cert.
-
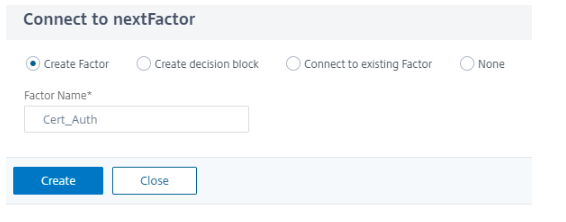
Create a next factor for certificate authentication.
-
Follow steps 15, 16, and 17. Add a schema for the certificate authentication and Add Cert Authentication Policy.
Note
For more information on certificate authentication, see Configuring and Binding a Client Certificate Authentication Policy.
-
Click Done to save the configuration.
-
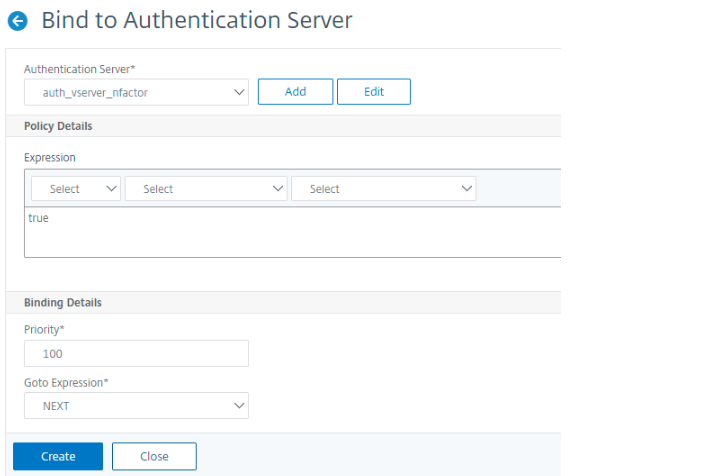
To bind the created nFactor flow to an authentication, authorization, and auditing virtual server, click Bind to Authentication Server and click Create.
Note
Bind and unbind the nFactor flow through the option given in nFactor Flow under Show Bindings only.
Unbind the nFactor Flow
-
Select the nFactor flow and click Show Bindings.
-
Select the authentication virtual server and click Unbind.