Configure two-factor authentication with one login schema and one passthrough schema in NetScaler nFactor authentication
The following section describes the use case of two-factor authentication with one login schema and one passthrough schema.
Two-factor authentication with one login schema and one passthrough schema
Assume a use case where, admins configures two-factor authentication with one login schema and one passthrough schema. Client submits one user name and two passwords. The first set of user name and password is evaluated through an LDAP policy as first-factor, and the second password is evaluated through a RADIUS policy as second-factor.
-
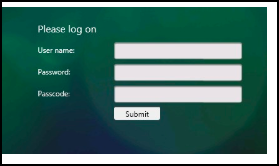
Once you access the traffic management virtual server, you are redirected to the login page for authentication.
-
The client submits a user name and two passwords, for example- user1, pass1 and pass2.
-
First-factor is evaluated against an LDAP action for user1 and pass1. Evaluation is successful and passed to the next factor, policy “label1”; in this case.
-
The policy label specifies that the second-factor is passthrough with a RADIUS policy. A passthrough schema means that NetScaler appliance does not go back to the client for any further input. NetScaler simply uses the information it already has. In this case, it is user1 and pass2. The second-factor is then evaluated implicitly.
-
The authentication server return cookies and a response that redirect the client’s browser back to the traffic management virtual server, where the requested content is available. If login fails, the client browser is presented with the original logon page so that the client can retry.
Perform the following by using the CLI
-
Configure traffic management and authentication virtual server.
add lb vserver lbvs55 HTTP 1.217.193.55 80 -AuthenticationHost auth56.aaatm.com -Authentication ONadd authentication vserver auth56 SSL 1.217.193.56 443 -AuthenticationDomain aaatm.com
-
Configure a second-factor.
add authentication loginSchema login1 -authenticationSchema login-2passwd.xml -userCredentialIndex 1 -passwordCredentialIndex 2add authentication loginSchemaPolicy login1 -rule true -action login1add authentication loginSchema login2 -authenticationSchema noschemaadd authentication loginSchemaPolicy login2 -rule true -action login2add authentication policylabel label1 -loginSchema login2
-
Configure LDAP and RADIUS factor.
add authentication ldapAction ldapAct1 -serverIP 1.217.28.180 -ldapBase "dc=aaatm, dc=com" -ldapBindDn administrator@aaatm.com -ldapBindDnPassword 71ca2b11ad800ce2787fb7deb54842875b8f3c360d7d46e3d49ae65c41550519 -encrypted -encryptmethod ENCMTHD_3 -ldapLoginName samAccountName -groupAttrName memberOf -subAttributeName CNadd authentication Policy ldap -rule true -action ldapAct1add authentication radiusAction radius -serverIP 1.217.22.20 -radKey a740d6a0aeb3288fa0a6fbe932d329acddd8f448ecb4a3038daa87b36599fd16 -encrypted -encryptmethod ENCMTHD_3 -radNASip ENABLED -radNASid NS28.50 -radAttributeType 11 -ipAttributeType 8add authentication Policy radius -rule true -action radius
-
Bind the policies.
bind authentication vserver auth56 -policy login1 -priority 1 -gotoPriorityExpression ENDbind authentication vserver auth56 -policy ldap -priority 1 -nextFactor label1 -gotoPriorityExpression nextbind authentication policylabel label1 -policyName radius -priority 2 -gotoPriorityExpression end
Note
The setup can also be created through the nFactor Visualizer available in NetScaler version 13.0 and later.
Configuring by using the nFactor Visualizer
-
Navigate to Security > AAA-Application Traffic > nFactor Visualizer > nFactor Flows and click Add.
-
Click + to add the nFactor flow.
-
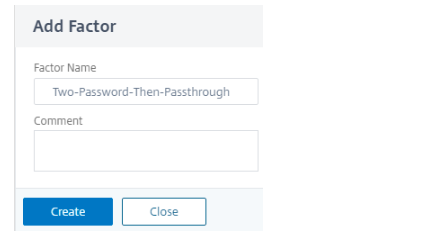
Add a factor. The name that you enter is the name of the nFactor flow. Click Create.
-
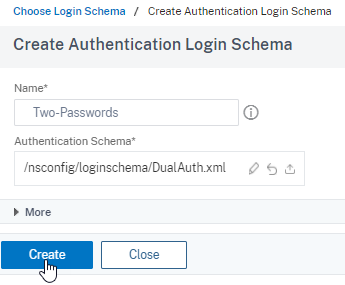
To add the two password schema for the first-factor, click Add Schema.
-
Click Add Policy to add the LDAP policy. You can create an authentication policy or select an existing authentication policy from the list.
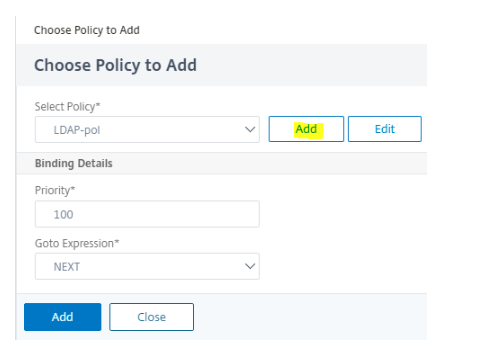
-
In the Action tab, select LDAP server.

Note
If LDAP server is not added, for more information on adding an LDAP server, see LDAP authentication policies
-
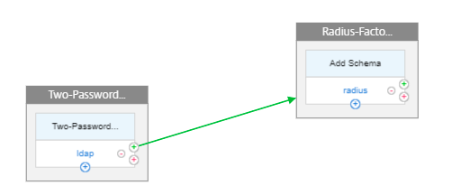
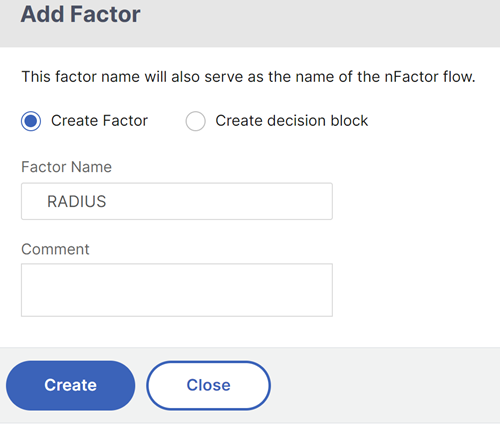
Click green + to add the RADIUS factor and click Create.
-
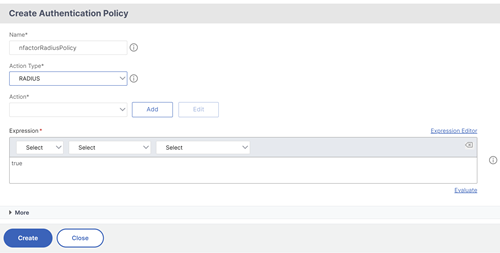
Do not add a schema for this factor, as by default it takes no schema. To add RADIUS authentication policy, click Add Policy.
Note
If RADIUS server if not added, for more information on adding an RADIUS server, see To configure RADIUS authentication
-
Click Done to save the configuration.
-
To bind the created nFactor flow to an authentication, authorization, and auditing virtual server, click Bind to Authentication Server and click Create.