Signature auto update
The Signature Auto Update functionality in the Web Application Firewall allows the user to get the latest signatures to protect the web application against new vulnerabilities. The auto update feature provides better protection without the need for ongoing manual intervention to get the latest updates.
The signatures are auto updated on an hourly basis and do not require regular check for the availability of the most recent update. Once you enable Signature Auto Update, then the NetScaler appliance connects to the server hosting the signatures to check if a newer version is available.
Customizable location
The latest Application Firewall signatures are hosted on Amazon which is configured as the default Signature URL to check for the latest update.
However, the user has an option to download these signature mapping files to their internal server. User can then configure a different Signature URL path to download the signature mapping files from a local server. For the auto update feature to work, you might need to configure the DNS server to access the external site.
Support for Cloud Software Group products against vulnerabilities
You can protect the Cloud Software Group products from future CVEs using a Web App Firewall. To use the feature, you must register NetScaler with the NetScaler Console service. You can enable or disable the signatures based on your requirements. By default, signatures in the range of 400,000-500,000 are enabled for the following profiles:
- ns-aaa-default-appfw-profile
- ns-aaatm-default-appfw-profile
- ns-vpn-default-appfw-profile
The administrators can disable the default signatures by assigning a custom signature object to the above profiles.
Update signatures
All the user defined signature objects which are created using the appfw default signature object have a version greater than zero. If you enable Signature Auto Update, then all the signatures are updated automatically.
If the user has imported signatures with the external format such as Cenzic or Qualys, then the signatures are imported with the version as zero. Similarly, if the user has created a signature object using the blank template, then it is created as a zero version signature. These signatures are not automatically updated, because the user might not be interested in the overhead of managing the default signatures that is not used.
However, Web Application Firewall also allows the user the flexibility to manually select these signatures and update them to add the default signature rules to the existing rules. After the signatures are manually updated, the version changes and then the signatures will also get auto updated along with the other signatures.
Configure the signature auto update
To configure the signature auto update feature using the CLI:
At the command prompt, type:
set appfw settings SignatureAutoUpdate on
set appfw settings SignatureUrl https://s3.amazonaws.com/NSAppFwSignatures/SignaturesMapping.xml
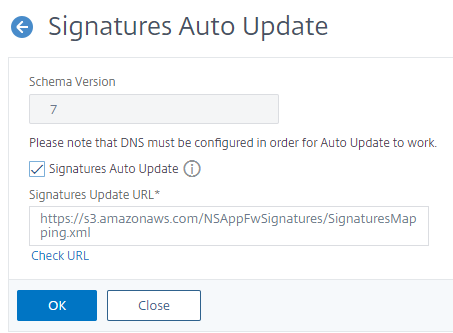
To configure the signature auto update using the GUI:
- Navigate to Security > NetScaler Web App Firewall > Signatures.
- Select Auto Update Settings from Action.
- Enable the Signatures Auto Update option.
- You can specify a customized path for the signature update URL, if necessary. Click Reset to reset to the default
s3.amazonaws.com server. - Click OK.
Update signatures manually
To manually update a zero version signature or any other user defined signature, you must first get the latest update for the default signatures and then use this for updating the target user defined signature.
Run the following commands from the CLI to update a signature file:
update appfw signatures "*Default Signatures"
update appfw signatures cenzic –mergedefault
Note:
Default SignaturesIs case sensitive. Cenzic in the preceding command is the name of the signature file that is updated.
Import default signatures without internet access
It is recommended to configure a proxy server to point to Amazon (AWS) server to get the latest update. However, if the NetScaler appliance does not have an internet connection to the external sites, then the user can store the updated signature files on a local server. The appliance can then download the signatures from the local server. In this scenario, the user must constantly check the Amazon site to get the latest updates. You can download and verify the signature file against the corresponding sha1 file which were created by using the Citrix public key to protect against tampering.
To copy the Signatures files to a local server, complete the following procedure:
- Create a local directory such as
<MySignatures>on a local server. - Open the AWS site.
- Copy the
SignaturesMapping.xmlfile to the<MySignatures>folder.
If you open the SignaturesMapping.xml file, you can see all the xml files for signatures and their corresponding sha1 files for different supported versions. One such pair is highlighted in the following screenshot:
- Create a subdirectory
<sigs>in the<MySignatures>folder. - Copy all pairs of the
*.xml files listed in the <file>tags and the*.xml.sha1files listed in the corresponding<sha1>tags of theSignaturesMapping.xmlfile to the<sigs>folder. The following are a few sample files that is copied to the<sigs>folder:
https://s3.amazonaws.com/NSAppFwSignatures/sigs/sig-r10.1b86v3s3.xml
https://s3.amazonaws.com/NSAppFwSignatures/sigs/sig-r10.1b86v3s3.xml.sha1
https://s3.amazonaws.com/NSAppFwSignatures/sigs/sig-r10.1b0v3s2.xml
https://s3.amazonaws.com/NSAppFwSignatures/sigs/sig-r10.1b0v3s2.xml.sha1
Note:
You can give any name to the
<MySignatures>folder and it can be in any location but the subdirectory<sigs>must be a subdirectory in the<MySignatures>folder where the mapping file is copied. In addition, ensure that as shown in the SignaturesMapping.xml, the subdirectory name<sigs>must have the exact name and is case sensitive. All Signature files and their corresponding sha1 files should be copied under this<sigs>directory.
After mirroring the contents from the hosted Amazon web server to the local server, change the path to the new local web server to set it as the SignatureUrl for auto update. For example, run the following command from the command line interface of the appliance:
set appfw settings SignatureUrl https://myserver.example.net/MySignatures/SignaturesMapping.xml
The update operation can take several minutes, depending on the number of signatures to be updated. Allow sufficient time for the update operation to complete.
If you face an error “Error in accessing URL!” while configuring, follow the steps to resolve it.
- Add the url
https://myserver.example.netto/netscaler/ns_gui/admin_ui/php/application/controllers/common/utils.phpso that Content Security Policy (CSP) security does not block the url access. Please note that these settings do not persists in an upgrade. User has to add it again after the upgrade.
$configuration_view_connect_src = "connect-src 'self' https://app.pendo.io https://s3.amazonaws.com https://myserver.example.net;";
- User must configure the webserver
https://myserver.example.netsuch that it responds to the following CORS headers forhttps://myserver.example.net/MySignatures/SignaturesMapping.xml
Access-Control-Allow-Methods: GET
Access-Control-Allow-Origin: *
Access-Control-Max-Age: 3000
Guidelines to update signatures
Following guidelines are used when updating signatures:
- The signatures are updated when the Signature update URL has a signature object which has the same or newer version.
- Each Signature Rule is associated with a rule ID and version number. For example:
<SignatureRule id="803" version="16" …> - Signature Rule from the incoming Signatures file with the same ID and version number as the existing one is ignored even if it has different patterns or log string.
-
Signature Rule with a new ID is added. All the actions and enabled flag are used from the new file.
Note:
You must review the updated signatures periodically to enable the newly added rules and change other action settings as per the requirements of the application.
- Rules with the same ID but with a newer version number replace the existing one. All the actions and enabled flag from the existing rule is preserved.
Tip:
When you update the signatures from the CLI, you must first update the default signatures. You must then add update commands to update each custom signature file that is based on the default signatures. If you do not update the default signatures first, a version mismatch error prevents custom signatures file update.
Auto-enable new signatures
From release 13.1 buid 27.x and later, you can select Auto Enable New Signatures to allow new WAF signature default rules to be auto-enabled after an update.
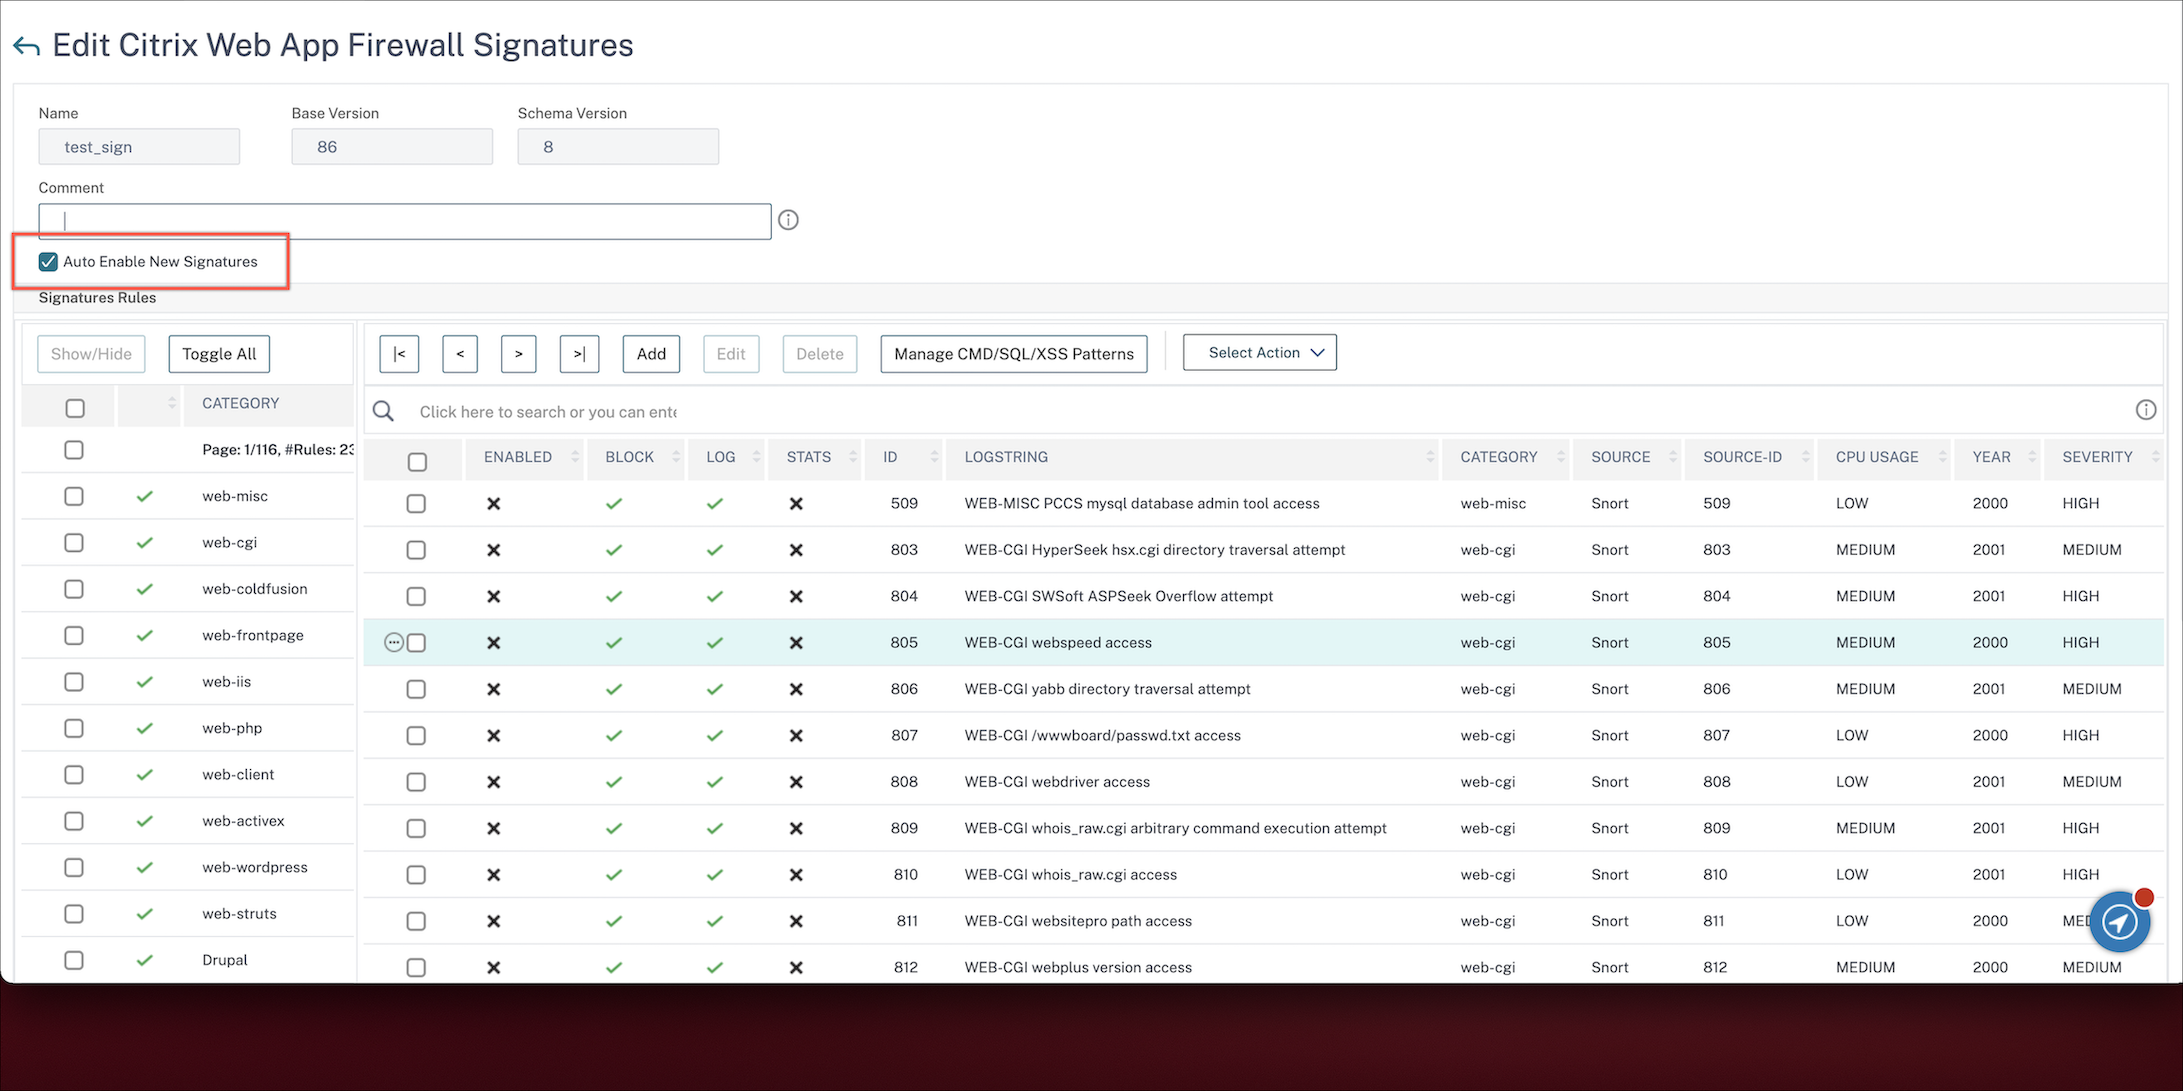
Auto-enable new signatures using the GUI
- Navigate to Security > NetScaler Web App Firewall > Signatures.
- Select a signature and click Edit.
-
Select Auto Enable New Signatures.
Auto-enable new signatures using the CLI
At the command prompt, type:
import appfw signatures <src> <name> [-xslt <string>] [-comment <string>] [-overwrite] [-merge [-preservedefactions]] [-sha1 <string>] [-VendorType Snort] [-autoEnableNewSignatures ( ON | OFF )]
Example:
import signatures http://www.example.com/ns/signatures.xml my-signature -autoEnableNewSignatures ON