Citrix Content Collaboration single sign-on configuration guide for Citrix Endpoint Management
You can configure the Citrix Endpoint Management server and Citrix Gateway to function as a SAML identity provider (IdP) for Citrix Content Collaboration. In this configuration, a user signing on to Citrix Content Collaboration using a web browser or other Citrix Files clients is redirected to the Citrix Endpoint Management environment for user authentication. After successful authentication by Citrix Endpoint Management, the user receives a SAML token that is valid for sign-in to their Citrix Content Collaboration account.
Prerequisites
A working configuration of Citrix Gateway and Citrix Endpoint Management server, which are already configured.
Configure SAML single sign-on for Citrix Files MDX apps
You can use the Citrix Endpoint Management Server along with Secure Hub to single sign-on (SSO) to Citrix Files MDX-wrapped applications. In this scenario, Secure Hub obtains a SAML token for the Citrix Content Collaboration sign-in using Citrix Endpoint Management server as an IdP.
- Sign into the Citrix Endpoint Management Server using the URL
https://<Citrix Endpoint Management Server>:4443 - Go to Configure > ShareFile.
- Use the Content Collaboration User Management Tool for user provisioning. See Provision user accounts and distribution groups.
SAML configuration for Citrix Files MDX apps is configured. If you want only to allow access to Citrix Content Collaboration using the Citrix Files MDX-wrapped applications, your configuration is complete. However, if you want to configure access for non-MDX Citrix Files clients, continue using the configuration guide.
Configuring Citrix Content Collaboration MDX SSO also enables user provisioning in the Citrix Endpoint Management server. Any users that are part of the selected roles and do not have an account in Citrix Content Collaboration are automatically provisioned by the Citrix Endpoint Management server based on how they first access Citrix Content Collaboration.
Configure Citrix Gateway
The following configuration is required on Citrix Gateway to support using Citrix Endpoint Management as a SAML identity provider:
Disable home page redirection
You must disable the default behavior for requests that come through the /cginfra path, so that the original requested internal URL is served to the user instead of the configured home page.
-
Edit the settings for the Citrix Gateway virtual server that is used for Citrix Endpoint Management sign-ins. Go to Other Settings and clear the check box labeled Redirect to Home Page:
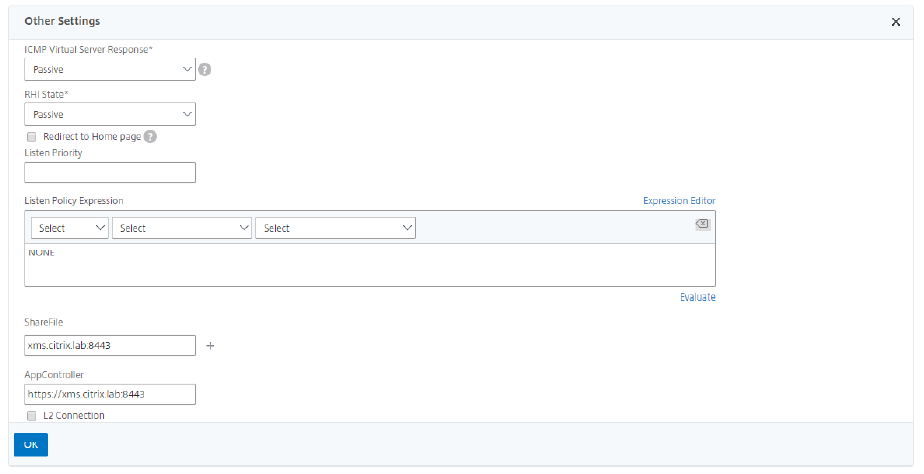
- For the ShareFile setting, add the internal server name and port of your Citrix Endpoint Management server. For example:
xms.citrix.lab:8443. - For the AppController setting, enter the address of your Citrix Endpoint Management server. This configuration authorizes requests to the specified URL through the /cginfra path.
Create a Citrix Content Collaboration session policy and request profile
- In the Citrix Gateway configuration utility, select Citrix Gateway > Policies > Session in the left navigation pane.
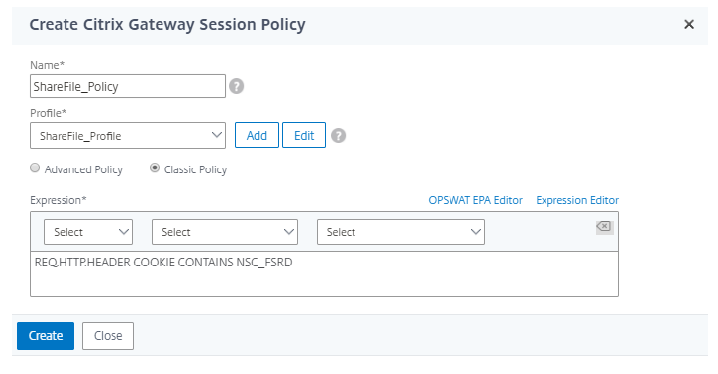
- To create a session policy, on the Policies tab, click Add… and then enter ShareFile_Policy as the name.
- To create an action, click Add… The Create Citrix Gateway session profile screen opens.
- In Name, enter ShareFile_Profile as the session profile name.
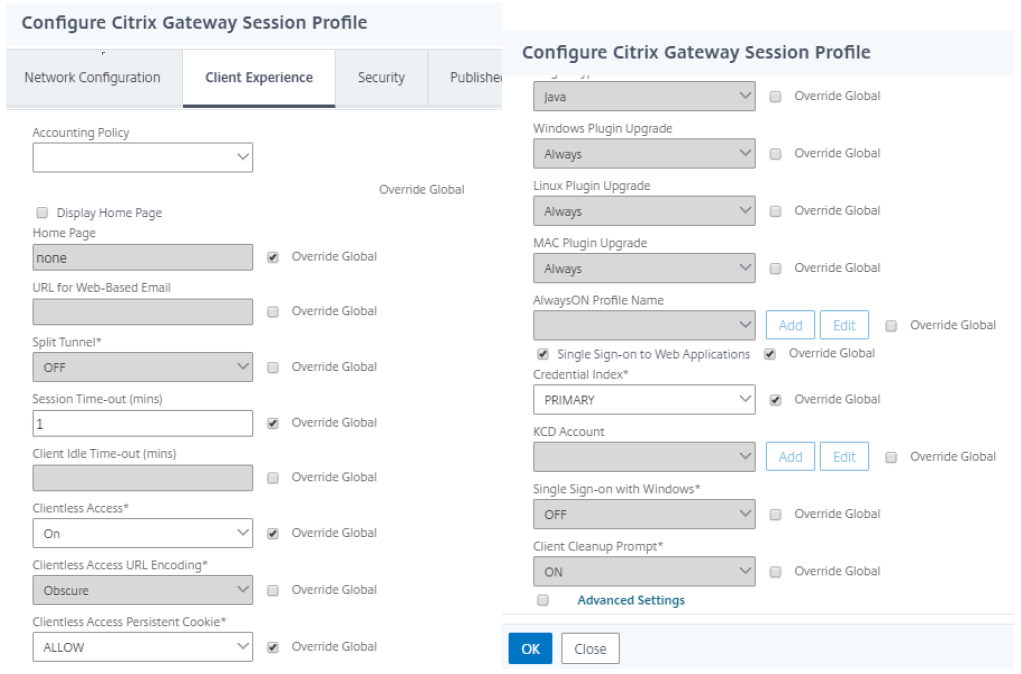
- On the Client Experience tab:
- For Home Page, enter none.
- For Session Time-out, enter 1.
- Enable Single Sign-on to Web Applications.
- For Clientless Access, set to On.
- For Clientless Access Persistent Cookie, set to Allow.
- For Credential Index, select PRIMARY.
-
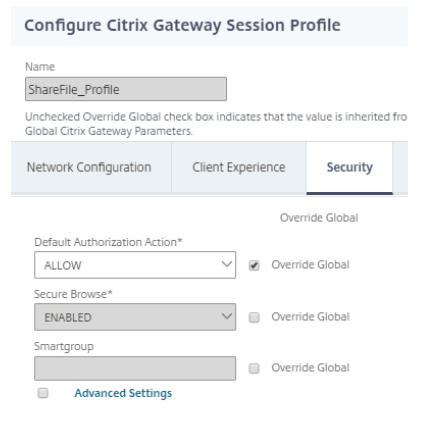
On the Security tab, set Default Authorization Action to Allow.
- On the Published Applications tab:
- For ICA Proxy, select ON.
- In Web Interface Address, enter your Citrix Endpoint Management server URL as shown.
- In Single Sign-on Domain, enter your Active Directory domain name.
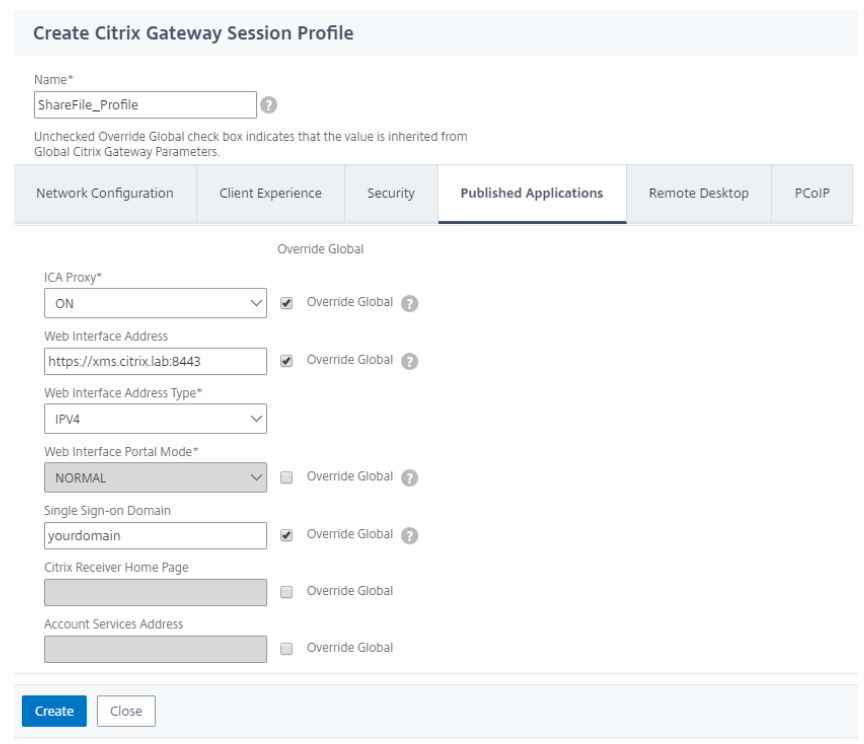
When configuring the Citrix Gateway session profile, the domain suffix entered into the Single Sign-On Domain field must match the Citrix Endpoint Management domain alias defined in LDAP.
- Click Create to finish defining the session profile.
- For the ShareFile_Policy expression, switch to Classic Policy and click Expression Editor.
-
Specify the expression using a Value of NSC_FSRD and a Header Name of COOKIE.
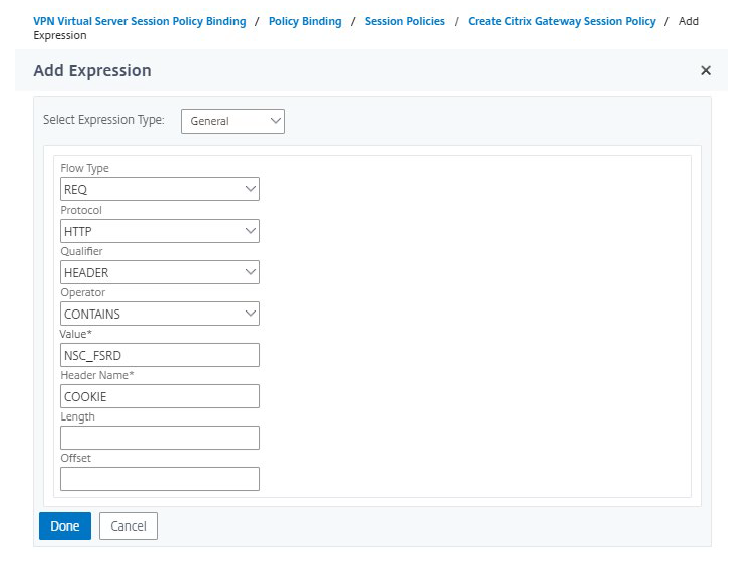
-
Click Done, click Create, and then click Close.
Configure policies on the Citrix Gateway virtual server
- In the Citrix Gateway configuration utility, select Citrix Gateway > Virtual Servers in the left navigation pane.
- In the Details pane, click your Citrix Gateway virtual server and then click Edit.
- Go to Configured policies > Session policies and click Add binding.
- Select the ShareFile_Policy.
-
Edit the auto-generated priority number for the inserted policy so that it has the lowest number (highest priority) compared to any other policies listed.

- Click Done and then save the running Citrix Gateway configuration.
Modify single sign-on settings
- Sign in to your account as a Citrix Content Collaboration administrator.
- In the web interface, navigate to Admin Settings > Security > Login & Security Policy and scroll down to the Single Sign-On settings.
-
Edit the Login URL.
- Insert the external FQDN of the Citrix Gateway virtual server plus /cginfra/https/ before the Citrix Endpoint Management server FQDN and :8443 after the FQDN.
- Change the parameter &app=ShareFile_SAML_SP to use the internal name of the application. The internal name is ShareFile_SAML by default, but with each change to your configuration the internal name changes to append a number (ShareFile_SAML2, ShareFile_SAML3, and so on).
- Add &nssso=true to the end of the URL. For example:
https://nsgateway.acme.com/cginfra/https/xms.citrix.lab:8443/samlsp/websso.do?action=authenticateUser&app=ShareFile_SAML&reqtype=1&nssso=true
Each time you edit or recreate the app, the internal application name is updated with a number appended to the name. You also must update the Login URL to reflect the updated application name. The following example shows how the Login URL needs to change when the internal application name changes from “ShareFile_SAML” to “ShareFile_SAML2”
-
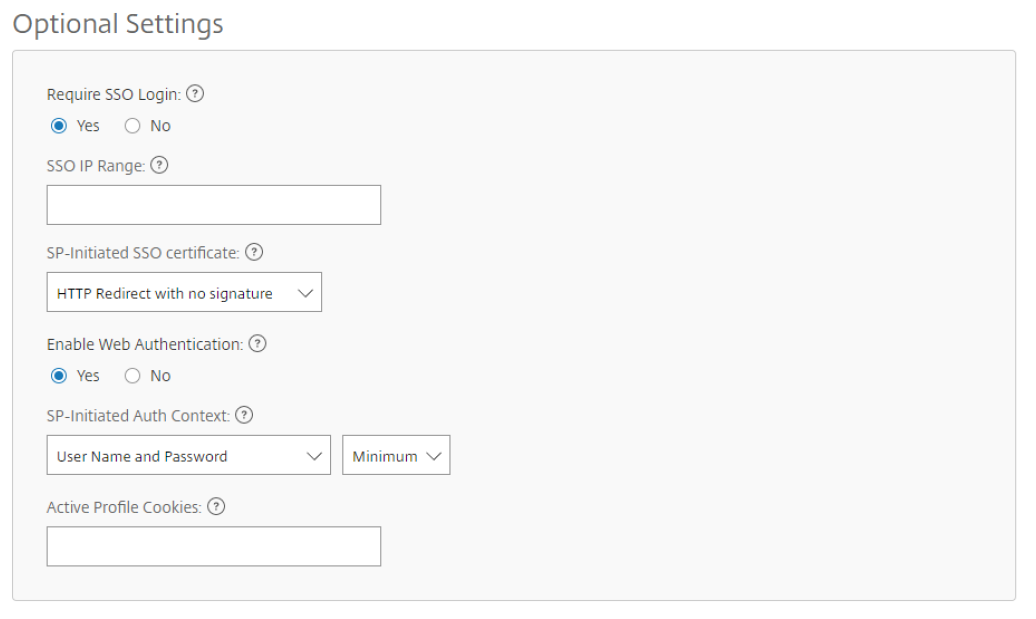
Under Optional Settings, click the Enable Web Authentication check box.
-
Click Save.
Validate your configuration
-
Go to
https://subdomain.sharefile.com/saml/login. You are redirected to the Citrix Gateway sign-in form. -
Sign in with user credentials that are valid for the Citrix Gateway and Citrix Endpoint Management server environment you configured. Your Citrix Files folders at
subdomain.sharefile.comappear.