People settings
Manage Users Home
Utilize manage users to do the following:
- Search for users including employee and client users.
- Create employee users and set access to folders, storage locations, and add to distribution groups.
- Create client users and set access to folders and distribution groups.
Search Users
Use the search function to find existing employee or client users.
Create New Users
New users for the Content Collaboration account can be created as either an employee user or a client user.
Create Employee
An employee user is most often an internal user within your company. Employee users are granted a wide range of permissions and access to your account. Creating an employee user consumes an employee license.
Requirements to create an employee user
- The manage employee users permission.
- Employee users can only grant or revoke permissions that they themselves have been granted.
- Only account administrators can delete users from the system.
- An email address can only be associated with ONE user at a time. You cannot use the same email address for multiple users.
To create an employee, go to Users > Manage Users Home in the Files console in Citrix Cloud. Use the Create Employee button to begin creating a user.
Type your user’s name, email address, and company info. You can also customize their password. Depending on your account type, you can customize the user’s individual bandwidth limit.
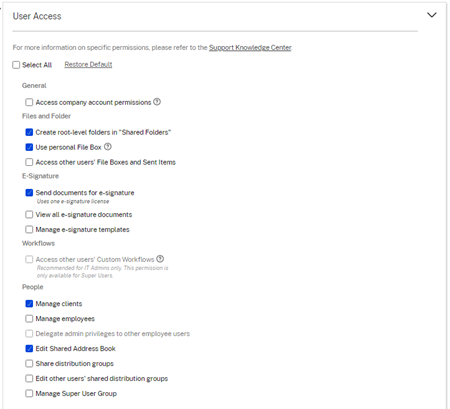
You can customize your new employee’s User Access and File settings. Depending on your account or plan and your own permissions, certain permissions might not be visible or applicable. User Access settings are typical access and feature-based permissions you can use to manage your employee’s access and abilities on the account.
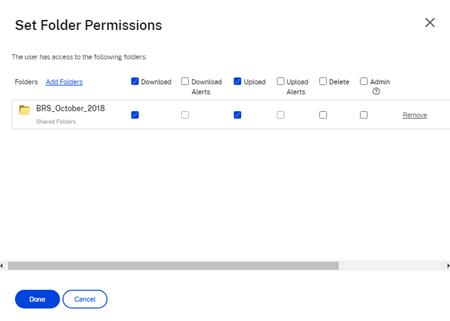
You can assign folders to your user, and add the user to Distribution Groups. You can also customize the user’s permissions to various folders on your account. To grant a user access to a folder, choose the check box beside the folder name.
You can send a Welcome Email to your new user or opt to do so later. This email includes a link to activate their new account.
Resend a welcome email or employee activation link
When a user is added, they are provided an activation link (by email or by a link generated and delivered by the creator). If the newly created user does not access that activation link within 30 days, a new activation link must be sent. When resending an activation link, the previous activation link is deactivated.
To resend the welcome email containing the activation link
- In ShareFile, go to Users > Resend Welcome Emails.
- Enter your user’s email address or name to add them to the To field, or select them from the Address Book.
- Customize your email message as needed.
- Click Send.
Accounts utilizing SAML
If you have configured a SAML SSO provider on your account and have created an employee user without any admin permissions, the user does not see or is not prompted to change their password within the activation email. Instead, that user is expected to sign in with their SAML credentials.
Strict employee licensing and company email address
By default, you cannot create a client user with the same email suffix as your company (ex: johndoe@company.com). This option is designed to prevent accounts from circumventing employee licensing requirements.
When a user attempts to create a client user with an employee company email, the user is prompted to send a request to an admin on the account to create the user as an employee.
Admins receive an email notification that allows them to review and approve the user creation request.
Manage employee permissions
Citrix Content Collaboration permissions are designed to give you granular control of your account and the permissions of your users.
Requirements to modify permissions
- The delegate administrator privileges to other employee users permission or Manage Employee Users permission.
- Employee users might only give or edit the permissions that they themselves have been given.
How to manage permissions
- In Citrix Content Collaboration, go to Users > Manage Users Home.
- Browse or search for your user. Choose the user or the Manage icon on the right to open the user profile.
- Change permissions as needed, then Save.
Default employee permissions
When creating an employee, the following permissions are granted by default. You can change these settings during the user creation process.
Note:
A gray setting indicates a permission that the creating user does not have access to or is not permitted to give to others, so they cannot grant that permission to another user.
Basic information
- Created - Date account is created.
- Email Address - The user’s email address.
- First Name
- Last Name
- Company name
- Notifications - Change the user’s default Notification Frequency settings.
- Default email language - Change the user’s default Email Notification Language.
- Password - When a user wants to change their password, they can use the Forgot Password link on the sign-in screen. If the link is not marked, they need to contact an employee who can manage employee permissions for help with signing in.
- Bandwidth limit - You can choose a maximum monthly bandwidth allowance for the employee. This limit prevents the employee from personally uploading and downloading more data than you allow. It also applies to all of their folders, so that they cannot share files with others more than you would like. Employee bandwidth limits can also affect clients that the employee supports by limiting how much they can download from the employee’s folders. Bandwidth limits are used by accounts where employee use might need to be limited to prevent bandwidth overages.
- Authentication - This setting is offered if the customer is using ShareFile credentials or two-step verification.
Access personal settings
In personal settings, a user can manage their name, company name, and avatar. They are able to update or change their password on this page if they have the permission to change their password.
Access Company Account Permissions
Advanced Preferences are account-wide settings that can be turned on or off by an employee user granted the Access Company Account Permissions permission. These settings can be found at Manage > Advanced Preferences.
Create Client
Create an external client with limited access to shared folders.
Requirements to create an external (client) user
- An Employee user.
- The Manage client users permission.
- Changing an external (client) email address or deleting an external (client) user from the system both require the Manage employee users permission.
To create an external (client) user, navigate to Users > Manage Users Home. Select the Create Client. The Create New Client screen displays.
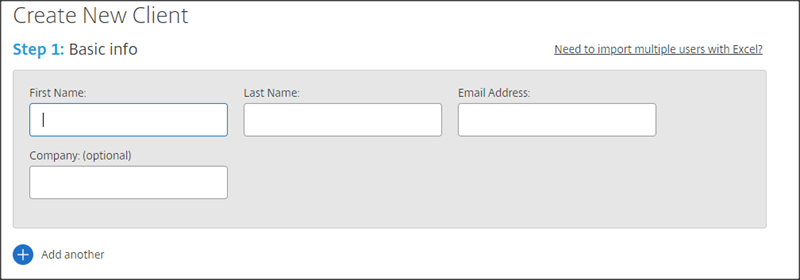
Enter your user’s email address, first name, last name, and company. If you want to add more users, click Add another. By default, new external (client) users are prompted to create a password when they sign in to Citrix Workspace for the first time.
You can assign folders to your user, and add the user to distribution groups. You can also copy folder permissions from an existing user to your new one. Using the Copy Folder Access option copies only folder permissions, not account permissions.
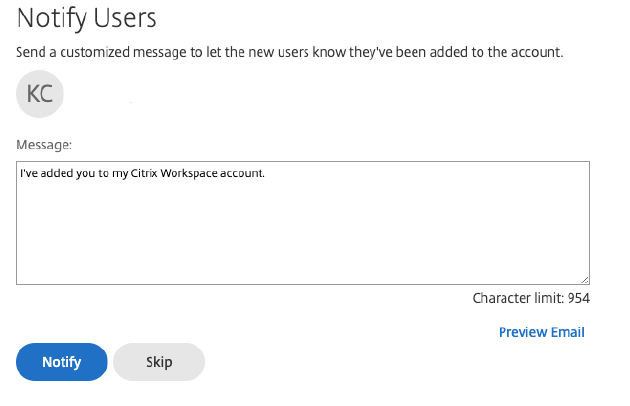
You can then send a welcome email to your new user, or opt to do so later. This email includes a link to activate their new account.
Give User Access to Folders
You can also create a client user from the Add People to Folder menu. A client user is created if you add an individual to a folder that is not currently a member of your account.
- Click the name of the folder where you would like to grant the new user access.
- Access the People on this Folder tab or the folder access menu.
- Click the Add People to Folder button.
- Click Create New User to add a client user to your account with access to this specific folder.
- The user’s email address, first name, and last name are required. The user is created as a client user and added to the list of users in the pane on the left.
- Check the Notify Added Users option in the bottom right.
- Save the changes. Your user then receives an email notification that they have been added to the folder and must activate their account.
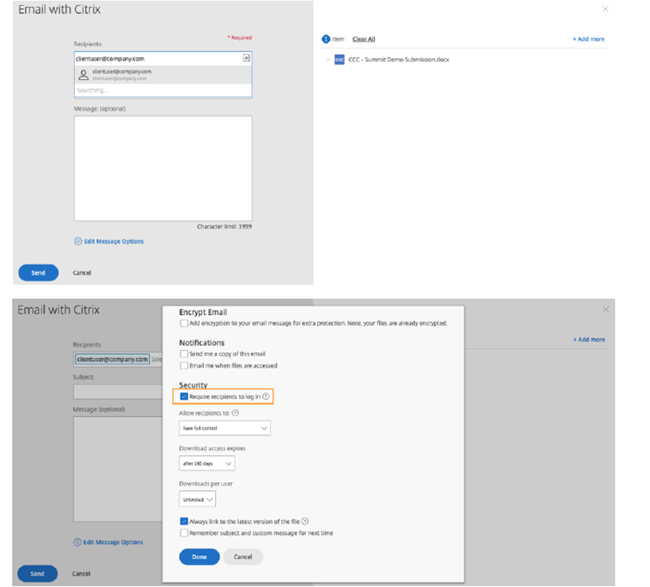
Create an external (client) user (Email with Citrix)
Email with Citrix allows you to send your files using Citrix Workspace’s email system. With this method, the recipient receives an email message containing a secure link to download the files. You can send a file stored on your account, or send a file stored on your computer.
To send a file stored on your computer using Citrix Workspace:
- Right-click any file, then click Email with Citrix.
- Enter a new external (client) users’ email address as a recipient for your message and file.
- Enter a subject for your message. You can enter extra text in the body of your message if needed.
-
Edit Message Options allows you to customize the following:
-
Send me a copy of this email - Receive a copy of the email message.
-
Email me when files are accessed - Receive a notification email when the file is viewed or downloaded.
-
Encrypt message - This option is available only to users with encrypted email enabled.
-
Require recipients to log in - Require that recipients log in with their Citrix Workspace account. If your recipient is not already a user on your account, they are then required to create a user name and password before accessing the file.
-
Access expires - Set how long you want the download link to be accessible.
-
Allow Recipients To - This option is available to users utilizing View-Only or IRM-protected sharing features.
-
Accesses per user - Limit the number of views or downloads users can have.
-
Always link to the latest version of the file - This option is available only to users with file versioning enabled.
-
Remember the subject and custom message for next time - Save the subject and custom message so that it is preset the next time you send a file.
-
- Click Send when ready. You then receive confirmation that the message was sent successfully.
External (client) user: Activate to access shared files
When you send a file link with the Require User to Login option checked to an external (client) user, the external (client) user is asked to create a Citrix Workspace account to access the link they have received. If you send a file request using the Email by Citrix system, the external (client) user receives an email with a link, as shown in the following image.
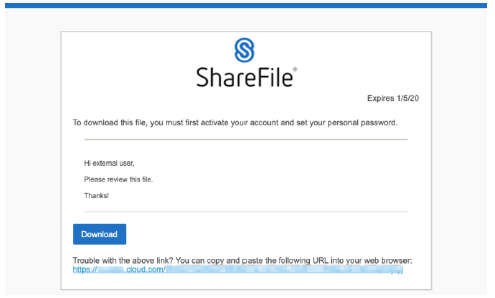
- Click the link to activate the account.
- Before they can download files, they must set a password for their account.
- Once they have set their password and clicked Reset Password, click Back to Sign In to sign in to Citrix Workspace to view or download the shared files.
- If they want to view the files again after leaving the page, go back to the email and click the link. The link takes the external (client) user directly to the files on return.
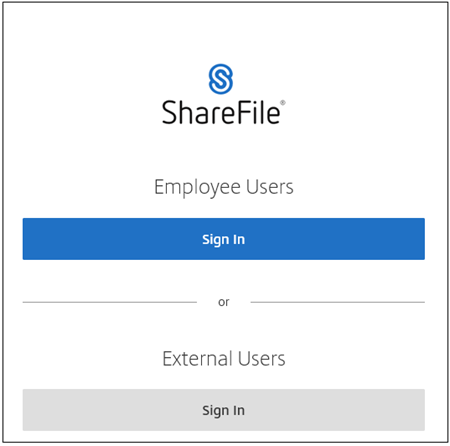
External (client) user: Sign in and view shared files and folders
When you add an external (client) user, the external (client) user can sign in to Citrix Workspace to view the shared files and folders. Sign in by doing the following:
- Go to the Citrix Workspace account URL (typically something like
[company].cloud.com). - Click to sign in as an External User. If they have signed in as an Employee User before this, they might not see the split sign-in page to sign in as an External User. If that occurs, clear the cache to see the page again.
- Enter the user name and password and click Sign In.
Browse Employees
From Citrix Content Collaboration, click People > Browse Employees and locate the employee user. Click their name to access their profile page.
Browse Clients
From Citrix Content Collaboration, click People > Browse Clients and locate the client user. Click their name to access their profile page.
Shared Address Book
The Shared Address Book is shared across all employee users. This address book can be accessed when you are adding users to folders or quickly sending a file.
Distribution Groups
When setting up a new Distribution Group, users can share the group with all employees. If this permission is enabled, the employee user is able to add more users to a group that has been created on the system and shared with others.
Resend Welcome Emails
To resend the welcome email containing the activation link:
- In Citrix Content Collaboration, go to People > Resend Welcome Emails.
- Enter your user’s email address or name to add them to the To field, or select them from the address book.
- Customize your email message as needed.
- Click Send.