Images
When you create a catalog to deliver desktops or apps, an image is used as a template for creating the machines.
Citrix provides three options for images:
- Use a Citrix-prepared image when creating a catalog: This option is recommended only for proof of concept deployments.
- Use a Citrix-prepared image to create another image: After the new image created, you customize it by adding applications and other software that your users need. Then, you can use that customized image when creating a catalog.
- Import an image from Azure: After you import an image from Azure, you can then use that image when creating a catalog. Additionally, you can use that image to create a new image using the image builder, adding apps and additional configurations. Then, you can use that customized image when creating a catalog.
When you create a catalog, Citrix DaaS Flex verifies that the image meets prerequisites for deploying a catalog.
Citrix prepared images
Citrix DaaS Flex provides prepared images that can be deployed to a catalog or used as a starting point to customize your image. The following configurations are offered:
- Windows 11 Pro (single-session)
- Windows Server 2019 (multi-session)
- Windows Server 2022 (multi-session)
- Windows Server 2025 (multi-session)
- Linux Ubuntu 22.04 LTS (single-session)
- Linux Ubuntu 22.04 LTS (multi-session)
The Citrix prepared images have a current version of the Citrix Virtual Delivery Agent (VDA) and Citrix Optimizer.
Citrix-prepared images are notated in the user interface as CITRIX.
Prepare a new image
Preparing a new image includes creating the image and then customizing it. When you create an image, a new VM is created to load the new image.
Requirements:
- Know the performance characteristics that the machines need. For example, running CAD apps might require different CPU, RAM, and storage than other office apps.
- If you plan to use a connection to your on-premises resources, set up that connection before creating the image and the catalog. For details, see Network connections.
When using a Citrix prepared Ubuntu image to build a new image, a root password is created for the new image. You can change that root password, but only during the image creation and customization process. You cannot change the root password after the image is used in a catalog.
- When the image is created, the administrator account that you specified (Login details for image building machine) is added to the sudoers group.
- After you RDP to the machine containing the new image, launch the terminal application and type
sudo passwd root. When prompted, provide the password you specified when creating the image. After verification, you’re prompted to enter a new password for the root user.
Create an image
- From the Citrix DaaS Flex dashboard, expand Images on the right.
-
Click Build Image.
-
On the Build image page, enter values in the following fields:
- Name the new image: Enter a name for the new image.
- Select an existing image to use as the base: Select an existing image. This is the base image that is used to create the new image.
- Subscription: Select an Azure subscription. For details, see Azure subscriptions.
- Network connection: Select No connectivity or a previously created connection.
- Region: (Available only for No connectivity.) Select a region where you want the machine containing the image to be created. If connectivity is configured, the catalog is created in the region of the connectivity configuration.
-
Domain type: Select the domain type: Active Directory or non-domain-joined.
- If you select Active Directory, select or add a domain. Specify an OU (optional), service account name, and password.
- Set logon credentials for the image building machine: You’ll use these credentials later when you connect (RDP) to the machine containing the new image, so that you can install apps and other software.
- Size of the image building machine: Select the CPU, RAM, and storage information for the machine that runs the image. Select a machine performance that meets your apps’ requirements.
- Restricted IP access: If you want to restrict access to the image building machine to specific addresses, select Add IP addresses and then enter one or more addresses. Citrix recommends restricting the allowed IP address range. After adding the addresses, click Done to return to the image building workflow.
- Optionally add up to 1024 characters of notes. After the image is created, you can update the notes from the image’s details display.
- When you’re done, click Build Image.
An image can take up to 30 minutes to build. On the Citrix DaaS Flex dashboard, expand Images on the right to see the current state.
Connect to a new image and customize it
After a new image is created, its name is added to the images list, with a status of Install apps and updates. To customize that image, download the RDP file. Use the RDP file to connect to the image and customize the software and configurations through that connection.
- From the Citrix DaaS Flex dashboard, expand Images on the right and select the image you want to connect to customize.
-
Click RDP to Public Address or RDP to Private Address based on your preference and connectivity.
- The image machine might power off if you do not RDP to it shortly after it’s created. This saves costs. If that happens, click Power On.
- Open the RDP file. Opening the file automatically attempts to connect to the address of the machine containing the new image. When prompted, enter the credentials you specified when creating the image.
- After you connect to the machine, customize the machine to meet the needs of your use case. Do not Sysprep the image.
- When you’re done customizing the new image, return to Images and click Finish build. The new image automatically undergoes validation testing.
Later, when you create a catalog, the new image is included in the list of images you can select.
On the Citrix DaaS Flex dashboard, the images display on the right indicates how many catalogs and machines use each image.
Note:
After you finalize an image, you cannot edit it. You must create a new image (using the previous image as a starting point), and then update the new image.
Import an image from Azure
When you import an image from Azure that has the Citrix VDA software and applications your users need, you can use it to create a catalog or replace the image in an existing catalog.
Imported image requirements
Citrix runs validation tests on the imported image. Ensure that the following requirements are met when you prepare the image that you’ll import into Citrix DaaS Flex.
-
Supported OS: The image must be a supported OS. To check a Windows OS version, run
Get-WmiObject Win32_OperatingSystem. - Supported generation: Generation 1 virtual machines support most guest operating systems. Generation 2 virtual machines support most 64-bit versions of Windows and more current version of Linux operating systems.
- Not generalized: The image must not be generalized.
-
No configured Delivery Controllers: Ensure that no Citrix Delivery Controllers are configured in the image. Ensure that the following registry keys are cleared.
HKLM:\SOFTWARE\Citrix\VirtualDesktopAgent\ListOfDDCsHKLM:\SOFTWARE\Policies\Citrix\VirtualDesktopAgent\ListOfDDCsHKLM:\SOFTWARE\Citrix\VirtualDesktopAgent\FarmGUIDHKLM:\SOFTWARE\Policies\Citrix\VirtualDesktopAgent\FarmGUID
-
Personality.inifile: Thepersonality.inifile must exist on the system drive. -
Valid VDA: The image must have Citrix VDA version 2507 or higher installed.
- Windows: To check, use
Get HKLM:\SOFTWARE\Microsoft\Windows\CurrentVersion\Uninstall\Citrix Virtual Desktop Agent. For installation guidance, see Install VDAs. - Red Hat Enterprise Linux and Ubuntu: For installation guidance, see Linux Virtual Delivery Agent.
- Windows: To check, use
- Azure Virtual Machine Agent: Before importing an image, make sure that the Azure Virtual Machine Agent is installed on the image. For more information, see the Microsoft article Azure Virtual Machine Agent overview.
Import the image
- From the Citrix DaaS Flex dashboard, expand Images on the right.
- Click Import image.
-
Choose how to import the image.
- For managed disks, use the export feature to generate a SAS URL. Set the expiration time to 7200 seconds or more.
-
For VHDs in a storage account, choose one of the following:
- Generate a SAS URL for the VHD file.
- Update the access level of a block storage container to blob or container. Then, get the file’s URL.
-
If you select:
-
Browse storage account:
- Select a subscription, resource group, storage account, and image.
- Name the image.
-
Azure public URL:
-
Enter the Azure-generated URL for the VHD. For guidance, click the link to the Microsoft document Download a Windows VHD from Azure.
- Select a subscription.
- Name the image.
-
-
- When you’re done, click Import.
Display and manage image information
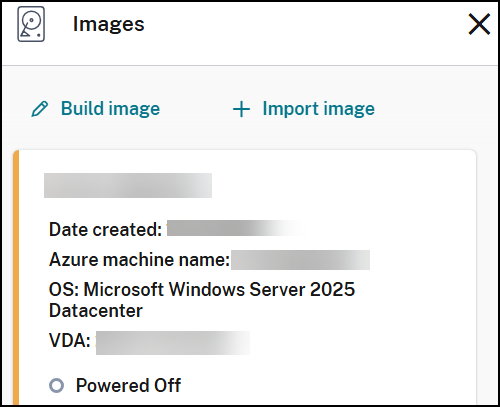
- From the Citrix DaaS Flex dashboard, expand Images on the right. The display lists the images that Citrix provides, and images you created and imported.
-
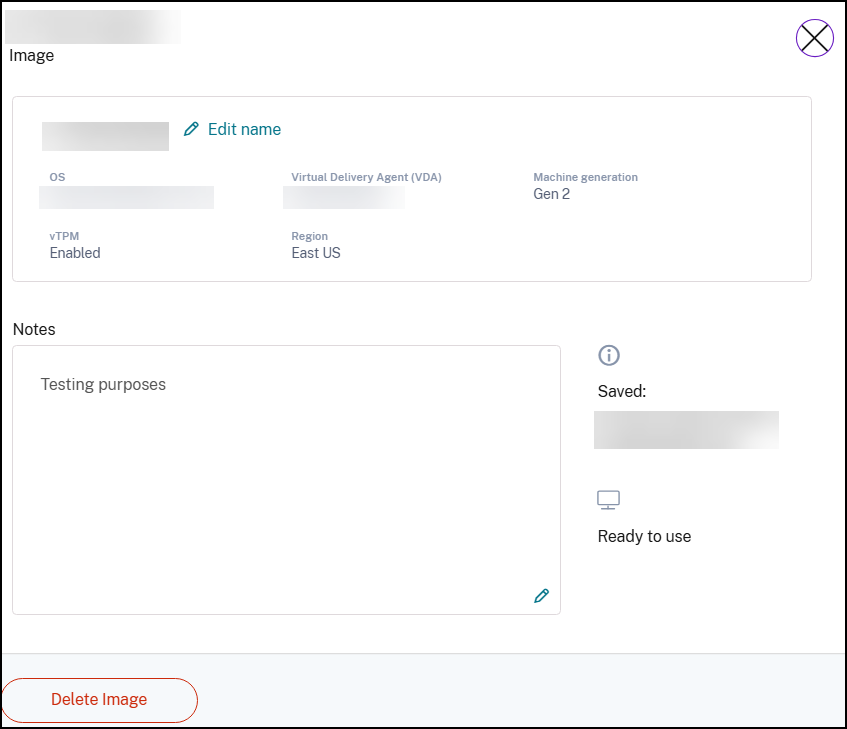
Click an image to display its details.
-
From the details card, you can:
- Change the image’s name.
- Add and edit notes (available only for images you prepared or imported, not Citrix-prepared images).
- Delete the image.
Delete an image
- From the Citrix DaaS Flex dashboard, expand Images on the right.
- Select the image you want to delete.
- Click Delete Image and confirm the deletion.