Boot from SAN environments
Boot-from-SAN environments offer several advantages, including high performance, redundancy, and space consolidation. In these environments, the boot disk is on a remote SAN and not on the local host. The host communicates with the SAN through a host bus adapter (HBA). The HBA’s BIOS contains the instructions that enable the host to find the boot disk.
Boot from SAN depends on SAN-based disk arrays with either hardware Fibre Channel or HBA iSCSI adapter support on the host. For a fully redundant boot from SAN environment, you must configure multiple paths for I/O access. To do so, ensure that the root device has multipath support enabled. For information about whether multipath is available for your SAN environment, consult your storage vendor or administrator. If you have multiple paths available, you can enable multipathing in your Citrix Hypervisor deployment upon installation.
Warning:
Boot-from-SAN settings are not inherited during the upgrade process. When upgrading using the ISO or network-boot, follow the same instructions as used in the installation process below to ensure that
multipathis correctly configured.
To install Citrix Hypervisor to a remote disk on a SAN with multipathing enabled from the installer UI:
-
Boot the computer from the installation media or by using network boot. For more information, see Install the Citrix Hypervisor server
-
Following the initial boot messages, you see one of the following screens:
-
If you are doing a BIOS installation, you see the Welcome to Citrix Hypervisor screen.
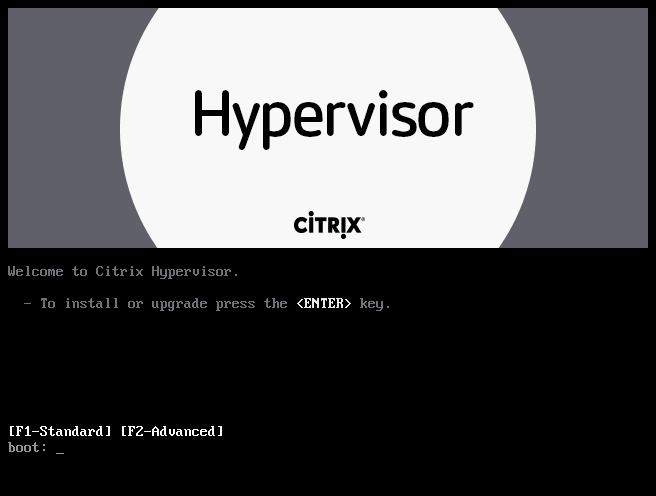
- At the welcome screen, press F2 to select Advanced install.
- At the boot prompt, enter
multipath
-
If you are doing a UEFI installation, you see a GRUB menu. This menu is shown for 5 seconds.
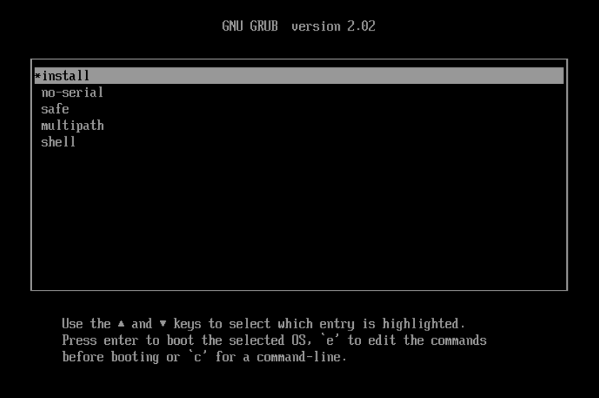
- On the GRUB menu, choose
multipathand press Enter.
- On the GRUB menu, choose
-
The Citrix Hypervisor installation process configures the Citrix Hypervisor server, which boots from a remote SAN with multipathing enabled.
To install Citrix Hypervisor to a remote disk on a SAN with multipathing enabled by using a configuration file:
To enable file system multipathing using PXE or UEFI installation, add device_mapper_multipath=yes to your configuration file. The following is an example configuration:
default xenserver
label xenserver
   kernel mboot.c32
   append /tftpboot/xenserver/xen.gz dom0_max_vcpus=1-2 \
   dom0_mem=1024M,max:1024M com1=115200,8n1 \
   console=com1,vga ---  /tftpboot/xenserver/vmlinuz \
   xencons=hvc console=hvc0 console=tty0 \
   device_mapper_multipath=yes \
   install ---  /tftpboot/xenserver/install.img
<!--NeedCopy-->
For additional information on storage multipathing in your Citrix Hypervisor environment, see Storage.
Software-boot-from-iSCSI for Cisco UCS
The Software-boot-from-iSCSI feature enables customers to install and boot Citrix Hypervisor from SAN using iSCSI. Using this feature, Citrix Hypervisor can be installed to, booted from, and run from a LUN provided by an iSCSI target. The iSCSI target is specified in the iSCSI Boot Firmware Table. This capability allows the root disk to be attached through iSCSI.
Citrix Hypervisor supports the following features for Software-boot-from-iSCSI:
-
Host installation through PXE-boot
-
Cisco UCS vNIC
Software-boot-from-iSCSI has been tested in Legacy BIOS and UEFI boot mode by using Cisco UCS vNICs and Power Vault, NetApp, and EqualLogic arrays. Other configurations might work, however, they have not been validated.
-
Jumbo Frames (MTU=9000) configured with the Cisco UCS manager
-
Cisco UCS line-rate limiting
-
Untagged VLANs
-
Networks using the vSwitch back-end
-
LVHDoISCSI SRs and NFS SRs on the same or different SAN/NAS
-
Multipathing of the iSCSI root disk
-
Compatibility with common Citrix Hypervisor (Network, Maintenance) operations
Requirements
-
The primary management interface (IP addressable) and the network for VM traffic, must use separate interfaces.
-
Storage (iSCSI targets) must be on a separate Layer 3 (IP) network to all other network interfaces with IP addresses on the host.
-
Storage must be on the same subnet as the storage interface of the Citrix Hypervisor server.
Install Citrix Hypervisor by using CD media
Perform the following steps to install Citrix Hypervisor using a CD:
-
Access the boot menu; at the
boot:prompt entermenu.c32 -
Use the cursor keys to select an installation option:
-
For a single path LUN, select install
-
For a multipathed LUN, select multipath
-
-
Press the tab key.
Edit the line ending with the following:
--- /install.img <!--NeedCopy--> -
Using the cursor keys, edit this line to read:
use_ibft --- /install.img <!--NeedCopy--> -
Press Enter.
Citrix Hypervisor server installation proceeds as normal.
Install Citrix Hypervisor by using PXE
Perform the following steps to install Citrix Hypervisor using PXE:
Note:
Ensure that you add the keyword use_ibft in the kernel parameters. If multipathing is required, you must add device_mapper_multipath=enabled.
The following example shows PXE configuration for a single LUN:
    label xenserver
    kernel mboot.c32
    append XS/xen.gz dom0_max_vcpus=2 dom0_mem=1024M,max:1024M
    com1=115200,8n1 console=com1,vga ---  XS/vmlinuz xencons=hvc console=tty0
    console=hvc0 use_ibft ---  XS/install.img
<!--NeedCopy-->
The following example shows PXE configuration for a multipathed LUN:
    label xenserver
    kernel mboot.c32
    append XS/xen.gz dom0_max_vcpus=2 dom0_mem=1024M,max:1024M
    com1=115200,8n1 console=com1,vga ---  XS/vmlinuz xencons=hvc console=tty0
    console=hvc0 use_ibft device_mapper_multipath=enabled ---  XS/install.img
<!--NeedCopy-->