Install and configure Citrix SD-WAN Center on ESXi Server
Install the VMware VSphere client
Following are the basic instructions for downloading and installing the VMware vSphere client that you will use to create and deploy the Citrix SD-WAN Center Virtual Machine. For more information, see VMware vSphere Client documentation.
To download and install the VMware vSphere Client, do the following:
-
Open a browser and navigate to the ESXi server that hosts your vSphere Client and Citrix SD-WAN Center Virtual Machine (VM) instance.
The VMware ESXi Welcome page appears.
-
Click the Download vSphere Client link to download the vSphere Client installation file.
-
Install the vSphere Client.
Run the vSphere Client installer file that you downloaded, and accept each of the default options when prompted.
-
After the installation completes, start the vSphere Client program.
The VMware vSphere Client login page appears, prompting you for the ESXi server login credentials.
-
Enter the ESXi server login credentials:
- IP address / Name: Enter the IP Address or Fully Qualified Domain Name (FQDN) for the ESXi server that hosts your Citrix SD-WAN Center VM instance.
- User name: Enter the server administrator account name. The default is root.
- Password: Enter the password associated with this administrator account.
-
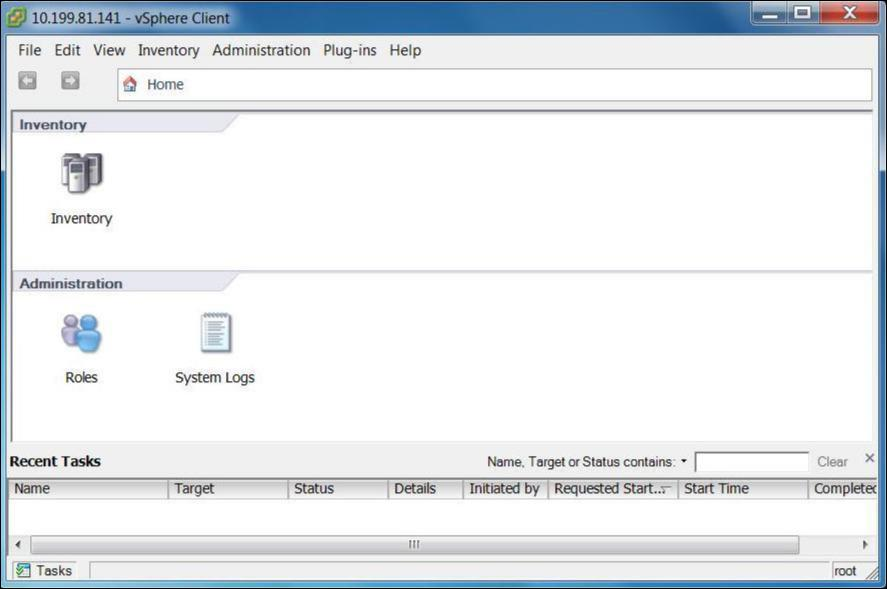
Click Login.
The vSphere Client main page appears.
Creating the Citrix SD-WAN Center VM using OVF template
After installing the VMware VSphere client, create the Citrix SD-WAN Center virtual machine.
-
If you have not already done so, download the Citrix SD-WAN Center OVF template file (. ova file) to the local PC.
For more information, see System requirements and installation.
-
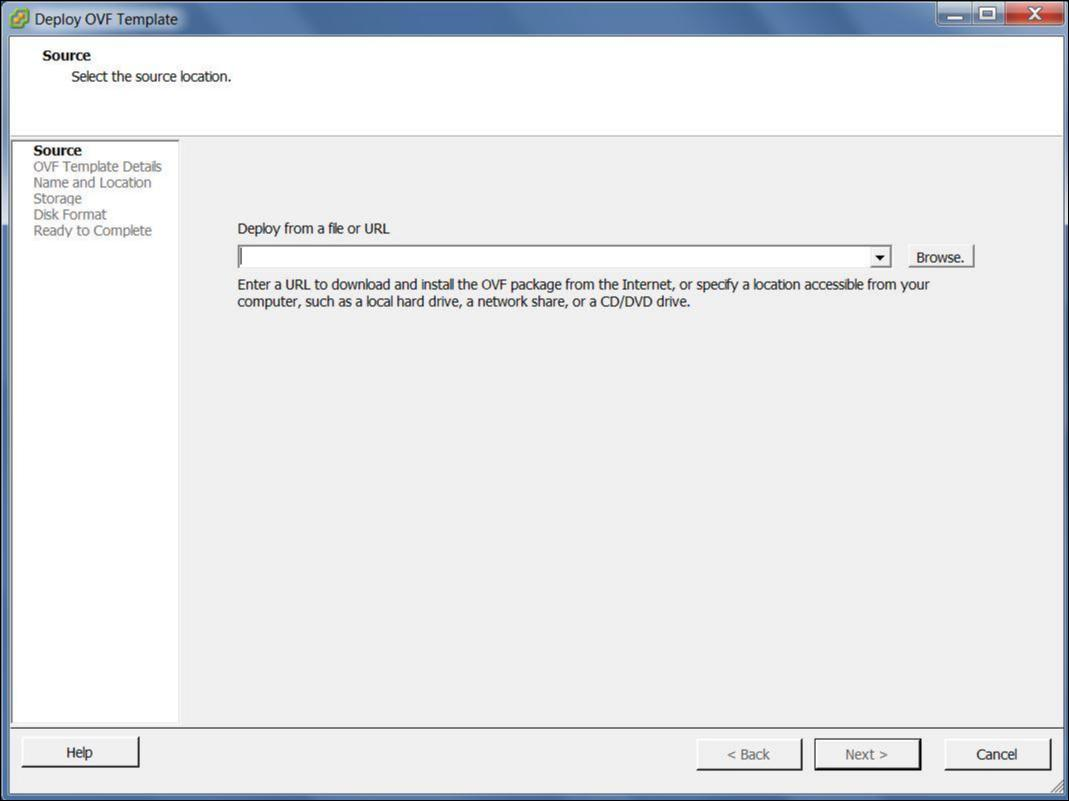
In the vSphere Client, click File, and then select Deploy OVF Template from the drop-down menu.
The Deploy OVF Template wizard appears.
-
Click Browse and select the Citrix SD-WAN Center OVF template (.ova file) that you want to install.
-
Click Next.
The ova file is imported and the OVF Template Details page appears.
-
Click Next.
-
On the End User License Agreement page, click Accept, and then click Next.
-
On the Name and Location page, enter a unique name for the new VM (or accept the default value).
The name must be unique within the current Inventory folder, and can be up to 80 characters in length.
-
Click Next.
The Storage page appears.
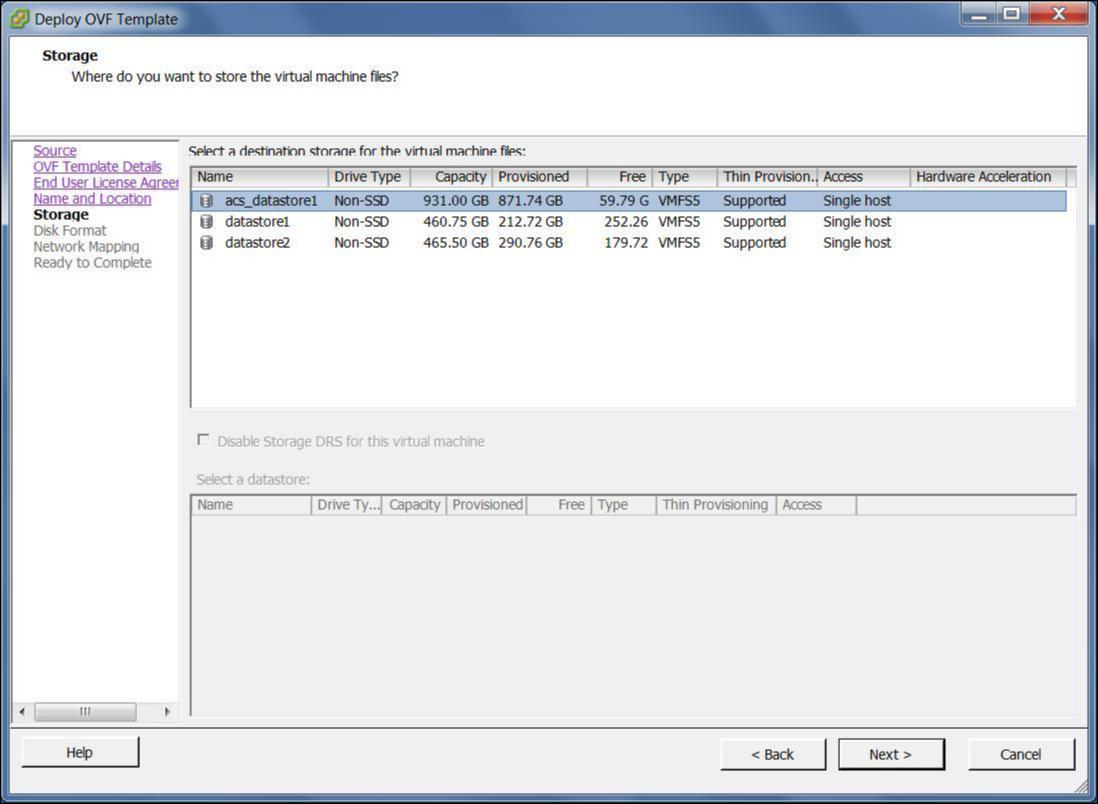
-
For now, accept the default storage resource by clicking Next. You can also configure the datastore. For more information see Add and configure the Datastore on ESXi server.
-
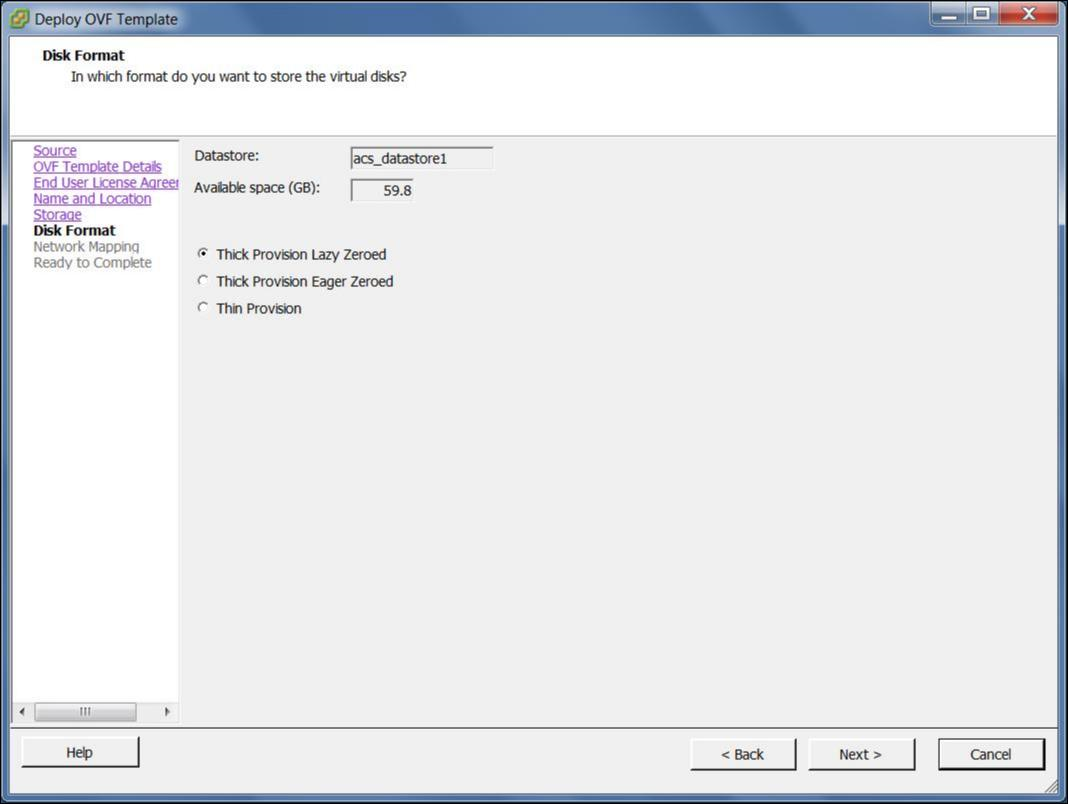
On the Disk Format page, accept the default settings, and click Next.
-
On the Network Mapping page, accept the default (VM Network) and click Next.
-
On the Ready to Complete page, click Finish to create the VM.
Note:
Decompressing the disk image onto the server can take several minutes.
-
Click Close.
View and record the management IP address on ESXi server
The management IP address is the IP address of the SD-WAN Center VM, use this IP address to log into the Citrix SD-WAN Center Web UI.
To display the management IP address, do the following:
-
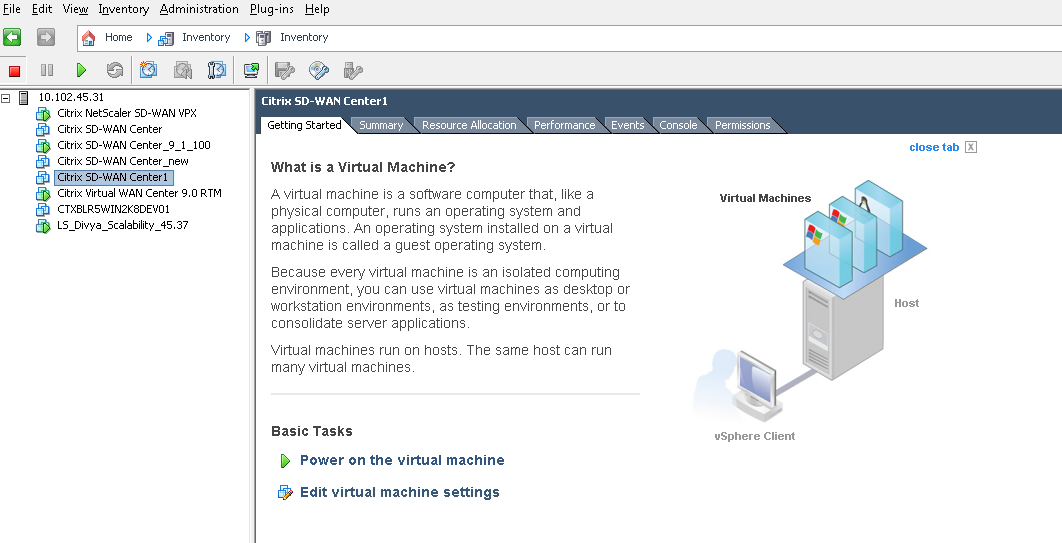
On the vSphere client Inventory page, select the new Citrix SD-WAN Center VM in the Inventory tree (left pane).
-
On the Citrix SD-WAN Center page, under Basic Tasks, click Power on the Virtual Machine.
-
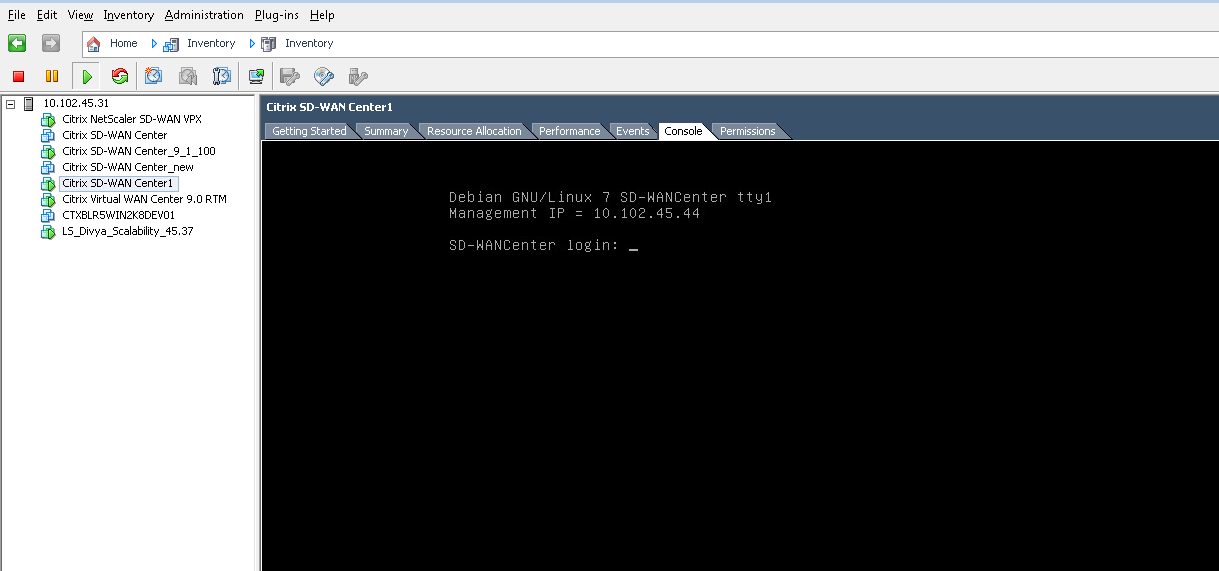
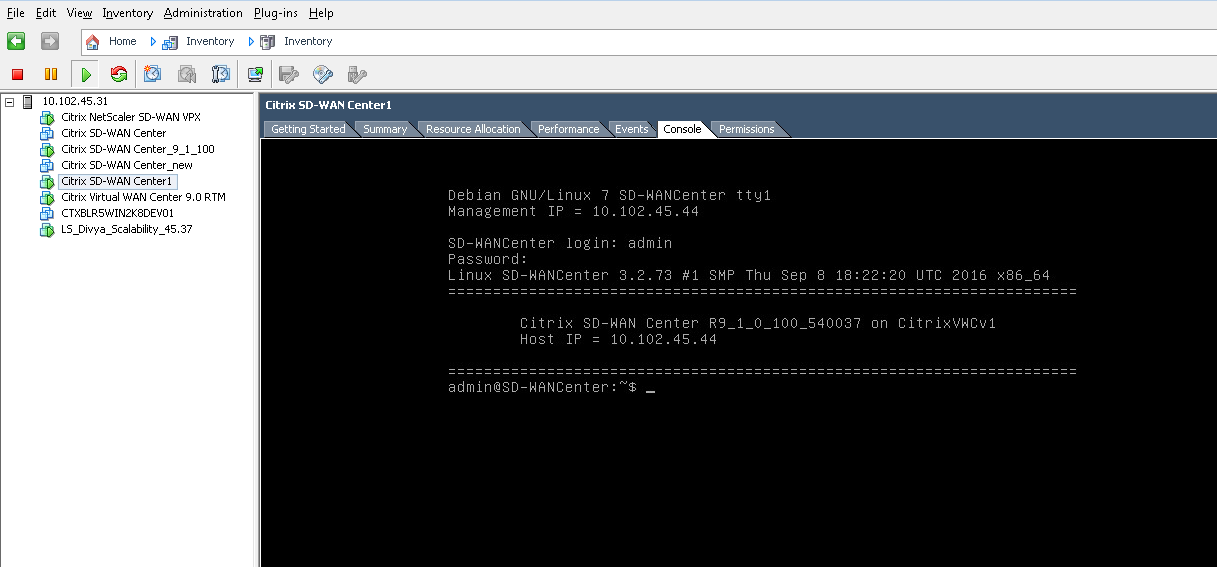
Select the Console tab, and then click anywhere inside the console area to enter console mode.
This turns control of your mouse cursor over to the VM console.
Note
To release console control of your cursor, press the <Ctrl> and <Alt> keys simultaneously.
-
Press Enter to display the console login prompt.
-
Log into the VM console.
The default login credentials for the new Citrix SD-WAN Center VM are as follows:
- Login: admin
- Password: password
-
Record the Citrix SD-WAN Center VM’s management IP address, which is shown as the Host IP address in a welcome message that appears when you log on.
Note
The DHCP server must be present and available in the SD-WAN network, or this step cannot be completed.
If the DHCP server is not configured in the SD-WAN network, you have to manually enter a static IP address.
To configure a static IP address as the management IP address:
-
When the VM is started, click the Console tab.
-
Log into the VM. The default login credentials for the new Citrix SD-WAN Center VM are as follows:
Login: admin
Password: password
-
In the console enter the CLI command management_ip.
-
Enter the command set interface <ipaddress> <subnetmask> <gateway>, to configure management IP.
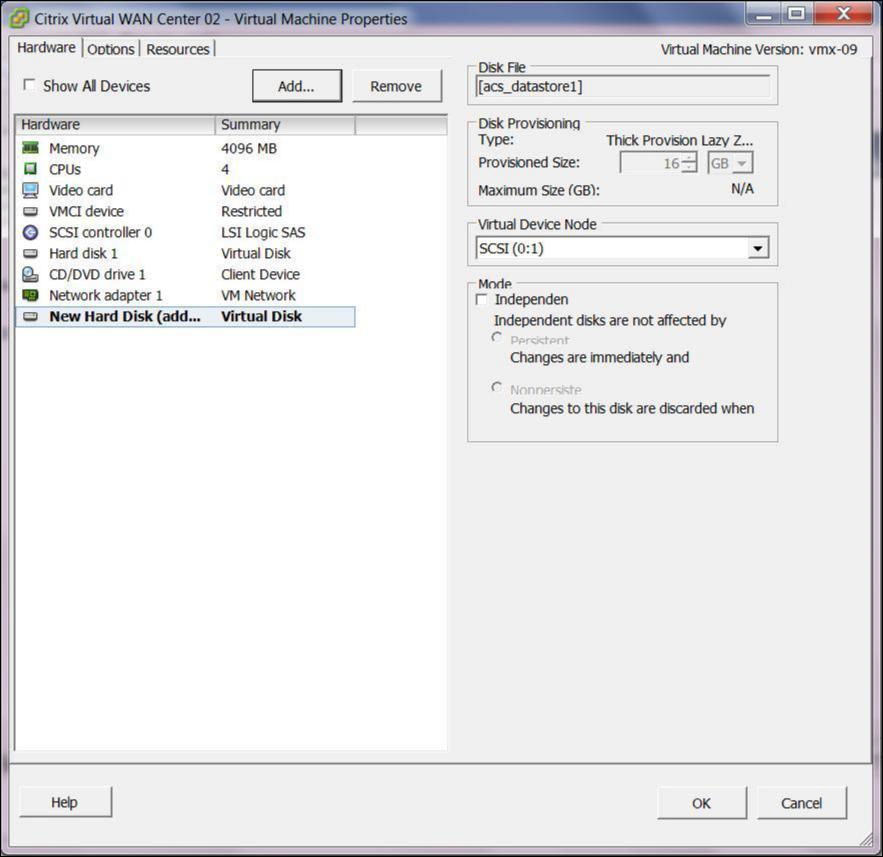
Add and Configure the Datastore on an ESXi server
You can add and configure datastore to store statistics from Citrix SD-WAN Center.
To add and configure the datastore:
-
In the vSphere client, click the Inventory icon to open the Inventory page.
-
Expand the Inventory tree branch for the Citrix SD-WAN Center VM host server.
-
In the left pane, click + next to the IP Address for the server hosting the Citrix SD-WAN Center VM you created.
-
Open the new Citrix SD-WAN Center VM for editing.
-
In the Inventory tree, right-click on the name of the Citrix SD-WAN Center VM you created and select Edit Setting from the drop-down menu.
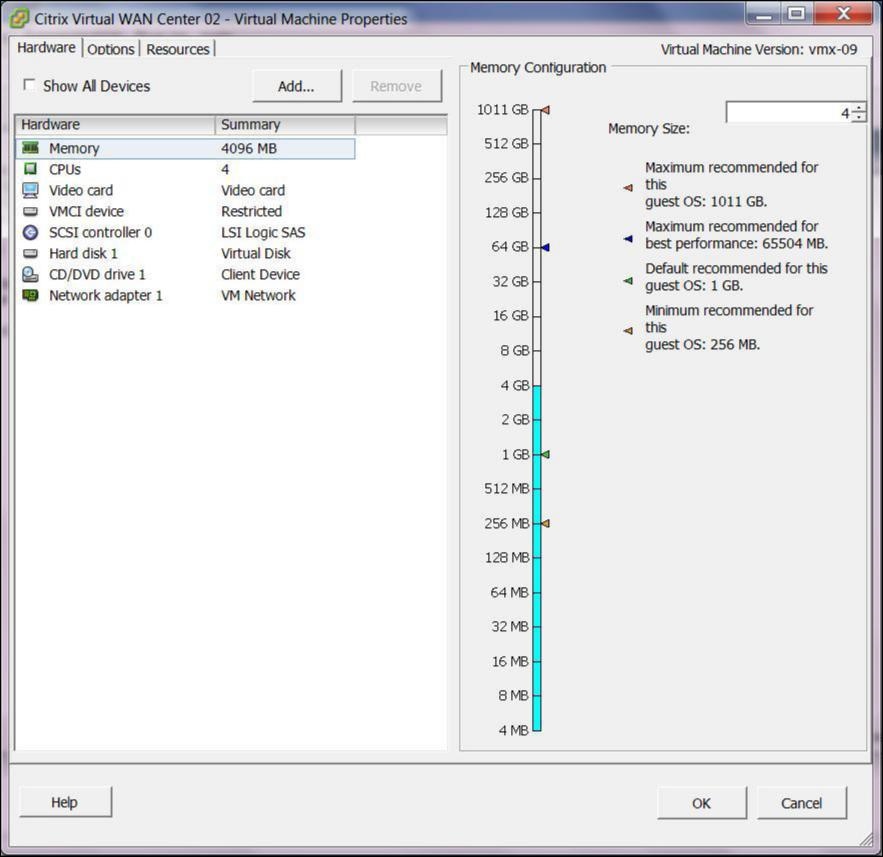
-
In the Memory Size field, enter the amount of memory to allocate for to this VM.
For more information, see Memory Requirements.
-
Click Add.
-
On the Device Type page of the Add Hardware wizard, select Hard Disk and then click Next.
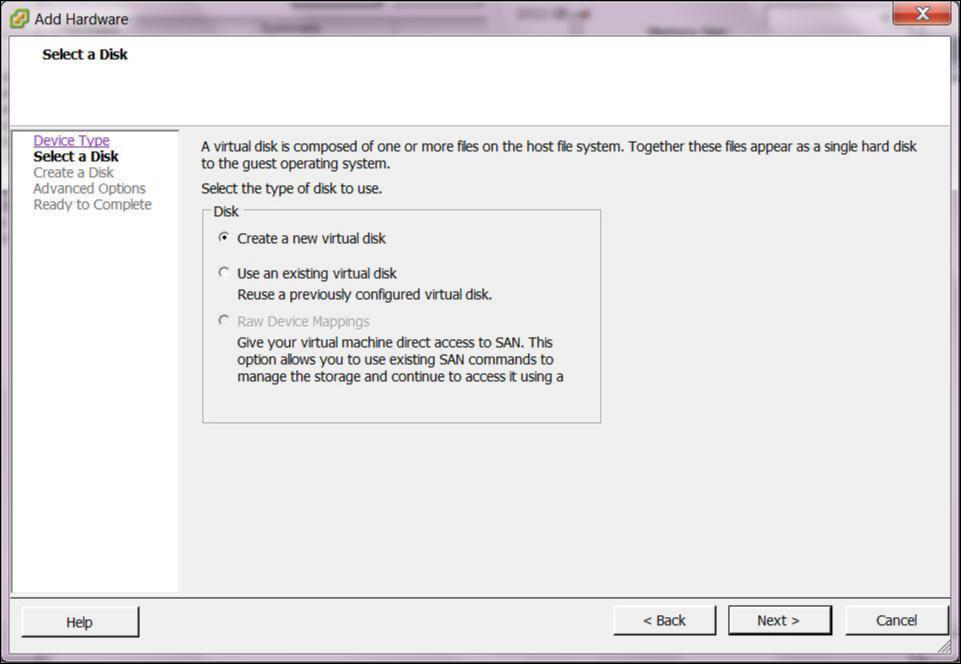
-
On the Select a Disk page, select Create a new virtual disk and click Next.
-
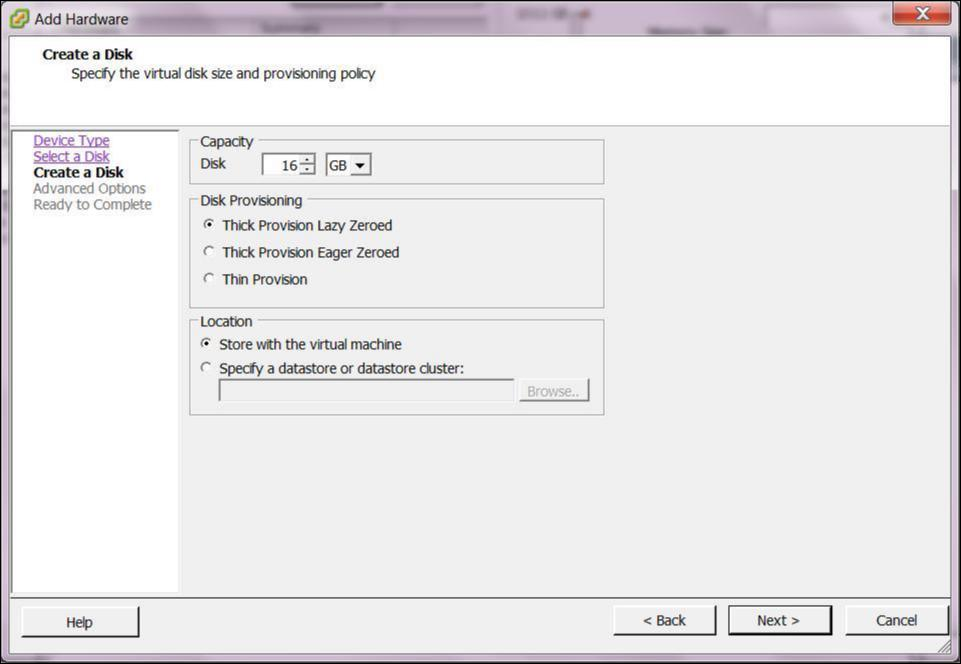
On the Create a Disk page, in the Capacity section, select the disk capacity for the new virtual disk.
-
In the Disk Provisioning section, select Thick Provision Lazy Zeroed (the default).
-
In the Location section, select Specify a datastore or datastore cluster.
-
Click Browse.
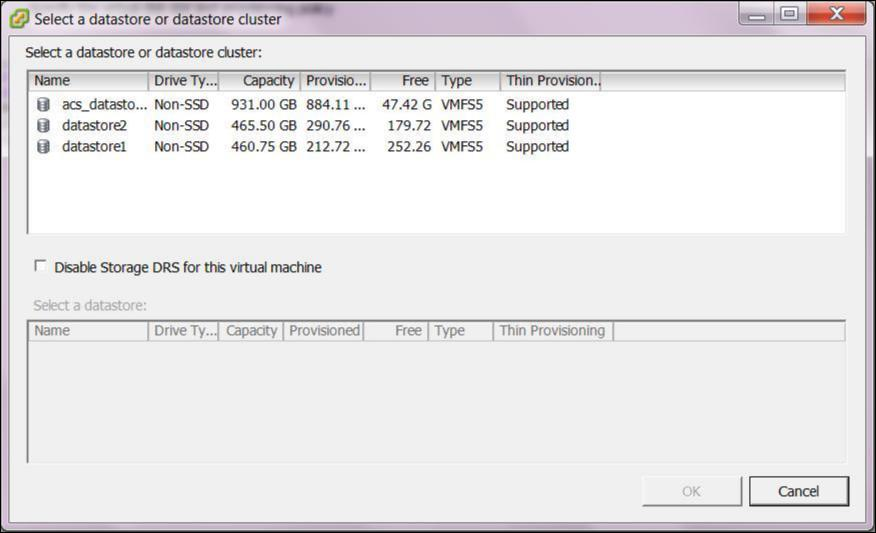
-
Select a datastore with sufficient available space, and click OK.
-
Click Next.
-
On the Advanced Options page, accept the Advanced Options default settings and click Next.
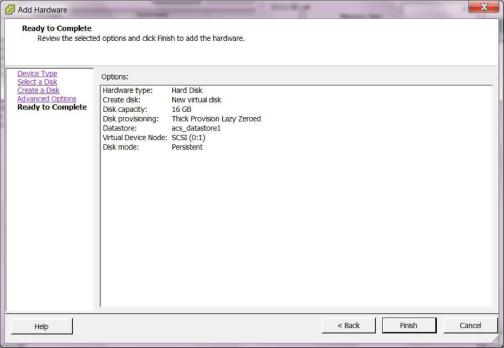
-
Click Finish.
This adds the new virtual disk, dismisses the Add Hardware wizard, and returns you to the Virtual Machine Properties page.
-
Click OK.