-
-
-
-
-
XenServer 6.5 Upgrade for SD-WAN Standard Edition Appliances
-
SD-WAN Standard Edition Virtual Appliance (VPX) in Hypervisor on HyperV 2012 R2 and 2016
-
Install SD-WAN SE Virtual Appliances (VPX) in Linux-KVM Platform
-
Deploy Citrix SD-WAN Standard Edition Instance on Azure - Release Version 10.2 and above
-
SD-WAN Standard Edition Virtual Appliance (VPX) High Availability support for AWS
-
Deploy a Citrix SD-WAN VPX instance on a Citrix ADC SDX appliance
-
Citrix SD-WAN VPX-L
-
This content has been machine translated dynamically.
Dieser Inhalt ist eine maschinelle Übersetzung, die dynamisch erstellt wurde. (Haftungsausschluss)
Cet article a été traduit automatiquement de manière dynamique. (Clause de non responsabilité)
Este artículo lo ha traducido una máquina de forma dinámica. (Aviso legal)
此内容已经过机器动态翻译。 放弃
このコンテンツは動的に機械翻訳されています。免責事項
이 콘텐츠는 동적으로 기계 번역되었습니다. 책임 부인
Este texto foi traduzido automaticamente. (Aviso legal)
Questo contenuto è stato tradotto dinamicamente con traduzione automatica.(Esclusione di responsabilità))
This article has been machine translated.
Dieser Artikel wurde maschinell übersetzt. (Haftungsausschluss)
Ce article a été traduit automatiquement. (Clause de non responsabilité)
Este artículo ha sido traducido automáticamente. (Aviso legal)
この記事は機械翻訳されています.免責事項
이 기사는 기계 번역되었습니다.책임 부인
Este artigo foi traduzido automaticamente.(Aviso legal)
这篇文章已经过机器翻译.放弃
Questo articolo è stato tradotto automaticamente.(Esclusione di responsabilità))
Translation failed!
Citrix SD-WAN VPXL
Citrix SD-WAN VPXL-SE is an enhanced version of the SD-WAN VPX-SE platform. Depending on the RAM/CPU/Disk configuration, the VPX platform can be operated either as VPX-SE or VPXL-SE. It is available on all VPX-SE platforms including Azure and AWS.
The Citrix SD-WAN VPXL-SE platform can handle up to 256 virtual paths when provisioned as an MCN/RCN.
Following are the configuration requirements for the VPXL-SE platform.
- 16 GB memory and 16 CPU cores.
- 250 GB of HDD.
The number of virtual paths and dynamic virtual paths that the SD-WAN VPXL-SE platform can handle, irrespective of the appliance role (MCN, RCN, or Client) is as follows:
| Memory | Less than 16 GiB | More than 16 GiB |
|---|---|---|
| Virtual Path | 16 | 256 |
| Dynamic Virtual Path | 8 | 32 |
Interface specifications
The SD-WAN VPXL-SE interface specifications are as follows:
- SD-WAN VPXL-SE supports a maximum number of eight interfaces.
- The first interface is reserved to be used as the Management IP Address for the Virtual Appliance.
- Before powering up the new VM for the SD-WAN VPXL-SE Virtual Appliance, you must configure and assign more interfaces (one each) for the LAN and WAN.
- For SD-WAN VPXL-SE, bridges are not created by default for the data interface (for example, eth1 and eth2).
Configuring Citrix SD-WAN VPXL-SE
To configure SD-WAN VPXL-SE:
- Import the SD-WAN VPX-SE base image (.ova or.xva template). Do not Power ON the Virtual machine.
- Modify the VM resources for Memory to 16 GB RAM, CPU to 16vCPUs and hard disk size to 250 GB.
- Add the required NIC interfaces to the VM (for LAN and WAN interfaces).
- Power ON the VM.
- Now, SD-WAN VPX-SE would operate as a VPXL-SE platform model.
- In case the VM is already Powered ON, before modifying the VM resources, you must perform Reimage Virtual WAN Appliance Software under Configuration > System Maintenance> Update Software, and use the cb-vw_CBVPXL_version.tar.gz image file.
Note
Ensure to clear options that mention to Power on the Virtual machine, after the VM provisioning/import process is complete.
Converting VPX to VPXL
To convert Citrix SD-WAN VPX to Citrix SD-WAN VPXL:
- Power off the existing VPX site.
- Modify the allocated resource of the VPX site from VPX to VPXL (this can be achieved by changing the vCPU and RAM to 8 GB and 16 GB, respectively.
- Login to the management console (Citrix SD-WAN Orchestrator service UI or Citrix SD-WAN appliance UI) and change the site type from VPX to VPXL.
- Activate this new configuration by performing a change management if your SD-WAN network is managed by an MCN, or by performing a deployment if it is managed by Citrix SD-WAN Orchestrator.
If your network is managed by the MCN, follow the additional steps provided below:
- Once the change management is completed by the MCN, download the latest Local Change Management (LCM) package for the VPXL converted site.
- Power on the VPXL converted site, and login to the Citrix SD-WAN appliance UI. Navigate to Configuration > Virtual WAN > Local Change Management and activate the downloaded zip file.
-
Once the activation is completed, navigate to Configuration > Virtual WAN > Enable/Disable purge flows to enable the virtual WAN service.
Note
You might notice a stale entry of the older site in the change management configuration. It can be removed by performing another round of change management.
How to upgrade VPX-SE to VPXL-SE
To upgrade VPX-SE to VPXL-SE:
- The VPX-SE should have been installed with an SD-WAN base release version of 9.3.0 or higher.
- Backup and save your existing configuration, if the VPX-SE you are upgrading is an MCN.
Important
A VPX-SE appliance provisioned with an SD-WAN release version 9.2 image cannot be upgraded to a VPXL-SE appliance.
To use the VPXL-SE platform, upgrade SD-WAN release version 9.2. to 9.3 using the change management procedure in the SD-WAN web GUI.
Deploying VPXL-SE in Microsoft Azure and AWS
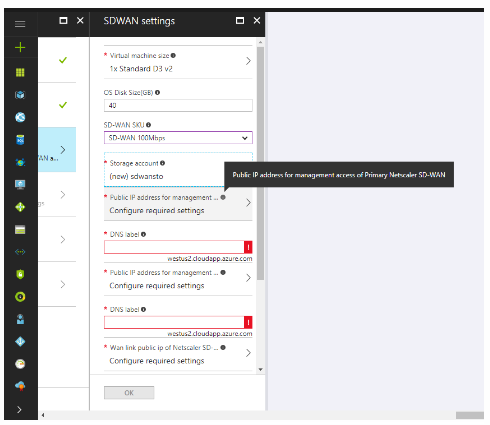
The steps to configure and deploy VPXL-SE in Microsoft Azure are similar to the steps to deploy the VPX-SE appliance in Azure. The only difference in the configuration steps is to choose hard disk space as 250 GB and instance as F8 for the VPXL-SE appliance to be successfully deployed in Azure.
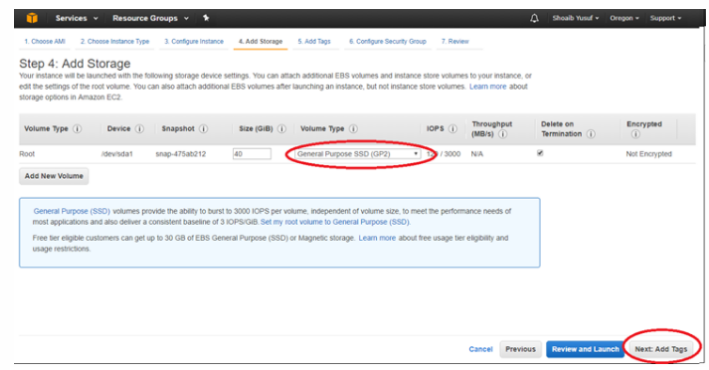
Similarly, the steps to configure and deploy VPXL-SE in AWS is similar to the steps for deploying VPX-SE appliance in AWS with the only difference of selecting disk size of 40 GB and instance of m4.4x large.
Related information
- Installing SD-WAN Virtual Appliances on VMware ESXi
- Installing SD-WAN Virtual Appliances on Microsoft Hyper-V Platform
- Installing SD-WAN Virtual Appliances on Amazon Web Services
- Installing SD-WAN Virtual Appliances on Microsoft Azure
- SD-WAN Standard Edition Virtual Appliance (VPX) high availability Support for AWS
- SD-WAN Standard Edition Virtual Appliance (VPX) high availability Support for Microsoft Azure
Share
Share
This Preview product documentation is Cloud Software Group Confidential.
You agree to hold this documentation confidential pursuant to the terms of your Cloud Software Group Beta/Tech Preview Agreement.
The development, release and timing of any features or functionality described in the Preview documentation remains at our sole discretion and are subject to change without notice or consultation.
The documentation is for informational purposes only and is not a commitment, promise or legal obligation to deliver any material, code or functionality and should not be relied upon in making Cloud Software Group product purchase decisions.
If you do not agree, select I DO NOT AGREE to exit.