SD-WAN Standard Edition Virtual Appliance (VPX) in Hypervisor on HyperV 2012 R2 and 2016
To install SD-WAN VPX-SE in the hypervisor on HyperV 2012 R2 and 2016:
-
Install HyperV Manager. For more information, see documentation at Microsoft.com.

-
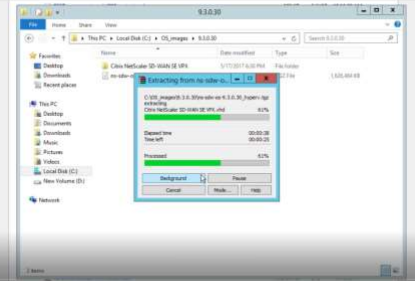
Unzip the SD-WAN distribution that you downloaded from My Citrix.
-
Start Hyper-V Manager.
There are two methods to create the virtual machine.
-
Method 1: Import virtual machine
-
In the navigation pane, under Hyper-V Manager, select the server on which you want to install SD-WAN VPX.
-
On the Actions menu, click Import Virtual Machine.
-
In the Import Virtual Machine dialog box, in Location box, specify the path to the folder that contains the SD-WAN VPX files.
Note
If you received a compressed file, make sure that you extract the files into a folder before you specify the path to the folder.
- Click Import.
- Verify that the virtual appliance that you created is listed under Virtual Machines.
- Right-click the virtual machine, and then click Settings.
- In the Settings window’s navigation pane, under Hardware, select the first network adapter in the list.
- In the Network drop-down menu, select apA1 Network. This is the LAN interface for apA1.
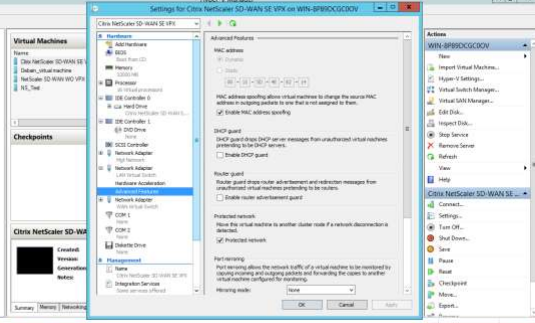
- Make sure the Enable MAC address spoofing box is selected. If it is not, select it and apply the changes.
- In the Settings window’s navigation pane, under Hardware, select the second network adapter in the list. Repeat the step 10 and step 11, and assign the adapter to apA2 Network. This is the WAN interface for apA2. Important: Do not configure the same Network for both the network adapters. Incorrect configuration creates packet loops, which can bring down the network.
- Optionally, change the virtual hard disk size:
- In the Settings window navigation pane, under IDE Controller 0, select Hard Drive.
- Click Edit.
- Follow the steps in the Edit Virtual Hard Disk Wizard to increase the allocation to one of the supported sizes, using the Expand option in the wizard.
- Optionally, change the memory size.
- In the Settings window’s navigation pane, under Hardware, select Memory.
- Allocate the RAM space by adjusting the memory to one of the supported sizes.
- Click OK.
- Optionally, define the management port.
- Right-click the virtual machine, and then click Settings.
- In the Settings window navigation pane, under Hardware, select Add Hardware.
- Select Network Adapter from the list of devices, and then click Add.
- Name the new virtual network as Primary Network 3.
- Make sure the Enable spoofing of MAC addresses check box is selected.
- Click OK to apply the changes.
- Right-click the SD-WAN VPX virtual machine and select Connect.
- In the file menu, click Action, and then click Start to start the virtual machine.
-
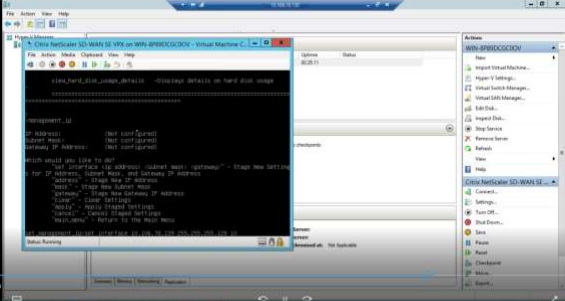
When an SD-WAN VPX virtual machine is started for the first time, it automatically starts the Deployment Wizard. This wizard asks questions about the deployment mode. Select Setup Using Web UI. On the next screen, enter the IP address, netmask, and gateway for the apA interface, and click Finish.
-
After SD-WAN VPX has restarted, log on to the browser based UI ((user name: admin, password: password) at the IP address that you assigned to apA, for example:
https://172.16.0.213 -
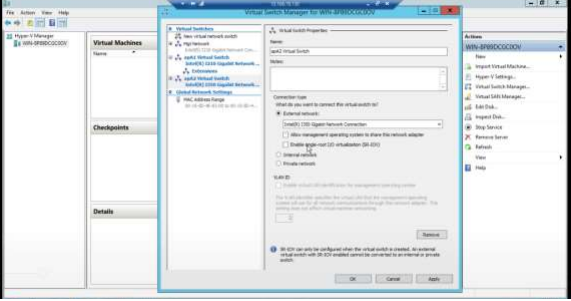
In the HyperV Manager window, go to Virtual Switch Manager, and configure interfaces in the following order; management, LAN, and WAN.
-
Download the hyperv.tgz file and untar it.
- Import VM using the extracted VHD and assign the number of CPUs and memory accordingly. Add interfaces in the order (management, LAN, and WAN). Enable Mac spoofing on LAN and WAN interfaces. Go to Settings > Interface >Advanced features.
-
-
Method 2: New virtual machine wizard
NOTE
Select method 2 if the Hyper-V virtual machine has to connect to orchestrator.
-
Open the SD-WAN Hyper-V setup file and select Virtual Hard Disks folder.
- Copy the hard disk image and paste it in a freshly created folder outside of the Hyper-V setup file.
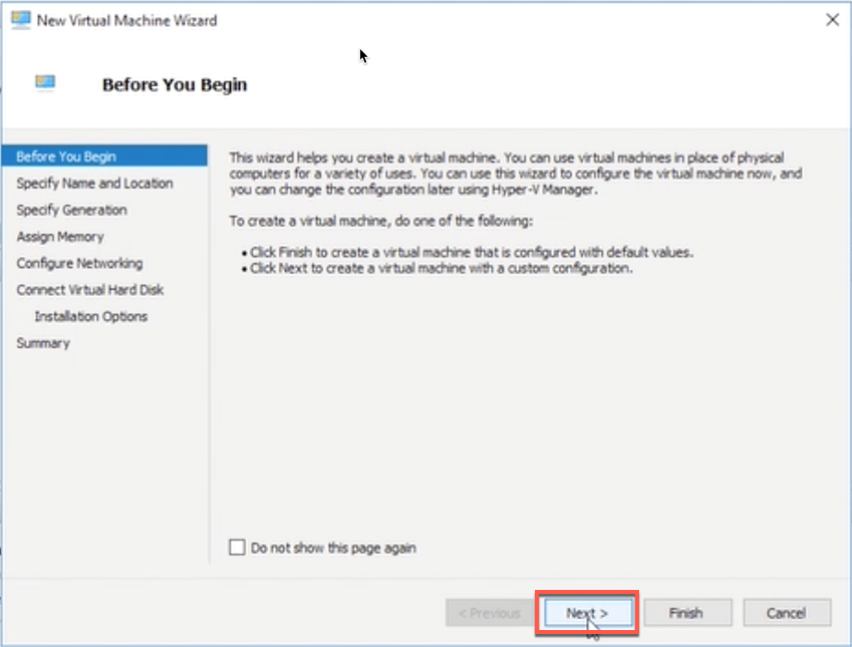
- Open the Hyper-V Manager > select the Hyper-V ID > right click and select New > Virtual Machine.
-
The Virtual Machine Wizard opens, Click Next.
-
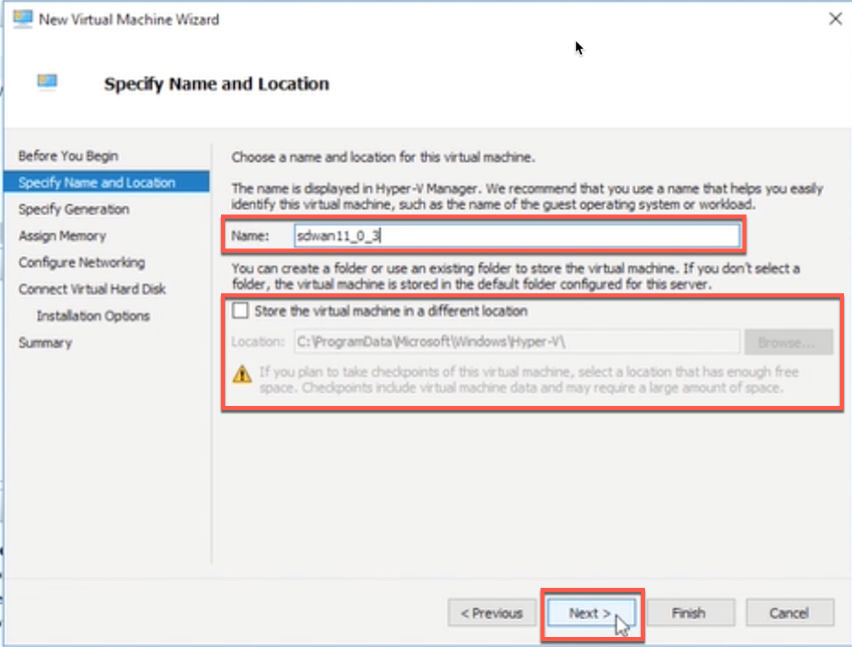
Provide the name and you can also specify a location for the virtual machine. Select the check box to provide a different location to store the virtual machine. Click Next.
-
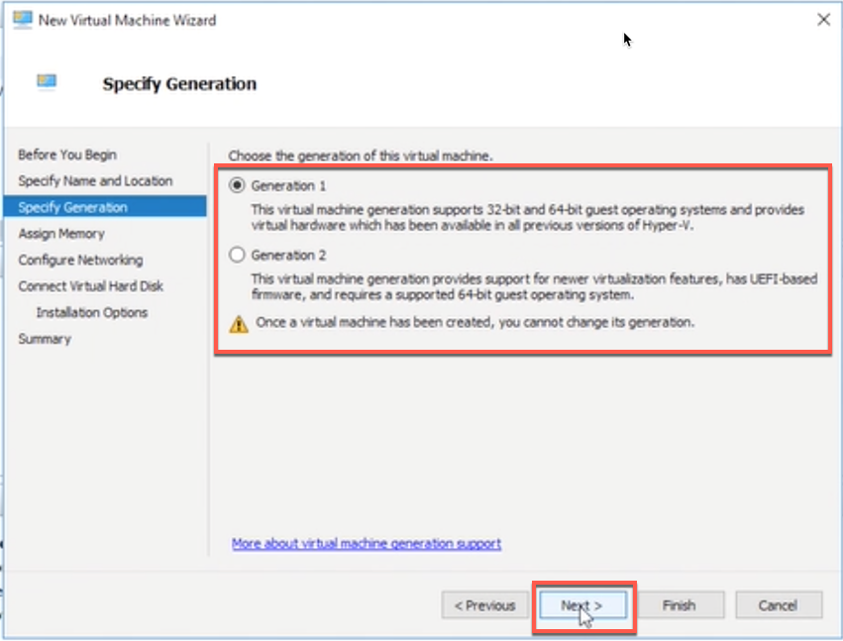
Select the generation for the virtual machine and click Next.
-
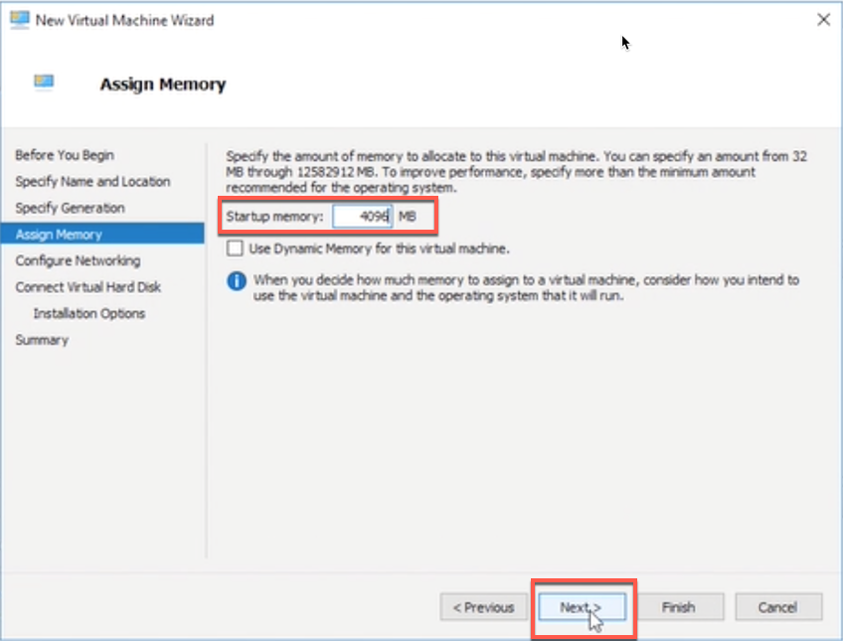
Specify the amount of memory to allocate to the virtual machine and click Next.
-
Select a connection from the drop-down list and click Next. The connection being selected here is for Management port.

-
To connect VHD, select the Use an existing virtual hard disk radio button, browse, and select the VHD file from the extracted zip file and click Next. The virtual hard disk can be found in below location:
**
> ctx-sdw-se-vpx > Virtual Hard Disks** 
-
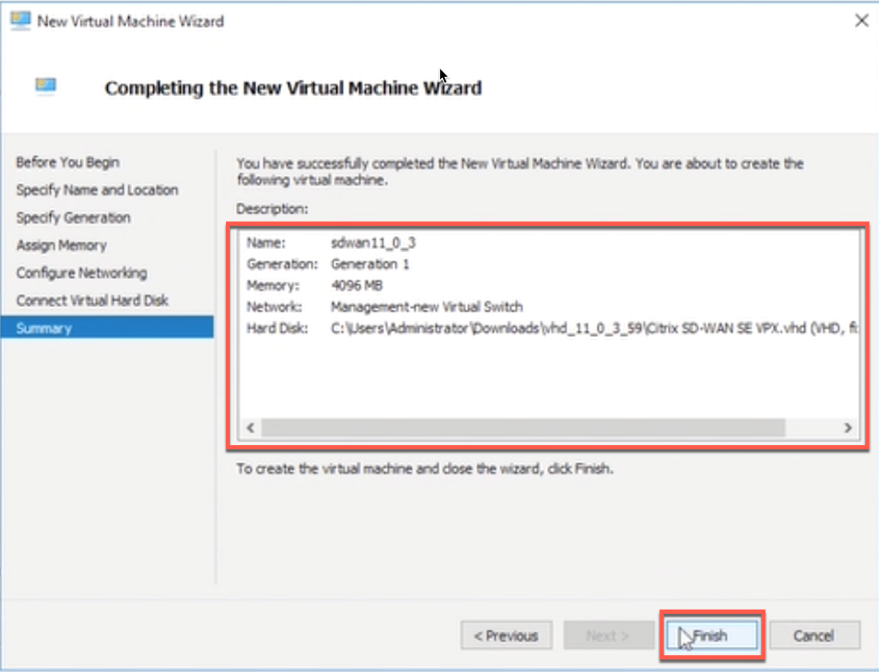
Verify the details on the Summary page and click Finish to complete the creation of the virtual machine.
-
By default, the virtual machine is in Off sate. The virtual machine created so far has only 1 Interface and 1 core, you have to increase the number of cores and add 2 more Interfaces for SD-WAN to work. Perform the following procedure:
- Verify that the virtual appliance that you created is listed under Virtual Machines.
- Right-click the virtual machine, and then click Settings.
- In the Settings window’s navigation pane, under Hardware, select the first network adapter in the list.
- In the Network drop-down menu, select apA1 Network. This is the LAN interface for apA1.
- Make sure the Enable MAC address spoofing box is selected. If it is not, select it and apply the changes.
- In the Settings window’s navigation pane, under Hardware, select the second network adapter in the list. Repeat the step 10 and step 11, and assign the adapter to apA2 Network. This is the WAN interface for apA2. Important: Do not configure the same Network for both the network adapters. Incorrect configuration creates packet loops, which can bring down the network.
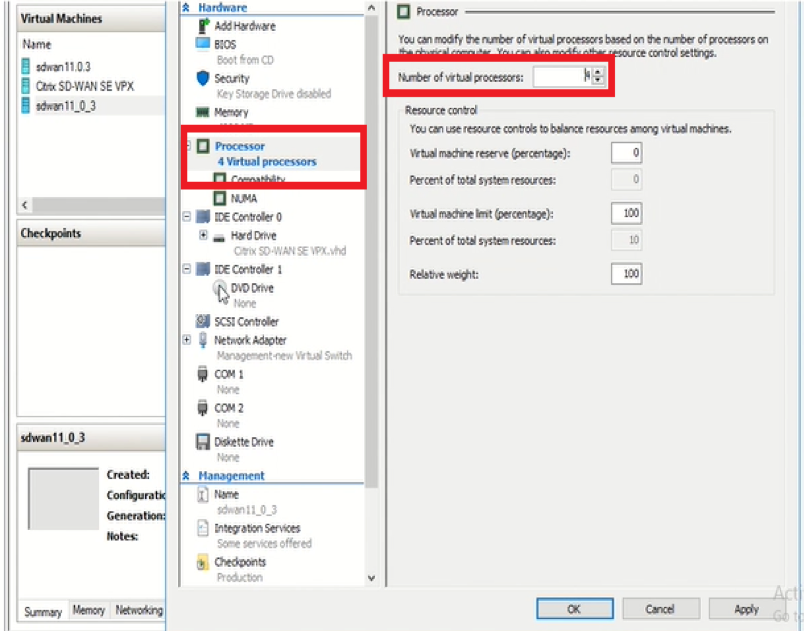
- Increase Number of Virtual CPU cores.
- In the Settings window navigation pane, select Processor.
- Increase Number of virtual processors to at least 4.
- Click Apply.
- Optionally, change the virtual hard disk size:
- In the Settings window navigation pane, under IDE Controller 0, select Hard Drive.
- Click Edit.
- Follow the steps in the Edit Virtual Hard Disk Wizard to increase the allocation to one of the supported sizes, using the Expand option in the wizard.
- Optionally, change the memory size.
- In the Settings window’s navigation pane, under Hardware, select Memory.
- Allocate the RAM space by adjusting the memory to one of the supported sizes.
- Click OK.
- Right click and select start. Once the state is changed to Running, your virtual machine is now ready to use.
Adding interfaces

Enabling Mac spoofing on the interfaces (LAN and WAN)
After the VM is up, assign free IP address. The VM can be accessed after assigning the IP address.
Note
The qcow image downloaded must be present under the default folder /var/lib/libvirt/images. If this image is downloaded, and used in different folder in KVM, there can be issues when disk size expansion is performed.
Limitations for deploying SD-WAN VPX-SE in HyperV 2012 R2 and 2016
- VLAN Tagged Trunk Deployment is not supported.