This content has been machine translated dynamically.
Dieser Inhalt ist eine maschinelle Übersetzung, die dynamisch erstellt wurde. (Haftungsausschluss)
Cet article a été traduit automatiquement de manière dynamique. (Clause de non responsabilité)
Este artículo lo ha traducido una máquina de forma dinámica. (Aviso legal)
此内容已经过机器动态翻译。 放弃
このコンテンツは動的に機械翻訳されています。免責事項
이 콘텐츠는 동적으로 기계 번역되었습니다. 책임 부인
Este texto foi traduzido automaticamente. (Aviso legal)
Questo contenuto è stato tradotto dinamicamente con traduzione automatica.(Esclusione di responsabilità))
This article has been machine translated.
Dieser Artikel wurde maschinell übersetzt. (Haftungsausschluss)
Ce article a été traduit automatiquement. (Clause de non responsabilité)
Este artículo ha sido traducido automáticamente. (Aviso legal)
この記事は機械翻訳されています.免責事項
이 기사는 기계 번역되었습니다.책임 부인
Este artigo foi traduzido automaticamente.(Aviso legal)
这篇文章已经过机器翻译.放弃
Questo articolo è stato tradotto automaticamente.(Esclusione di responsabilità))
Translation failed!
Configure video caching
You can configure the video caching feature through either the Citrix SD-WAN WANOP graphical user interface or command line interface. By default, the appliance is configured to cache videos from YouTube and Vimeo. Youku, Metacafe, and Dailymotion are also configured on the appliance by default. All you have to do is enable them. You can add video websites, such as an internal website serving video tutorials or other information .
Note
Video caching an optional feature that is not enabled by default. You need not enable it unless you have a substantial amount of HTTP video traffic .
Prerequisites
To configure video caching on the appliance, make sure that the following prerequisites are met:
-
You have configured appropriate IP address for accelerated bridge port you are planning to use for video caching.
-
You can ping the apA/apB gateway from the appliance.
-
DNS Server details are accurate.
-
Appliance can resolve the DNS name www.Citrix.com.
-
The Citrix SD-WAN WANOP apX IP address has an HTTP access in your corporate network.
-
If the appliance is deployed between the trunk ports of two network devices, you must specify the VLAN ID with the IP address to be used by the appliance to send HTTP requests on the Network Configuration page.
-
For Web (Internet)and Web (Private) service classes, the Acceleration Policy setting should not be set to None.
Enable video caching feature
Before you can start using the video caching feature, you must enable it.
To enable video caching:
-
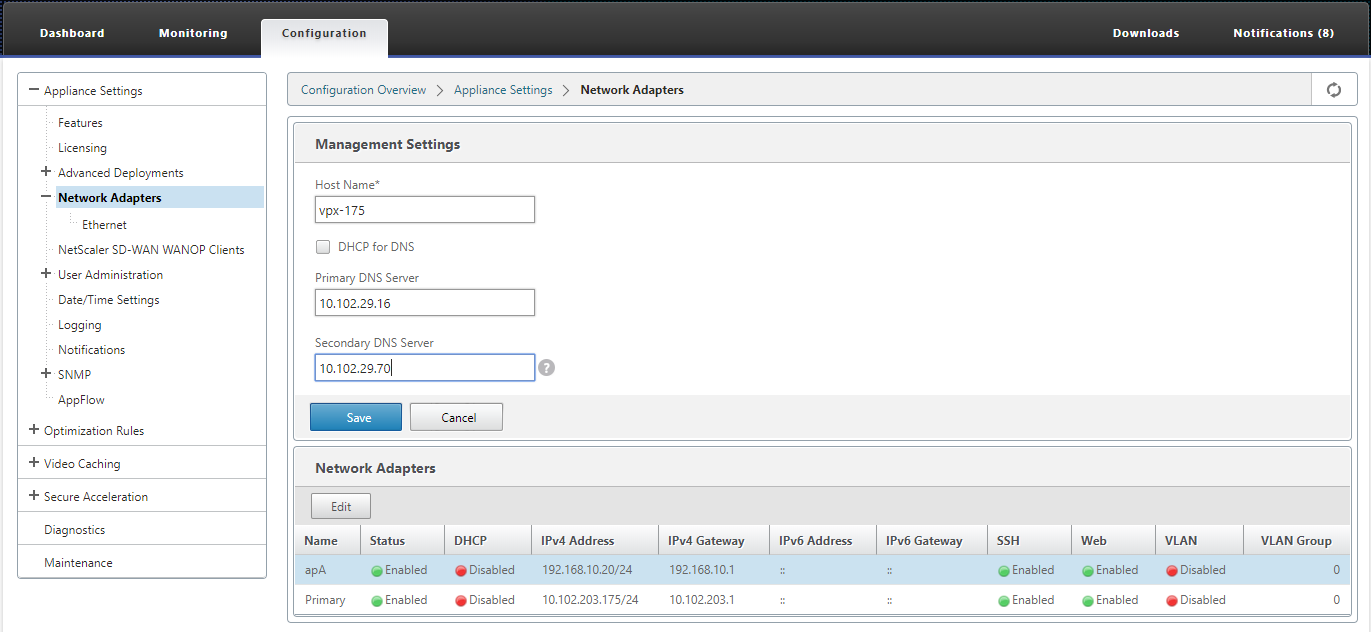
Navigate to the Configuration > Appliance Settings > Network Adapters, under Management Settings section verify and ensure that the Primary DNS Server details are accurate and the appliance is able to resolve the DNS name www.Citrix.com. Click the edit icon to change the settings.
-
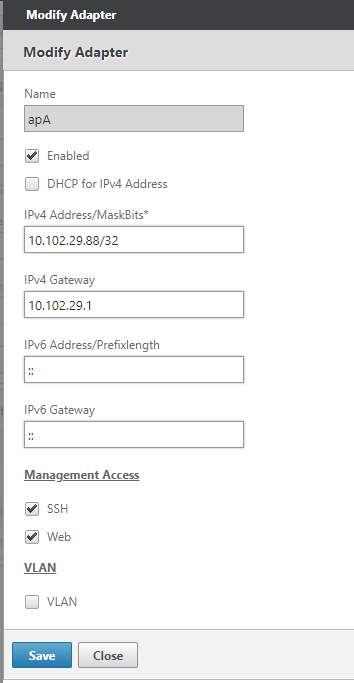
Navigate to the Configuration > Appliance Settings > Network Adapters. In the Network Adapters section, select an acceleration pair ( for example apA) and clik Edit.
Ensure that the IP addresses, network mask, and default gateway IP addresses specified for the accelerated pair are accurate.
-
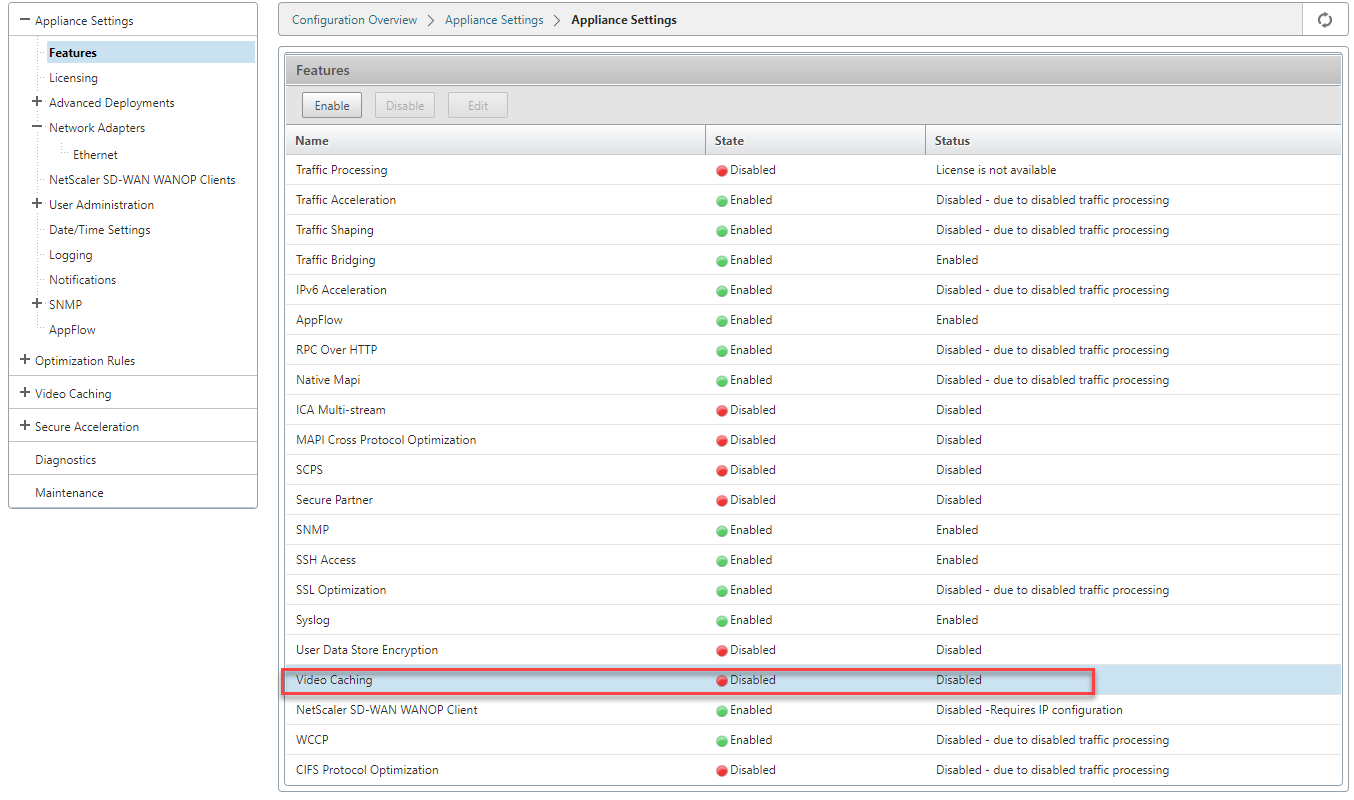
Navigate to the Configuration > Appliance Settings > Features page and enable Video Caching feature.
A confirmation dialog box appears, click Yes.
Note
The service restarts and a new caching partition is created. If you are enabling the feature for the first time on the appliance, a new partition is created by reducing the disk space allocated to other disk based compression. The disk based compression history is reset, and existing connections are terminated.
-
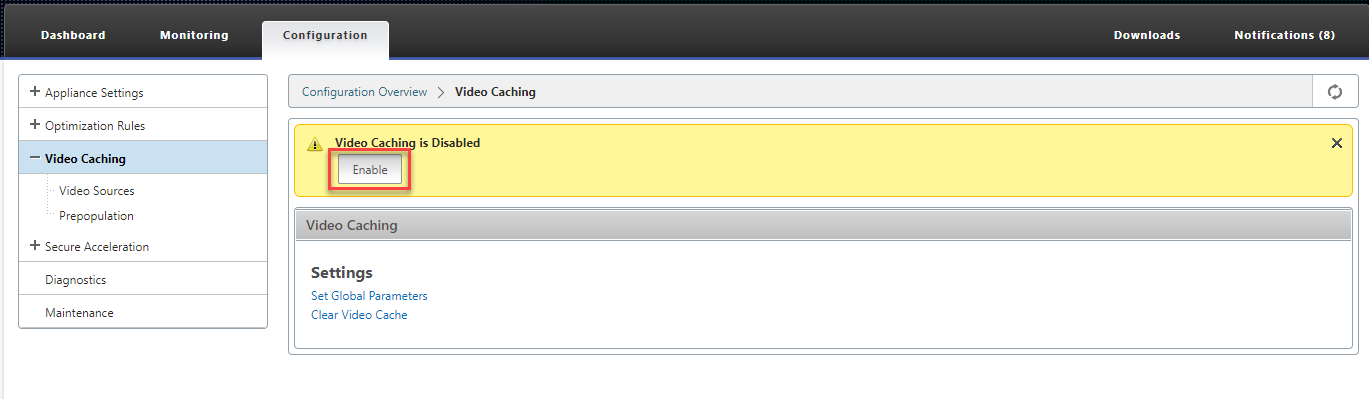
Alternatively, you can navigate to Configuration > Optimization Rules > Video Caching and click Enable.
Add video websites
The appliance is configured to cache videos from YouTube and Vimeo, and is partially configured to cache videos from Youku, Metacafe, and Dailymotion. To cache videos from any of the latter three sites, you must enable the site. A video from an enabled website is cached as soon as a user accesses it. You can configure additional video websites that do not require URL rewrite by adding their host names or IP addresses to the Video Source list on the appliance. You can also include custom sites that do not have any cache avoidance mechanisms.
You must enable these video sources before the appliance can cache videos from them.
The video caching feature uses video sources for the configuration workflow. If you configure any of the video sources with a host name or a website/hostname, the appliance proxies all HTTP traffic that flows through the appliance. However, if you configure all video sources with IP addresses only, the appliance proxies and caches only these IP addresses. Regardless of whether you use host names or IP addresses, if your organization does not permit access to the YouTube, Vimeo, Dailymotion, Metacafe, and Youku websites, make sure that you disable these video sources.
To enable a video source:
-
Navigate to Configuration > Optimization Rules > Video Caching > Video Sources.
-
Select a video source from the list click Modify.

-
In the Cache Status drop-down box, select Enable and click Save.
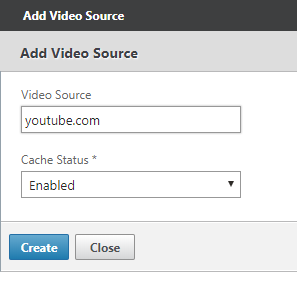
To add a video source:
-
Navigate to Configuration > Optimization Rules > Video Caching > Video Sources, click Add.
-
In the Video Source field, type the website name or IP address of the web server that you want to add to the video source list.
-
In the Cache Status list, ensure that Enabled is selected. You can select Disabled from this list if you want to enable video caching for this site at a later time.
-
Click Create.
To delete a video source, select it from the Video Sources list and click Delete.
Share
Share
This Preview product documentation is Cloud Software Group Confidential.
You agree to hold this documentation confidential pursuant to the terms of your Cloud Software Group Beta/Tech Preview Agreement.
The development, release and timing of any features or functionality described in the Preview documentation remains at our sole discretion and are subject to change without notice or consultation.
The documentation is for informational purposes only and is not a commitment, promise or legal obligation to deliver any material, code or functionality and should not be relied upon in making Cloud Software Group product purchase decisions.
If you do not agree, select I DO NOT AGREE to exit.