This content has been machine translated dynamically.
Dieser Inhalt ist eine maschinelle Übersetzung, die dynamisch erstellt wurde. (Haftungsausschluss)
Cet article a été traduit automatiquement de manière dynamique. (Clause de non responsabilité)
Este artículo lo ha traducido una máquina de forma dinámica. (Aviso legal)
此内容已经过机器动态翻译。 放弃
このコンテンツは動的に機械翻訳されています。免責事項
이 콘텐츠는 동적으로 기계 번역되었습니다. 책임 부인
Este texto foi traduzido automaticamente. (Aviso legal)
Questo contenuto è stato tradotto dinamicamente con traduzione automatica.(Esclusione di responsabilità))
This article has been machine translated.
Dieser Artikel wurde maschinell übersetzt. (Haftungsausschluss)
Ce article a été traduit automatiquement. (Clause de non responsabilité)
Este artículo ha sido traducido automáticamente. (Aviso legal)
この記事は機械翻訳されています.免責事項
이 기사는 기계 번역되었습니다.책임 부인
Este artigo foi traduzido automaticamente.(Aviso legal)
这篇文章已经过机器翻译.放弃
Questo articolo è stato tradotto automaticamente.(Esclusione di responsabilità))
Translation failed!
Basic Configuration Mode
The Basic configuration mode allows you to configure sites easily and quickly. Using WAN Link templates, you can configure certain settings and, save it as templates, and then apply these templates to other sites. These reduce repetitive tasks and allow configuring new sites with minimal clicks.
The simplified basic configuration mode has two views Global and Sites.
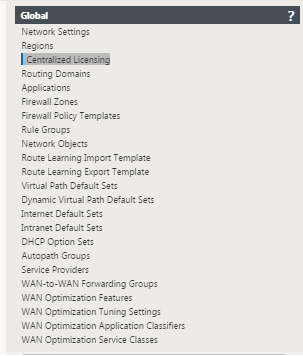
Using the Global tab, you can:
- Install centralized licenses.
- Install certificates.
- Configure Routing Domains.
- Configure Applications.
- Set the global virtual WAN network encryption settings.
- Set global security settings and firewall settings.
- Create Regions and define Region Control Nodes.
- Set up Rules.
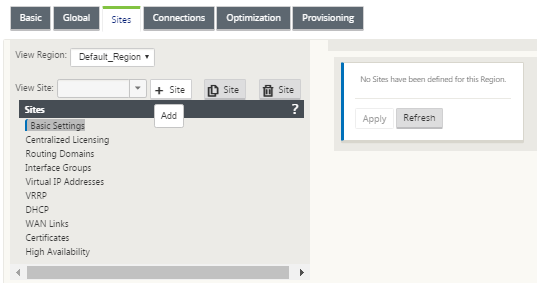
Using the Sites tab, you can:
- Add Sites.
- Configure Basic Settings for the site.
- Enable site as intermediate node.
- Configure centralized licensing
- Configure Interface Groups, Virtual IP addresses
- Configure routing domains and WAN Links.
- Create multiple WAN Link Templates and map it to Service Providers.
- Create WAN Link Template for MPLS links.
- Configure the WAN Link speeds in Mbps or Kbps.
- Set up MPLS Queues using % or kbps.
- Enable dynamic virtual path.
- Clone Sites.
Global virtual WAN network encryption
To set global virtual WAN network encryption settings:
-
In the SD-WAN web management interface, navigate to Configuration Editor > New > Basic. Click Global to change from the (default) Sites view to the Network view.
-
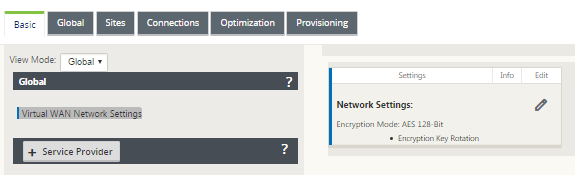
Under Global, click Virtual WAN Network Settings.
-
In the right pane, click the Network Settings edit icon.
-
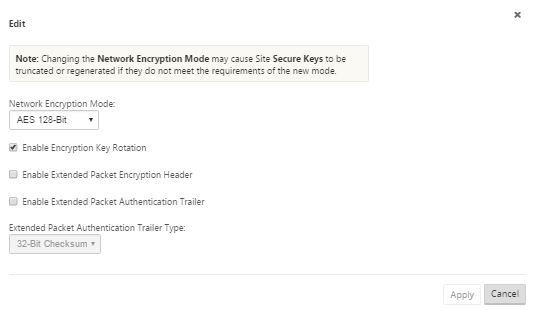
Select the required network encryption options:
- Network Encryption Mode – This is the encryption algorithm used for encrypted paths. Select one of the following from the drop-down menu: AES 128 Bits or AES 256 Bits.
- Enable Encryption Key Rotation – When enabled, encryption keys are rotated at intervals of 10–15 minutes.
- Enable Extended Packet Encryption Header – When enabled, a 16 bytes encrypted counter is prepended to encrypted traffic to serve as an initialization vector, and randomize packet encryption.
- Enable Extended Packet Authentication Trailer – When enabled, an authentication code is appended to the contents of the encrypted traffic to verify that the message is delivered unaltered.
- Extended Packet Authentication Trailer Type – This is the type of trailer used to validate packet contents. Select one of the following from the drop-down menu: 32-Bit Checksum or SHA-256.
-
Click Apply.
WAN link template
To create WAN link templates and associate it to service provider:
-
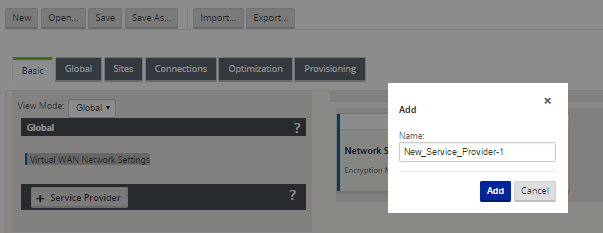
In the SD-WAN web management interface, navigate to Configuration Editor > New > Basic. Click Global to change from the (default) Sites view to the Network view.
-
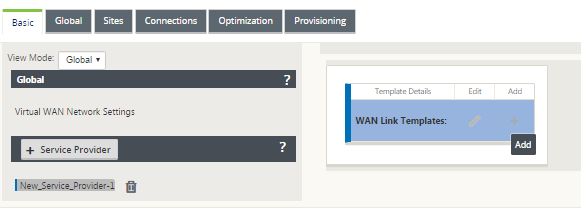
Click + Service Provider. Select and click the default name to rename the service provider.
-
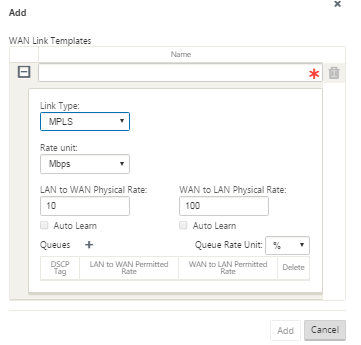
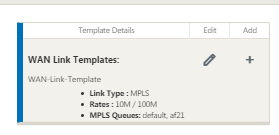
Click + on the right pane to create a WAN link template. In the WAN Link Templates window, enter a name for the WAN link template.

-
Select the newly created Service Provider. Click the + Add sign to edit WAN Link templates.
-
In the Link Type field, select the link type. Either Internet or MPLS.

-
In the Rate unit field, select a unit for the WAN link speed. Either Kbps or Mbps. Specify the physical rate for LAN to WAN and WAN to LAN.
Tip
Select Auto Learn, to automatically detect the permitted rate.
-
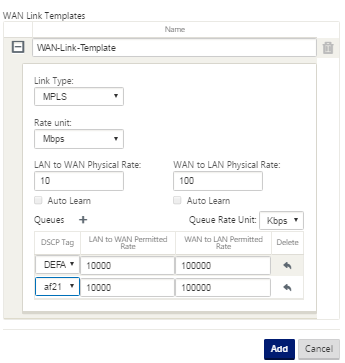
For MPLS links, create an MPLS Queue. Click + and enter values for the following parameters and click Add.
- DSCP tag - Service Provider’s DSCP tag setting for the queue.
- LAN to WAN Permitted Rate - The amount of bandwidth that SD-WAN devices are permitted to use for upload, which cannot exceed the defined physical upload rate of the WAN Link.
-
WAN to LAN Permitted Rate - The amount of bandwidth that SD-WAN devices are permitted to use for download, which cannot exceed the defined physical download rate of the WAN Link.
Tip
You can set the unit for permitted rates of the MPLS queue to % or Kbps.
-
Click Apply. Continue to add more WAN link templates for the service provider, if necessary.
You can view a summary of the template details in the left pane. The Link type is displayed as broadband in the summary, if you selected internet link type.
Site cloning
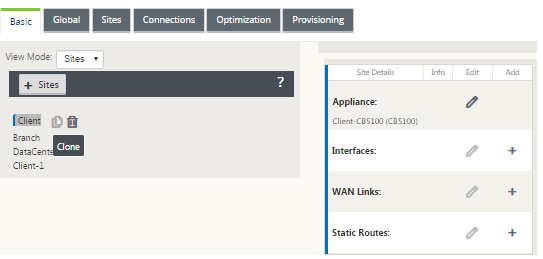
The Basic > Sites view simplifies the configuration process by enabling you to create a configuration file that generates a virtual path between the defined sites. The required configuration properties for a virtual path between sites include:
- Appliance
- Interface
- WAN Links
- Static Routes
For information on adding and configuring an MCN site, see Setting up the Master Control Node (MCN) Site.
For information on adding and configuring a Branch site, see Adding and Configuring the Branch Sites.
You can now easily duplicate by using the clone option. This simplifies the process of creating multiple similar sites.
Note
A site configured as a primary or secondary MCN cannot be cloned.
To clone a site:
-
In the SD-WAN web management interface, navigate to Configuration Editor > Basic. Click Sites.
-
Select a site other than primary or secondary MCN and click the clone icon.
-
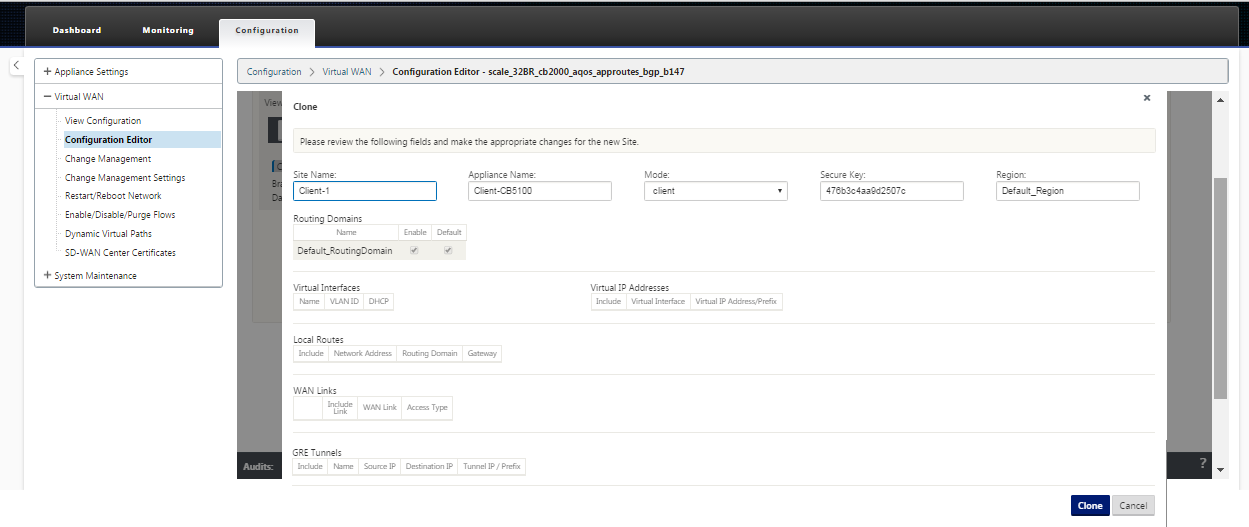
In the Clone Site window, review the fields and change the values for the fields for which the input values must be different from the site being cloned.
-
Click Clone. The cloned site appears in the list of sites.
Share
Share
This Preview product documentation is Cloud Software Group Confidential.
You agree to hold this documentation confidential pursuant to the terms of your Cloud Software Group Beta/Tech Preview Agreement.
The development, release and timing of any features or functionality described in the Preview documentation remains at our sole discretion and are subject to change without notice or consultation.
The documentation is for informational purposes only and is not a commitment, promise or legal obligation to deliver any material, code or functionality and should not be relied upon in making Cloud Software Group product purchase decisions.
If you do not agree, select I DO NOT AGREE to exit.