Configure apps and policies using the Secure Private Access config tool - Legacy
You can use the Secure Private Access config tool on a Citrix Virtual Apps and Desktops delivery controller to quickly create a SaaS or Web application. In addition, you can use this tool to set application restrictions, traffic routing, and create a NetScaler Gateway. The tool generates script files as output that can be run on the respective machines to deploy the configuration.
Supported product versions
Ensure that your product meets the minimal version requirements.
- Citrix Workspace app
- Windows – 2303 and later
- macOS – 2304 and later
- Citrix Virtual Apps and Desktops – Supported LTSR and current versions
- StoreFront – LTSR 2203 or non-LTSR 2212 and later
- NetScaler – 12.1 and later
Prerequisites to use the config tool
- Access to download the config tool from the Downloads page.
- Admin permissions on the Citrix Virtual Apps and Desktops controller to run the config tool.
- At least one delivery group exists on the delivery controller.
Get started with the config tool
You can perform the following tasks using the config tool.
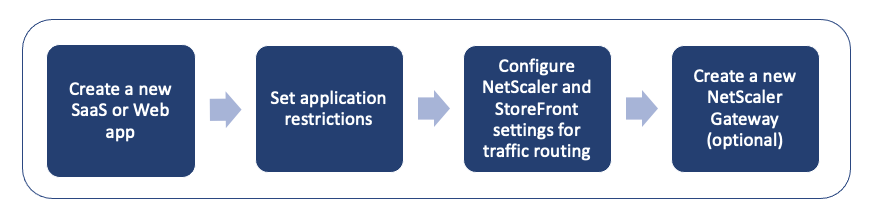
- Publish a new application
- Set application restrictions
- Configure StoreFront and NetScaler Gateway settings
- Configure a new NetScaler Gateway
Publish a new application
- Run the config tool.
-
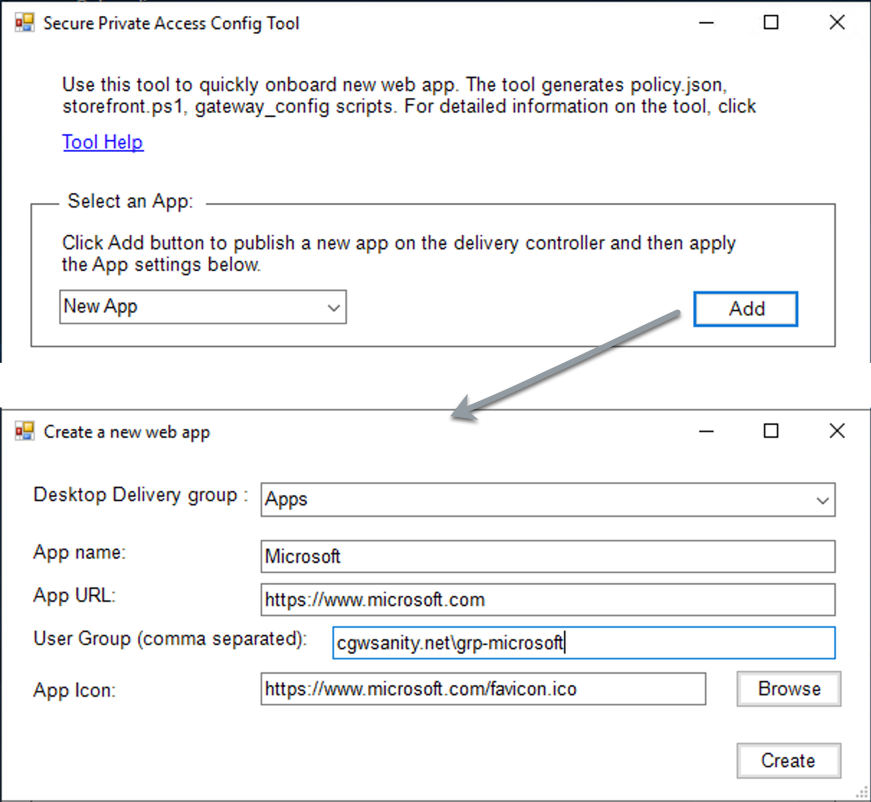
In the Select an App section, select New App in the drop-down list, and then click Add.
-
Complete the app configuration.
- Desktop Delivery group: Select the delivery group for which this app must be made accessible. All existing delivery groups are enumerated in the Desktop delivery group.
- App name: Enter the app name.
- App URL: Specify the URL for the app.
-
User group: Enter both the domain name and group name in the format “Domain\Group”. User groups can contain spaces. For example, “cgwsanity.net\grp-microsoft”, “cgwsanity.net\grp microsoft”. These groups must already exist in the Active Directory.
Note:
- Built-in domain security groups such as “Domain Users” or “Domain Admins” are not supported. Only the manually created user groups must be used.
- The user group is only used in NetScaler Gateway authorization policies and not for app assignments in Citrix Virtual Apps and Desktops. Hence, the user group that you enter here is not visible in Studio.
- App icon: The tool uses favicon.ico of the URL if detected. Admin can also customize the icons if necessary. If no icon is provided by the admin, the default icon is assigned to the app.
- Click Create.
The application is published on the delivery controller and is available to the users in the User groups in StoreFront.
Set application restrictions
After you have published a new application, you can enable or disable restrictions for that app.
-
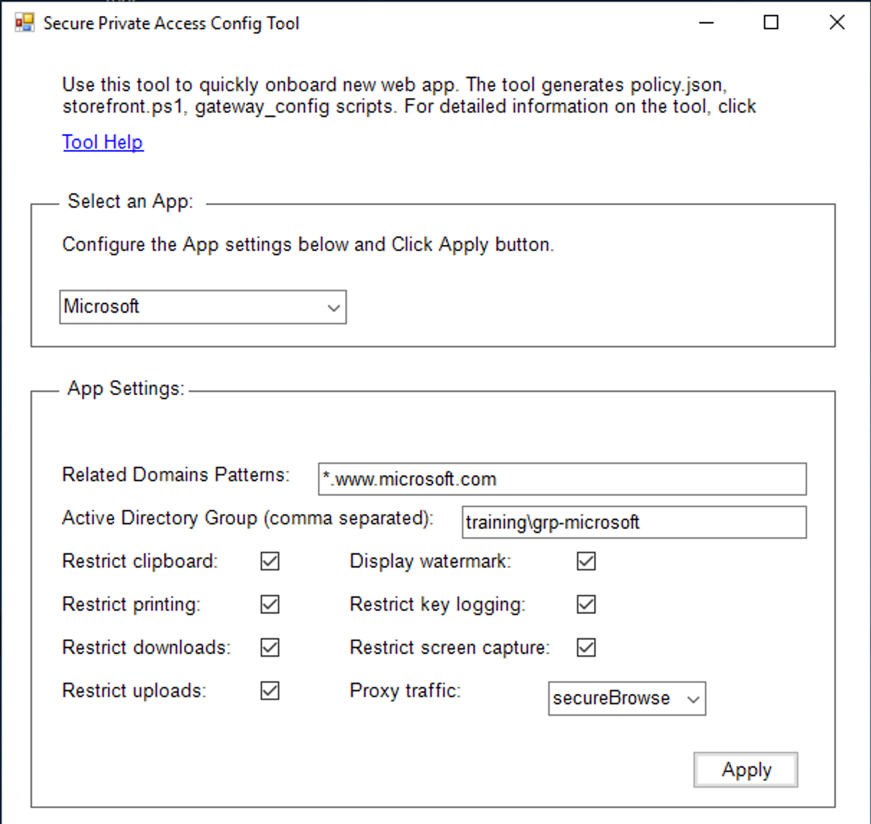
In the Select an App section, select the app from the drop-down list for which you want to enforce the settings.
-
Configure the app settings in the App Settings section.
- Related Domains Patterns: The related domain URL is auto-populated based on the app URL. Admins can add additional domains separated by a comma.
- Active Directory Group: Enter the groups for which this application must be accessible. This is a mandatory field. You can enter multiple groups separated by a comma. These groups must match the groups available in the Active Directory. There is no validation done on the group names that you enter here. So, it is important that you take care to enter the group names to match with what is there in the Active Directory.
- App settings: All app settings are restricted (selected) by default. You can select or clear the appropriate settings that you want for the user groups.
- Proxy traffic: Select secureBrowse. This setting enables the Citrix Enterprise Browser to tunnel the traffic to the webpage via NetScaler Gateway.
-
Click Apply.
Configure StoreFront and NetScaler Gateway settings
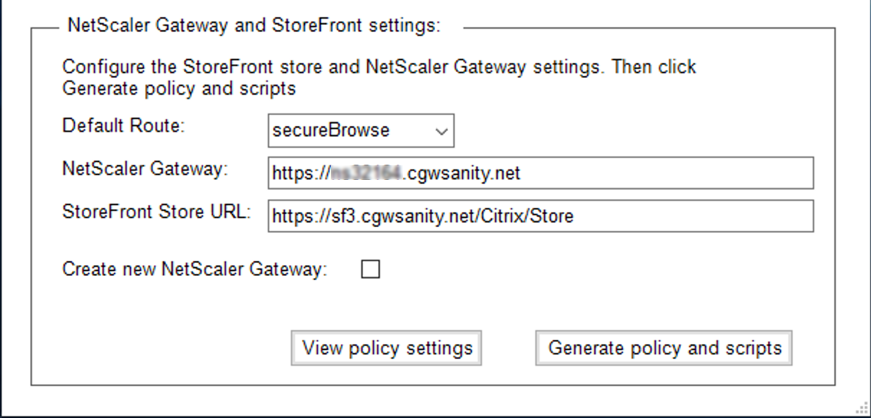
You can configure settings for routing traffic through NetScaler Gateway. You can configure an existing NetScaler Gateway or create a new NetScaler Gateway in the Gateway and StoreFront settings section.
-
Default route: If a policy is not defined for the app, the default route is applied for the apps.
- secureBrowse: The Citrix Enterprise Browser tunnels the traffic to the webpage via NetScaler Gateway.
- Direct: The Citrix Enterprise Browser enables direct access to the apps.
- NetScaler Gateway: Enter the NetScaler Gateway URL.
-
StoreFront Store URL: Enter the complete StoreFront store URL. For example,
http://<directory path>/Citrix/<StoreName>. You can get the URL from the StoreFront console. - (Optional) Create New Gateway: Select the checkbox to create a new NetScaler Gateway and click Create.
Create a new NetScaler Gateway (optional)
You can create a new NetScaler Gateway if you do not want to change the existing gateway settings.
If you already have a NetScaler Gateway, you can configure the authorization policies and bindings for the apps by using the config tool.
-
You must enter the following details for the new NetScaler Gateway. No validation is done by the tool on the values that you enter when creating a new gateway. So, it is important that you take care to enter accurate values.
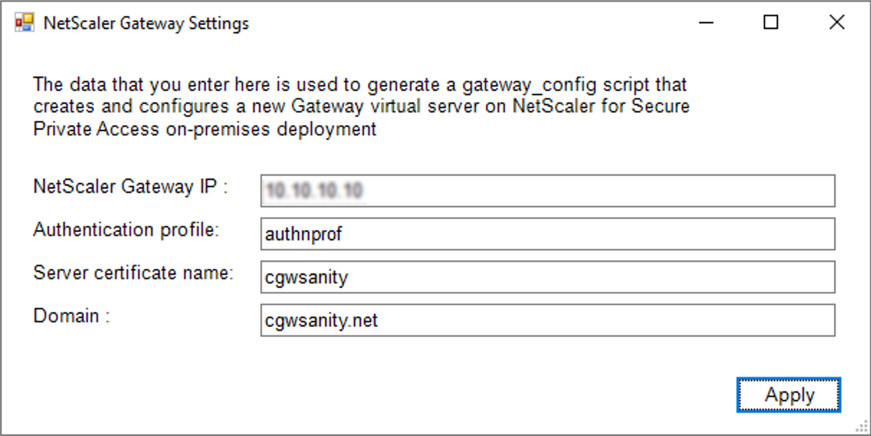
-
Gateway IP: IP address of the NetScaler Gateway.
- Authentication profile: Enter the authentication profile name that is already configured on NetScaler. For details, see Authentication profiles.
- Server certificate name: Enter the SSL certificate name that is already configured on NetScaler. For details, see SSL certificates.
- Domain: Used for SSO to apps in the internal network. For details, see VPN session action.
-
- Click Apply.
-
Click Generate policy and scripts.
The policy.json, storefront.ps1, and gateway_config files are generated and stored in the location from where you have run the config tool.

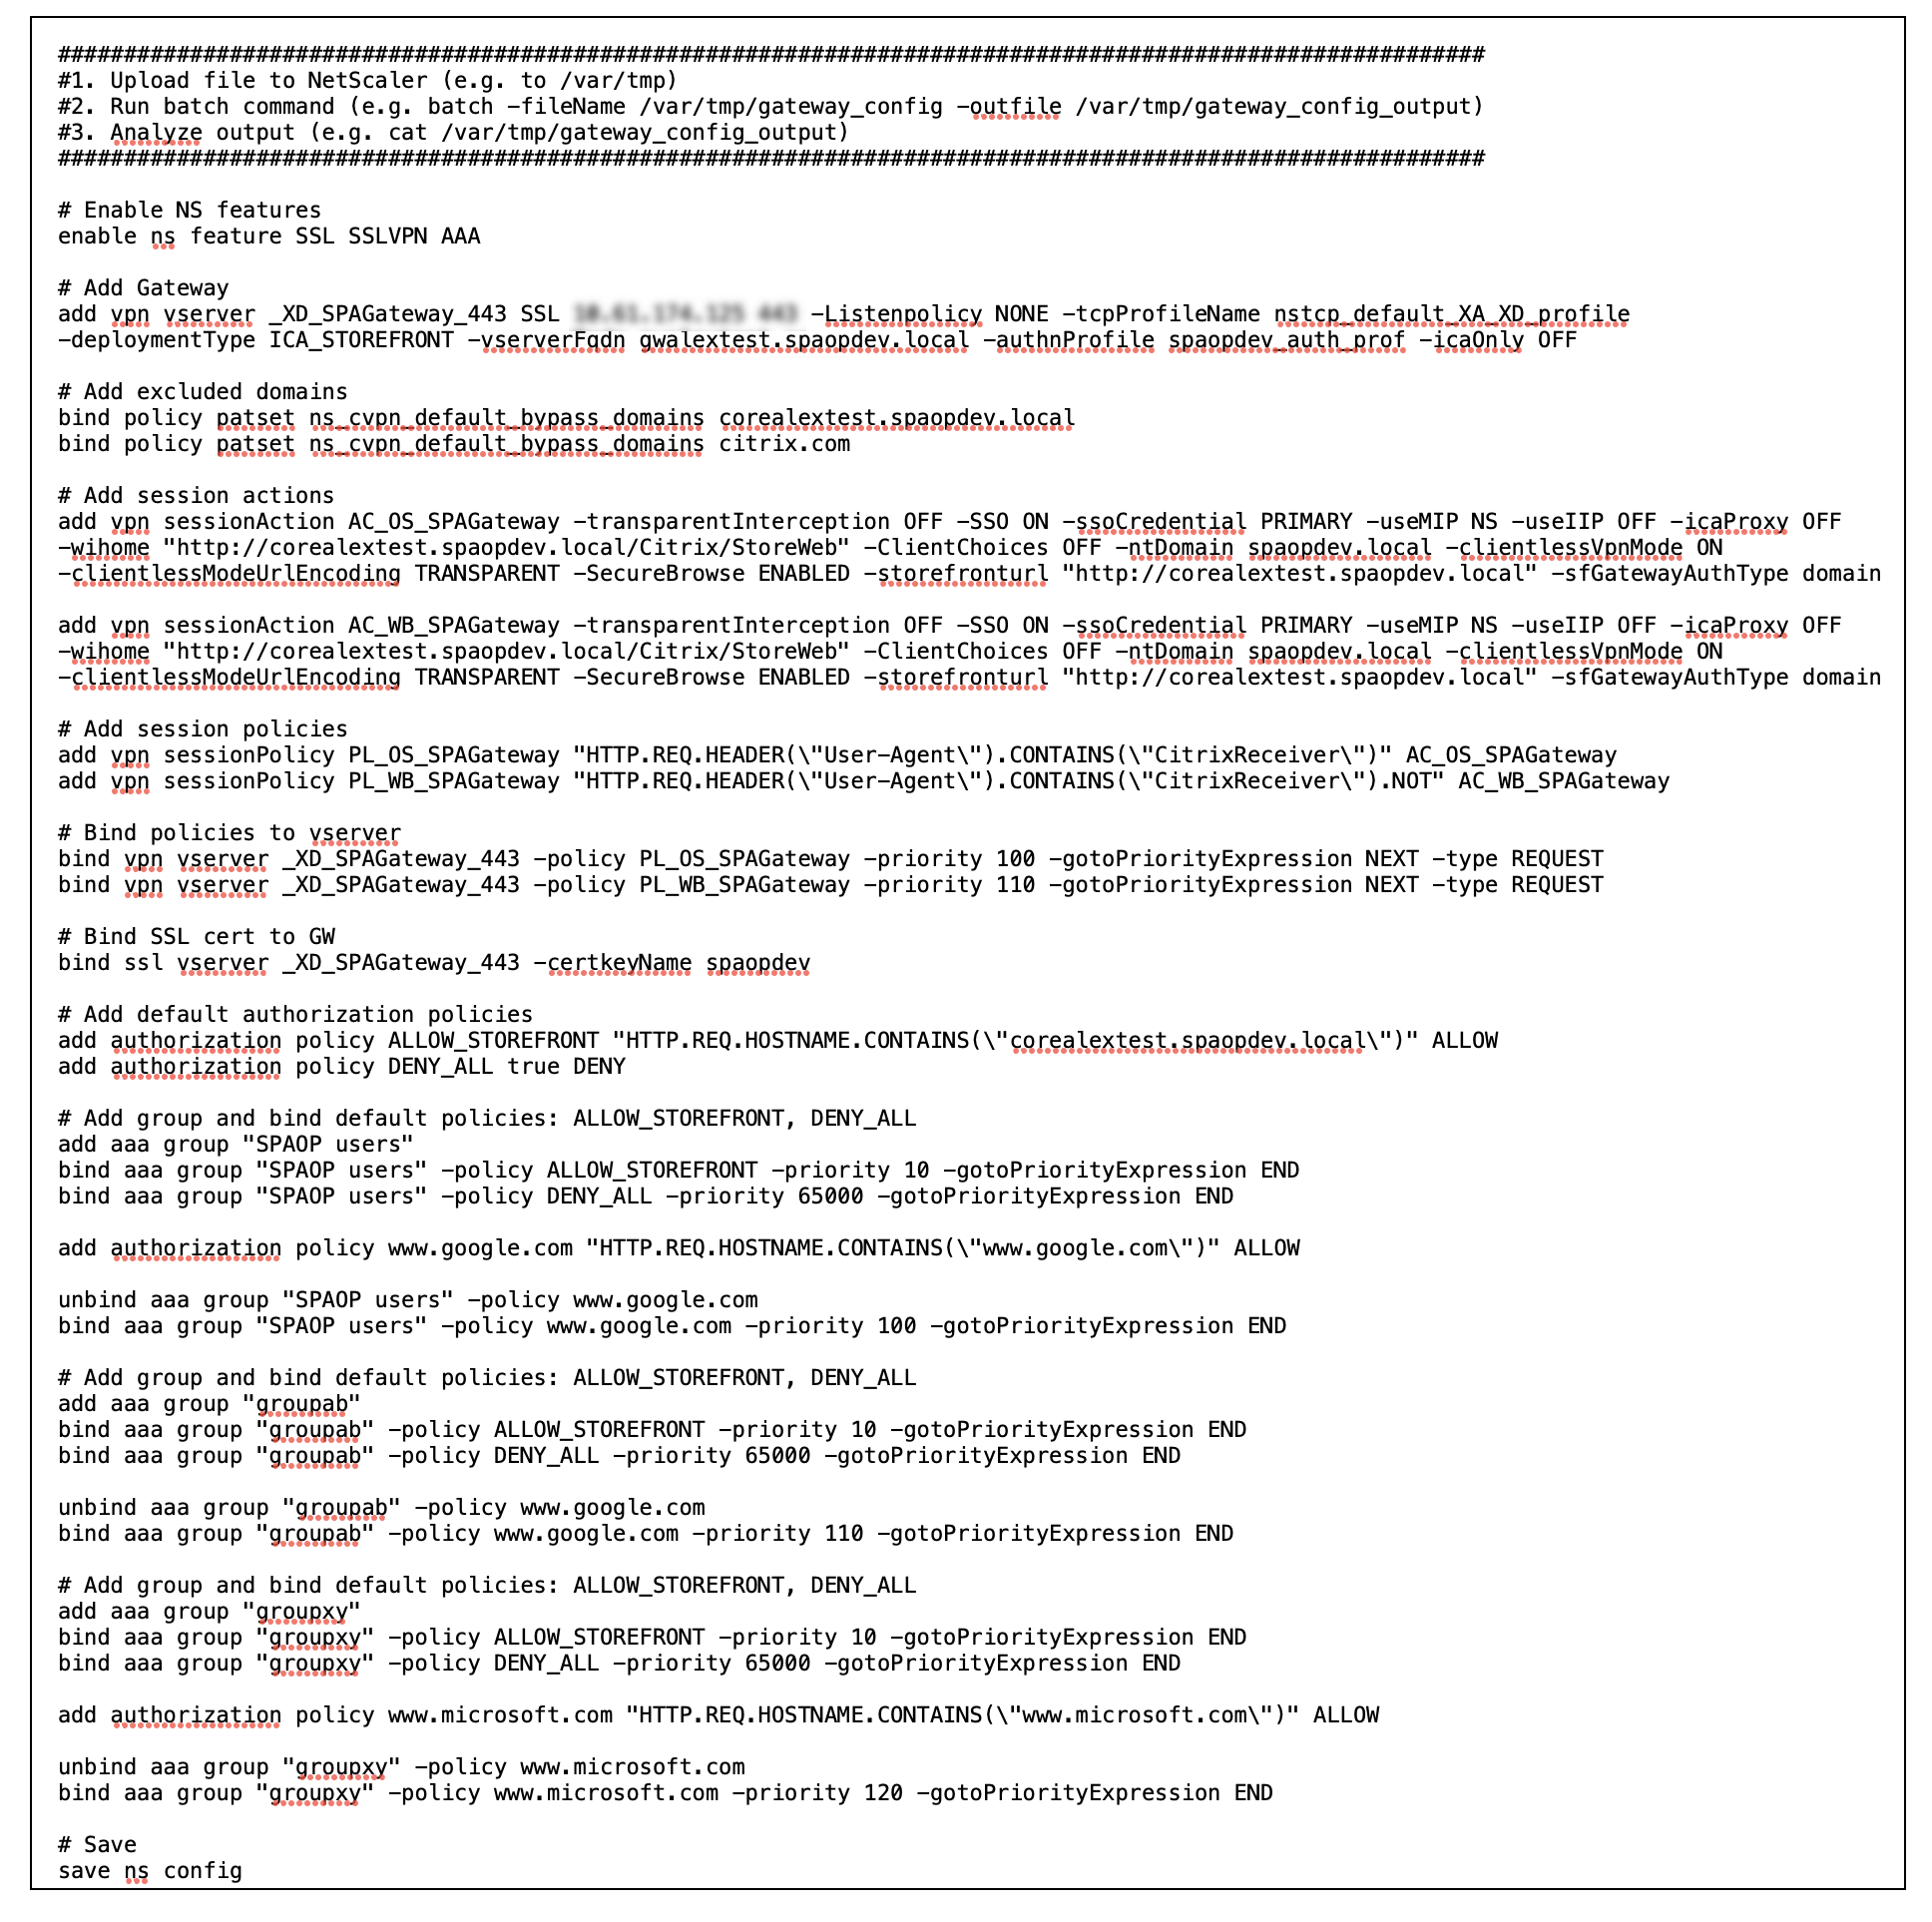
When you open the gateway_config file in a supported application, you can view two sections in the output file.
- Sections related to NetScaler Gateway configuration (applicable only when a new gateway is created)
- Sections related to the authorization policies, user groups, and binding policies to the user groups.
The following image displays the gateway_config file of a new NetScaler Gateway configuration.
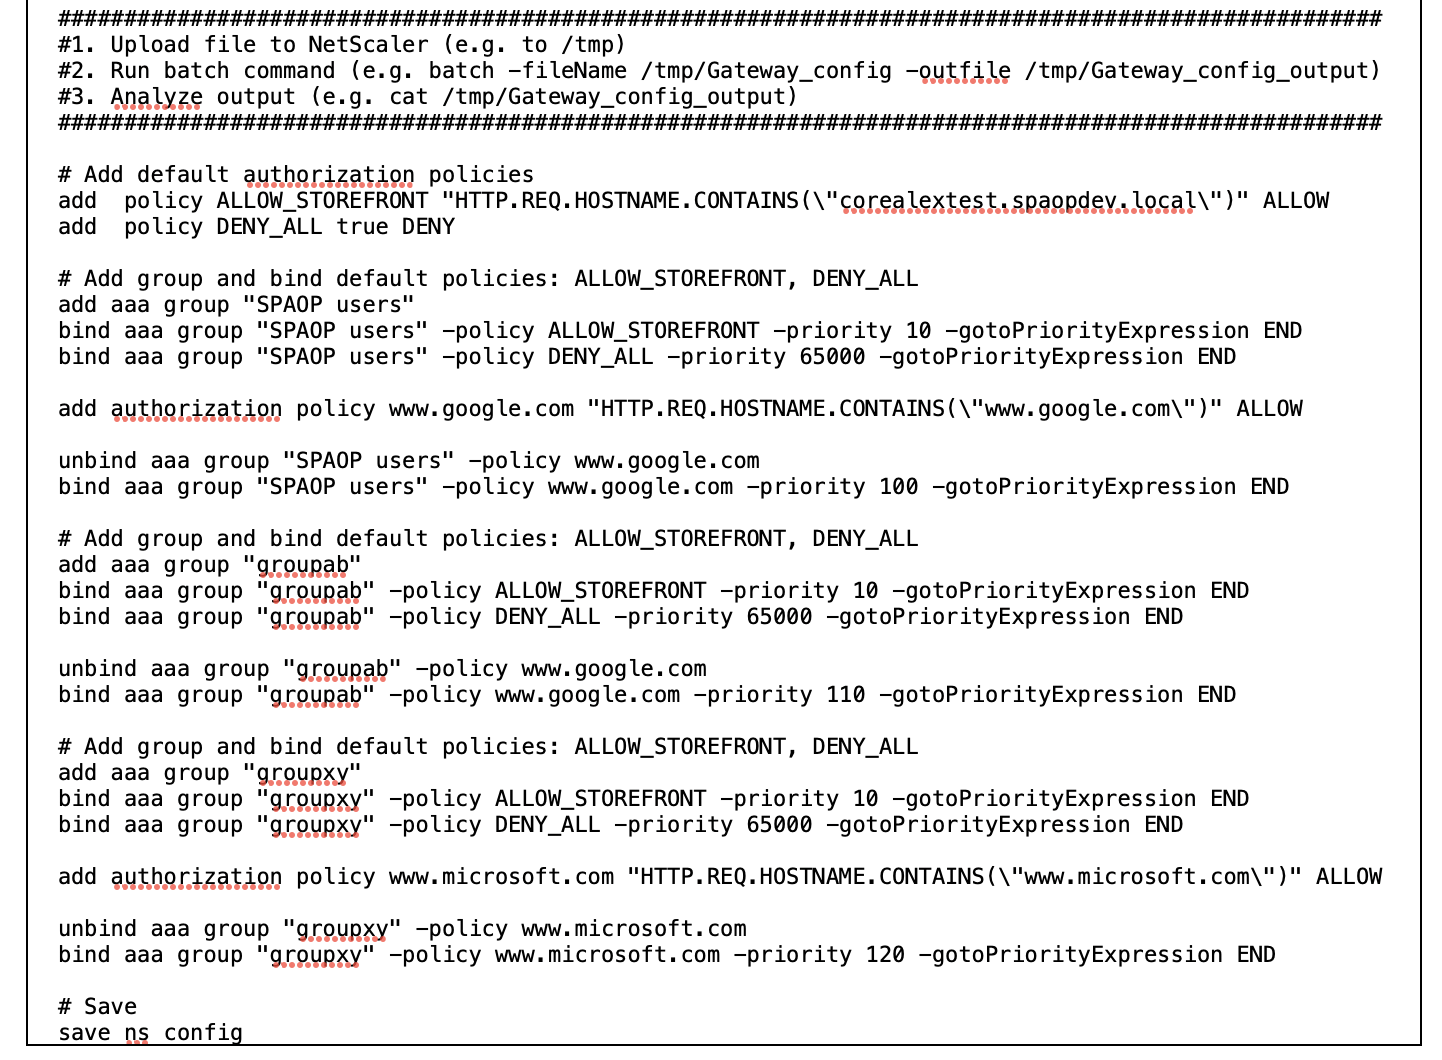
The following image displays the gateway_config file of an updated NetScaler Gateway configuration.
Configure StoreFront with the new NetScaler Gateway
-
For configuring StoreFront and NetScaler Gateway settings in the tool, you need the following:
- NetScaler Gateway FQDN
- StoreFront store URL
-
StoreFront configuration requirements:
- NetScaler Gateway: Remote access is enabled.
- Pass-through authentication from NetScaler Gateway is enabled.
- Active directory: Admin access to add or update users or groups, and to configure authentication profile or policies on NetScaler.
For more details, see Integrate NetScaler Gateway with StoreFront.
Use the config tool output files to deploy apps and policies configuration
The config tool generates the following files. These files are saved in the location/directory where the tool is uploaded and run.
- policy.json
- storefront.ps1
- gateway_config
- Copy storefront.ps1 files to StoreFront.
-
Run the storefront.ps1 script on PowerShell, as an administrator.
The script creates a Resources\SecureBrowser folder if it is not already available in the path under store.
The script also updates the web.config file for the route for the policy.json file.
-
Copy the policy.json file to the Resources\SecureBrowser folder that the storefront.ps1 creates under the store.
-
Copy the gateway_config to a NetScaler and run the script using the following batch command on the NetScaler CLI.
batch -fileName /var/tmp/gateway_config -outfile /var/tmp/gateway_config_output
Note:
- When any configuration change is done in the tool, the scripts and policies have to be regenerated. You must copy the policy.json file again to the Resources\SecureBrowser folder on the StoreFront machine and the gateway_config script has to be run again on the NetScaler.
- You don’t have to run the storefront.ps1 again if the store name/URL is not changed.
Additional references
Refer to the following documentation for more details.