Use case: Making enterprise network secure by using ICAP for remote malware inspection
The Citrix Secure Web Gateway (SWG) appliance acts as a proxy and intercepts all the client traffic. The appliance uses policies to evaluate the traffic and forwards client requests to the origin server on which the resource resides. The appliance decrypts the response from the origin server and forwards the plain text content to the ICAP server for an antimalware check. The ICAP server responds with a message indicating “No adaptation required,” or error, or modified request. Depending on the response from the ICAP server, the content requested is either forwarded to the client, or an appropriate message is sent.
For this use case, you must perform some general configuration, proxy and SSL interception related configuration, and ICAP configuration on the Citrix SWG appliance.
General configuration
Configure the following entities:
- NSIP address
- Subnet IP (SNIP) address
- DNS name server
- CA certificate-key pair to sign the server certificate for SSL interception
Proxy server and SSL interception configuration
Configure the following entities:
- Proxy server in explicit mode to intercept all outbound HTTP and HTTPS traffic.
- SSL profile to define SSL settings, such as ciphers and parameters, for connections.
- SSL policy to define rules for intercepting traffic. Set to true to intercept all client requests.
For more details, see the following topics:
In the following sample configuration, the antimalware detection service resides at www.example.com.
Sample general configuration:
add ns ip 192.0.2.5 255.255.255.0

add ns ip 198.51.100.5 255.255.255.0 -type SNIP

add dns nameServer 203.0.113.2

add ssl certKey ns-swg-ca-certkey -cert ns_swg_ca.crt -key ns_swg_ca.key
<!--NeedCopy-->
Sample proxy server and SSL interception configuration:
add cs vserver explicitswg PROXY 192.0.2.100 80 –Authn401 ENABLED –authnVsName explicit-auth-vs

set ssl parameter -defaultProfile ENABLED

add ssl profile swg_profile -sslInterception ENABLED

bind ssl profile swg_profile -ssliCACertkey ns-swg-ca-certkey

set ssl vserver explicitswg -sslProfile swg_profile

add ssl policy ssli-pol_ssli -rule true -action INTERCEPT

bind ssl vserver explicitswg -policyName ssli-pol_ssli -priority 100 -type INTERCEPT_REQ
<!--NeedCopy-->
Sample ICAP Configuration:
add service icap_svc 203.0.113.225 TCP 1344

enable ns feature contentinspection

add icapprofile icapprofile1 -uri /example.com -Mode RESMOD

add contentInspection action CiRemoteAction -type ICAP -serverName  icap_svc -icapProfileName icapprofile1

add contentInspection policy CiPolicy -rule "HTTP.REQ.METHOD.NE(\"CONNECT\")" -action CiRemoteAction

bind cs vserver explicitswg -policyName  CiPolicy -priority 200 -type response
<!--NeedCopy-->
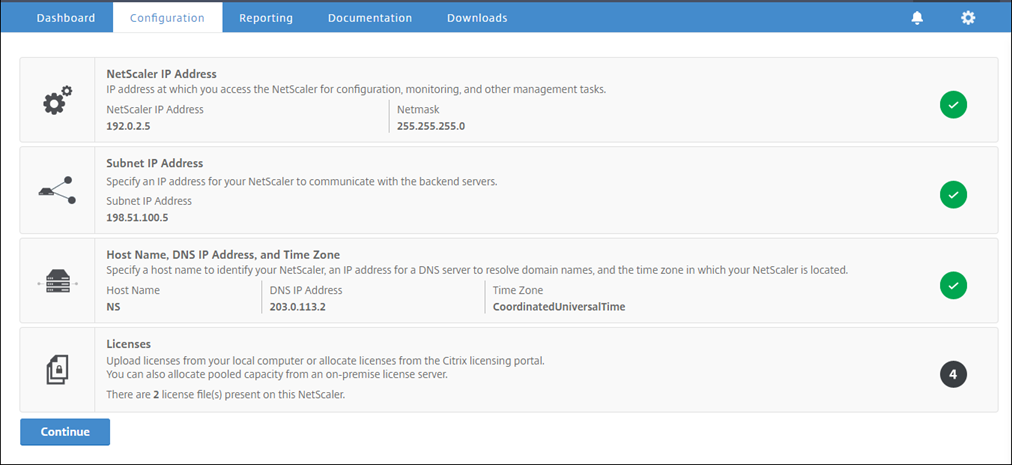
Configure SNIP address and DNS name server
-
In a web browser, type the NSIP address. For example,
http://192.0.2.5. -
In User Name and Password, type the administrator credentials. The following screen appears. If the following screen does not appear, skip to the proxy settings section.
-
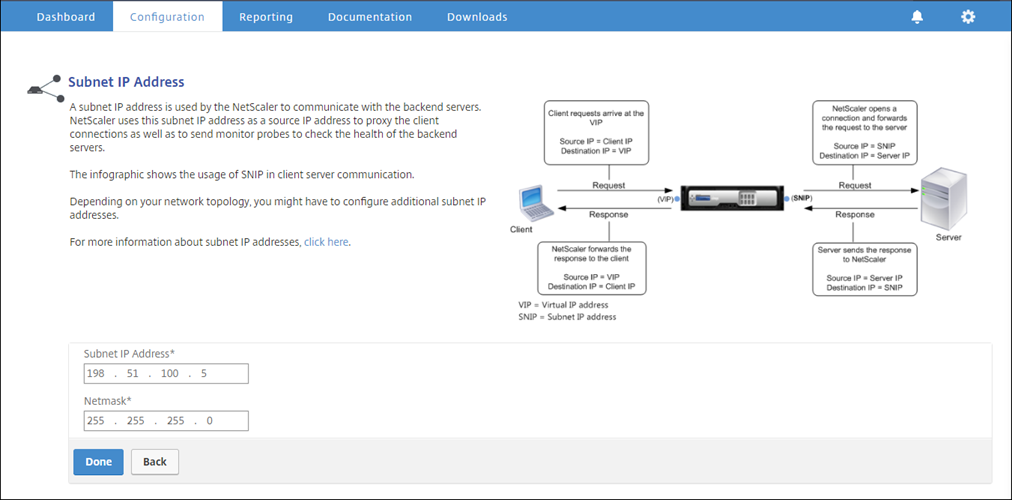
Click inside Subnet IP Address section, and enter an IP address.
-
Click Done.
-
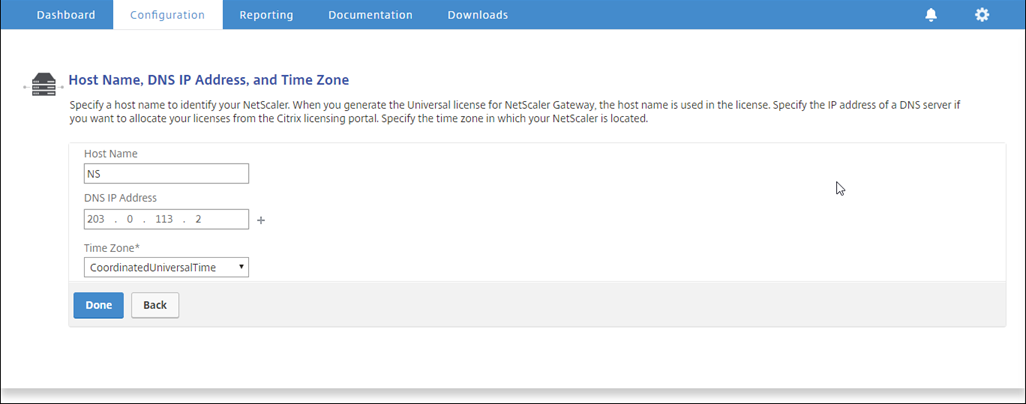
Click inside Host Name, DNS IP Address, and Time Zone section, and enter values for these fields.
-
Click Done and then click Continue.
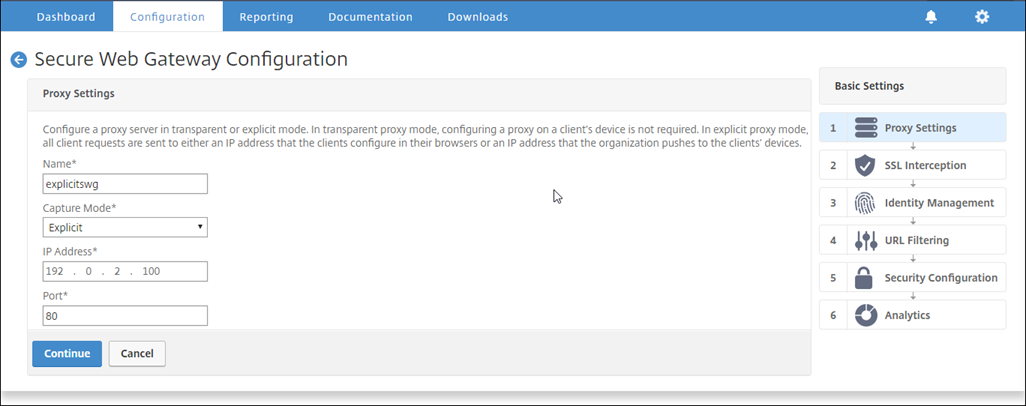
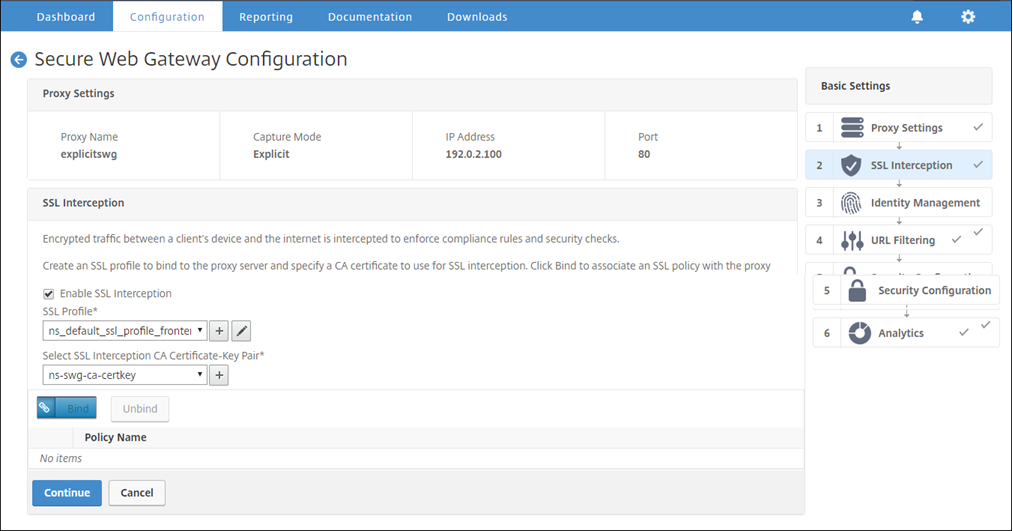
Configure the proxy settings
-
Navigate to Secure Web Gateway > Secure Web Gateway Wizard.
-
Click Get Started and then click Continue.
-
In the Proxy Settings dialog box, enter a name for the explicit proxy server.
-
For Capture Mode, select Explicit.
-
Enter an IP address and port number.
-
Click Continue.
Configure the SSL interception settings
-
Select Enable SSL Interception.
-
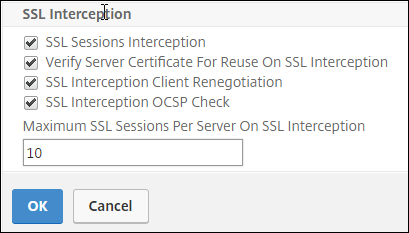
In SSL Profile, select an existing profile or click “+” to add a new front-end SSL profile. Enable SSL Sessions Interception in this profile. If you select an existing profile, skip the next step.
-
Click OK and then click Done.
-
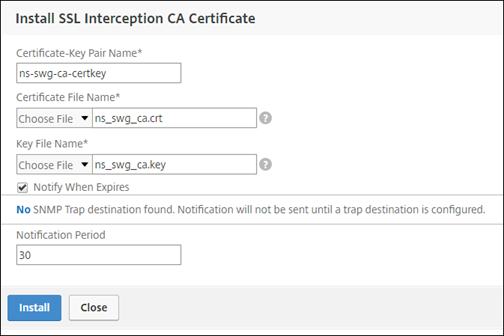
In Select SSL interception CA Certificate-Key Pair, select an existing certificate or click “+” to install a CA certificate-key pair for SSL interception. If you select an existing certificate, skip the next step.
-
Click Install and then click Close.
-
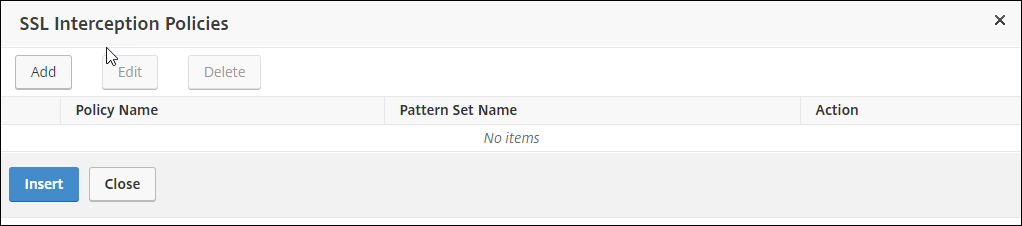
Add a policy to intercept all the traffic. Click Bind. Click Add to add a new policy or select an existing policy. If you select an existing policy, click Insert, and skip the next three steps.
-
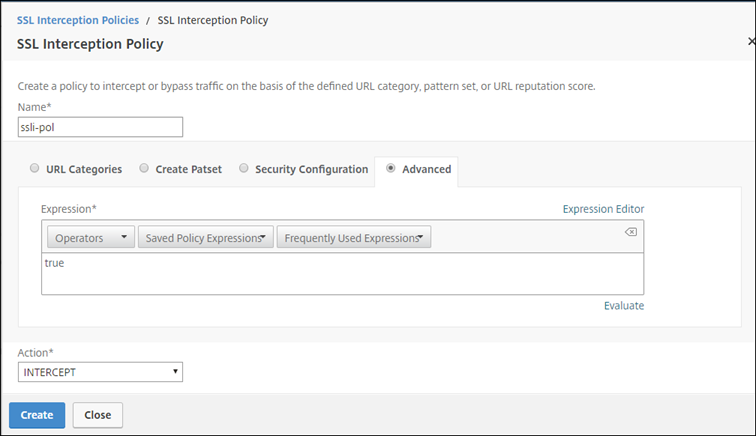
Enter a name for the policy and select Advanced. In the Expression editor, enter true.
-
For Action, select INTERCEPT.
-
Click Create.
-
Click Continue four times, and then click Done.
Configure the ICAP settings
-
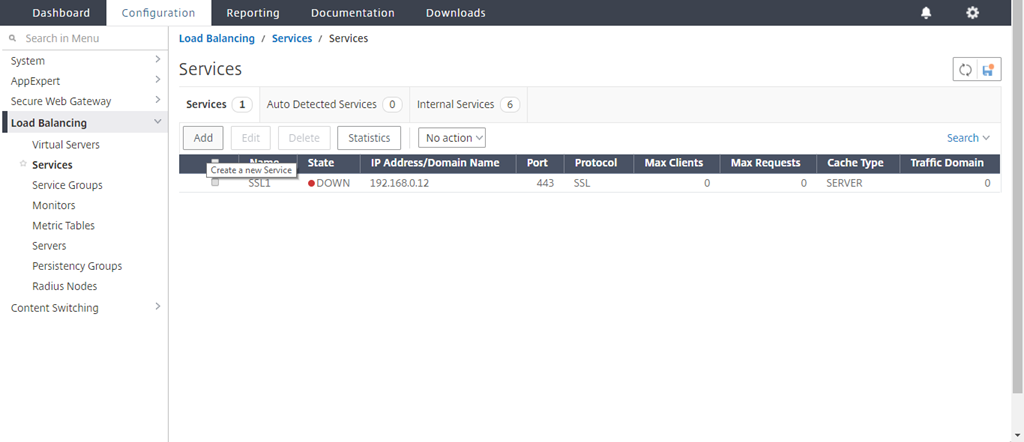
Navigate to Load Balancing > Services and click Add.
-
Type a name and IP address. In Protocol, select TCP. In Port, type 1344. Click OK.
-
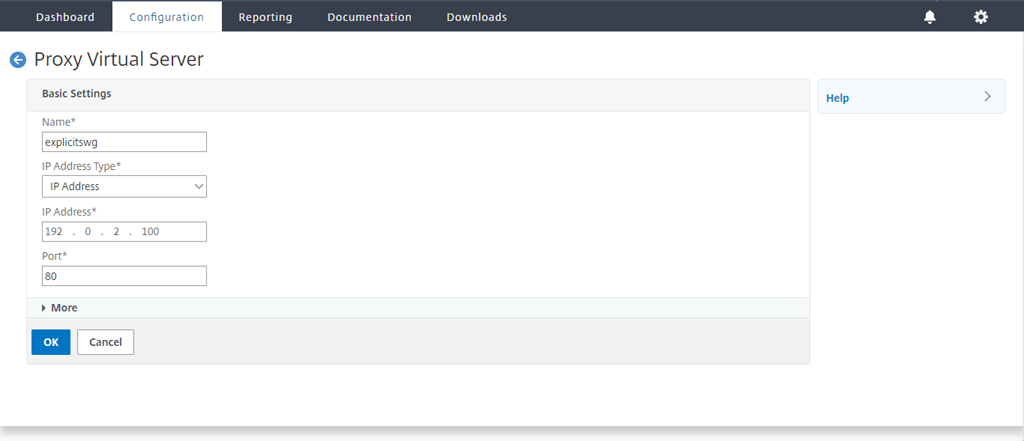
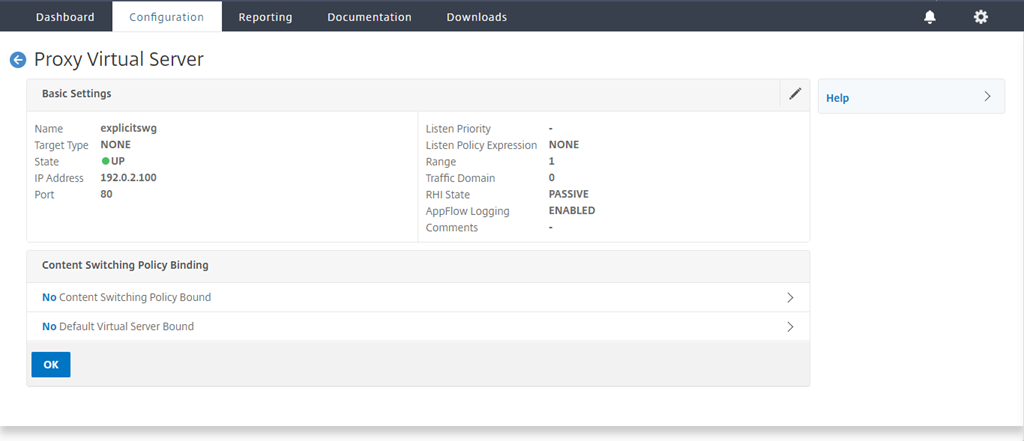
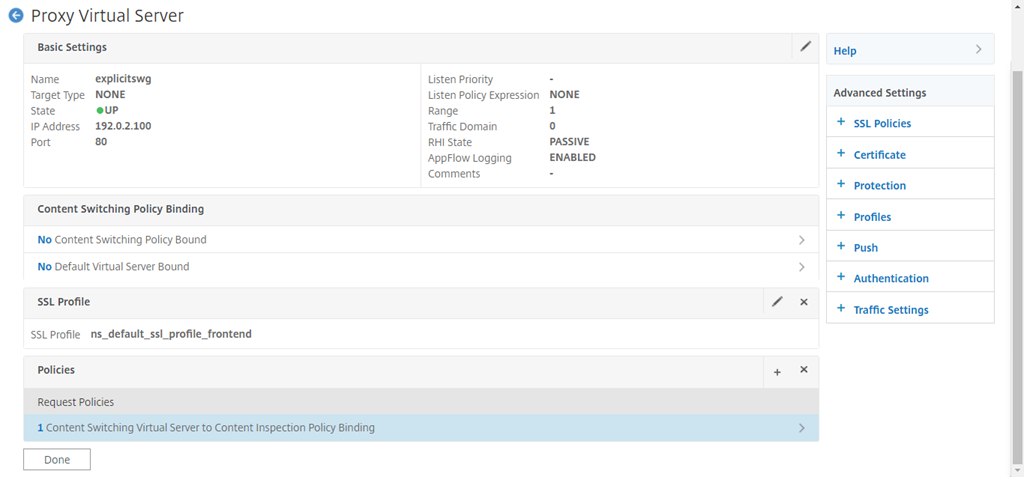
Navigate to Secure Web Gateway > Proxy Virtual Servers. Add a proxy virtual server or select a virtual server and click Edit. After entering details, click OK.
Click OK again.
-
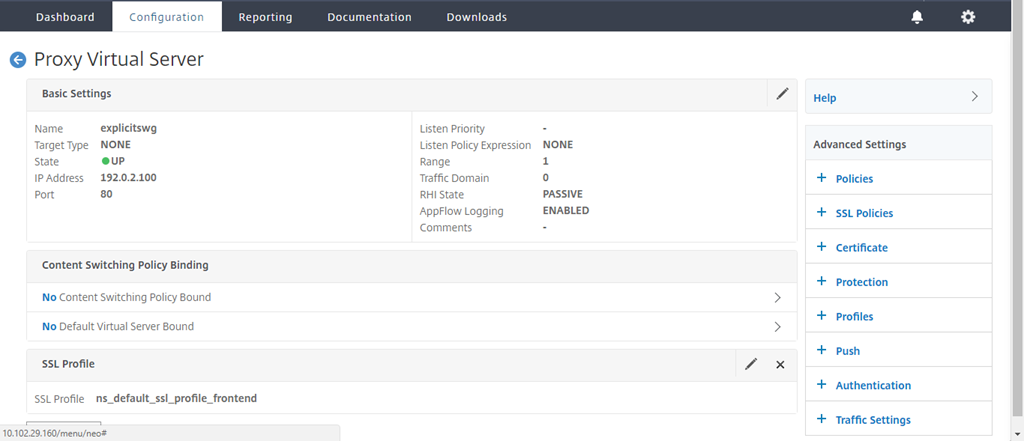
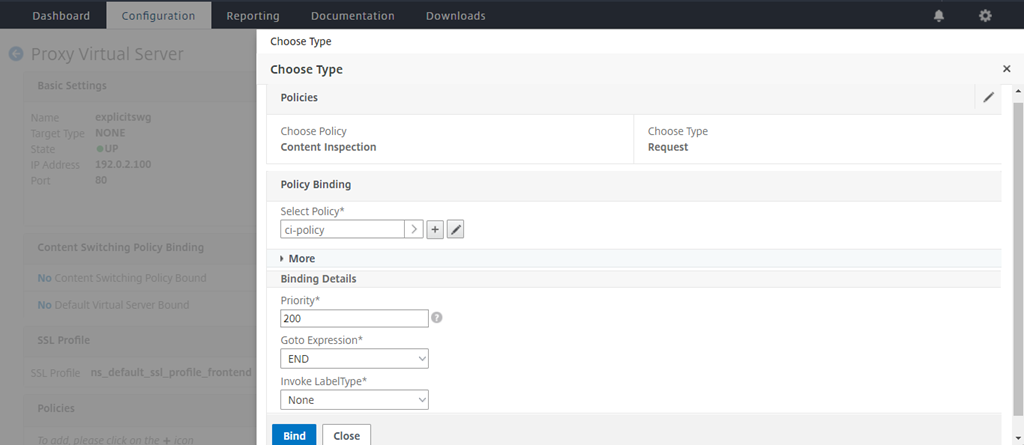
In Advanced Settings, click Policies.
-
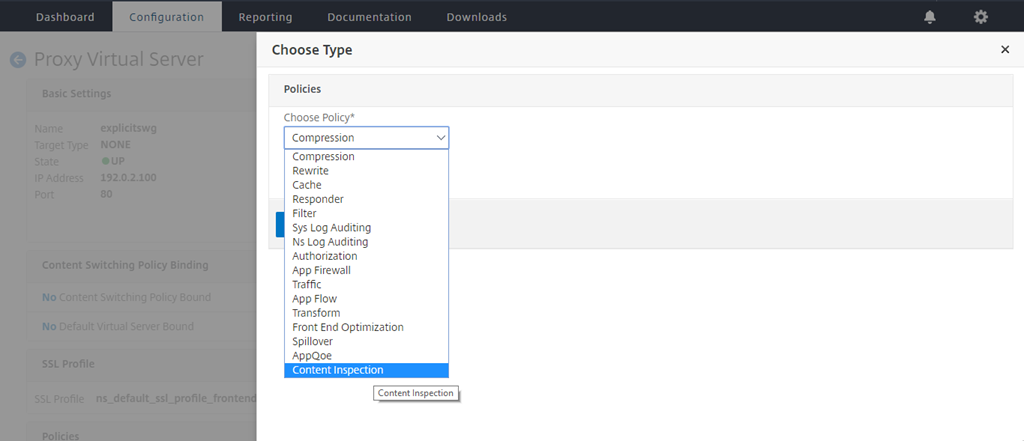
In Choose Policy, select Content Inspection. Click Continue.
-
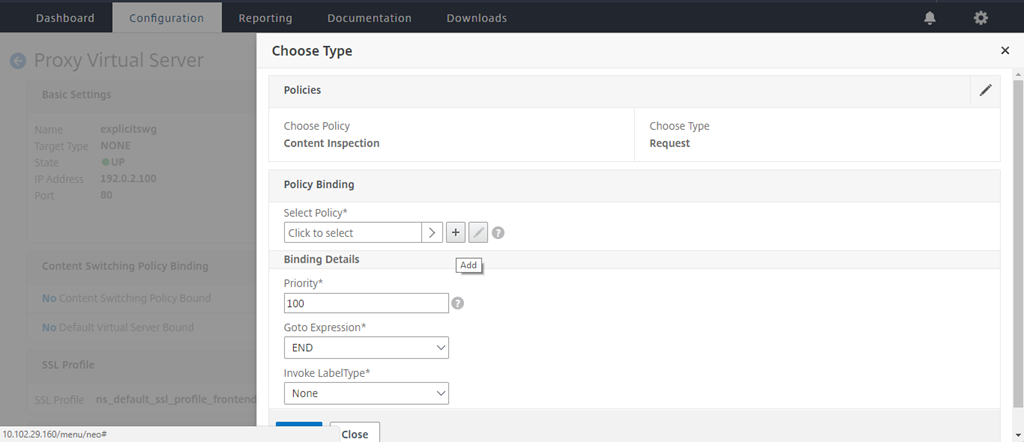
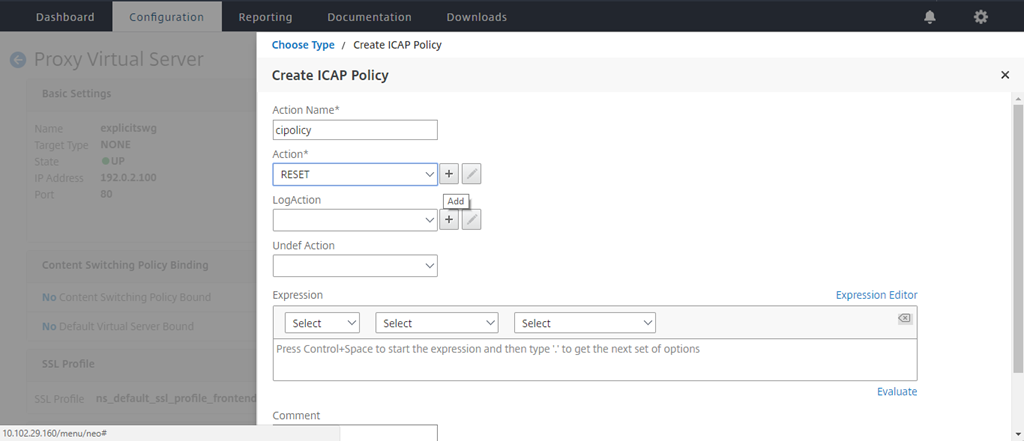
In Select Policy, click the “+” sign to add a policy.
-
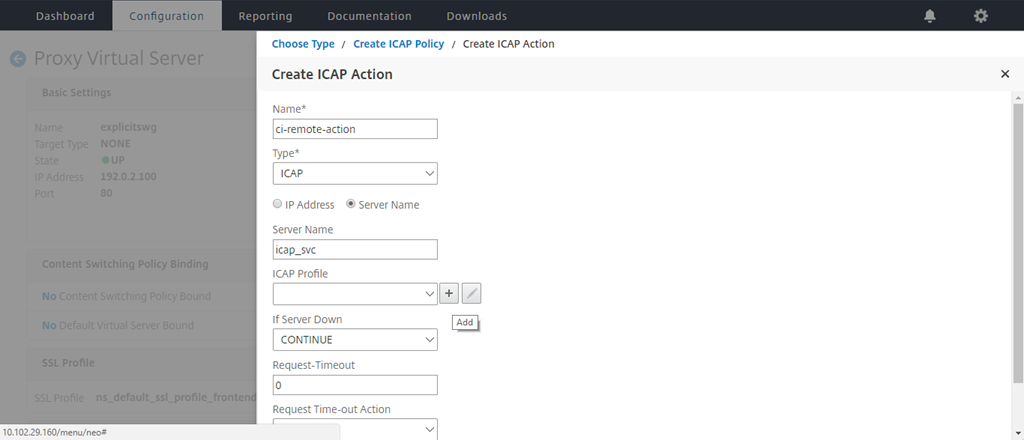
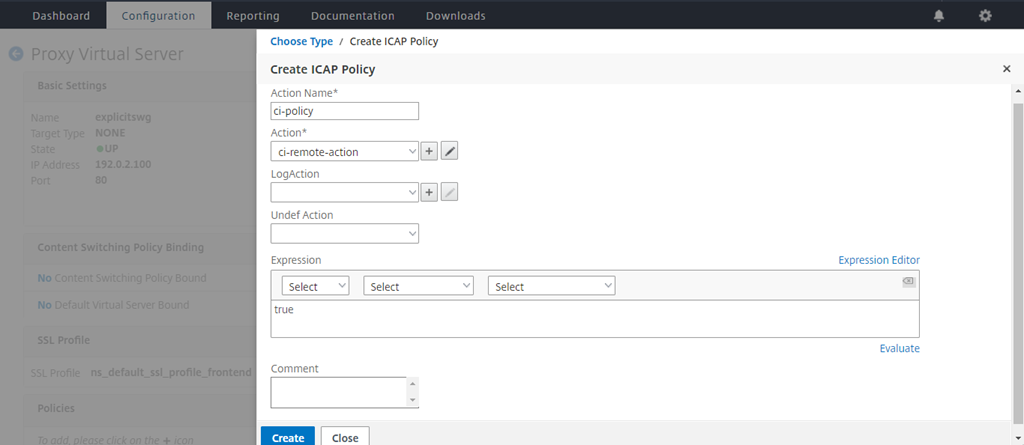
Enter a name for the policy. In Action, click the “+” sign to add an action.
-
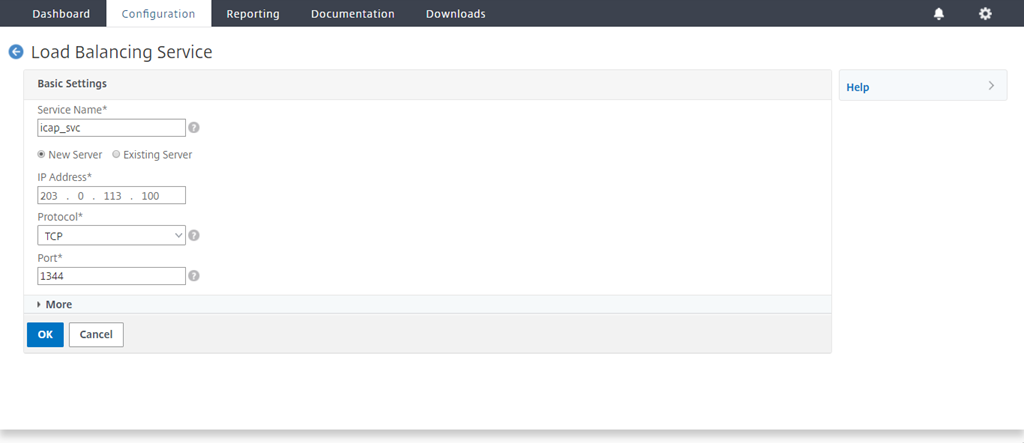
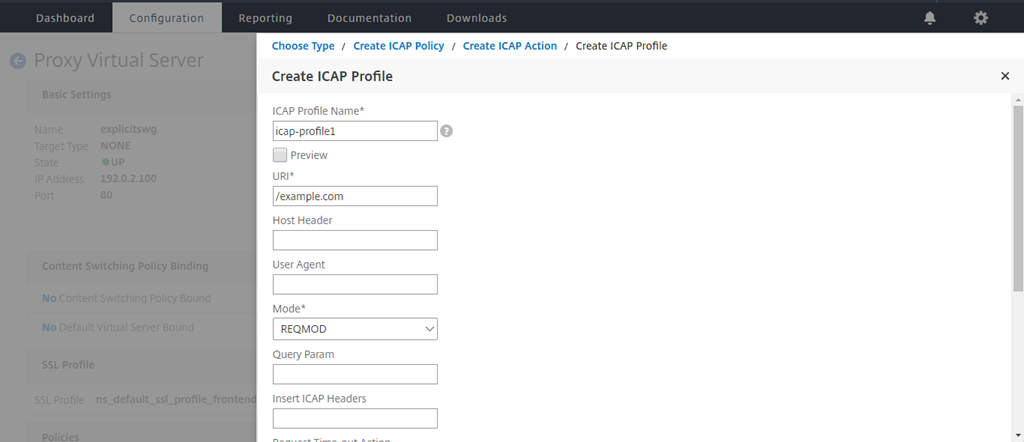
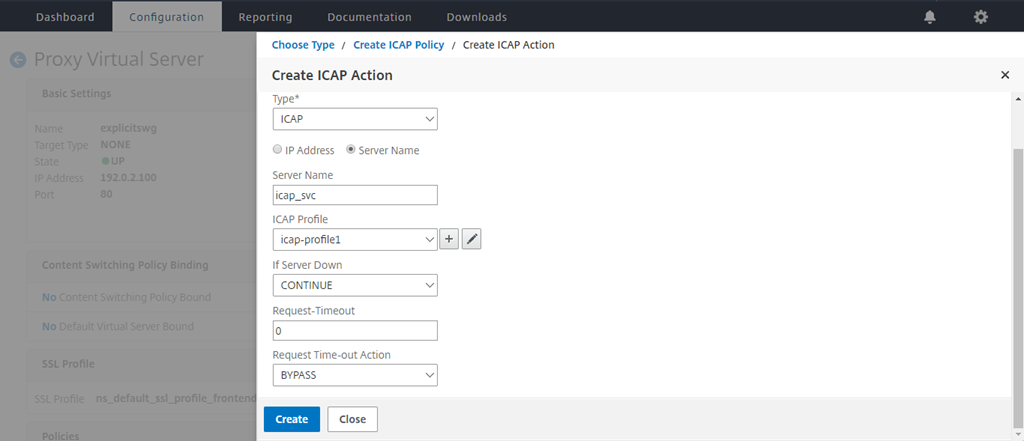
Type a name for the action. In Server Name, type the name of the TCP service created earlier. In ICAP Profile, click the “+” sign to add an ICAP profile.
-
Type a profile name, URI. In Mode, select REQMOD.
-
Click Create.

-
In the Create ICAP Action page, click Create.
-
In the Create ICAP Policy page, enter true in the Expression Editor. Then, click Create.
-
Click Bind.
-
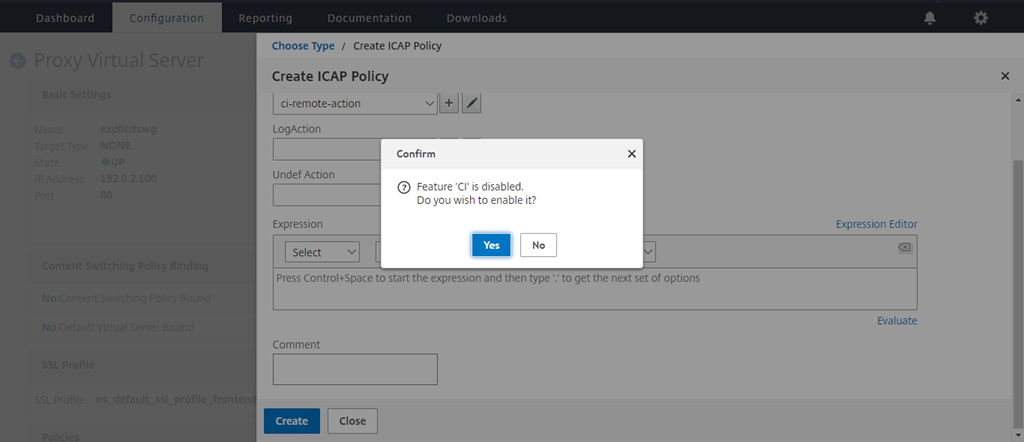
If prompted to enable the content inspection feature, select Yes.
-
Click Done.
Sample ICAP transactions between the Citrix SWG appliance and the ICAP server in RESPMOD
Request from the Citrix SWG appliance to the ICAP server:
RESPMOD icap://10.106.137.15:1344/resp ICAP/1.0

Host: 10.106.137.15

Connection: Keep-Alive

Encapsulated: res-hdr=0, res-body=282

HTTP/1.1 200 OK

Date: Fri, 01 Dec 2017 11:55:18 GMT

Server: Apache/2.2.21 (Fedora)

Last-Modified: Fri, 01 Dec 2017 11:16:16 GMT

ETag: "20169-45-55f457f42aee4"

Accept-Ranges: bytes

Content-Length: 69

Keep-Alive: timeout=15, max=100

Content-Type: text/plain; charset=UTF-8

X5O\!P%@AP\[4\\PZX54(P^)7CC)7}$EICAR-STANDARD-ANTIVIRUS-TEST-FILE\!$H+H\*
<!--NeedCopy-->
Response from the ICAP server to the Citrix SWG appliance:
ICAP/1.0 200 OK

Connection: keep-alive

Date: Fri, 01 Dec, 2017 11:40:42 GMT

Encapsulated: res-hdr=0, res-body=224

Server: IWSVA 6.5-SP1\_Build\_Linux\_1080 $Date: 04/09/2015 01:19:26 AM$

ISTag: "9.8-13.815.00-3.100.1027-1.0"

X-Virus-ID: Eicar\_test\_file

X-Infection-Found: Type=0; Resolution=2; Threat=Eicar\_test\_file;

HTTP/1.1 403 Forbidden

Date: Fri, 01 Dec, 2017 11:40:42 GMT

Cache-Control: no-cache

Content-Type: text/html; charset=UTF-8

Server: IWSVA 6.5-SP1\_Build\_Linux\_1080 $Date: 04/09/2015 01:19:26 AM$

Content-Length: 5688

\<html\>\<head\>\<META HTTP-EQUIV="Content-Type" CONTENT="text/html; charset=UTF-8"/\>

…

…

\</body\>\</html\>
<!--NeedCopy-->