Use case: Making enterprise internet access compliant and secure
The director of network security in a financial organization wants to protect the enterprise network from any external threats coming from the web in the form of malware. To do this, the director needs to gain visibility in to otherwise bypassed encrypted traffic and control access to malicious websites. The director is required to do the following:
- Intercept and examine all the traffic, including SSL/TLS (encrypted traffic), coming into and going out of the enterprise network.
- Bypass interception of requests to websites containing sensitive information, such as user financial information or emails.
- Block access to harmful URLs identified as serving harmful or adult content.
- Identify end users (employees) in the enterprise who are accessing malicious websites and block internet access for these users or block the harmful URLs.
To achieve all of the above, the director can set up a proxy on all the devices in the organization and point it to the Citrix Secure Web Gateway (SWG), which acts as a proxy server in the network. The proxy server intercepts all the encrypted and unencrypted traffic passing through the enterprise network. It prompts for user authentication, and associates the traffic with a user. URL categories can be specified to block access to Illegal/Harmful, Adult, and Malware and SPAM websites.
To achieve the above, configure the following entities:
- DNS name server to resolve host names.
- Subnet IP (SNIP) address to establish a connection with the origin servers. The SNIP address should have internet access.
- Proxy server in explicit mode to intercept all outbound HTTP and HTTPS traffic.
- SSL profile to define SSL settings, such as ciphers and parameters, for connections.
- CA certificate-key pair to sign the server certificate for SSL interception.
- SSL policy to define the websites to intercept and to bypass.
- Authentication virtual server, policy, and action to ensure that only valid users are granted access.
- Appflow collector to send data to the Citrix Application Delivery Management (ADM).
Both CLI and GUI procedures are listed for this sample configuration. The following sample values are used. Replace them with valid data for IP addresses, SSL certificate and key, and LDAP parameters.
| Name | Values used in the sample configuration |
|---|---|
| NSIP address | 192.0.2.5 |
| Subnet IP address | 198.51.100.5 |
| LDAP virtual server IP address | 192.0.2.116 |
| DNS name server IP address | 203.0.113.2 |
| Proxy server IP address | 192.0.2.100 |
| MAS IP address | 192.0.2.41 |
| CA certificate for SSL interception | ns-swg-ca-certkey (certificate: ns_swg_ca.crt and key: ns_swg_ca.key) |
| LDAP base DN | CN=Users,DC=CTXNSSFB,DC=COM |
| LDAP bind DN | CN=Administrator,CN=Users,DC=CTXNSSFB,DC=COM |
| LDAP bind DN password | zzzzz |
Using the secure web gateway wizard to configure interception and examination of the traffic to and from the enterprise network
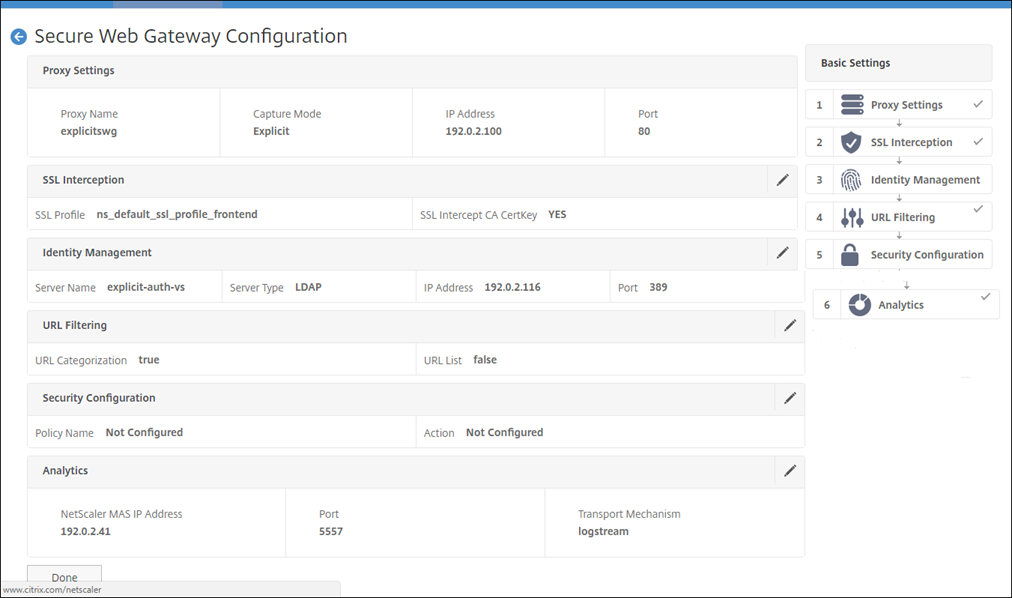
Creating a configuration for intercepting and examining encrypted traffic in addition to the other traffic to and from a network requires configuring proxy settings, SSLi settings, user authentication settings, and URL Filtering settings. The following procedures include examples of the values entered.
Configure SNIP address and DNS name server
-
In a web browser, type the NSIP address. For example,
http://192.0.2.5. -
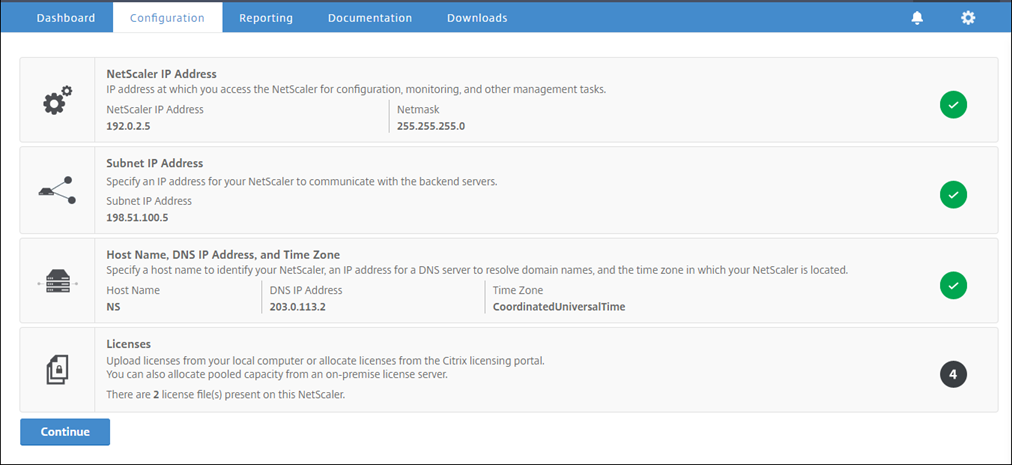
In User Name and Password, type the administrator credentials. The following screen appears.
-
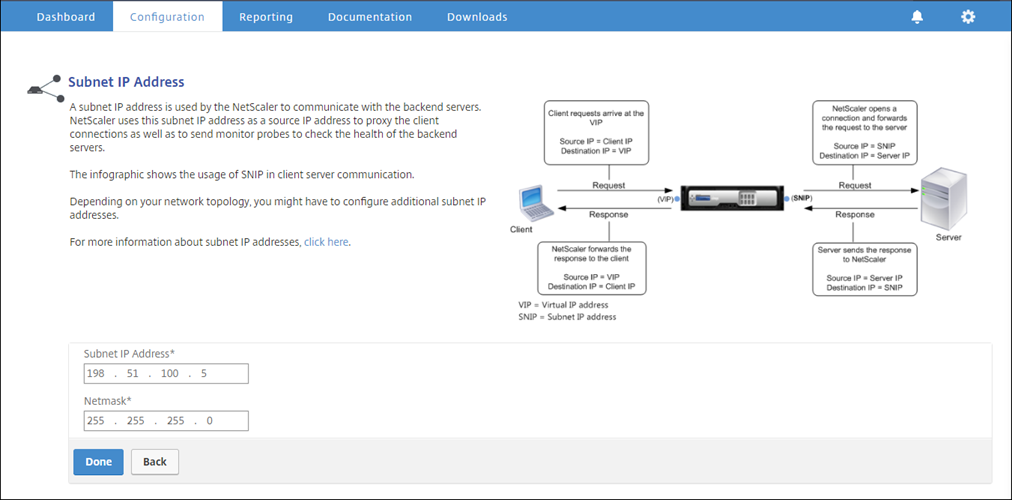
Click inside Subnet IP Address section, and enter an IP address.
-
Click Done.
-
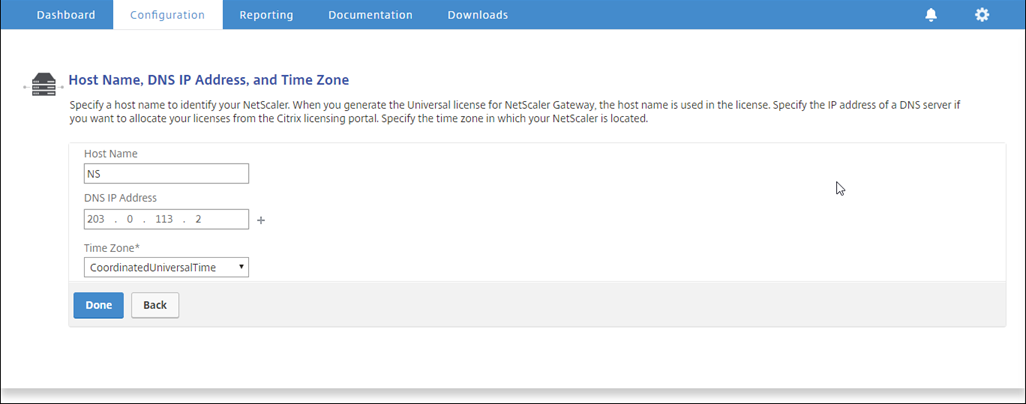
Click inside Host Name, DNS IP Address, and Time Zone section, and enter values for these fields.
-
Click Done and then click Continue.
Configure the proxy settings
-
Navigate to Secure Web Gateway > Secure Web Gateway Wizard.
-
Click Get Started and then click Continue.
-
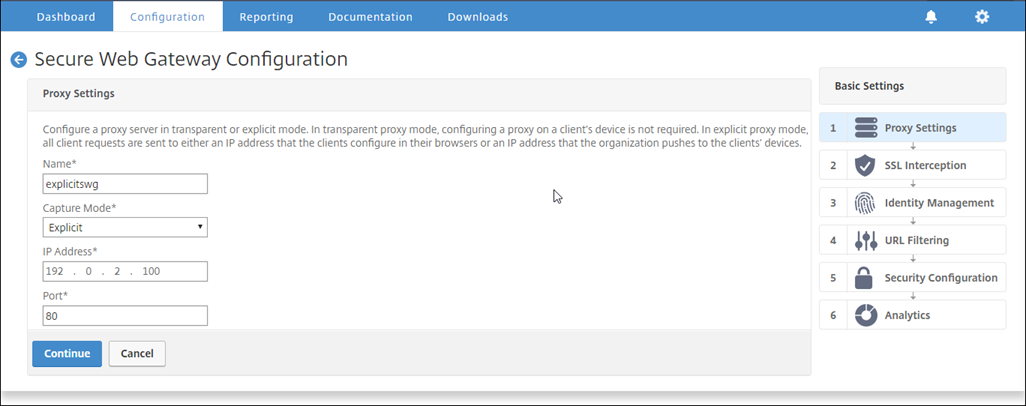
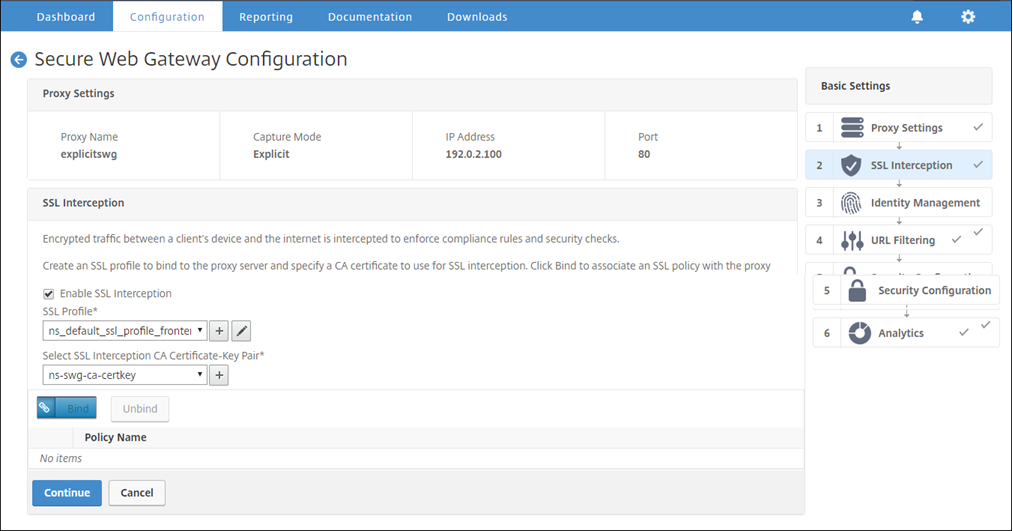
In the Proxy Settings dialog box, enter a name for the explicit proxy server.
-
For Capture Mode, select Explicit.
-
Enter an IP address and port number.
-
Click Continue.
Configure the SSL interception settings
-
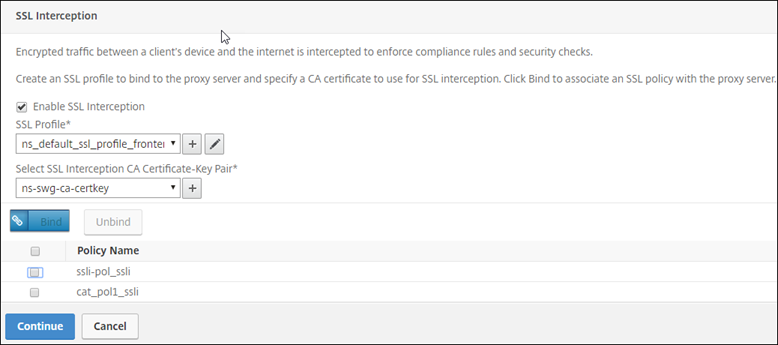
Select Enable SSL Interception.
-
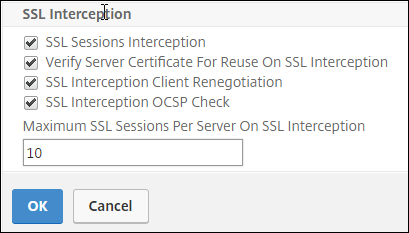
In SSL Profile, click “+” to add a new front-end SSL profile and enable SSL Sessions Interception in this profile.
-
Click OK and then click Done.
-
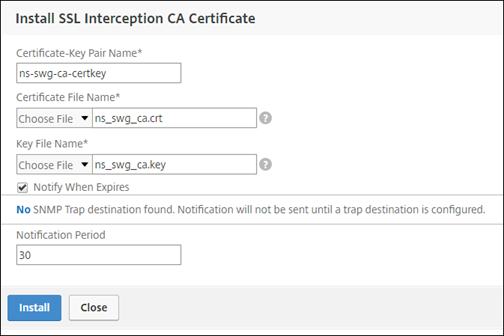
In Select SSL interception CA Certificate-Key Pair, click “+” to install a CA certificate-key pair for SSL interception.
-
Click Install and then click Close.
-
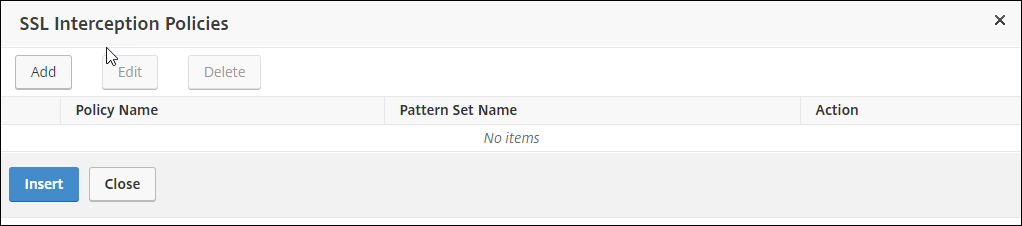
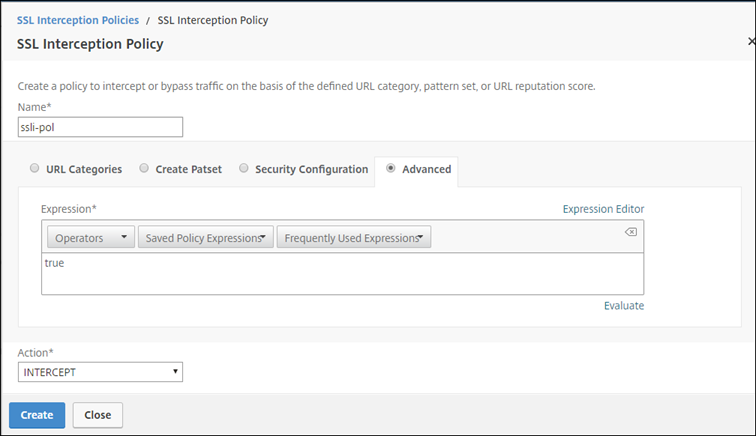
Add a policy to intercept all the traffic. Click Bind and then click Add.
-
Enter a name for the policy and select Advanced. In the Expression editor, enter true.
-
For Action, select INTERCEPT.
-
Click Create and then click Add to add another policy to bypass sensitive information.
-
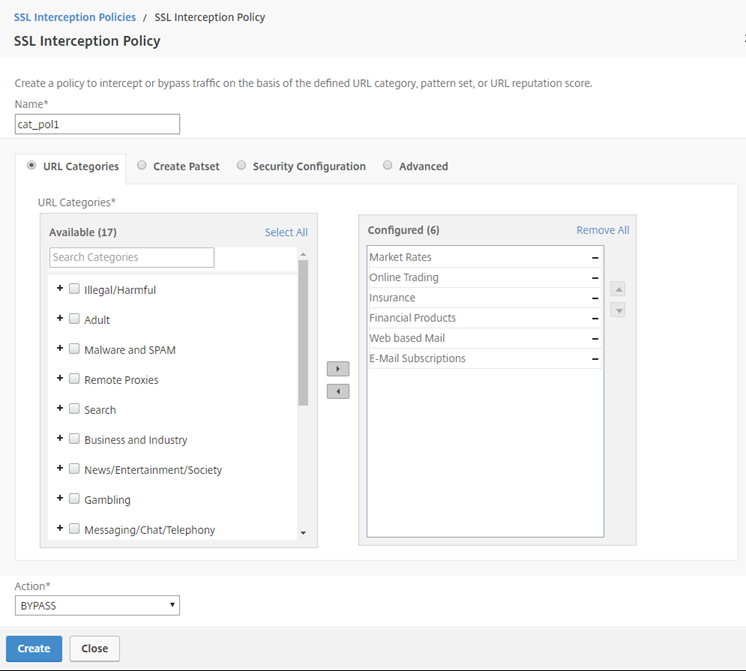
Enter a name for the policy and in URL Categories, click Add.
-
Select the Finance and Email categories and move them to the Configured list.
-
For Action, select BYPASS.
-
Click Create.
-
Select the two policies created earlier, and click Insert.

-
Click Continue.
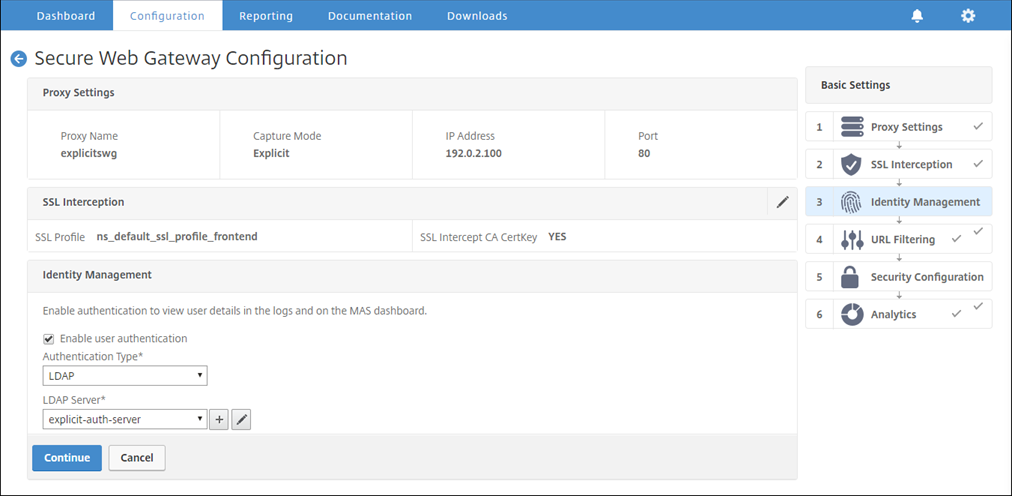
Configure the user authentication settings
-
Select Enable user authentication. In the Authentication Type field, select LDAP.
-
Add LDAP server details.
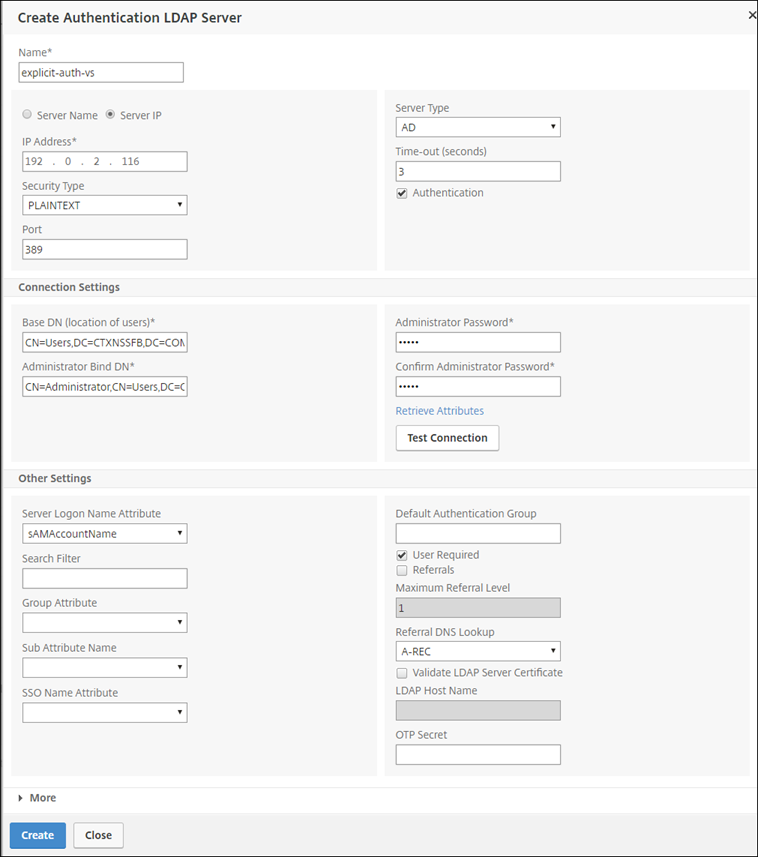
-
Click Create.
-
Click Continue.
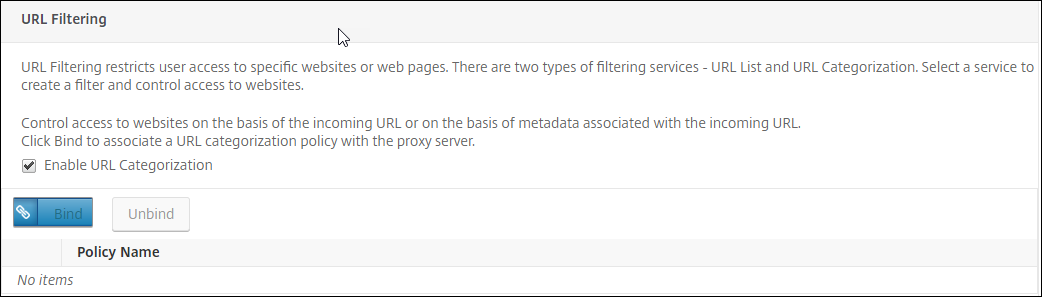
Configure URL Filtering settings
-
Select Enable URL Categorization, and then click Bind.
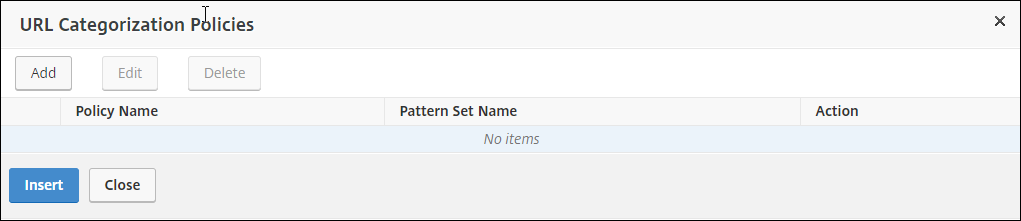
-
Click Add.
-
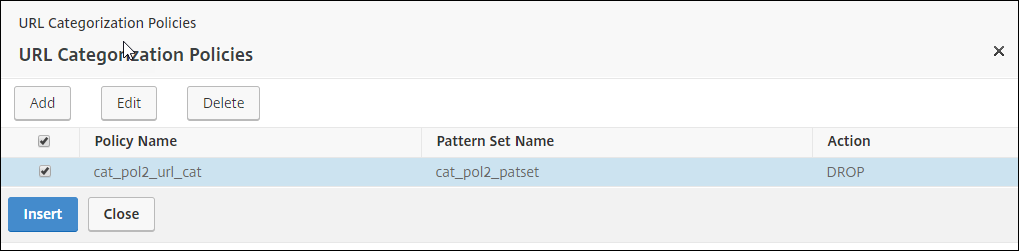
Enter a name for the policy. For Action, select Deny. For URL Categories, select Illegal/Harmful, Adult, and Malware and SPAM, and move them to the Configured list.
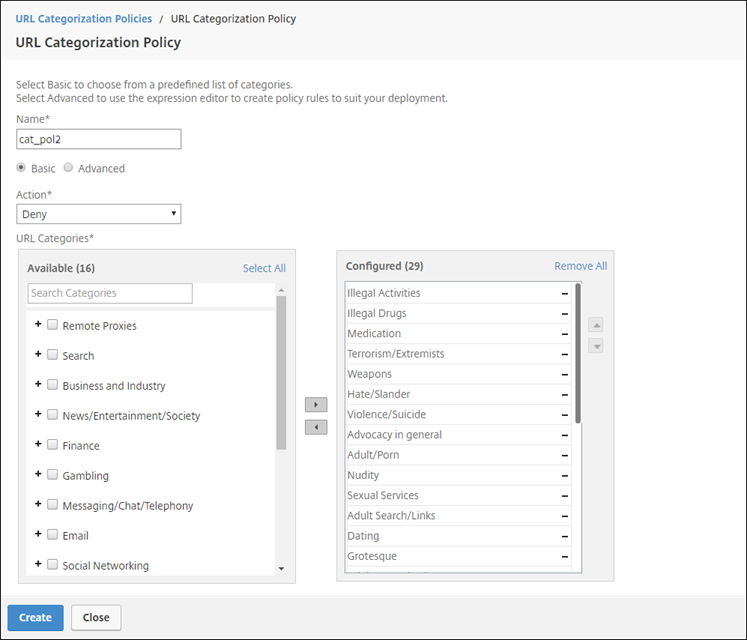
-
Click Create.
-
Select the policy and then click Insert.
-
Click Continue.

-
Click Continue.
-
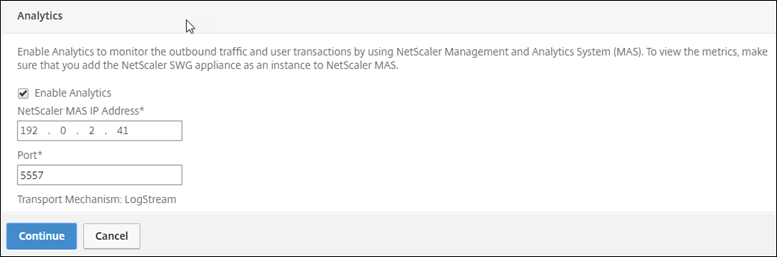
Click Enable Analytics.
-
Enter the IP address of Citrix ADM and for Port, specify 5557.
-
Click Continue.
-
Click Done.
Use Citrix ADM to view key metrics for users and determine the following:
- Browsing behavior of the users in your enterprise.
- URL categories accessed by the users in your enterprise.
- Browsers used to access the URLs or domains.
Use this information to determine whether the user’s system is infected by malware, or understand the bandwidth consumption pattern of the user. You can fine tune the policies on your Citrix SWG appliance to restrict these users, or block some more websites. For more information about viewing the metrics on MAS, see the “Inspecting Endpoints” use case in MAS use cases.
Note
Set the following parameters by using the CLI.
set syslogparams -sslInterception ENABLED

set cacheparameter -memLimit 100

set appflow param -AAAUserName ENABLED
<!--NeedCopy-->
CLI example
The following example includes all the commands used to configure interception and examination of the traffic to and from the enterprise network.
General configuration:
    add ns ip 192.0.2.5 255.255.255.0

    add ns ip 198.51.100.5 255.255.255.0 -type SNIP

    add dns nameServer 203.0.113.2

    add ssl certKey ns-swg-ca-certkey -cert ns_swg_ca.crt -key ns_swg_ca.key

    set syslogparams -sslInterception ENABLED

    set cacheparameter -memLimit 100

    set appflow param -AAAUserName ENABLED
<!--NeedCopy-->
Authentication configuration:
add authentication vserver explicit-auth-vs SSL

bind ssl vserver explicit-auth-vs -certkeyName ns-swg-ca-certkey

add authentication ldapAction swg-auth-action-explicit -serverIP 192.0.2.116 -ldapBase "CN=Users,DC=CTXNSSFB,DC=COM" -ldapBindDn "CN=Administrator,CN=Users,DC=CTXNSSFB,DC=COM" -ldapBindDnPassword zzzzzz -ldapLoginName sAMAccountName

add authenticationpolicy swg-auth-policy -rule true -action swg-auth-action-explicit

bind authentication vserver explicit-auth-vs -policy swg-auth-policy -priority 1
<!--NeedCopy-->
Proxy server and SSL interception configuration:
add cs vserver explicitswg PROXY 192.0.2.100 80 –Authn401 ENABLED –authnVsName explicit-auth-vs

set ssl parameter -defaultProfile ENABLED

add ssl profile swg_profile -sslInterception ENABLED

bind ssl profile swg_profile -ssliCACertkey ns-swg-ca-certkey

set ssl vserver explicitswg -sslProfile swg_profile

add ssl policy ssli-pol_ssli -rule true -action INTERCEPT

bind ssl vserver explicitswg -policyName ssli-pol_ssli -priority 100 -type INTERCEPT_REQ
<!--NeedCopy-->
URL categories configuration:
add ssl policy cat_pol1_ssli -rule "client.ssl.client_hello.SNI.URL_CATEGORIZE(0,0).GROUP.EQ("Finance") || client.ssl.client_hello.SNI.URL_CATEGORIZE(0,0).GROUP.EQ("Email")" -action BYPASS

bind ssl vserver explicitswg -policyName cat_pol1_ssli -priority 10 -type INTERCEPT_REQ

add ssl policy cat_pol2_ssli -rule "client.ssl.client_hello.sni.url_categorize(0,0).GROUP.EQ("Adult") || client.ssl.client_hello.sni.url_categorize(0,0).GROUP.EQ("Malware and SPAM") || client.ssl.client_hello.SNI.URL_CATEGORIZE(0,0).GROUP.EQ("Illegal/Harmful")" -action RESET

bind ssl vserver explicitswg -policyName cat_pol2_ssli -priority 20 -type INTERCEPT_REQ
<!--NeedCopy-->
AppFlow configuration to pull data into Citrix ADM:
add appflow collector _swg_testswg_apfw_cl -IPAddress 192.0.2.41 -port 5557 -Transport logstream

set appflow param -templateRefresh 60 -httpUrl ENABLED -AAAUserName ENABLED -httpCookie ENABLED -httpReferer ENABLED -httpMethod ENABLED -httpHost ENABLED -httpUserAgent ENABLED -httpContentType ENABLED -httpVia ENABLED -httpLocation ENABLED -httpDomain ENABLED -cacheInsight ENABLED -urlCategory ENABLED

add appflow action _swg_testswg_apfw_act -collectors _swg_testswg_apfw_cl -distributionAlgorithm ENABLED

add appflow policy _swg_testswg_apfw_pol true _swg_testswg_apfw_act

bind cs vserver explicitswg -policyName _swg_testswg_apfw_pol -priority 1
<!--NeedCopy-->