Enable multiple site management
By default, one Web Studio console is mapped to a single Citrix Virtual Apps and Desktops™ site, and when necessary, you can configure a Web Studio console to manage multiple sites. In this way, you can have only one Web Studio installed to configure and manage all your sites.
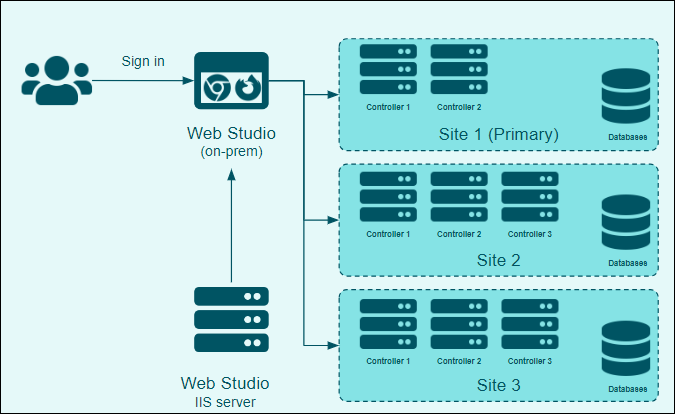
The following diagram illustrates the multiple-site architecture, where a single Web Studio deployment manages multiple independent Citrix Virtual Apps™ and Desktops sites.
Note:
Multi-site deployments support Web Studio connecting to Delivery Controllers from one earlier version. This backward compatibility allows for staged upgrades. However, running all components on the same version is recommended to ensure full functionality.
Benefits
- Improves efficiency when managing multiple sites with a unified single sign-on experience.
- Eases troubleshooting with all configurations accessible from one console.
Considerations
When configuring and deploying the sites, keep the following items in mind:
- Required version:
- Citrix Virtual Apps and Desktops 2311 and later.
- The Delivery Controller™ version must either match the Web Studio version or be earlier than it, with a minimum requirement of 2311 or later.
- This feature is exclusive to Web Studio (web-based) and not available with Citrix Studio (Windows-based).
- To support single sign-on, deploy all the sites on trusted domains.
- You can manage a maximum of 10 Citrix Virtual Apps and Desktops sites using the unified Web Studio console.
Workflow
Before you begin
-
Determine the primary site and ensure that the Web Studio console is accessible for primary site management.
Note:
- When designing a primary site, be aware that the accessibility of added sites depends on the primary site’s availability. Performance issues with the primary site may impact the access to added sites.
- If Web Studio is not installed, see Install Web Studio.
-
Ensure that the sites that you intend to manage with Web Studio are already in place.
- To create a new site, see Create a site.
-
(Recommended) To enable single sign-on when switching between the sites on the console, enable Integrated Windows Authentication (IWA) on all the sites. For the sites where IWA is not enabled, you can also use your login credentials to sign in.
Step 1: Sign in to Web Studio console
- Open a web browser. Enter
https://<address of the server hosting Web Studio>/Citrix/Studio. -
Sign in to Web Studio to manage the primary site.
Note:
The Delivery Controller address that you use during installation identifies the site. If the Delivery Controller is from the primary site, you will sign in to that site.
Step 2: Add sites using Web Studio
-
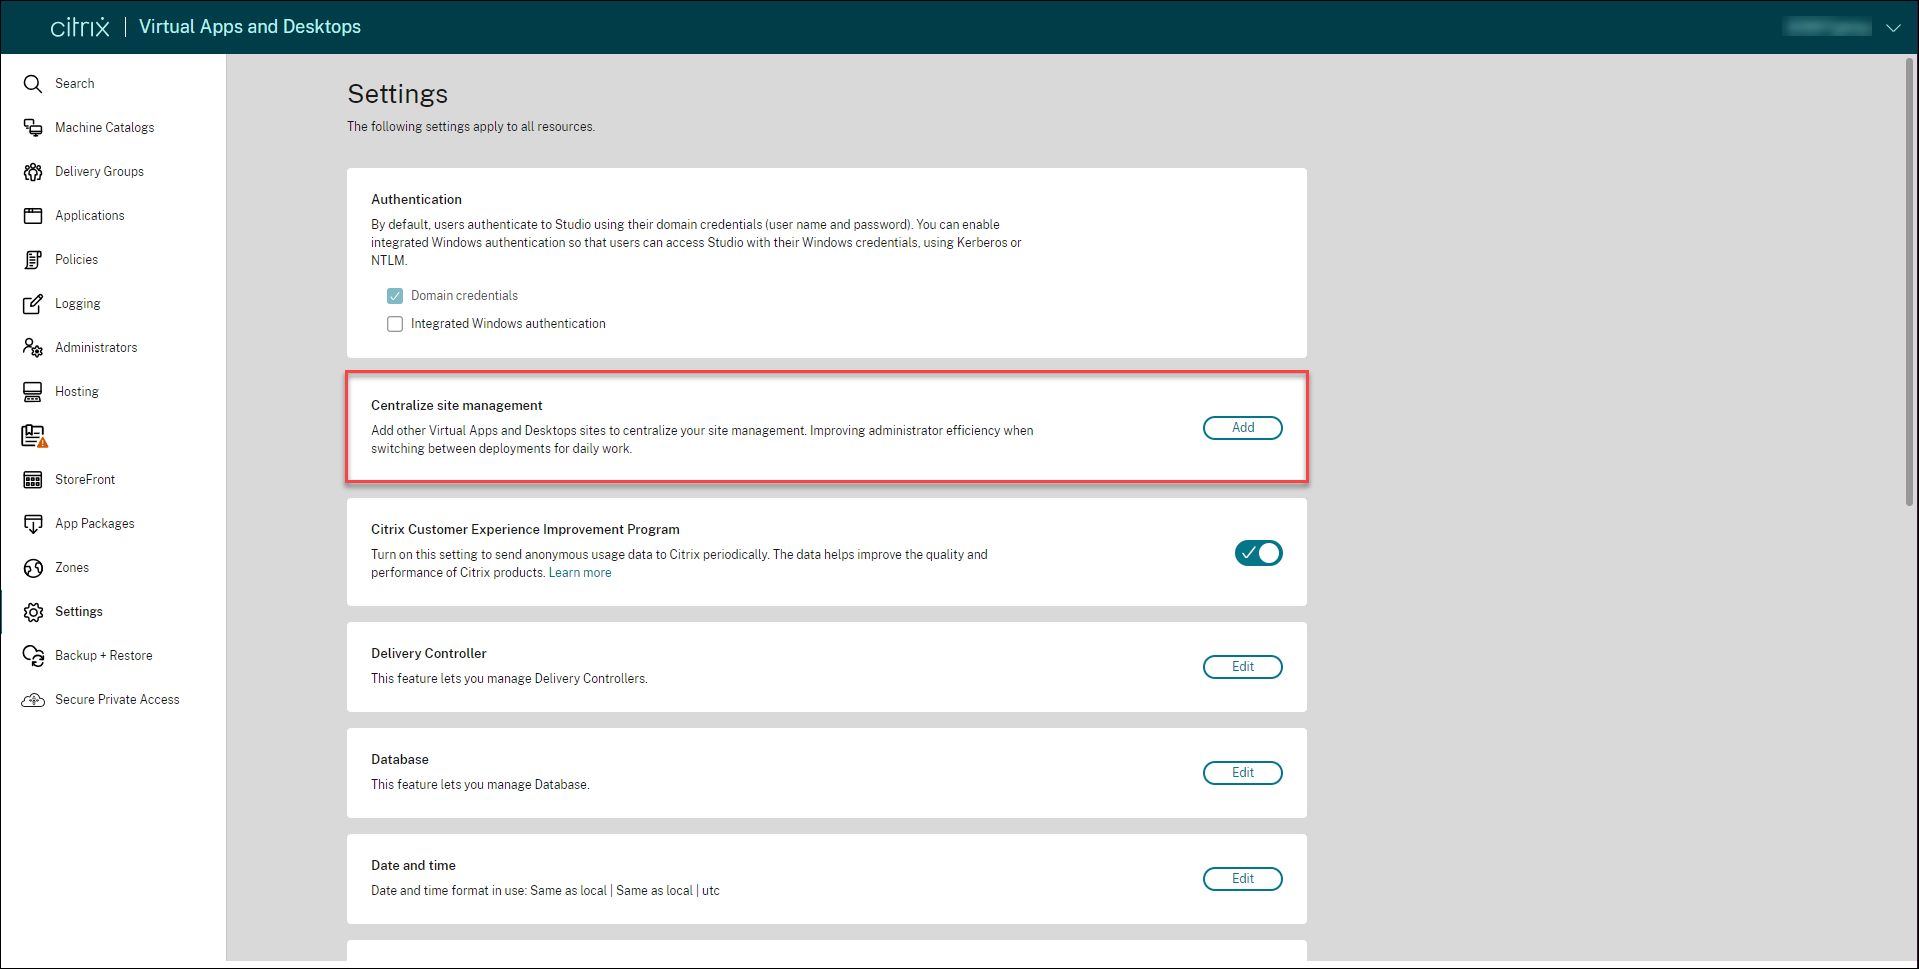
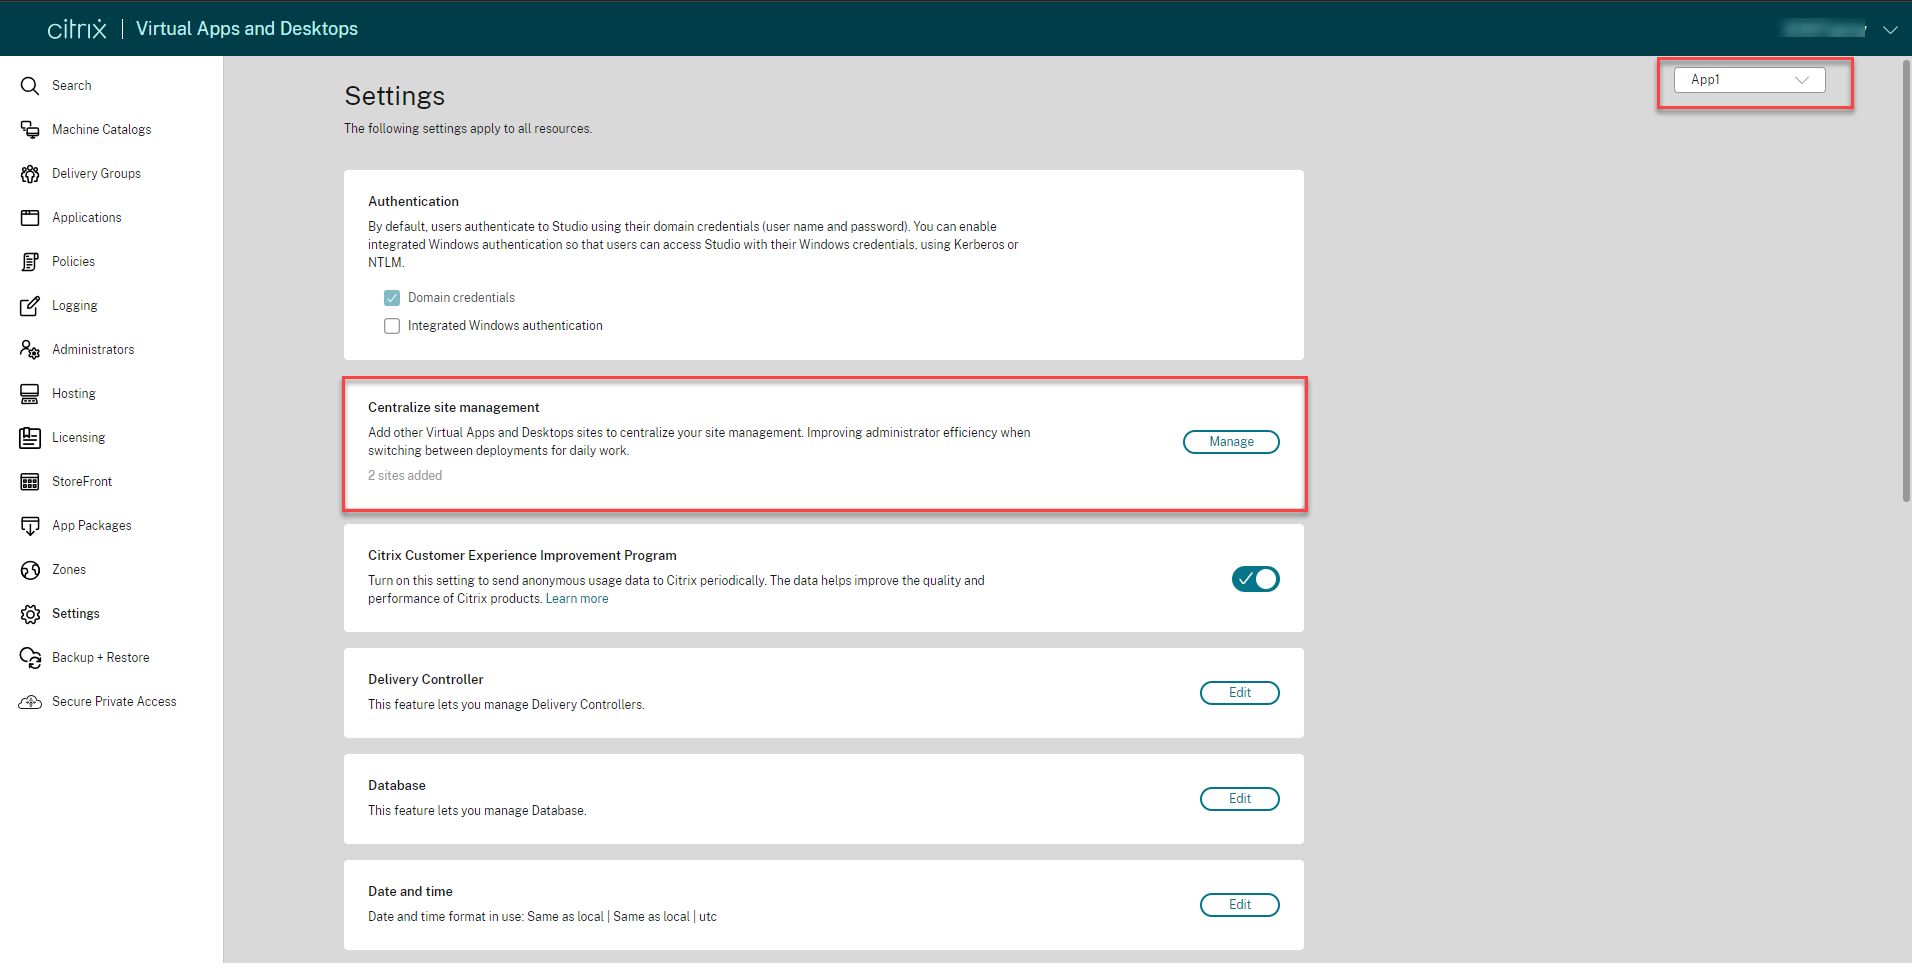
Go to Settings > Centralize site management, and then click Add.
-
On the Add Virtual Apps and Desktops sites page, click Add site.
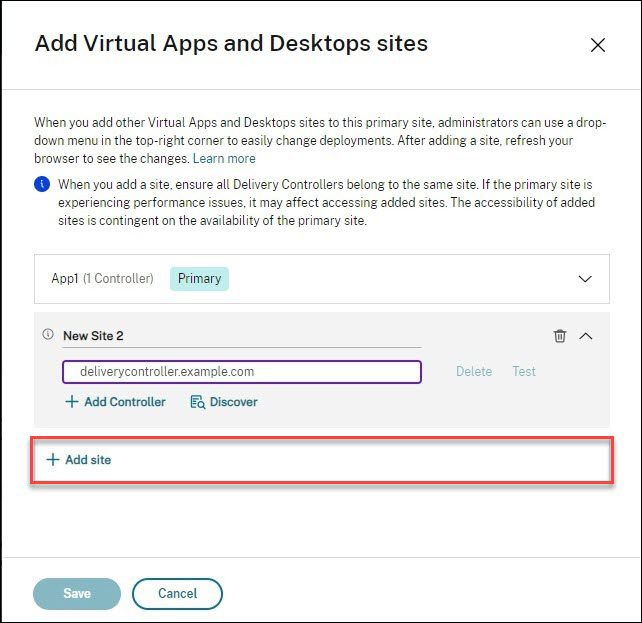
- Perform either of the following actions to add the delivery controllers:
- Click Add Controller, and then enter the FQDN. Click Test to test its connectivity.
-
Click Discover.
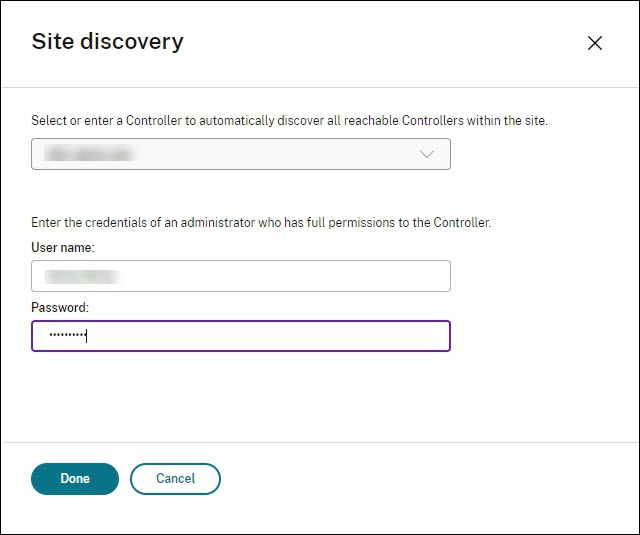
- On the Site discovery page, select or enter the address of a Controller present within the site.
- Enter the credentials of an administrator who has full permission to the Controller in the User name and Password fields.
- click Done.
Note:
The Discover feature automatically adds delivery controllers reachable within the site based on the delivery controller address that you enter.
-
Click Save.
To manage or edit the site configurations, go to Settings > Centralize site management, and click Manage. The Manage option is enabled only for the primary site.
Step 3: Manage site settings
Refresh your browser for the site configuration changes to appear. The site selection box appears at the top right corner of the console.
On the Settings page, select the site from the drop-down menu on the right corner, next to the Refresh icon. The console displays the configuration of the selected site.
Note:
- When the primary site is not reachable, you cannot access other sites associated with it.
- When switching to another site, ensure that you have the necessary permissions or access credentials to sign in.
Sign-in experience after site configuration
- Open a web browser. Enter
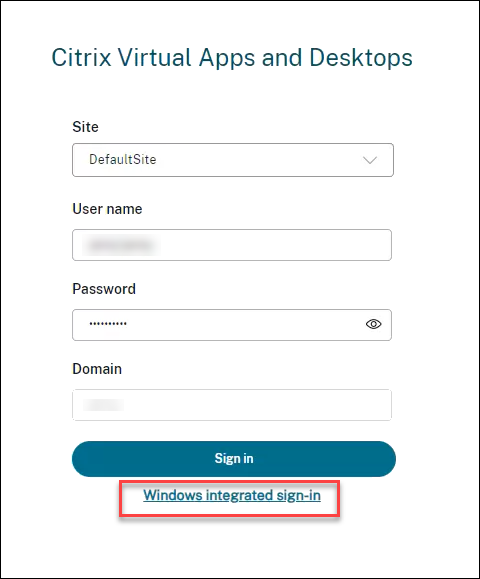
https://<address of the server hosting Web Studio>/Citrix/Studio. - Select a site from the Site field.
-
Select Windows Integrated sign-in or enter the Username and Password to sign in.
Note:
Windows Integrated sign-in is available only if it is enabled for the site selected. For more information about Integrated Windows authentication, see Manage authentication.