 View PDF


Configure algorithms
Aug 14, 2017
The initial configuration you perform using the Configure Modules wizard provides global settings for algorithms and algorithm groups. This topic describes how to customize algorithms, RAG status, and remediation actions.
Turn algorithms and algorithm groups on and off
Turning off algorithms and algorithm groups that are not relevant reduces unnecessary processing and focuses the report results on your actual needs. For example, some of the reports test for compatibility with features that are optional. If your enterprise does not use (or plan to use) any of the optional features, you can turn off the associated algorithms to speed analysis.
- From the AppDNA menus, choose Configure > Modules > Module > Report, where Module and Report identify the report whose algorithms you want to turn on or off.
- In the Algorithm Groups screen, locate the algorithm group or algorithm that you want to turn on or off.
- Clear or select the Enabled check box to turn the algorithm group or algorithm off or on.
- Click Save on the toolbar to preserve your changes.
- Re-analyze your applications so that the changes are reflected in reports.
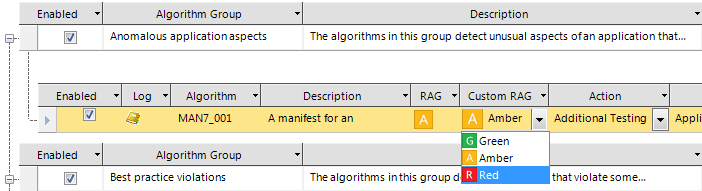
Set custom RAGs
The standard RAG status of an application is determined by the algorithms built into the report. However, sometimes you might want to raise an amber status to red or lower it to green, depending on the specific needs of your organization. By default, the custom RAG is the same as the standard RAG.
-
From the AppDNA menus, choose Configure > Modules > Module > Report, where Module and Report identify the report that contains the algorithm whose custom RAGs you want to set.
-
In the Algorithm Groups screen, click List View on the toolbar.
-
Locate the algorithm whose custom RAG you want to set.
-
In the Custom RAG column, select the new value.
-
Click Save on the toolbar to preserve your changes.
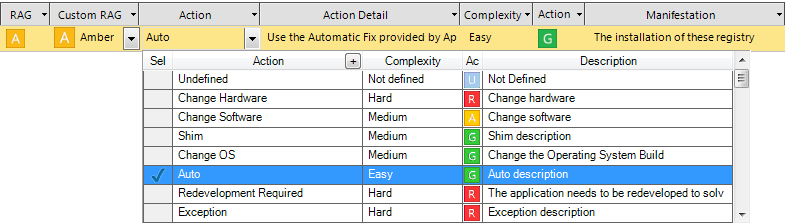
Change remediation actions
Just as sometimes you may want to customize the RAGs, you may sometimes also want to customize an algorithm’s remediation actions – for example, to require additional testing.
-
From the AppDNA menus, choose Configure > Modules > Module > Report, where Module and Report identify the report that contains the algorithm whose action you want to change.
-
In the Algorithm Groups screen, click List View on the toolbar.
-
Locate the algorithm whose remediation actions you want to customize.
-
From the drop-down list in the Action column, select the action you require.
-
Depending on the action, you may need to customize the action detail. To do this, from the drop-down list in the Action Detail column, select the action detail you require.
-
Click Save on the toolbar to preserve your changes.
Notice that changing the remediation action sometimes automatically changes the action RAG (also known as the remediation RAG). The action RAG provides an indication of the application’s RAG status after the remediation action has been implemented.
View the algorithm version history
-
From the AppDNA menus, choose Configure > Modules > Module > Report, where Module and Report identify the report that contains the algorithm.
-
In the Algorithm Groups screen, click List View on the toolbar.
-
Locate the algorithm whose version history you want to view.
-
Click the icon in the Log column.
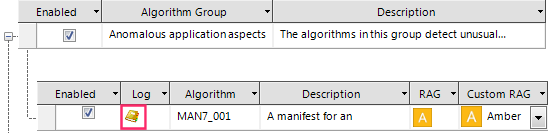
The Algorithm Version History displays the algorithm’s version history, including whether it was installed by the latest upgrade to AppDNA and whether it has been used in an analysis.