 View PDF


App-V sequencing
Aug 14, 2017
Automate and batch the creation of App-V packages from your portfolio of native installers, using AppDNA’s knowledge to increase the sequencing success rate.
Without the App-V solution, you can import applications and their App-V packages with Import > Applications, however additional software requirements and steps are required to complete the process. For more information, see Direct Import and Install Capture.
Using the App-V Solution wizard, you can automate App-V sequencing with success checking and remediation, and launch testing and deployment to App-V servers. This supports App-V adoption and upgrades in App-V environments.
Prerequisites
Before you start, check:
- App-V versions 5.0 and 5.0 SP1 are supported. App-V version 4.6 or earlier versions are not supported
- The App-V sequencing and client components are on the virtual machine where you want to carry out the sequencing.
- You have access to a network share which contains the prerequisite installers for carrying out an App-V capture on a machine. These include:
- appv_client_setup.exe
- appv_sequencer_setup.exe
- AppVPackageRemediationUtility.exe
- Citrix AppDNA VM Configuration. msi
- dotNetFx40_Full_x86_x64.exe
- Virtual machine configuration profiles are set up for App-V sequencing in Edit > Settings > Install Capture [optional]. Virtual machines can be added in the third step of the App-V Solution wizard.

Configure an App-V solution
To configure an App-V solution:
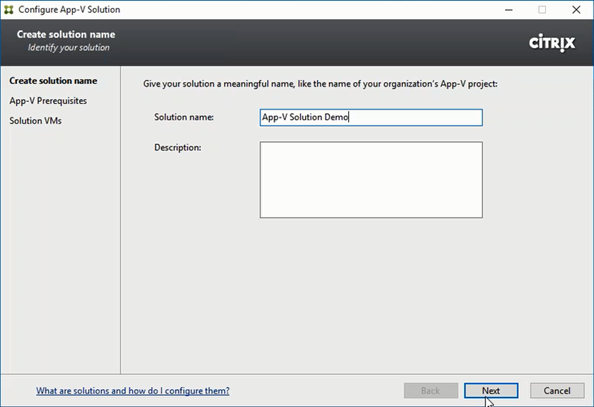
1. Select Solutions > Add solution > App-V.

2. Name the solution, and click Next.
3. Specify or browse to a network share where the App-V prerequisite installers are. For example, \\networkshare\AppDNA Output or \\[IP address]\AppDNA Share. Click Next.
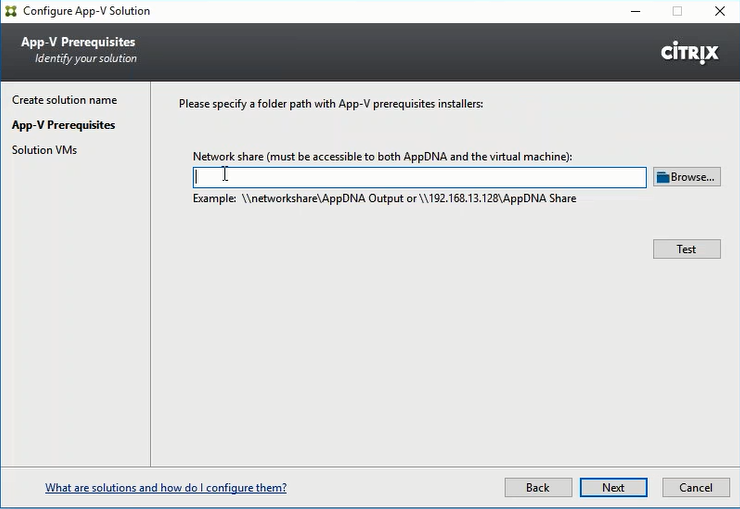
When the virtual machine starts, the prerequisites defined in this step will be installed if they are not already on the machine.
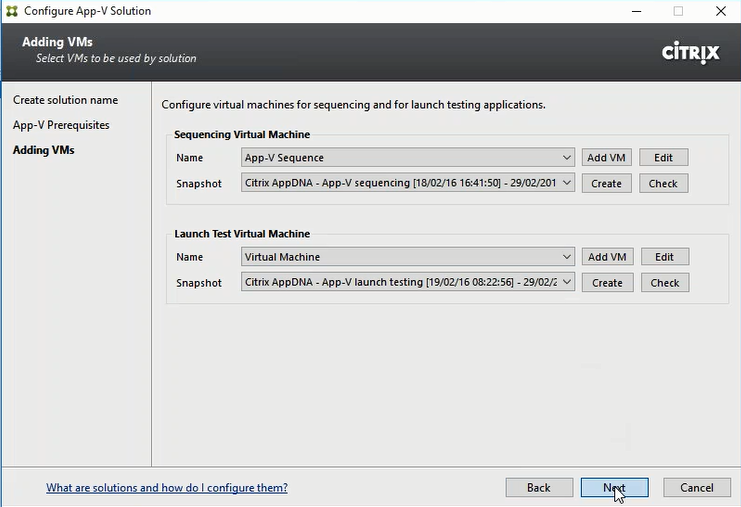
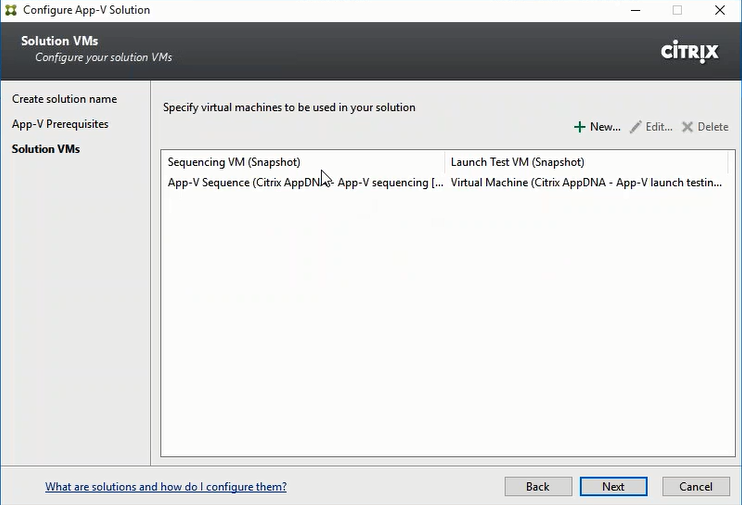
4. Select or add two different virtual machines, which will be used to carry out the App-V sequencing and App-V launch testing. The App-V client cannot be on the same machine as the App-V sequencer. Click Next.
5. Select No ** or Yes from the Check OS family and OS bitness dialog.
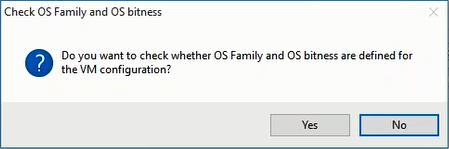
This can be useful for analysis later on. For example, if you set up multiple pairs of machines for App-V sequencing which contain two pairs of 64-bit machines and one pair of 32-bit machines, AppDNA will assess if your package has any 64-bit components on it, and use the 64-bit pairs of machines to carry out the sequencing and profiling on.
6. Review the virtual machines selected so far. Click New to add another pair of virtual machines. Select Edit or Delete to change the virtual machines you have specified. Click Next.
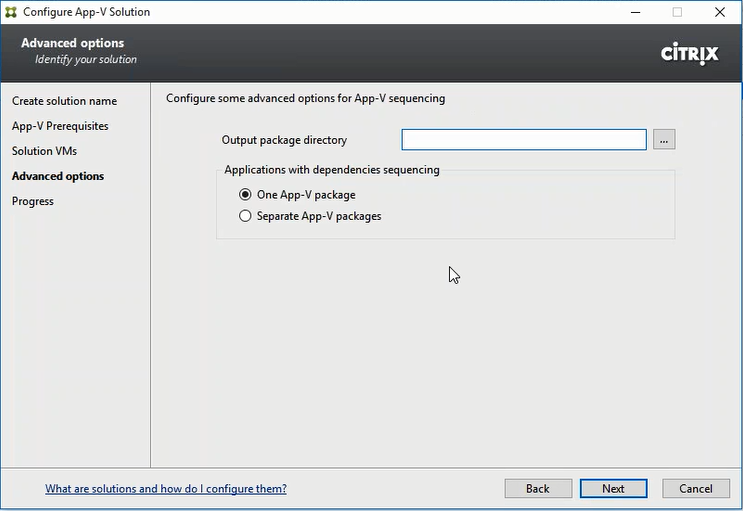
7. Select the output directory for the package. This is where the results of the sequencing will be saved. Click Next.
8. A progress screen displays while the solution is prepared. When it has finished, click Close.
Once you have completed the configuration steps, the App-V solution dashboard is displayed.
Process applications with the App-V solution
At the end of the App-V solution configuration steps, the App-V solution dashboard displays a series of “swim lanes” corresponding to the App-V sequencing process steps.
To add applications to the process:
1. Select the Add imported app icon.
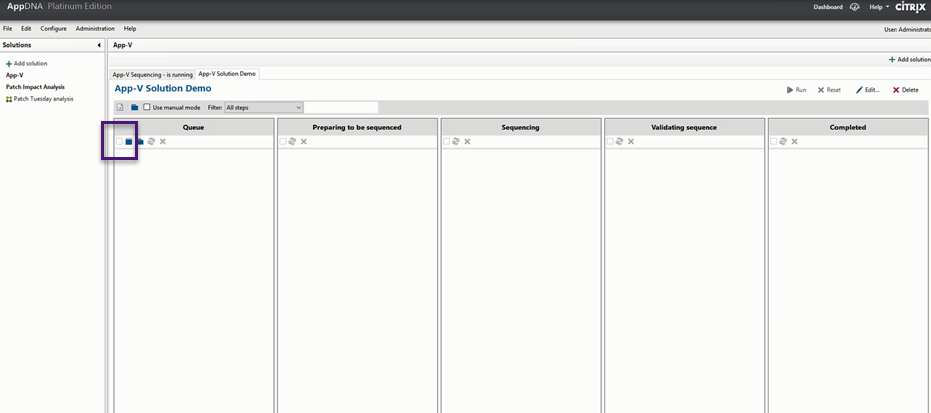
2. Select applications from the list. This adds the applications to the Queue swim lane.
3. Select Run.
![]()
At any time, select the info icon next to the application to view the workflow details.
Applications which progress through sequencing and launch testing without errors to the Completed swim lane, can form an App-V package which you can have confidence in, as it has already passed a launch test in your target OS.