Support for smart cards
You can use a smart card connected to the client device for authentication when logging on to a Linux virtual desktop session. This feature is implemented through smart card redirection over the ICA® smart card virtual channel. You can also use the smart card within the session. Use cases include adding a digital signature to a document, encrypting or decrypting an email, or authenticating to a website that requires smart card authentication.
The Linux VDA uses the same configuration as the Windows VDA for this feature. For more information, see the Configure the smart card environment section in this article.
The availability of pass-through authentication by using smart cards is contingent on the following conditions:
- The Linux VDA is installed on RHEL 7.7.
- Smart cards supported by CoolKey are used.
- Citrix Workspace™ app for Windows is used.
Note:
Using a mapped smart card within a Linux VDA session to sign on to Citrix Gateway is not officially supported.
Install the Linux VDA software on RHEL 7.7
Install the Linux VDA software using the RPM package manager or easy install, see the Installation overview section.
After the VDA installation is complete, verify that the VDA can register to the Delivery Controller™ and the published Linux desktop sessions can be launched successfully using password authentication.
Ensure that CoolKey supports your smart card
CoolKey is a widely used smart card driver on RHEL. CoolKey supports four types of smart cards, which are CoolKey cards, CAC, PIV, and PKCS#15. But the number of cards that are formally supported and validated is still limited (see Smart Card Support in Red Hat Enterprise Linux).
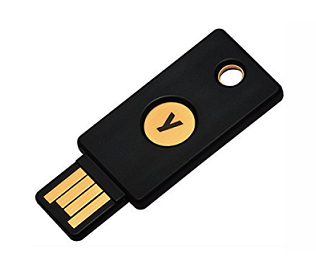
In this article, the YubiKey 4 smart card is used as an example to illustrate the configuration. YubiKey 4 is an all-in-one USB CCID PIV device that can easily be purchased from Amazon or other retail vendors. The CoolKey driver supports YubiKey 4.
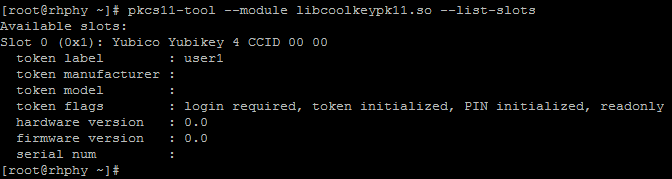
If your organization requires some other more advanced smart card, prepare a physical machine with RHEL 7.7 and the CoolKey package installed. For information about the CoolKey installation, see Install the smart card driver. Insert your smart card, and run the following command to verify that CoolKey supports your smart card:
pkcs11-tool --module libcoolkeypk11.so --list-slots
<!--NeedCopy-->
If CoolKey supports your smart card, the command output is similar to the following where slot information is contained.
 s
s
Configuration
Prepare a root certificate
A root certificate is used to verify the certificate on the smart card. Do the following to download and install a root certificate.
-
Obtain a root certificate in PEM format, typically from your CA server.
You can run a command similar to the following to convert a DER file (*.crt, *.cer, *.der) to PEM. In the following command example, certnew.cer is a DER file.
openssl x509 -inform der -in certnew.cer -out certnew.pem <!--NeedCopy--> -
Install the root certificate to the
openssldirectory. The certnew.pem file is used as an example.cp certnew.pem <path where you install the root certificate> <!--NeedCopy-->To create a path for installing the root certificate, run
sudo mdkir -p <path where you install the root certificate>.
Configure the NSS database
The Linux VDA logon module relies on the NSS database to access smart cards and certificates. Do the following to configure the NSS database.
-
Add the previously mentioned root certificate to the NSS database.
certutil -A -n "My Corp Root" -t "CT,C,C" -a -d /etc/pki/nssdb -i /etc/pki/CA/certs/certnew.pem <!--NeedCopy--> -
Run the following command to verify that the root certificate is added to the NSS database successfully.
certutil -L -d /etc/pki/nssdb
<!--NeedCopy-->
The command output is similar to the following if the root certificate is added successfully.

-
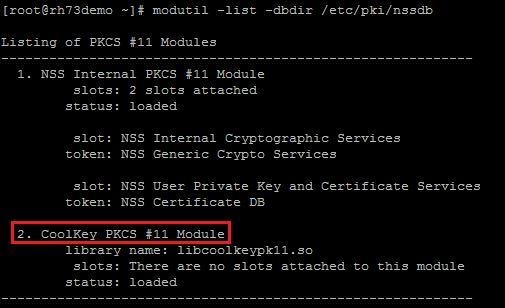
Check whether CoolKey is installed in the NSS PKCS#11 library.
modutil -list -dbdir /etc/pki/nssdb
<!--NeedCopy-->
The command output is similar to the following if the CoolKey module is installed.
If the CoolKey module is not installed, run the following command to install the module manually, and then check the installation again.
modutil -add "CoolKey PKCS #11 Module" -libfile libcoolkeypk11.so -dbdir /etc/pki/nssdb <!--NeedCopy--> -
Configure the pam_pkcs11 module.
The pam_pkcs11 module relies on the local VDA configuration to verify user certificates. The default root certificate used by pam_pkcs11 is located at /etc/pam_pkcs11/cacerts/. Each root certificate in this path has a hash link. Run the following commands to install the prepared root certificate and to configure pam_pkcs11.
yum install pam_pkcs11

mkdir /etc/pam_pkcs11/cacerts/

cp certnew.pem /etc/pam_pkcs11/cacerts/

cacertdir_rehash /etc/pam_pkcs11/cacerts
<!--NeedCopy-->
Configure the smart card environment
You can use the ctxsmartlogon.sh script to configure the smart card environment or do the configuration manually.
-
Use the ctxsmartlogon.sh script to configure the smart card environment
Note:
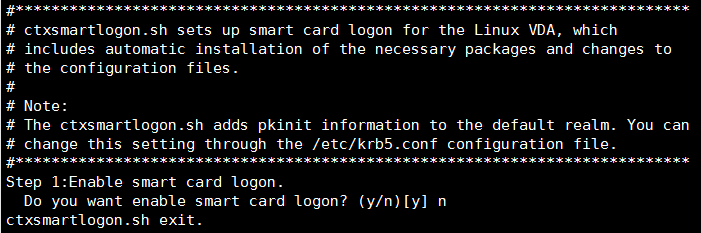
The ctxsmartlogon.sh script adds PKINIT information to the default realm. You can change this setting through the /etc/krb5.conf configuration file.
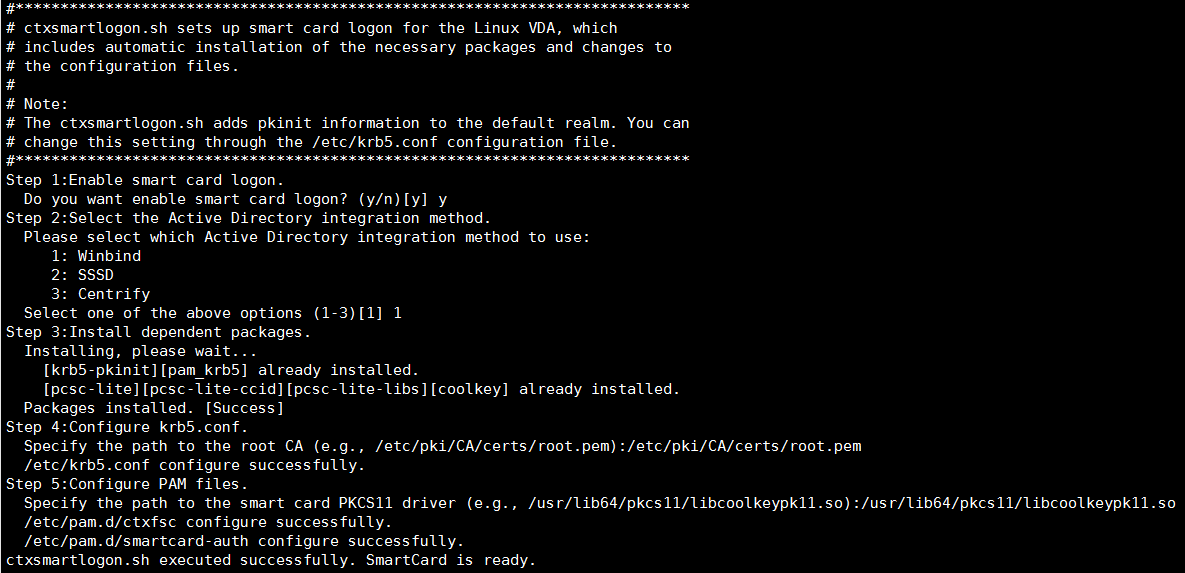
Before using smart cards for the first time, run the ctxsmartlogon.sh script to configure the smart card environment.
Tip:
If you have used SSSD for domain joining, restart the SSSD service after you run ctxsmartlogon.sh.
 sudo /opt/Citrix/VDA/sbin/ctxsmartlogon.sh
 <!--NeedCopy-->
The results resemble the following:
You can also disable smart cards by running the ctxsmartlogon.sh script:
 sudo /opt/Citrix/VDA/sbin/ctxsmartlogon.sh
 <!--NeedCopy-->
The results resemble the following:
-
Manually configure the smart card environment
The Linux VDA uses the same smart card environment with the Windows VDA. In the environment, multiple components must be configured, including the Domain Controller, Microsoft Certificate Authority (CA), Internet Information Services, Citrix StoreFront, and Citrix Workspace app. For information about the configuration based on the YubiKey 4 smart card, see Knowledge Center article CTX206156.
Before proceeding to the next step, ensure that all components are correctly configured, the private key and user certificate are downloaded to the smart card, and you can successfully log on to the Windows VDA using the smart card.
Install the PC/SC Lite packages
PCSC Lite is an implementation of the Personal Computer/Smart Card (PC/SC) specification in Linux. It provides a Windows smart card interface for communicating to smart cards and readers. Smart card redirection in the Linux VDA is implemented on the PC/SC level.
Run the following command to install the PC/SC Lite packages.
yum install pcsc-lite pcsc-lite-ccid pcsc-lite-libs
<!--NeedCopy-->
Install the smart card driver
CoolKey is a widely used smart card driver on RHEL. If CoolKey is not installed, run the following command to install it.
yum install coolkey
<!--NeedCopy-->
Install the PAM modules for smart card authentication
Run the following command to install the pam_krb5 and krb5-pkinit modules.
yum install pam_krb5 krb5-pkinit
<!--NeedCopy-->
The pam_krb5 module is a pluggable authentication module that PAM-aware applications can use to check passwords and obtain ticket-granting tickets from the Key Distribution Center (KDC). The krb5-pkinit module contains the PKINIT plug-in that allows clients to obtain initial credentials from the KDC using a private key and a certificate.
Configure the pam_krb5 module
The pam_krb5 module interacts with the KDC to get Kerberos tickets using certificates in the smart card. To enable pam_krb5 authentication in PAM, run the following command:
authconfig --enablekrb5 --update
<!--NeedCopy-->
In the /etc/krb5.conf configuration file, add PKINIT information according to the actual realm.
Note:
The pkinit_cert_match option specifies matching rules that the client certificate must match before it is used to attempt PKINIT authentication. The syntax of the matching rules is:
[relation-operator] component-rule …where
relation-operatorcan be either&&, meaning all component rules must match, or ||, meaning only one component rule must match.
Here is an example of a generic krb5.conf file:
EXAMPLE.COM = {

    kdc = KDC. EXAMPLE.COM

    auth_to_local = RULE:[1:$1@$0]

    pkinit_anchors = FILE:<path where you install the root certificate>/certnew.pem

    pkinit_kdc_hostname = KDC.EXAMPLE.COM

    pkinit_cert_match = ||<EKU>msScLogin,<KU>digitalSignature

    pkinit_eku_checking = kpServerAuth

 }
<!--NeedCopy-->
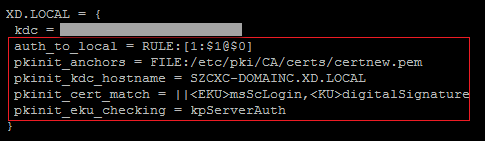
The configuration file resembles the following after you add the PKINIT information.
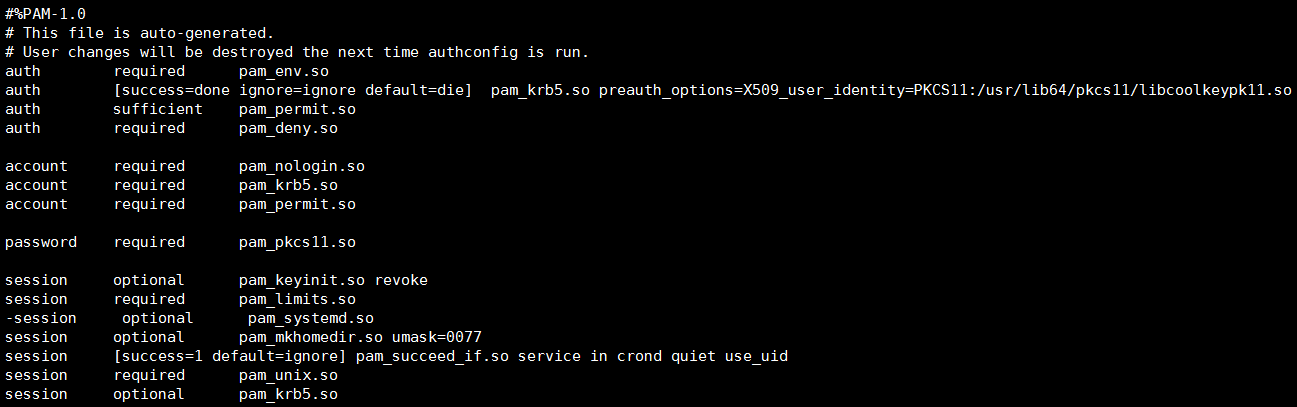
Configure PAM authentication
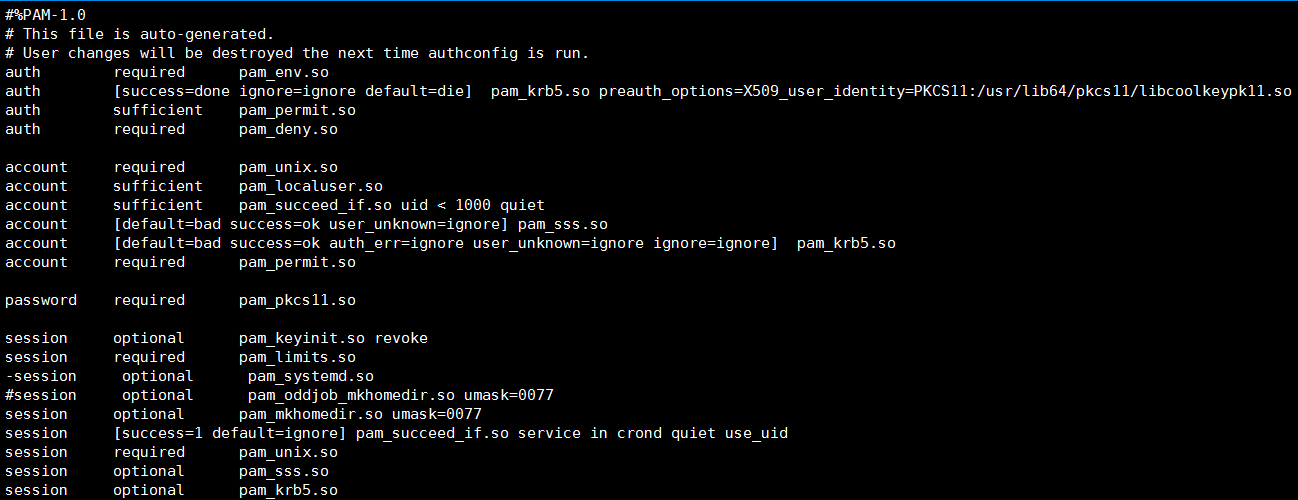
PAM configuration files tell what modules are used for PAM authentication. To add pam_krb5 as an authentication module, add the following line to the /etc/pam.d/smartcard-auth file:
auth [success=done ignore=ignore default=die] pam_krb5.so preauth_options=X509_user_identity=PKCS11:/usr/lib64/pkcs11/libcoolkeypk11.so
The configuration file resembles the following after modification if SSSD is used.
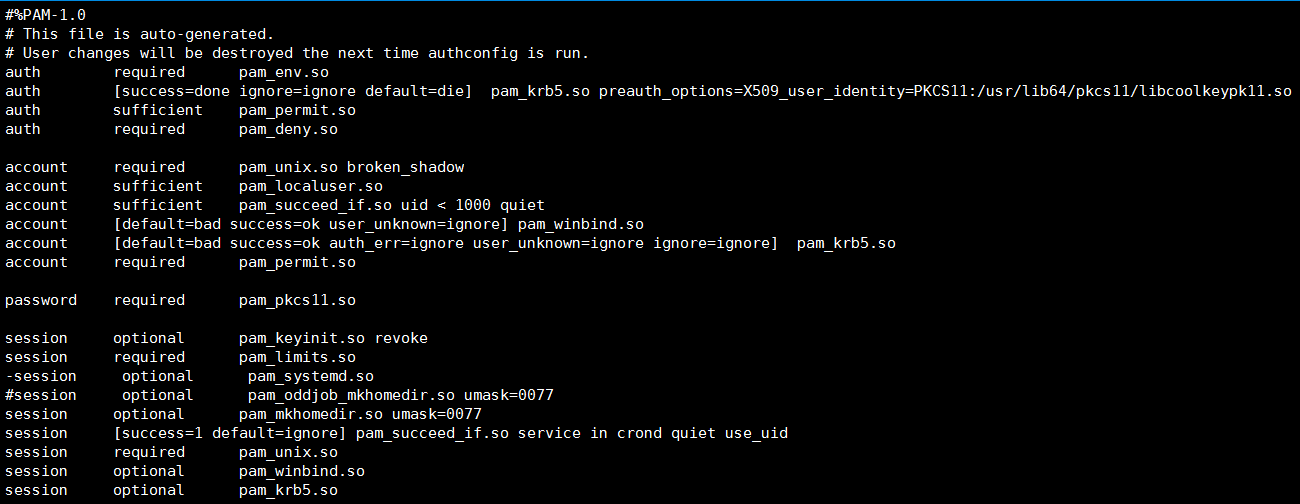
The configuration file resembles the following after modification if Winbind is used.
The configuration file resembles the following after modification if Centrify is used.
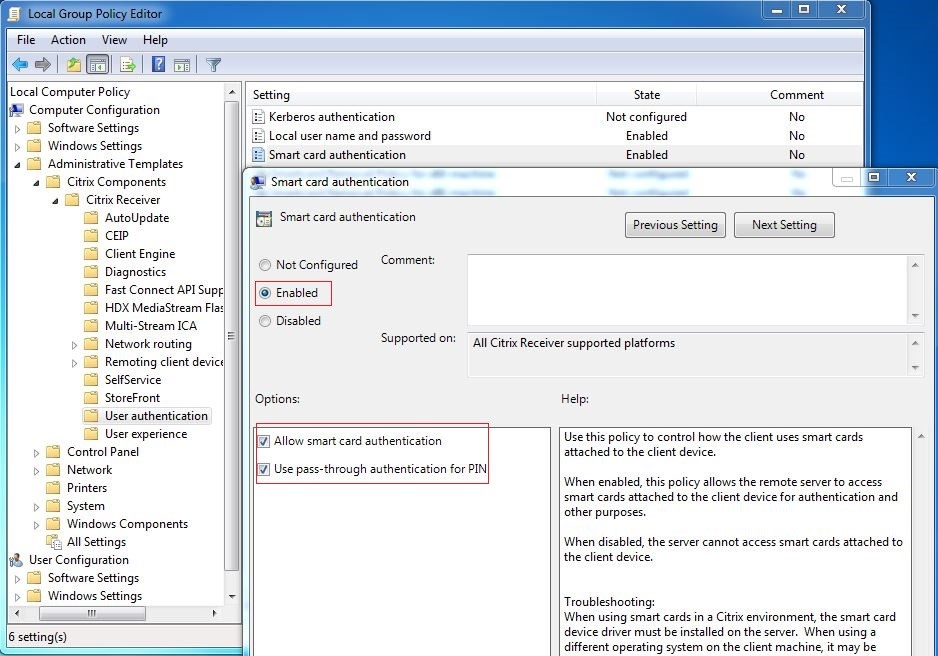
(Optional) Single sign-on by using smart cards
Single sign-on (SSO) is a Citrix feature that implements pass-through authentication with virtual desktop and application launches. This feature reduces the number of times that users type their PIN. To use SSO with the Linux VDA, configure Citrix Workspace app. The configuration is the same with the Windows VDA. For more information, see Knowledge Center article CTX133982.
Enable the smart card authentication as follows when configuring the group policy in Citrix Workspace app.
Fast smart card logon
Fast smart card is an improvement over the existing HDX PC/SC-based smart card redirection. It improves performance when smart cards are used in high-latency WAN environments. For more information, see Smart cards.
The Linux VDA supports fast smart card on the following versions of Citrix Workspace app:
- Citrix Receiver for Windows 4.12
- Citrix Workspace app 1808 for Windows and later
Enable fast smart card logon on the client
Fast smart card logon is enabled by default on the VDA and disabled by default on the client. On the client, to enable fast smart card logon, include the following parameter in the default.ica file of the associated StoreFront site:
[WFClient]
SmartCardCryptographicRedirection=On
<!--NeedCopy-->
Disable fast smart card logon on the client
To disable fast smart card logon on the client, remove the SmartCardCryptographicRedirection parameter from the default.ica file of the associated StoreFront site.
Usage
Log on to the Linux VDA by using a smart card
You can use a smart card to log on to the Linux VDA in both SSO and non-SSO scenarios.
- In the SSO scenario, you are automatically logged on to StoreFront™ by using the cached smart card certificate and PIN. When you launch a Linux virtual desktop session in StoreFront, the PIN is passed to the Linux VDA for smart card authentication.
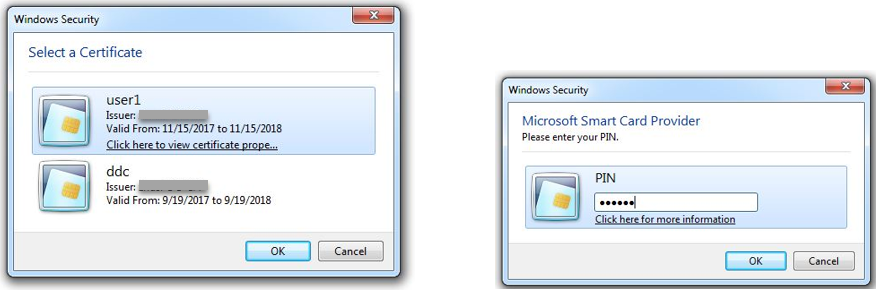
-
In the non-SSO scenario, you are prompted to select a certificate and type a PIN to log on to StoreFront.
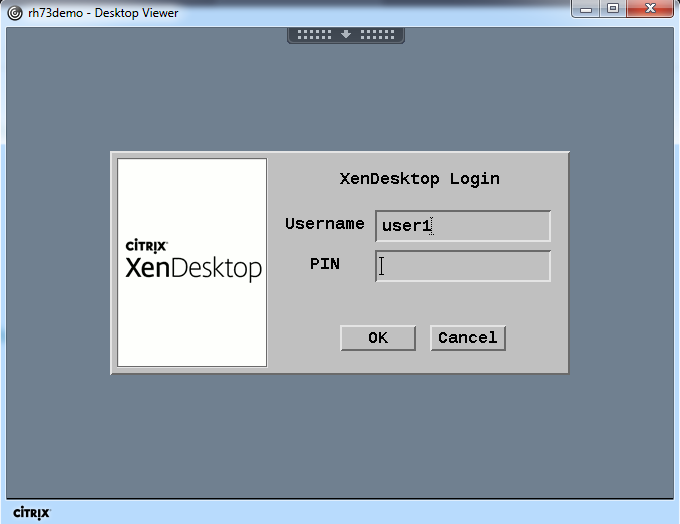
When you launch a Linux virtual desktop session in StoreFront, a dialog box for logon to the Linux VDA appears as follows. The user name is extracted from the certificate in the smart card and you must type the PIN again for logon authentication.
This behavior is the same with the Windows VDA.
Reconnect to a session by using a smart card
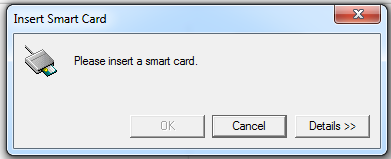
To reconnect to a session, ensure that the smart card is connected to the client device. Otherwise, a gray caching window appears on the Linux VDA side and exits quickly because reauthentication fails without the smart card connected. No other prompt is provided in this case to remind you to connect the smart card.
On the StoreFront side, however, if a smart card is not connected when you try to reconnect to a session, the StoreFront web might give an alert as follows.
Limitation
Smart card removal policy
The Linux VDA uses only the default behavior for smart card removal. When you remove the smart card after logging on to the Linux VDA successfully, the session still keeps connected and the session screen is not locked.
Support for other smartcards and the PKCS#11 library
Although only the CoolKey smart card is listed on our support list, you can try using other smart cards and the PKCS#11 library because Citrix is providing a generic smart card redirection solution. To switch to your specific smart card or the PKCS#11 library:
-
Replace all the
libcoolkeypk11.soinstances with your PKCS#11 library. -
To set the path of your PKCS#11 library to the registry, run the following command:
/opt/Citrix/VDA/bin/ctxreg update -k "HKLM\System\CurrentControlSet\Control\Citrix\VirtualChannels\Scard" -v "PKCS11LibPath" -d "PATH"
<!--NeedCopy-->
where PATH points to your PKCS#11 library such as /usr/lib64/pkcs11/libcoolkeypk11.so
-
Disable fast smart card logon on the client.