Manage and monitor the SDX appliance
After your NetScaler SDX appliance is up and running, you can perform various tasks to manage and monitor the appliance from the Management Service user interface.
Modify the network configuration of the SDX appliance
You can modify the network configuration details that you provided for the SDX appliance during initial configuration.
To modify the network configuration of the SDX appliance, click System. In the System pane, under the Setup Appliance group, click Network Configuration and enter the details in the wizard.
Note:
On Network Configuration, when you enable access to the Citrix Hypervisor, a warning message “Access will be disabled automatically after six hours” is displayed.
Change the password of the default user account
The default user account provides complete access to all features of the NetScaler SDX appliance. To preserve security, use the default admin account only when necessary. Only individuals whose duties require full access must know the password for the default admin account. Citrix recommends changing the default admin password frequently. If you lose the password, you can reset the password to the default by reverting the appliance settings to factory defaults, and you can then change the password.
To change the password of the default user account, click System > User Administration > Users. Select a user and click Edit to change the password.
Modify the time zone on the appliance
You can modify the time zone of the Management Service and the Citrix Hypervisor. The default time zone is UTC.
To modify the time zone, click System and in the System Settings group, click Change Time Zone.
Modify the host name of the appliance
You can change the host name of the Management Service by navigating to System > System Settings > Change Hostname. The Citrix Hypervisor host name will be backed up and restored during the backup/restore operation. During configuration reset, the Citrix Hypervisor host name will be reset to the default value “netscaler-sdx”.
VLAN filtering
VLAN filtering provides segregation of data between VPX instances that share a physical port. For example, if you have configured two VPX instances on two different VLANs and you enable VLAN filtering, one instance cannot view the other instance’s traffic. If VLAN filtering is disabled, all the instances can see the tagged or untagged broadcast packets, but the packets are dropped at the software level. If VLAN filtering is enabled, each tagged broadcast packet reaches only the instance that belongs to the corresponding tagged VLAN. If none of the instances belong to the corresponding tagged VLAN, the packet is dropped at the hardware level (NIC).
If VLAN filtering is enabled on an interface, a limited number of tagged VLANs can be used on that interface. 63 tagged VLANs on a 10G interface and 32 tagged VLANs on a 1G interface. A VPX instance receives only the packets that have the configured VLAN IDs. Restart the VPX instances associated with an interface if you change the state of the VLAN filter from DISABLED to ENABLED on that interface.
VLAN filtering is enabled by default on the SDX appliance. If you disable VLAN filtering on an interface, you can configure up to 4096 VLANs on that interface.
Note: VLAN filtering can be disabled only on an SDX appliance running Citrix Hypervisor version 6.0.
To enable VLAN filtering on an interface, click System > Interfaces. Select an interface and click VLAN Filter and enter the details to enable VLAN filtering.
Configure clock synchronization
When you enable Network Time Protocol (NTP) sync, the Management Service is restarted. You can configure your SDX appliance to synchronize its local clock with an NTP server. As a result, the clock on the SDX appliance has the same date and time settings as the other servers on your network. The clock synchronization configuration does not change if the appliance is restarted, upgraded, or downgraded. However, the configuration does not get propagated to the secondary NetScaler instance in a high availability setup.
The clock is synchronized immediately if you add an NTP server or change any of the authentication parameters. You can also explicitly enable and disable NTP synchronization.
Note: If you do not have a local NTP server, you can find a list of public, open access, NTP servers at the official NTP site, http://www.ntp.org. Before configuring your NetScaler to use a public NTP server, be sure to read the Rules of Engagement page (link included on all Public Time Servers pages).
To configure an NTP server, click System > NTP Servers.
To enable NTP synchronization
- In the navigation pane, expand System, and then click NTP Servers.
- In the details pane, click NTP Synchronization.
- In the NTP Synchronization dialog box, select Enable NTP Sync.
- Click OK, and then click Close.
To modify authentication options
- In the navigation pane, expand System, and then click NTP Servers.
- In the details pane, click Authentication Parameters.
- In the Modify Authentication Options dialog box, set the following parameters:
- Authentication—Enable NTP authentication. Possible values: YES, NO. Default: YES.
- Trusted Key IDs—The trusted key IDs. While adding an NTP server, you select a key identifier from this list. Minimum value: 1. Maximum value: 65534.
- Revoke Interval—The interval between rerandomization of certain cryptographic values used by the Autokey scheme, as a power of 2, in seconds. Default value: 17 (2^17=36 hours).
- Automax Interval—The interval between regeneration of the session key list used with the Autokey protocol, as a power of 2, in seconds. Default value: 12 (2^12=1.1 hours).
- Click OK, and then click Close.
View the properties of the SDX appliance
View system properties such as the number of CPU cores and SSL chips, total available memory and free memory, and various product details on the Configuration tab.
To view the properties of the SDX appliance, click the Configuration tab.
You can view the following information about system resources, Hypervisor, License, and System:
System Resources:
-
Total CPU Cores; The number of CPU cores on the SDX appliance.
-
Total SSL Chips: The total number of SSL chips on the SDX appliance.
-
Free SSL chips: The total number of SSL chips that have not been assigned to an instance.
-
Total Memory (GB): Total appliance memory in GB.
-
Free Memory (GB): Free appliance memory in GB.
Hypervisor Information:
-
Uptime: Time since the appliance was last restarted, in number of days, hours, and minutes.
-
Edition: The edition of the Citrix Hypervisor that is installed on the SDX appliance.
-
Version: The version of the Citrix Hypervisor that is installed on the SDX appliance.
-
iSCSI IQN: The iSCSI Qualified Name.
-
Product Code: Product code of Citrix Hypervisor.
-
Serial Number: Serial number of Citrix Hypervisor.
-
Build Date: Build date of Citrix Hypervisor.
-
Build Number: Build number of Citrix Hypervisor.
-
Supplemental Pack: Version of the supplemental pack installed on the SDX appliance.
License Information:
-
Platform: Model number of the hardware platform, based on the installed license.
-
Maximum Instances: The maximum number of instances that you can set up on the SDX appliance, based on the installed license.
-
Available Instances (Shared): The number of instances that can be configured depending on the number of CPU cores that are still available.
-
Maximum Throughput (Mbps): The maximum throughput that can be achieved on the appliance, based on the installed license.
-
Available Throughput (Mbps): The available throughput based on the installed license.
System Information:
-
Platform: Model number of the hardware platform.
-
Product: Type of NetScaler product.
-
Build: NetScaler release and build running on the SDX appliance.
-
IP Address: IP address of the Management Service.
-
Host ID: Citrix Hypervisor host ID.
-
System ID: Citrix Hypervisor system ID.
-
Serial Number:Citrix Hypervisor serial number.
-
System Time: System time displayed in Day Month Date Hours:Min:Sec Timezone Year format.
-
Uptime: Time since the Management Service was last restarted, in the number of days, hours, and minutes.
-
BIOS version: BIOS version.
View real-time appliance throughput
The total throughput of the SDX appliance for incoming and outgoing traffic is plotted in real time in a graph that is updated at regular intervals. By default, throughputs for both incoming and outgoing traffic are plotted together on the graph.
To view the throughput of the SDX appliance, on the GUI click Dashboard and check System Throughput (Mbps).
View real-time CPU and memory usage
You can view a graph of CPU and memory usage of the appliance. The graph is plotted in real time and updated at regular intervals.
To view the CPU and memory usage of the SDX appliance, on the GUI click Dashboard and check Management Service Statistics.
View CPU usage for all cores
You can view the usage of each CPU core on the SDX appliance.
The CPU Core Usage pane displays the following details:
-
Core Number: The CPU core number on the appliance.
-
Physical CPU: The physical CPU number of that core.
-
Hyper Threads: The hyper threads associated with that CPU core.
-
Instances: The instances that are using that CPU core.
-
Average Core Usage: The average core usage, expressed as a percentage.
To view the CPU usage for all the cores on the SDX appliance, on the GUI click Dashboard and check System CPU Usage (%).
Install an SSL certificate on the SDX appliance
The SDX appliance is shipped with a default SSL certificate. For security reasons, you might want to replace this certificate with your own SSL certificate. To do so, you must first upload your SSL certificate to the Management Service and then install the certificate. Installing an SSL certificate terminates all current client sessions with the Management Service. Log on to the Management Service for any additional configuration tasks.
To install an SSL certificate, click System. In the Set Up Appliance group, click Install SSL Certificate and enter the details in the wizard.
View the SSL certificate on the Management Service
The Management Service uses an SSL certificate for secure client connections. View the details of this certificate, such as validity status, issuer, subject, days to expire, valid from and to dates, version, and serial number.
To view the SSL certificate, click System and in the Set Up Appliance group, click View SSL Certificate.
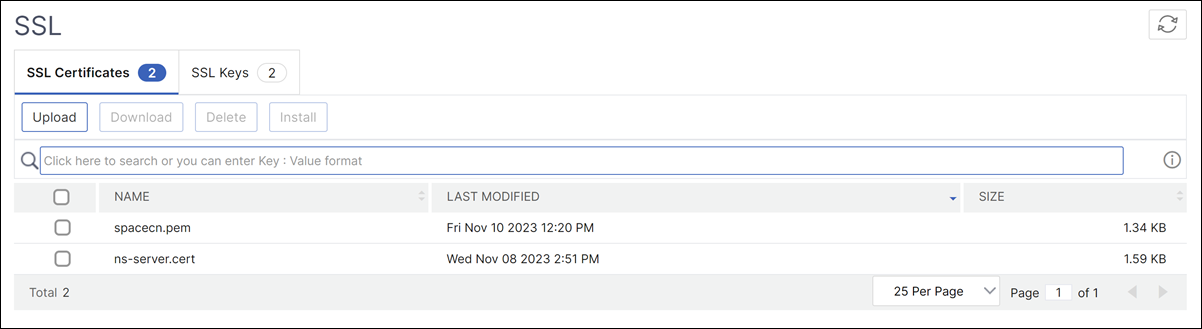
SSL certificates and keys for NetScaler instances
Separate views of SSL certificates and keys for NetScaler instances provide enhanced usability. Use a new Management Service node, SSL Certificate Files, to upload and manage the SSL certificates and corresponding public and private key pairs that can be installed on NetScaler instances.
To access the SSL certificates and keys for NetScaler instances, navigate to Configuration > NetScaler > SSL Certificate Files.
Modify system settings
For security reasons, you can specify that the Management Service and a VPX instance must communicate with each other only over a secure channel. You can also restrict access to the Management Service user interface. Clients can log on the Management Service user interface only by using https.
To modify system settings, click Configuration > System and in the System Settings group, click Change System Settings.
Restart the appliance
The Management Service provides an option to restart the SDX appliance. During the restart, the appliance shuts down all hosted instances, and then restarts the Citrix Hypervisor. When the Citrix Hypervisor restarts, it starts all hosted instances along with the Management Service.
To restart the appliance, click Configuration > System and in the System Administration group, click Reboot Appliance.
Shut down the appliance
You can shut down the SDX appliance from the Management Service.
To shut down the appliance, click Configuration > System, and in the System Administration group, click Shut Down Appliance.