Install, upgrade, and uninstall
This article contains the following sections:
Install Session Recording by using the Citrix Virtual Apps and Desktops installer
Installation checklist
You can install the Session Recording components by using the Citrix Virtual Apps and Desktops™ installer.
Before you start the installation, complete this list:
| ✔ | Step |
|---|---|
| Select the machines on which you want to install each Session Recording component. Ensure that each computer meets the hardware and software requirements for the component or components to be installed on it. | |
| Use your Citrix account credentials to access the Citrix Virtual Apps™ and Desktops download page and download the product ISO file. Unzip the ISO file or burn a DVD of it. | |
| To use the TLS protocol for communication between the Session Recording components, install the correct certificates in your environment. | |
| Install any hotfixes required for the Session Recording components. The hotfixes are available from the Citrix Support. | |
| Configure Director to create and activate the Session Recording policies. For more information, see Configure Director to use the Session Recording Server. |
Note:
- We recommend that you divide the published applications into separate Delivery Groups based on your recording policies. Session sharing for published applications can conflict with the active policy if the applications are in the same Delivery Group. Session Recording matches the active policy with the first published application that a user opens. Starting with the 7.18 release, you can use the dynamic session recording feature to start or stop recording sessions at any time during the sessions. This feature can help to mitigate the conflict issue with the active policy. For more information, see Dynamic session recording.
- If you are planning to use Machine Creation Services™ (MCS) or Provisioning Services, prepare a unique QMId. Failure to comply can cause recording data losses.
- SQL Server requires that TCP/IP is enabled, the SQL Server Browser service is running, and Windows Authentication is used.
- To use HTTPS, configure server certificates for TLS/HTTPS.
- Ensure that users under
Local Users and Groups > Groups > Usershave write permission to theC:\windows\Tempfolder.
Install Session Recording by using the Citrix Virtual Apps and Desktops installer
We recommend that you install the Session Recording Administration, Session Recording Agent, and Session Recording Player components on separate servers. The following procedures detail how to install these components:
Install the Session Recording Administration components
Install the Session Recording Agent
Install the Session Recording Player
Install the Session Recording Administration components
The Session Recording Administration components include the Session Recording Database, Session Recording Server, and Session Recording Policy Console. You can choose the component to install on a server.
Step 1: Download the product software and launch the wizard
- Use your Citrix account credentials to access the Citrix Virtual Apps and Desktops download page and download the product ISO file. Unzip the ISO file or burn a DVD of it.
- Use a local administrator account to log on to the machine where you are installing the Session Recording Administration components. Insert the DVD in the drive or mount the ISO file. If the installer does not launch automatically, double-click the AutoSelect application or the mounted drive.
The installation wizard launches.
Step 2: Choose which product to install

Click Start next to the product to install Citrix Virtual Apps or Citrix Virtual Desktops™.
Step 3: Select Session Recording
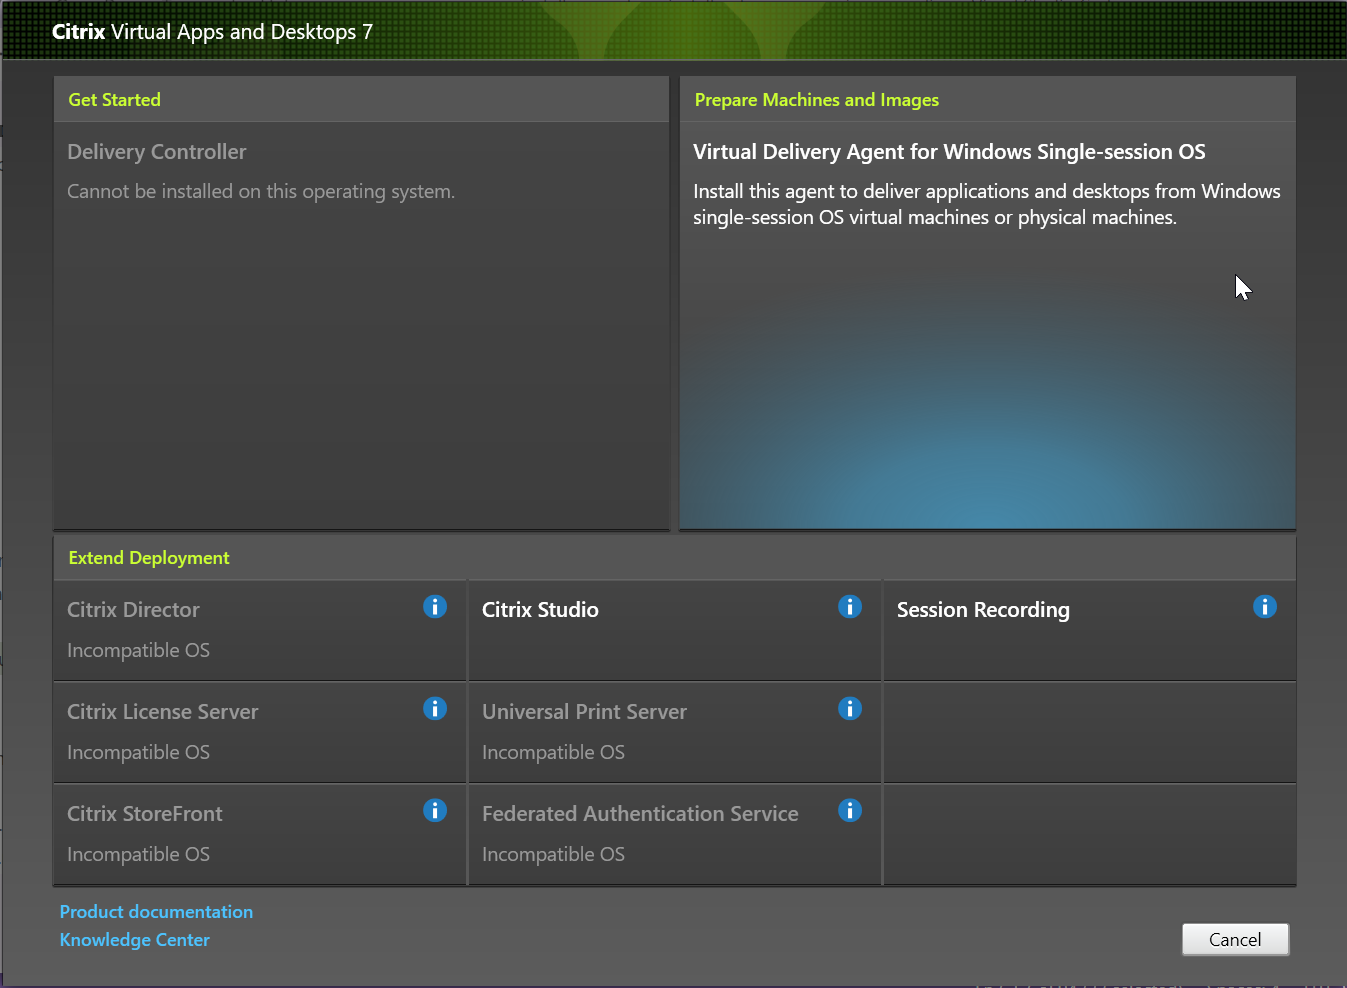
Select the Session Recording entry.
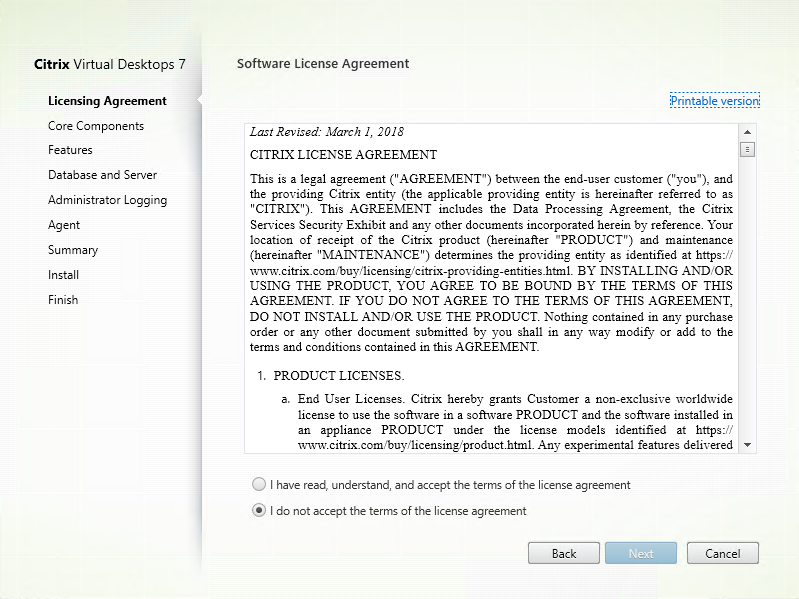
Step 4: Read and accept the license agreement
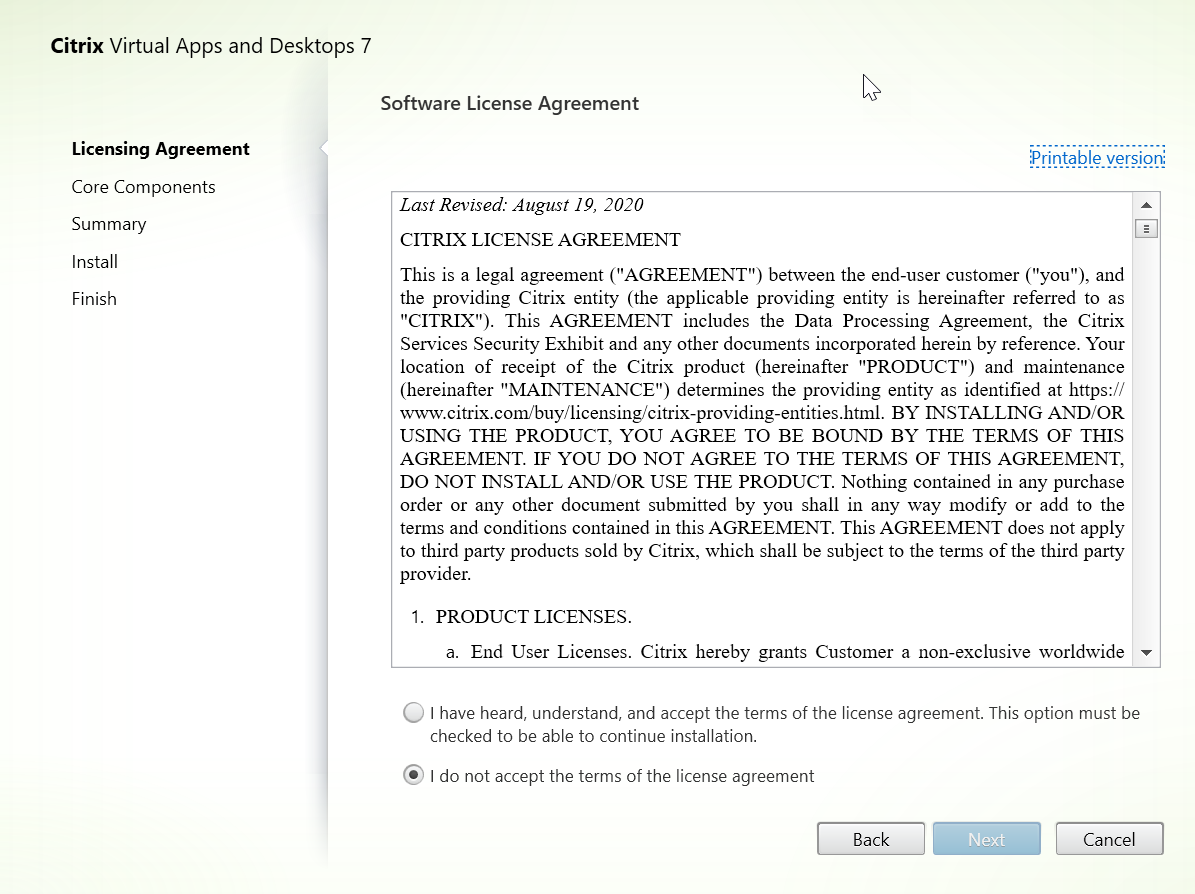
On the Software License Agreement page, read the license agreement, accept it, and then click Next.
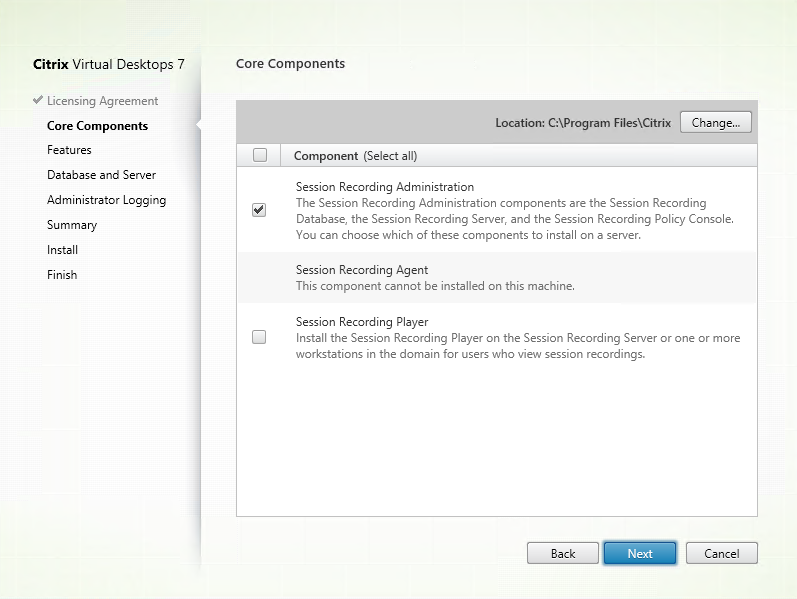
Step 5: Select the components to install and the installation location
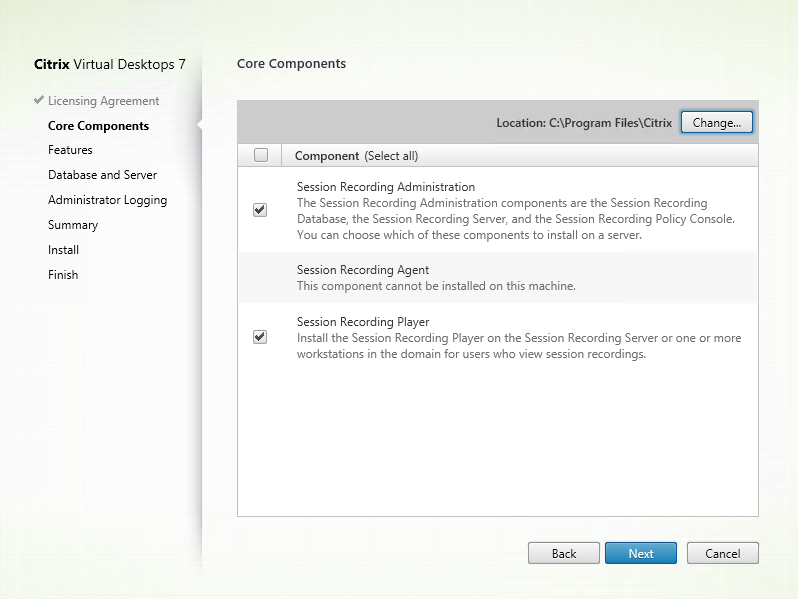
On the Core Components page:
- Location: By default, components are installed in C:\Program Files\Citrix. The default location works for most deployments. You can specify a custom installation location.
- Component: By default, all the check boxes next to the components that can be installed are selected. The installer knows whether it is running on a single-session OS or a multi-session OS. It allows the Session Recording Administration components to be installed on a multi-session OS only. It allows the Session Recording Agent to be installed only on a machine that has a VDA installed. If you install the Session Recording Agent on a machine that has no VDA installed in advance, the Session Recording Agent option is unavailable.
Select Session Recording Administration and click Next.
Step 6: Select the features to install
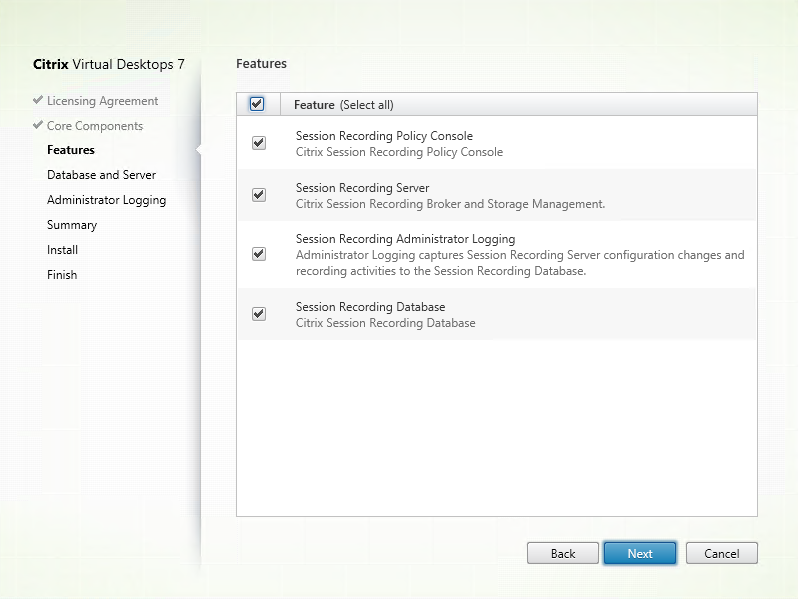
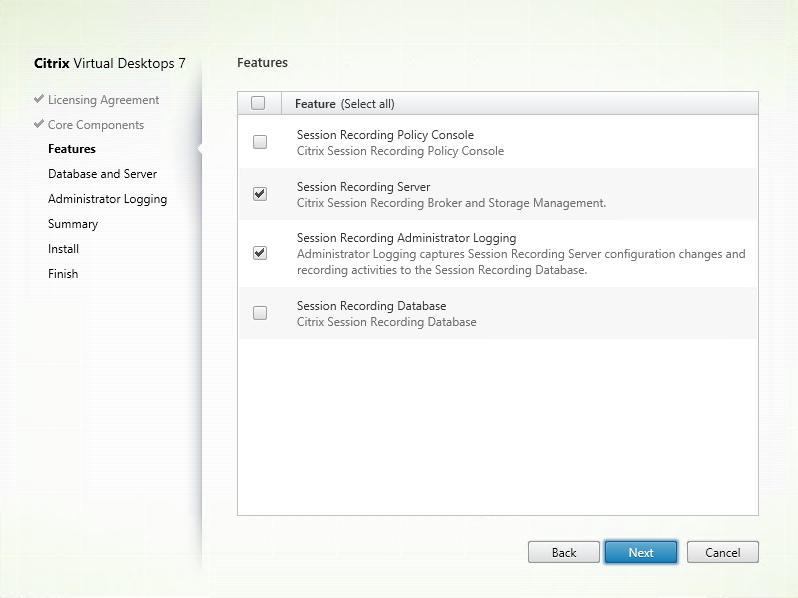
On the Features page:
- By default, all the check boxes next to the features that can be installed are selected. Installing all these features on a single server is fine for a proof of concept. However, for a large production environment, we recommend that you install the Session Recording Policy Console on a separate server and the Session Recording Server, Session Recording Administrator Logging, and Session Recording Database on another separate server. The Session Recording Administrator Logging is an optional subfeature of the Session Recording Server. Select the Session Recording Server before you can select the Session Recording Administrator Logging.
- To add another feature on the same server after you select and install a feature or features on it, you must run the msi package and you cannot run the installer again.
Select the feature or features that you want to install and click Next.
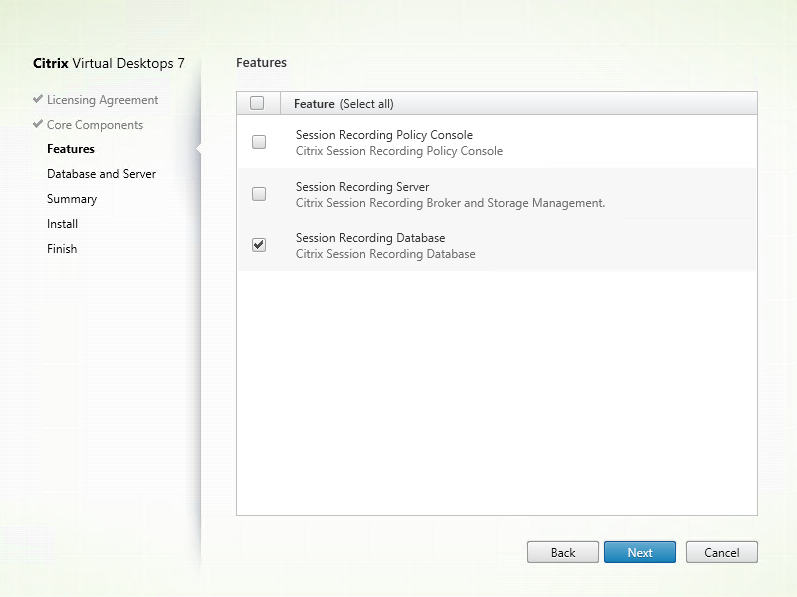
Step 6.1: Install the Session Recording Database
Note:
The Session Recording Database is not an actual database. It is a component responsible for creating and configuring the required databases in the Microsoft SQL Server instance during installation. Session Recording supports three solutions for database high availability based on Microsoft SQL Server. For more information, see Database high availability.
You can deploy the Session Recording Database on Azure SQL Managed Instance, on SQL Server on Azure Virtual Machines (VMs), and on AWS RDS. On Azure SQL Managed Instance and on AWS RDS, you can deploy the Session Recording Database only by using the SessionRecordingAdministrationx64.msi package. For more information, see Deploy the Session Recording Database on Azure SQL Managed Instance or on AWS RDS. On SQL Server on Azure VMs, you can deploy the Session Recording Database both by using the msi package and the Citrix Virtual Apps and Desktops installer. For more information, see Deploy the Session Recording Database on SQL Server on Azure VMs.
There are typically three types of deployments for the Session Recording Database and Microsoft SQL Server:
- Deployment 1: Install the Session Recording Server and Session Recording Database on the same machine and the Microsoft SQL Server on a remote machine. (Recommended)
- Deployment 2: Install the Session Recording Server, Session Recording Database, and Microsoft SQL Server on the same machine.
- Deployment 3: Install the Session Recording Server on a machine and install both the Session Recording Database and Microsoft SQL Server on another machine. (Not recommended)
1. On the Features page, select Session Recording Database and click Next.
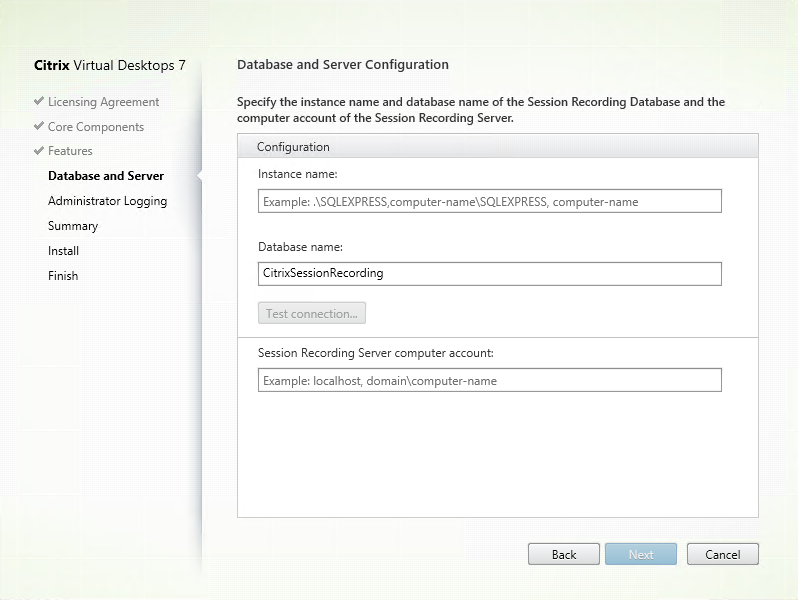
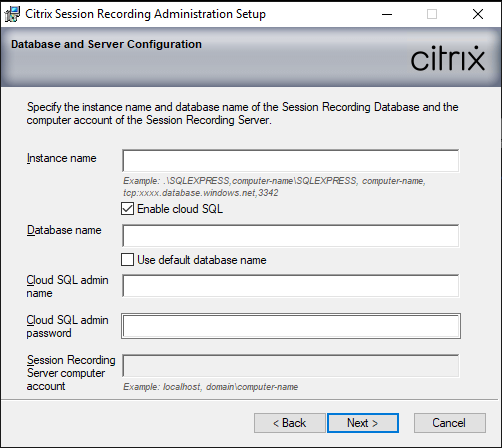
2. On the Database and Server Configuration page, specify the instance name and database name of the Session Recording Database and the computer account of the Session Recording Server. Click Next.
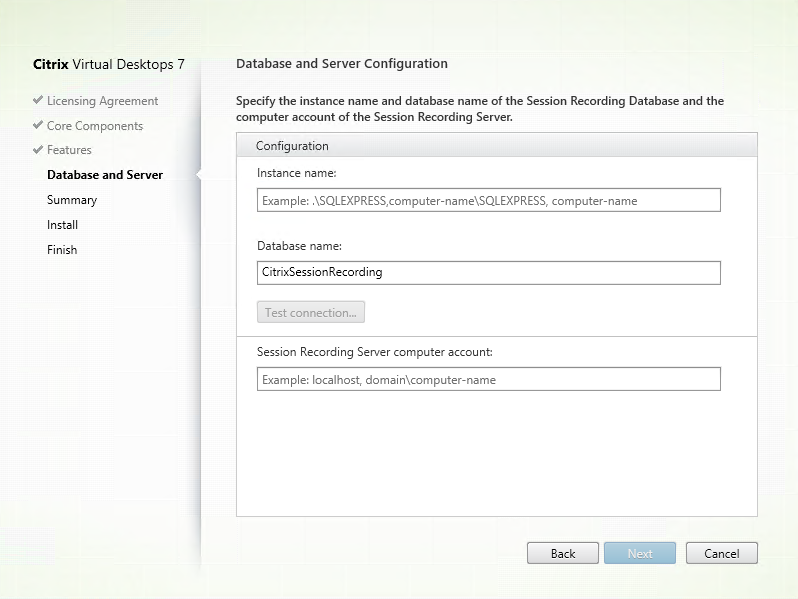
On the Database and Server Configuration page:
- Instance name: If the database instance is not a named instance as you configured when you set up the instance, you can use only the computer name of the SQL Server. If you have named the instance, use computer-name\instance-name as the database instance name. To determine the server instance name that you are using, run select @@servername on the SQL Server. The return value is the exact database instance name. If your SQL server is configured to be listening on a custom port (other than the default port 1433), set the custom listener port by appending a comma to the instance name. For example, type DXSBC-SRD-1,2433 in the Instance name text box, where 2433, following the comma, denotes the custom listener port.
-
Database name: Type a custom database name in the Database name text box or use the default database name preset in the text box. Click Test connection to test the connectivity to the SQL Server instance and the validity of the database name.
Important:
A custom database name must contain only A-Z, a-z, 0–9, and underscores, and cannot exceed 123 characters.
- You must have the securityadmin and dbcreator server role permissions of the database. If you do not have the permissions, you can:
- Ask the database administrator to assign the permissions for the installation. After the installation completes, the securityadmin and dbcreator server role permissions are no longer necessary and can be safely removed.
-
Or, use the SessionRecordingAdministrationx64.msi package under \layout\image-full\x64\Session Recording on the Citrix Virtual Apps and Desktops ISO. During the msi installation, a dialog box prompts for the credentials of a database administrator with the securityadmin and dbcreator server role permissions. Type the correct credentials and then click OK to continue the installation.
The installation creates the Session Recording Database and adds the machine account of the Session Recording Server as db_owner.
-
Session Recording Server computer account:
- Deployments 1 and 2: Type localhost in the Session Recording Server computer account text box.
- Deployment 3: Type the name of the machine hosting the Session Recording Server in the format of domain\computer-name. The Session Recording Server computer account is the user account for accessing the Session Recording Database.
Note:
Attempts to install the Session Recording Administration components can fail with error code 1603 when a domain name is set in the Session Recording Server computer account text box. As a workaround, type localhost or NetBIOS domain name\machine name in the Session Recording Server computer account text box. To get the NetBIOS domain name, run
$env:userdomainin PowerShell orecho %UserDomain%in a command prompt on the machine where the Session Recording Server is installed.
3. Review the prerequisites and confirm the installation.
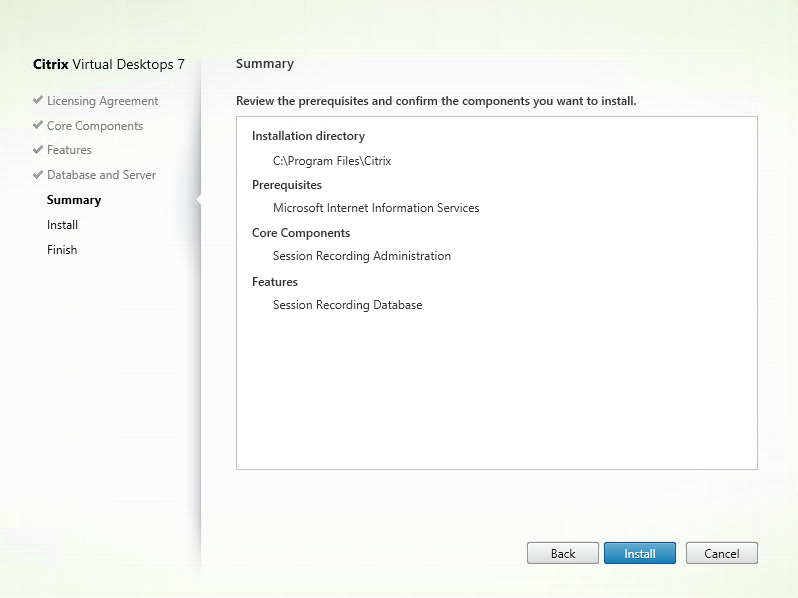
The Summary page shows your installation choices. You can click Back to return to the earlier wizard pages and make changes, or click Install to start the installation.
4. Complete the installation.
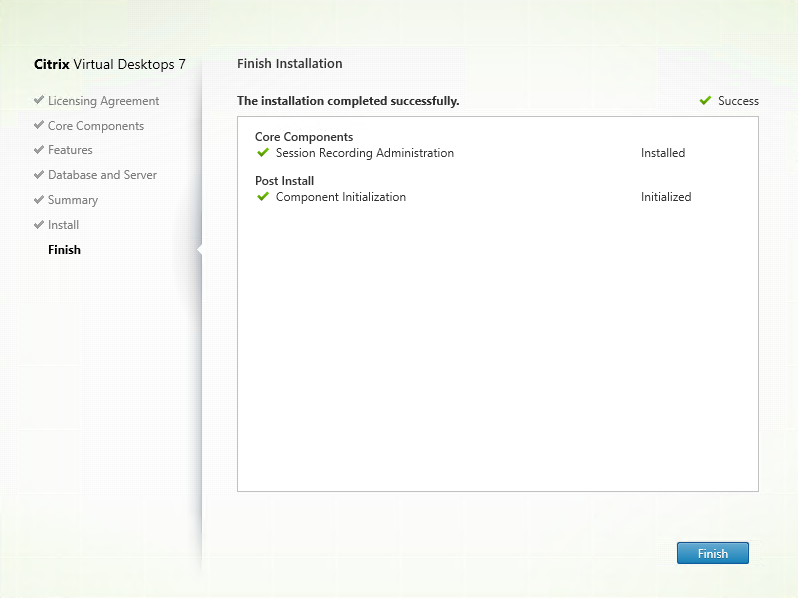
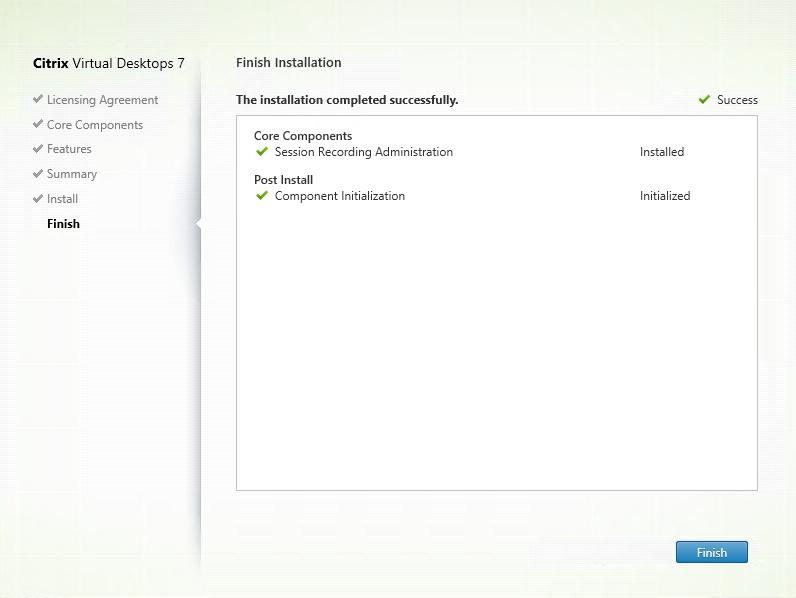
The Finish Installation page shows green check marks for all the prerequisites and components that have been installed and initialized successfully.
Click Finish to complete the installation of the Session Recording Database.
Step 6.2: Install the Session Recording Server
1. On the Features page, select Session Recording Server and Session Recording Administrator Logging. Click Next.
Note:
- The Session Recording Administrator Logging is an optional subfeature of the Session Recording Server. Select the Session Recording Server before you can select the Session Recording Administrator Logging.
- We recommend that you install the Session Recording Administrator Logging together with the Session Recording Server at the same time. If you don’t want the Administrator Logging feature to be enabled, you can disable it on a later page. However, if you choose not to install this feature at the beginning but want to add it later, you must add it manually by using SessionRecordingAdministrationx64.msi.
2. On the Database and Server Configuration page, specify the configurations.
On the Database and Server Configuration page:
- Instance name: Type the name of your SQL Server in the Instance name text box. If you are using a named instance, type computer-name\instance-name; otherwise, type computer-name only. If your SQL server is configured to be listening on a custom port (other than the default port 1433), set the custom listener port by appending a comma to the instance name. For example, type DXSBC-SRD-1,2433 in the Instance name text box, where 2433, following the comma, denotes the custom listener port.
- Database name: Type a custom database name in the Database name text box or use the default database name CitrixSessionRecording that is preset in the text box.
- You must have the securityadmin and dbcreator server role permissions of the database. If you do not have the permissions, you can:
- Ask the database administrator to assign the permissions for the installation. After the installation completes, the securityadmin and dbcreator server role permissions are no longer necessary and can be safely removed.
- Or, use the SessionRecordingAdministrationx64.msi package to install the Session Recording Server. During the msi installation, a dialog box prompts for the credentials of a database administrator with the securityadmin and dbcreator server role permissions. Type the correct credentials and then click OK to continue the installation.
- After typing the correct instance name and database name, click Test connection to test the connectivity to the Session Recording Database.
- Type the Session Recording Server computer account, and then click Next.
3. On the Administration Logging Configuration page, specify configurations for the Administration Logging feature.
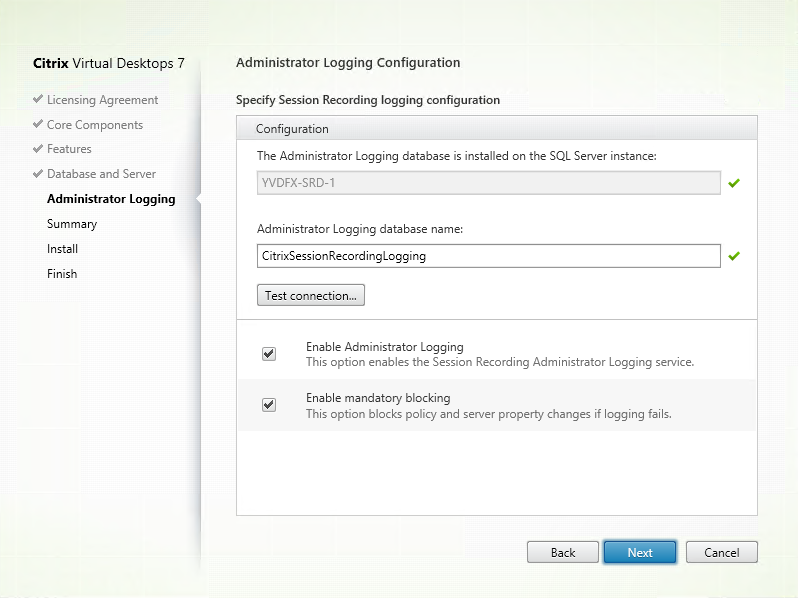
On the Administration Logging Configuration page:
- The Administration Logging database is installed on the SQL Server instance: This text box is not editable. The SQL Server instance name of the Administration Logging database is automatically grabbed from the instance name that you typed on the Database and Server Configuration page.
-
Administrator Logging database name: To install the Session Recording Administrator Logging feature, type a custom database name for the Administrator Logging database in this text box or use the default database name CitrixSessionRecordingLogging that is preset in the text box.
Note:
The Administrator Logging database name must be different from the Session Recording Database name that is set in the Database name text box on the previous Database and Server Configuration page.
- After typing the Administrator Logging database name, click Test connection to test the connectivity to the Administrator Logging database.
- Enable Administration Logging: By default, the Administration Logging feature is enabled. You can disable it by clearing the check box.
- Enable mandatory blocking: By default, mandatory blocking is enabled. The normal features might be blocked if logging fails. You can disable mandatory blocking by clearing the check box.
Click Next to continue the installation.
4. Review the prerequisites and confirm the installation.
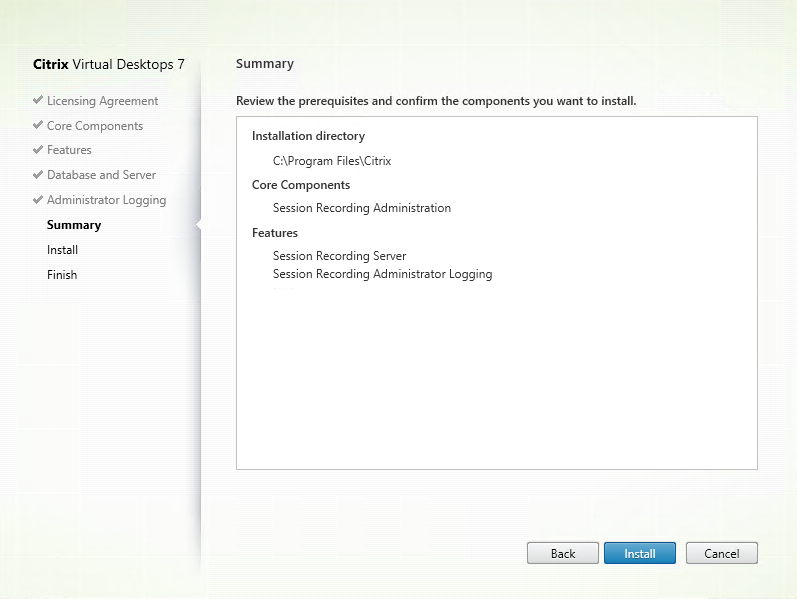
The Summary page shows your installation choices. You can click Back to return to the earlier wizard pages and make changes, or click Install to start the installation.
5. Complete the installation.
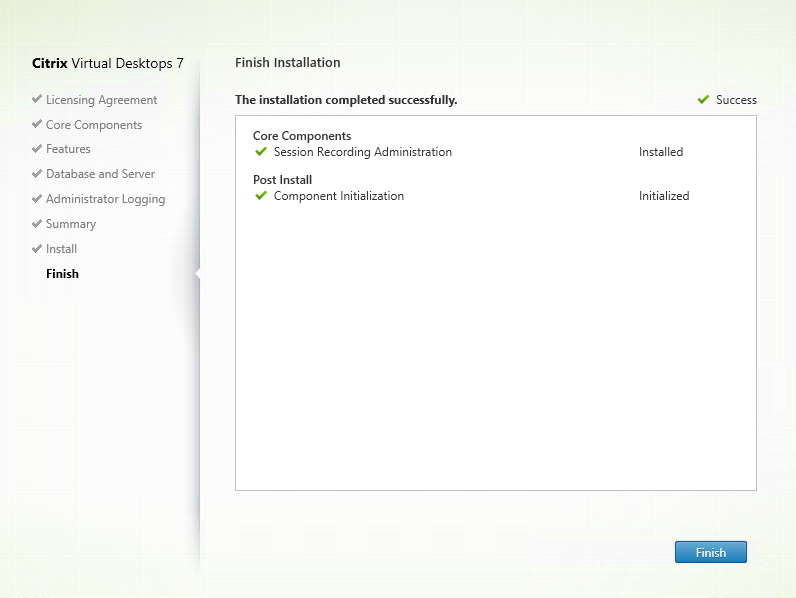
The Finish Installation page shows green check marks for all the prerequisites and components that have been installed and initialized successfully.
Click Finish to complete the installation of the Session Recording Server.
Note:
The Session Recording Server default installation uses HTTPS/TLS to secure communications. If TLS is not configured in the default Internet Information Services (IIS) site of the Session Recording Server, use HTTP. To do so, cancel the selection of SSL in the IIS Management Console by navigating to the Session Recording Broker site, opening the SSL settings, and clearing the Require SSL check box.
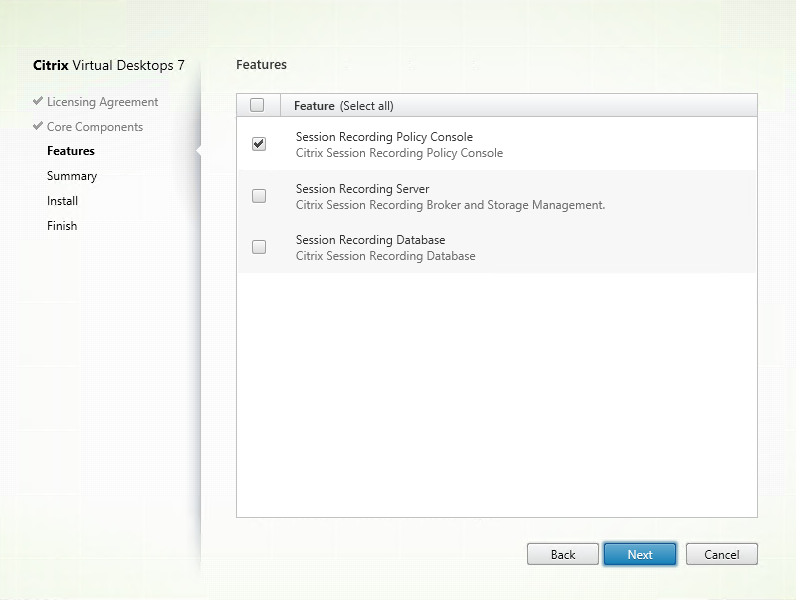
Step 6.3: Install the Session Recording Policy Console
1. On the Features page, select Session Recording Policy Console and click Next.
2. Review the prerequisites and confirm the installation.
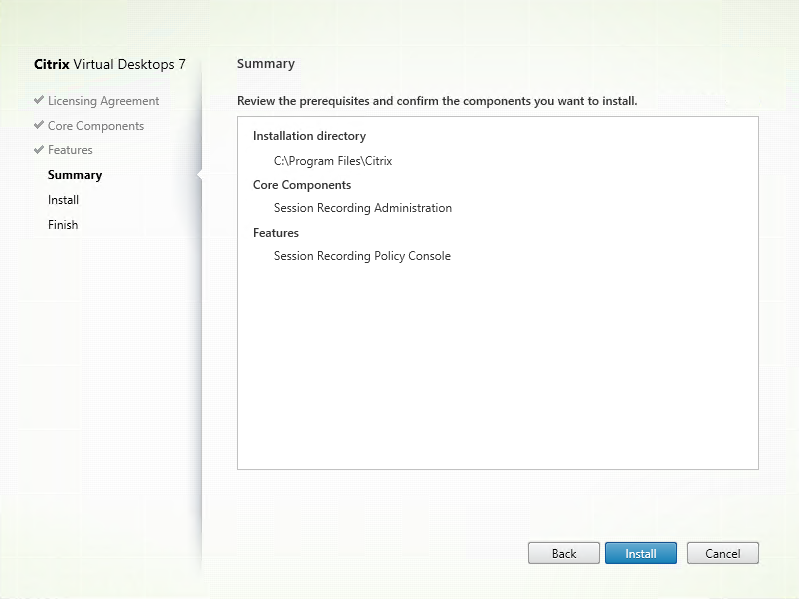
The Summary page shows your installation choices. You can click Back to return to the earlier wizard pages and make changes, or click Install to start the installation.
3. Complete the installation.
The Finish Installation page shows green check marks for all the prerequisites and component that have been installed and initialized successfully.
Click Finish to complete your installation of the Session Recording Policy Console.
Step 7: Install Broker_PowerShellSnapIn_x64.msi
Important:
To use the Session Recording Policy Console, you must have the Broker PowerShell Snap-in (
Broker_PowerShellSnapIn_x64.msi) installed. The snap-in cannot be automatically installed by the installer. Locate the snap-in on the Citrix Virtual Apps and Desktops ISO (\layout\image-full\x64\Citrix Desktop Delivery Controller) and follow the instructions for installing it manually. Failure to comply can cause an error.
Install the Session Recording Agent
Install the Session Recording Agent on the VDA or VDI machine on which you want to record sessions.
Step 1: Download the product software and launch the wizard
Use a local administrator account to log on to the machine where you are installing the Session Recording Agent component. Insert the DVD in the drive or mount the ISO file. If the installer does not launch automatically, double-click the AutoSelect application or the mounted drive.
The installation wizard launches.
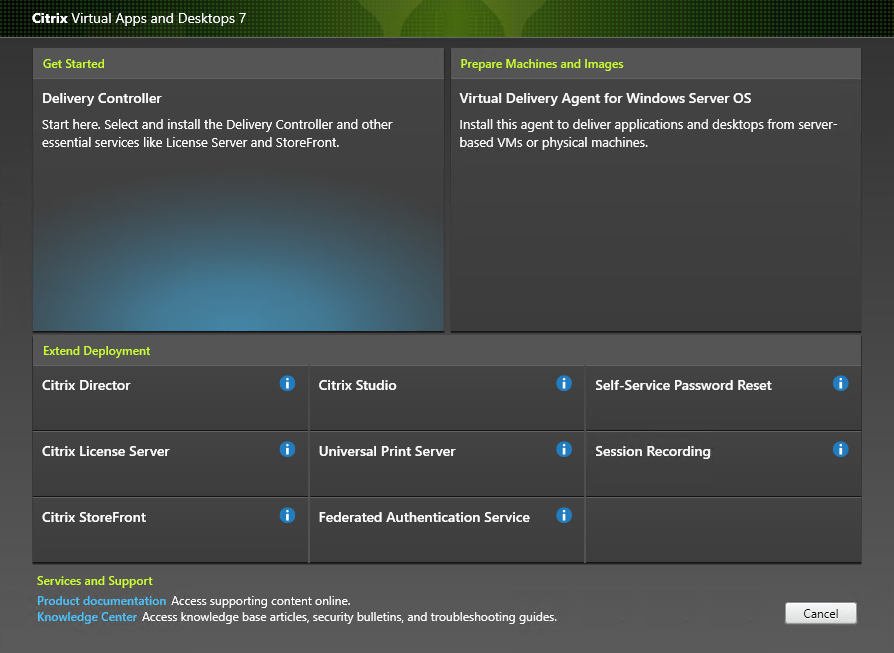
Step 2: Choose which product to install

Click Start next to the product to install Citrix Virtual Apps or Citrix Virtual Desktops.
Step 3: Select Session Recording

Select the Session Recording entry.
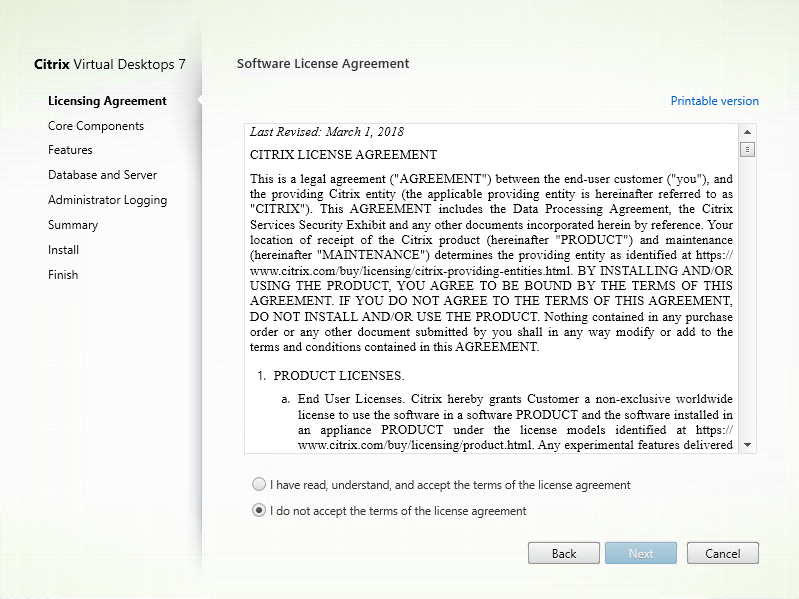
Step 4: Read and accept the license agreement
On the Software License Agreement page, read the license agreement, accept it, and then click Next
Step 5: Select the component to install and the installation location
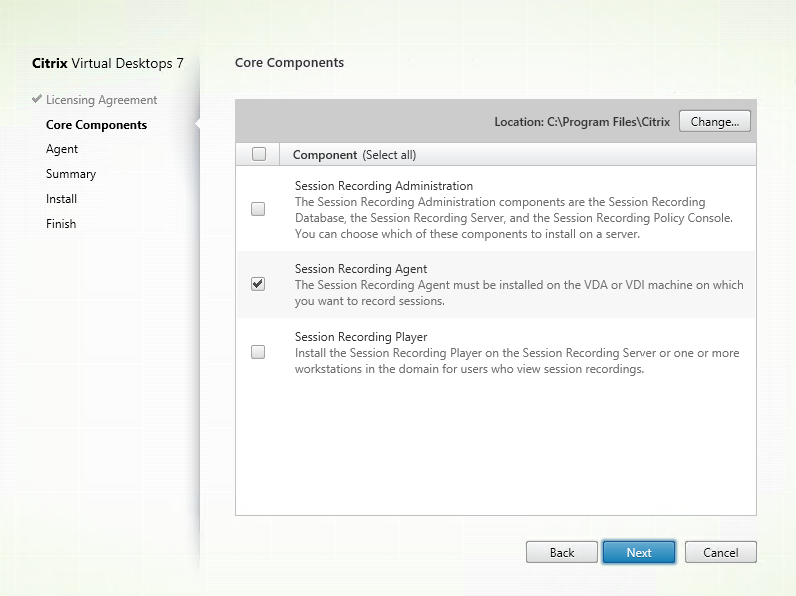
Select Session Recording Agent and click Next.
Step 6: Specify the Agent configuration
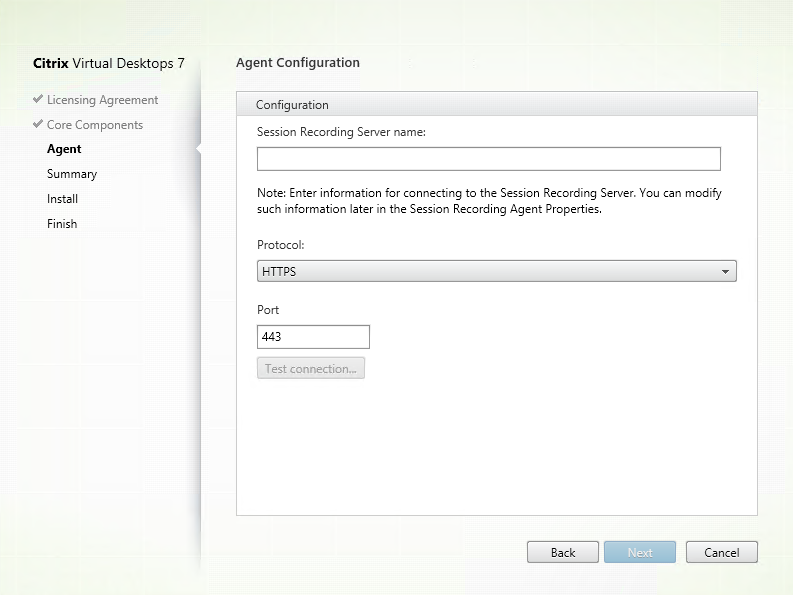
On the Agent Configuration page: If you have installed the Session Recording Server in advance, type the computer name of the machine where you installed the Session Recording Server and the protocol and port information for the connection to the Session Recording Server. If you have not installed Session Recording yet, you can change such information later in Session Recording Agent Properties.
Note:
There is a limitation with the test connection function of the installer. It does not support the “HTTPS requires TLS 1.2” scenario. If you use the installer in this scenario, test connection fails but you can ignore the failure and click Next to continue the installation. It does not affect normal functioning.
Step 7: Review the prerequisites and confirm the installation
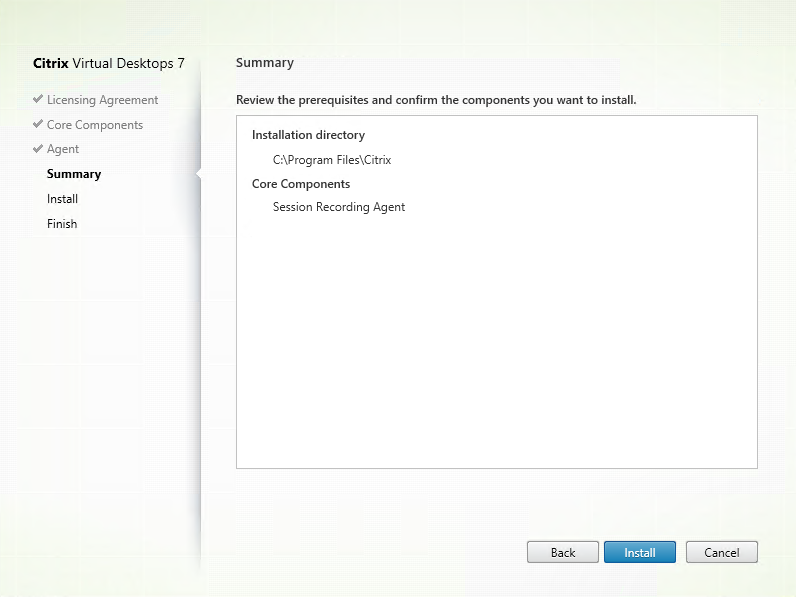
The Summary page shows your installation choices. You can click Back to return to the earlier wizard pages and make changes, or click Install to start the installation.
Step 8: Complete the installation
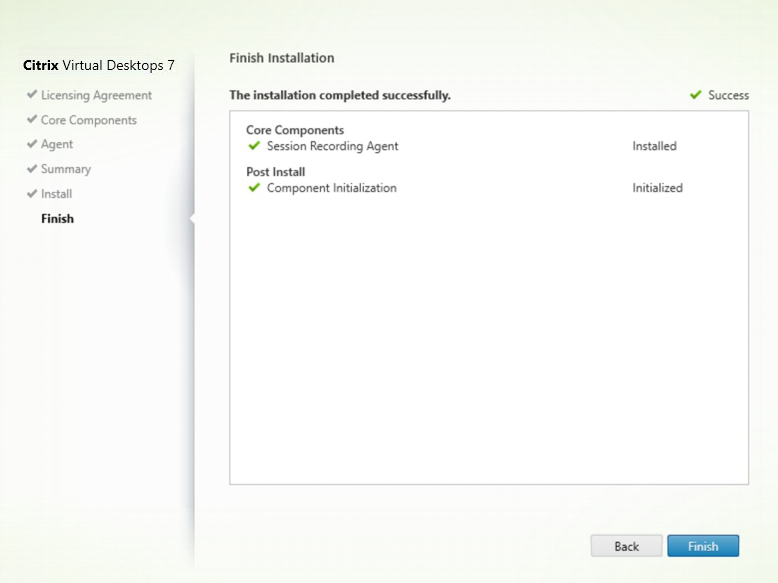
The Finish Installation page shows green check marks for all the prerequisites and components that have been installed and initialized successfully.
Click Finish to complete the installation of the Session Recording Agent.
Note:
When Machine Creation Services (MCS) or Provisioning Services (PVS) creates multiple VDAs with the configured master image and Microsoft Message Queuing (MSMQ) installed, those VDAs can have the same QMId under certain conditions. This case might cause various issues, for example:
- Sessions might not be recorded even if the recording agreement is accepted.
- The Session Recording Server might not be able to receive session logoff signals and therefore, sessions might always be in Live status.
As a workaround, create a unique QMId for each VDA and it differs depending on the deployment methods.
No extra actions are required if single-session OS VDAs with the Session Recording Agent installed are created with PVS 7.7 or later and MCS 7.9 or later in the static desktop mode that is, for example, configured to make all changes persistent with a separate Personal vDisk or the local disk of your VDA.
For multi-session OS VDAs created with MCS or PVS and single-session OS VDAs that are configured to discard all changes when a user logs off, use the GenRandomQMID.ps1 script to change the QMId on system startup. Change the power management strategy to ensure that enough VDAs are running before user logon attempts.
To use the GenRandomQMID.ps1 script, do the following:
1. Ensure that the execution policy is set to RemoteSigned or Unrestricted in PowerShell.
Set-ExecutionPolicy RemoteSigned2. Create a scheduled task, set the trigger as on system startup, and run with the SYSTEM account on the PVS or MCS master image machine.
3. Add the command as a startup task.
powershell .exe -file C:\\GenRandomQMID.ps1Summary of the GenRandomQMID.ps1 script:
- Remove the current QMId from the registry.
- Add
SysPrep = 1toHKEY_LOCAL_MACHINE\SOFTWARE\Microsoft\MSMQ\Parameters.- Stop related services, including CitrixSmAudAgent and MSMQ.
- To generate a random QMId, start the services that stopped previously.
Example GENRANDOMQMID.PS1:
# Remove old QMId from registry and set SysPrep flag for MSMQ

Remove-Itemproperty -Path HKLM:Software\Microsoft\MSMQ\Parameters\MachineCache -Name QMId -Force

Set-ItemProperty -Path HKLM:Software\Microsoft\MSMQ\Parameters -Name "SysPrep" -Type DWord -Value 1

# Get dependent services

$depServices = Get-Service -name MSMQ -dependentservices | Select -Property Name

# Restart MSMQ to get a new QMId

Restart-Service -force MSMQ

# Start dependent services

if ($depServices -ne $null) {

    foreach ($depService in $depServices) {

        $startMode = Get-WmiObject win32_service -filter "NAME = '$($depService.Name)'" | Select -Property StartMode

        if ($startMode.StartMode -eq "Auto") {

            Start-Service $depService.Name
        }
}

}
<!--NeedCopy-->
Install the Session Recording Player
Install the Session Recording Player on the Session Recording Server or on workstations in the domain.
Step 1: Download the product software and launch the wizard
Use a local administrator account to log on to the machine where you are installing the Session Recording Player component. Insert the DVD in the drive or mount the ISO file. If the installer does not launch automatically, double-click the AutoSelect application or the mounted drive.
The installation wizard launches.
Step 2: Choose which product to install

Click Start next to the product to install Citrix Virtual Apps or Citrix Virtual Desktops.
Step 3: Select Session Recording
Select the Session Recording entry.
Step 4: Read and accept the license agreement
On the Software License Agreement page, read the license agreement, accept it, and then click Next.
Step 5: Select the component to install and the installation location
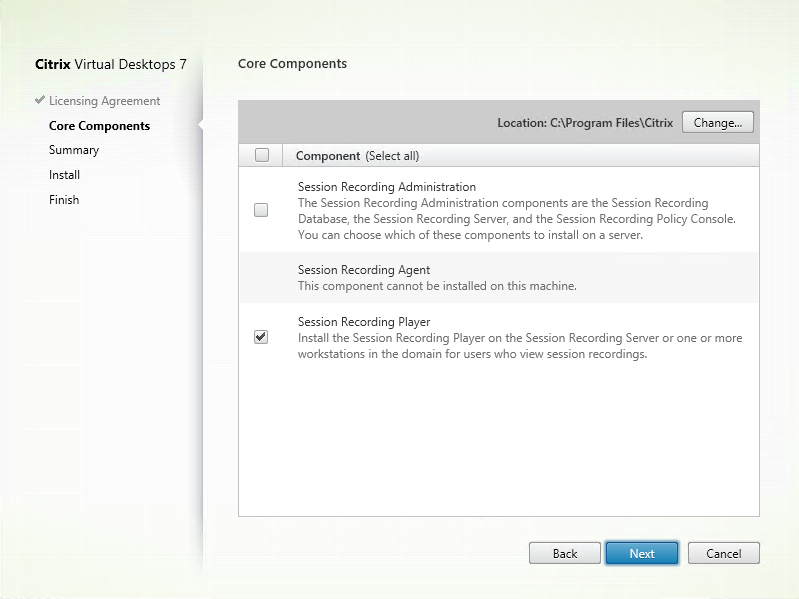
Select Session Recording Player and click Next.
Step 6: Review the prerequisites and confirm the installation
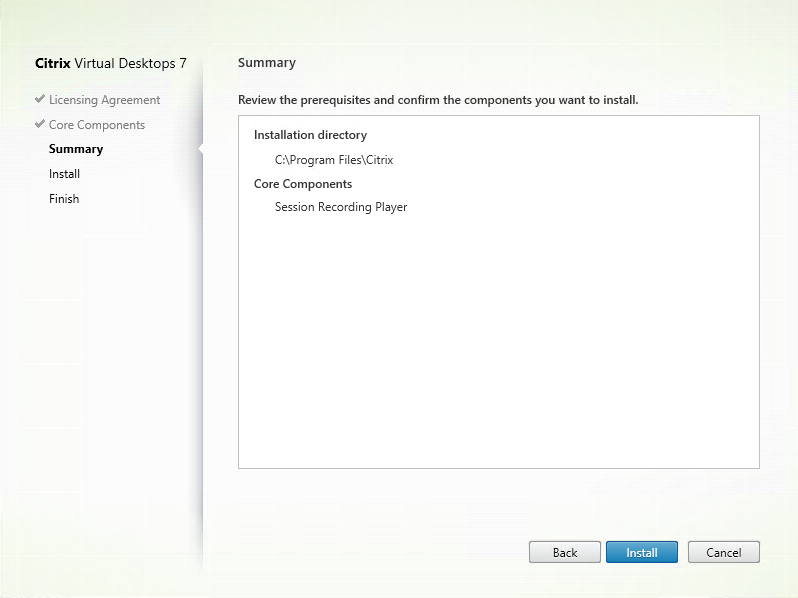
The Summary page shows your installation choices. You can click Back to return to the earlier wizard pages and make changes, or click Install to start the installation.
Step 7: Complete the installation
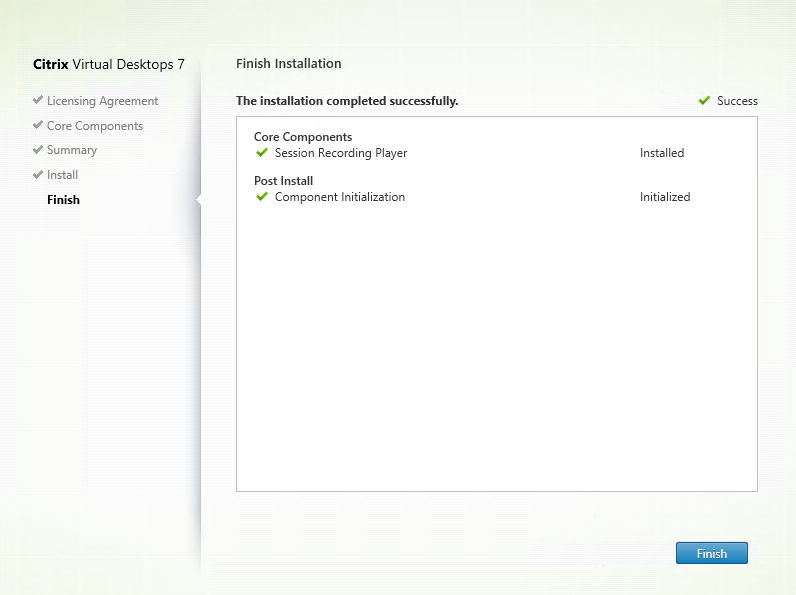
The Finish Installation page shows green check marks for all the prerequisites and components that have been installed and initialized successfully.
Click Finish to complete the installation of the Session Recording Player.
Automate installation
Session Recording supports silent installation with options. Write a script that uses silent installation and run the relevant commands.
Automate installation of the Session Recording Administration components
Install the complete set of the Session Recording Administration components by using a single command
For example, either of the following commands installs the complete set of the Session Recording Administration components and creates a log file to capture the installation information.
msiexec /i "c:\SessionRecordingAdministrationx64.msi" ADDLOCAL="SsRecServer,PolicyConsole,SsRecLogging,StorageDatabase" DATABASEINSTANCE="WNBIO-SRD-1" DATABASENAME="CitrixSessionRecording" LOGGINGDATABASENAME="CitrixSessionRecordingLogging" DATABASEUSER="localhost" /q /l*vx "yourinstallationlog"
<!--NeedCopy-->
msiexec /i "SessionRecordingAdministrationx64.msi" ADDLOCAL="SsRecServer,PolicyConsole,SsRecLogging,StorageDatabase" DATABASEINSTANCE="CloudSQL" DATABASENAME="CitrixSessionRecording" LOGGINGDATABASENAME="CitrixSessionRecordingLogging" AZURESQLSERVICESUPPORT="1" AZUREUSERNAME="CloudSQLAdminName" AZUREPASSWORD="CloudSQLAdminPassword" /q /l*vx "c:\WithLogging.log"
<!--NeedCopy-->
Note:
The
SessionRecordingAdministrationx64.msifile is located on the Citrix Virtual Apps and Desktops ISO under\layout\image-full\x64\Session Recording.
Where:
- ADDLOCAL provides the features for you to select. You can select more than one option. SsRecServer is the Session Recording Server. PolicyConsole is the Session Recording Policy Console. SsRecLogging is the Administrator Logging feature. StorageDatabase is the Session Recording Database. Session Recording Administrator Logging is an optional subfeature of the Session Recording Server. Select the Session Recording Server before you can select Session Recording Administrator Logging.
-
DATABASEINSTANCE is the instance name of the Session Recording database. For example,
.\SQLEXPRESS,computer-name\SQLEXPRESS,computer-nameortcp:srt-sql-support.public.ca7b16b60789.database.windows.net,3342if you are using Azure SQL Managed Instance. - DATABASENAME is the database name of the Session Recording Database.
- LOGGINGDATABASENAME is the name of the Administrator Logging database.
-
AZURESQLSERVICESUPPORT determines whether cloud SQL is supported. To use cloud SQL, set it to
1. - DATABASEUSER is the computer account of the Session Recording Server.
- AZUREUSERNAME is the cloud SQL admin name.
- AZUREPASSWORD is the cloud SQL admin password.
- /q specifies quiet mode.
- /l*v specifies verbose logging.
- yourinstallationlog is the location of your installation log file.
Create a master image for deploying the Session Recording Server
You might already have the Session Recording Database and the Administration Logging database in place from an existing deployment. For such scenarios, you can now forego database checks when you are installing the Session Recording Administration components using SessionRecordingAdministrationx64.msi. You can create a master image for deploying the Session Recording Server easily on many other machines. After deploying the Server on target machines using the master image, run a command on each machine to connect to the existing Session Recording Database and Administration Logging database. This master image support facilitates deployment and minimizes the potential impact of human error. It applies only to fresh installations and consists of the following steps:
-
Start a command prompt and run a command similar to the following:
msiexec /i "SessionRecordingAdministrationx64.msi" ADDLOCAL="SsRecServer,PolicyConsole,SsRecLogging,StorageDatabase" DATABASEINSTANCE="sqlnotexists" DATABASENAME="CitrixSessionRecording2" LOGGINGDATABASENAME="CitrixSessionRecordingLogging2" DATABASEUSER="localhost" /q /l*vx "c:\WithLogging.log" IGNOREDBCHECK="True"
<!--NeedCopy-->
This command installs the Session Recording Administration components without configuring and testing connectivity to the Session Recording Database and the Administration Logging database.
Set the IGNOREDBCHECK parameter to True and use random values for DATABASEINSTANCE, DATABASENAME, and LOGGINGDATABASENAME.
-
Create a master image on the machine that you are operating.
-
Deploy the master image to other machines for deploying the Session Recording Server.
-
On each of the machines, run commands similar to the following:
.\SsRecUtils.exe -modifydbconnectionpara DATABASEINSTANCE DATABASENAME LOGGINGDATABASENAME

iisreset /noforce
<!--NeedCopy-->
The commands connect the Session Recording Server installed earlier to an existing Session Recording Database and Administration Logging database.
The
SsRecUtils.exefile is located at\Citrix\SessionRecording\Server\bin\. Set the DATABASEINSTANCE, DATABASENAME, and LOGGINGDATABASENAME parameters as needed.
Retain databases when uninstalling the Session Recording Administration components
With KEEPDB set to True, the following command retains the Session Recording Database and the Administration Logging database when uninstalling the Session Recording Administration components:
msiexec /x "SessionRecordingAdministrationx64.msi" KEEPDB="True"
<!--NeedCopy-->
Automate installation of the Session Recording Player and web player
For example, the following commands install the Session Recording Player and web player, respectively.
msiexec /i "c:\SessionRecordingPlayer.msi" /q /l*\vx "yourinstallationlog"
<!--NeedCopy-->
msiexec /i "c:\SessionRecordingWebPlayer.msi" /q /l*vx "yourinstallationlog"
<!--NeedCopy-->
Note:
The
SessionRecordingPlayer.msifile is located on the Citrix Virtual Apps and Desktops ISO under\layout\image-full\x86\Session Recording.The
SessionRecordingWebPlayer.msifile is located on the Citrix Virtual Apps and Desktops ISO under\layout\image-full\x64\Session Recording.
Where:
- /q specifies quiet mode.
- /l*v specifies verbose logging.
- yourinstallationlog is the location of your installation log file.
Automate installation of the Session Recording Agent
For example, the following command installs the Session Recording Agent and creates a log file to capture the installation information.
For 64-bit systems:
msiexec /i SessionRecordingAgentx64.msi /q /l*vx yourinstallationlog SESSIONRECORDINGSERVERNAME=yourservername
SESSIONRECORDINGBROKERPROTOCOL=yourbrokerprotocol SESSIONRECORDINGBROKERPORT=yourbrokerport
<!--NeedCopy-->
Note:
The
SessionRecordingAgentx64.msifile is located on the Citrix Virtual Apps and Desktops ISO under\layout\image-full\x64\Session Recording.
For 32-bit systems:
msiexec /i SessionRecordingAgent.msi /q /l*vx yourinstallationlog SESSIONRECORDINGSERVERNAME=yourservername
SESSIONRECORDINGBROKERPROTOCOL=yourbrokerprotocol SESSIONRECORDINGBROKERPORT=yourbrokerport
<!--NeedCopy-->
Note:
The
SessionRecordingAgent.msifile is located on the Citrix Virtual Apps and Desktops ISO under\layout\image-full\x86\Session Recording.
Where:
- yourservername is the NetBIOS name or FQDN of the machine hosting the Session Recording Server. If not specified, this value defaults to localhost.
- yourbrokerprotocol is HTTP or HTTPS that the Session Recording Agent uses to communicate with the Session Recording Broker. If not specified, this value defaults to HTTPS.
- yourbrokerport is the port number that the Session Recording Agent uses to communicate with the Session Recording Broker. If not specified, this value defaults to zero, which directs the Session Recording Agent to use the default port number for your selected protocol: 80 for HTTP or 443 for HTTPS.
- /q specifies quiet mode.
- /l*v specifies verbose logging.
- yourinstallationlog is the location of your installation log file.
Upgrade Session Recording
You can upgrade certain deployments to later versions without having to first set up new machines or Sites. You can upgrade from the version of Session Recording included in the latest CU of XenApp and XenDesktop 7.6 LTSR, and from any later version, to the latest release of Session Recording.
Note:
When you upgrade Session Recording Administration from 7.6 to 7.13 or later and choose Modify in Session Recording Administration to add the Administrator Logging service, the SQL Server instance name does not appear on the Administrator Logging Configuration page. The following error message appears when you click Next: Database connection test failed. Please enter correct Database instance name. As a workaround, add the read permission for localhost users to the following SmartAuditor Server registry folder:
HKEY_LOCAL_MACHINE\SOFTWARE\Citrix\SmartAuditor\Server.You cannot upgrade from a Technical Preview version.
Requirements, preparation, and limitations
- Use the Session Recording installer’s graphical or command line interface to upgrade the Session Recording components on the machine where you installed the components.
- Before any upgrade activity, back up the database named CitrixSessionRecording in the SQL Server instance. In this way, you can restore it if any issues are discovered after the database upgrade.
- In addition to being a domain user, you must be a local administrator on the machines where you are upgrading the Session Recording components.
- If the Session Recording Server and Session Recording Database are not installed on the same server, you must have the database role permission to upgrade the Session Recording Database. Otherwise, you can:
- Ask the database administrator to assign the securityadmin and dbcreator server role permissions for the upgrade. After the upgrade completes, the securityadmin and dbcreator server role permissions are no longer necessary and can be safely removed.
- Or, use the SessionRecordingAdministrationx64.msi package to upgrade. During the msi upgrade, a dialog box prompts for the credentials of a database administrator who has the securityadmin and dbcreator server role permissions. Type the correct credentials and then click OK to continue the upgrade.
- If you do not plan to upgrade all the Session Recording Agents at the same time, Session Recording Agent 7.6.0 (and later) is compatible with the latest (current) release of Session Recording Server. However, some new features and bug fixes might not take effect.
- Any sessions started during the upgrade of Session Recording Server are not recorded.
- The Graphics Adjustment option in Session Recording Agent Properties is enabled by default after a fresh installation or upgrade to keep compatible with the Desktop Composition Redirection mode. You can disable this option manually after a fresh installation or upgrade.
- The Administrator Logging feature is not installed after you upgrade Session Recording from a previous release where the feature is unavailable. To add the feature, modify the installation after the upgrade.
- If there are live recording sessions when the upgrade process starts, there is little chance that the recording can be complete.
- Review the following upgrade sequence, so that you can plan and mitigate potential outages.
Upgrade sequence
- When the Session Recording Database and Session Recording Server are installed on different servers, stop the Session Recording Storage Manager service manually on the Session Recording Server. Then upgrade the Session Recording Database first.
- Through the Internet Information Services (IIS) Manager, ensure that the Session Recording Broker is running. Upgrade the Session Recording Server. If the Session Recording Database and Session Recording Server are installed on the same server, the Session Recording Database is also upgraded.
- The Session Recording service is back online automatically when the upgrade of the Session Recording Server is completed.
- Upgrade the Session Recording Agent (on the master image).
- Upgrade the Session Recording Policy Console with or after the Session Recording Server.
- Upgrade the Session Recording Player.
Deploy the Session Recording Database on cloud SQL database services
This section describes how to deploy the Session Recording Database on Azure SQL Managed Instance, on AWS RDS, and on SQL Server on Azure VMs.
Deploy the Session Recording Database on Azure SQL Managed Instance or on AWS RDS
Tip:
You can also run a single command similar to the following to deploy the Session Recording Database on Azure SQL Managed Instance or on AWS RDS. For more information, see the preceding Automate installation section in this article.
msiexec /i "SessionRecordingAdministrationx64.msi" ADDLOCAL="SsRecServer,PolicyConsole,SsRecLogging,StorageDatabase" DATABASEINSTANCE="CloudSQL" DATABASENAME="CitrixSessionRecording" LOGGINGDATABASENAME="CitrixSessionRecordingLogging" AZURESQLSERVICESUPPORT="1" AZUREUSERNAME="CloudSQLAdminName" AZUREPASSWORD="CloudSQLAdminPassword" /q /l*vx "c:\WithLogging.log"
<!--NeedCopy-->
-
Create an Azure SQL Managed instance or create a SQL Server instance through the Amazon RDS console.
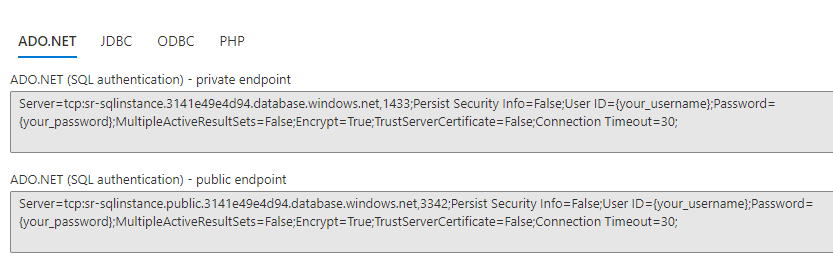
-
(For Azure SQL only) Keep a record of the Server strings that appear in the properties panel. The strings are the instance name of the Session Recording Database. For an example, see the following screen capture.
-
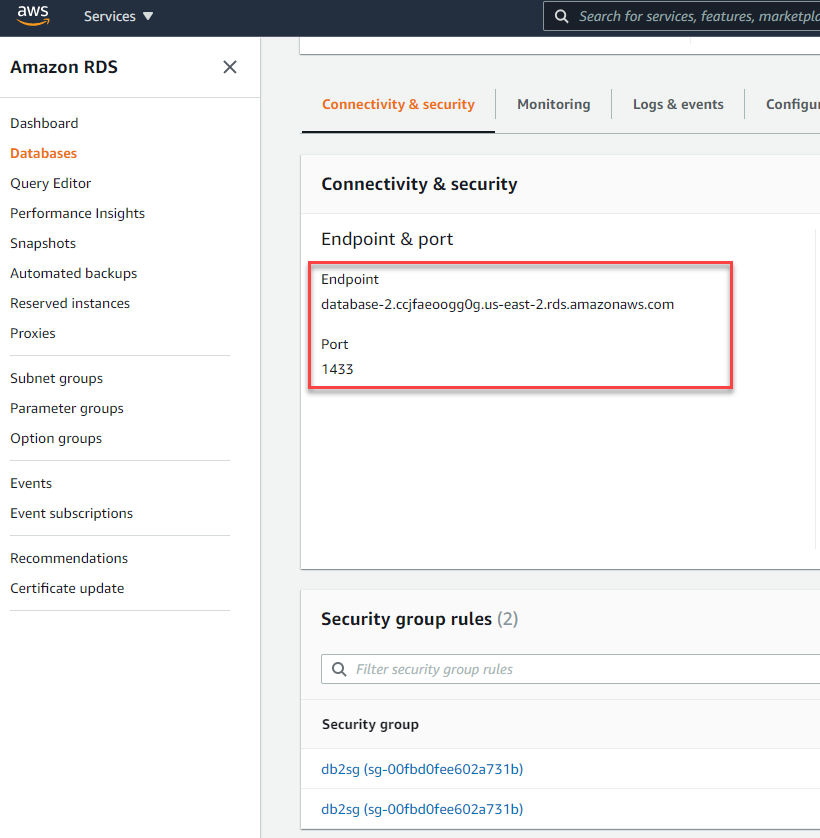
(For AWS RDS only) Keep a record of the Endpoint and Port information. We use it as the instance name of your database, in the format of <Endpoint, Port>.
-
Run SessionRecordingAdministrationx64.msi to install the Session Recording Database.
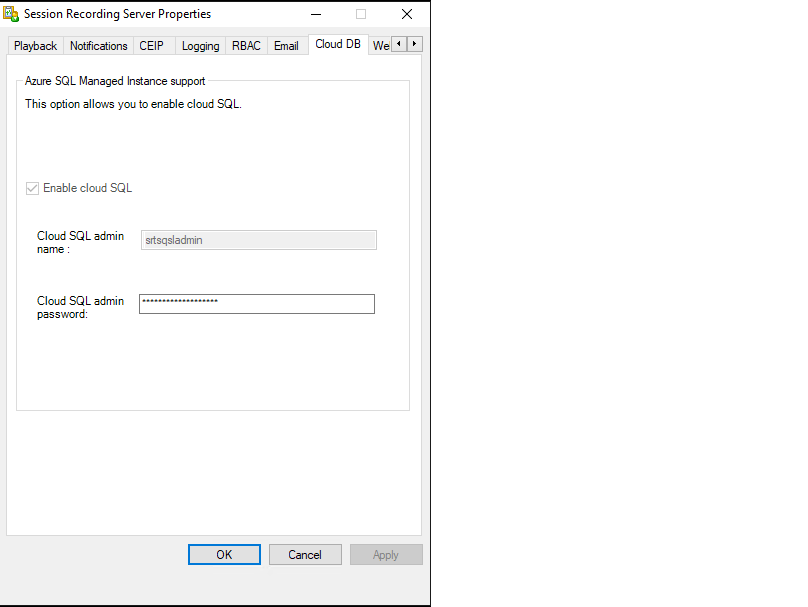
Select the Enable cloud SQL check box and fill in the cloud SQL admin name and password. Make other required configurations.
Note:
If you change the cloud SQL admin password, you must update the password in Session Recording Server Properties. When you open Session Recording Server Properties, an error message appears. Click OK to proceed, select the Cloud DB tab, and type the new cloud SQL admin password. Restart the Citrix Session Recording Analytics service, the Citrix Session Recording Storage Manager service, and the IIS service.
Azure AD authentication is not supported.
Migrate an on-premises database to cloud SQL Managed Instance
-
Migrate your on-premises database according to https://docs.microsoft.com/en-us/data-migration/ or https://docs.aws.amazon.com/prescriptive-guidance/latest/patterns/migrate-an-on-premises-microsoft-sql-server-database-to-amazon-rds-for-sql-server.html.
-
To make Session Recording work properly after the migration, run SsRecUtils.exe on the Session Recording Server.
C:\Program Files\Citrix\SessionRecording\Server\bin\SsRecUtils.exe -modifyazuredbconnectionpara {Database Instance} {Session Recording Database Name} {Session Recording Logging Database Name} {AzureAdminName}{AzureAdminPassword} iisreset /noforce -
On the Session Recording Server, restart the Citrix Session Recording Analytics service, the Citrix Session Recording Storage Manager service, and the IIS service.
Migrate a production database from Azure SQL Managed Instance to an on-premises database
-
Migrate the database according to https://docs.microsoft.com/en-us/data-migration/.
-
To make Session Recording work properly after the migration, run SsRecUtils.exe on the Session Recording Server.
C:\Program Files\Citrix\SessionRecording\Server\bin\SsRecUtils.exe -modifydbconnectionpara {Database Instance} {Session Recording Database Name} {Session Recording Logging Database Name} iisreset /noforce -
On the Session Recording Server, restart the Citrix Session Recording Analytics service, the Citrix Session Recording Storage Manager service, and the IIS service.
Deploy the Session Recording Database on SQL Server on Azure VMs
On SQL Server on Azure VMs, you can deploy the Session Recording Database both by using the msi package and the Citrix Virtual Apps and Desktops installer.
- Check out an Azure SQL VM.
- Configure the VM and add it to the domain where you install the Session Recording components.
- Use the VM’s FQDN as the instance name during the installation of the Session Recording Database. Note: If you are using SessionRecordingAdministrationx64.msi for the installation, clear the Enable cloud SQL check box.
- Follow the installation user interface to complete installing the Session Recording Database.
Uninstall Session Recording
To remove the Session Recording components from a server or workstation, use the uninstall or remove programs option available from the Windows Control Panel. To remove the Session Recording Database, you must have the same securityadmin and dbcreator SQL Server role permissions as when you installed it.
For security reasons, the Administrator Logging Database is not removed after the components are uninstalled.