This content has been machine translated dynamically.
Dieser Inhalt ist eine maschinelle Übersetzung, die dynamisch erstellt wurde. (Haftungsausschluss)
Cet article a été traduit automatiquement de manière dynamique. (Clause de non responsabilité)
Este artículo lo ha traducido una máquina de forma dinámica. (Aviso legal)
此内容已经过机器动态翻译。 放弃
このコンテンツは動的に機械翻訳されています。免責事項
이 콘텐츠는 동적으로 기계 번역되었습니다. 책임 부인
Este texto foi traduzido automaticamente. (Aviso legal)
Questo contenuto è stato tradotto dinamicamente con traduzione automatica.(Esclusione di responsabilità))
This article has been machine translated.
Dieser Artikel wurde maschinell übersetzt. (Haftungsausschluss)
Ce article a été traduit automatiquement. (Clause de non responsabilité)
Este artículo ha sido traducido automáticamente. (Aviso legal)
この記事は機械翻訳されています.免責事項
이 기사는 기계 번역되었습니다.책임 부인
Este artigo foi traduzido automaticamente.(Aviso legal)
这篇文章已经过机器翻译.放弃
Questo articolo è stato tradotto automaticamente.(Esclusione di responsabilità))
Translation failed!
Enable or disable lossy screen recording
Lossy screen recording lets you adjust compression options to reduce the size of recording files and to accelerate navigating recorded sessions during playback. Lossy screen recording is suitable for use when:
- the size of recording files per time unit is too large, or
- there is a lag while you fast forward or rewind during recording playback.
You can now enable lossy screen recording in any of the following ways:
-
Activate a system-defined session recording policy that has lossy screen recording enabled.
-
Create and activate a custom session recording policy, and make sure to select Enable lossy screen recording when creating the custom policy.
-
Select Enable lossy screen recording when configuring an event response policy. When a monitored event is detected later, lossy screen recording is triggered.
For more information, see Configure session recording policies and Configure event response policies.
When the active session recording or event response policy doesn’t have lossy screen recording enabled, compression options are unavailable.
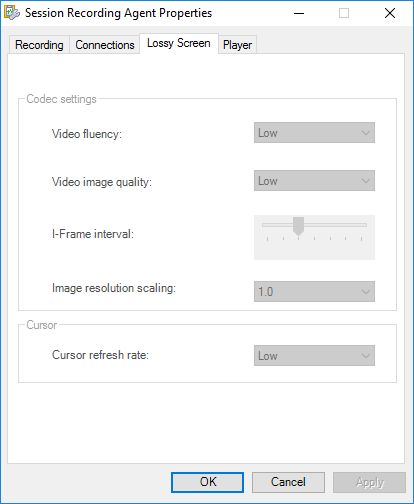
When the active session recording or event response policy has lossy screen recording enabled, compression options are available on the Lossy Screen tab of Session Recording Agent Properties.
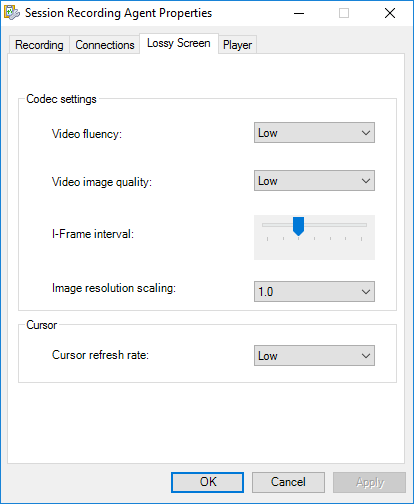
You can adjust the compression options to your needs. We recommend you use the default values unless there is a practical need to change the values.
For a description of compression options, see the following table:
| Compression option | Description | Default value | Remarks |
|---|---|---|---|
| Video fluency (FPS) | Low: 1; Medium: 10; High: 20 | Low | N/A |
| Video image quality |
Low: minCrf:33 maxCrf:45; Medium: minCrf:25 maxCrf:37; High: minCrf:18 maxCrf:30
|
Low | N/A |
| I-Frame interval (seconds) | 60, 120, 300, 600, 1200, 1800, 3600 | 600 | The larger the I-Frame interval value, the smaller the storage space occupied by the compressed video. The smaller the I-Frame interval value, the better the seeking experience (fast forward and rewind). |
| Image resolution scaling | 1.0, 0.9, 0.8, 0.7, 0.6, 0.5, 0.4 | 1 | You can downscale the resolution of recorded screens to a percentage, for example, 0.9 means 90%. If you don’t want to change the resolution, use the default value 1.0. |
| Cursor refresh rate (times per second) | Low: 3; Medium: 5; High: 10 | Low | N/A |
You can also set image resolution scaling by editing the Registry. To do so, complete the following steps:
Warning:
Editing the registry incorrectly can cause serious problems that might require you to reinstall your operating system. Citrix® cannot guarantee that problems resulting from the incorrect use of the Registry Editor can be solved. Use the Registry Editor at your own risk. Be sure to back up the registry before you edit it.
- Browse to HKEY_LOCAL_MACHINE\SOFTWARE\Citrix\SmartAuditor\Agent\ SRGraphicsZoomFactor.
- Set a value data that suits your needs. For the optional values, see the preceding table.
Share
Share
In this article
This Preview product documentation is Citrix Confidential.
You agree to hold this documentation confidential pursuant to the terms of your Citrix Beta/Tech Preview Agreement.
The development, release and timing of any features or functionality described in the Preview documentation remains at our sole discretion and are subject to change without notice or consultation.
The documentation is for informational purposes only and is not a commitment, promise or legal obligation to deliver any material, code or functionality and should not be relied upon in making Citrix product purchase decisions.
If you do not agree, select I DO NOT AGREE to exit.