
Overview
This guide provides high level instructions to install the Citrix Virtual Delivery Agent (VDA) on Windows 10. Deploy Virtual Machines (VMs) with Citrix Machine Creation Services (MCS) via Citrix DaaS
The following steps covered in this Guide
- Install VDA
- Optimize Windows 10 for MCS
- Create a Machine Catalog and deploy VMs
- Create a Delivery Group and assign VMs
- Configure Citrix Workspace and Citrix Files clients
Prerequisites
Note
This guide assumes that the reader has a basic understanding of the following technologies:
Citrix Cloud, Citrix DaaS and basic Windows administration
-
A Windows 10 VM in Microsoft Azure, Google Cloud Platform (GCP), or an on-premises virtual environment
-
A Citrix Cloud account with Citrix DaaS permissions
-
A domain account with the ability to create machine accounts in the desired OU
-
A Citrix.com account to download software
- Citrix VDA
- Citrix Optimizer
Windows VM Preparation
-
Join VM to the domain
-
Launch windows settings and check for updates
-
Install applications required for the image template and any OS configuration
Citrix Virtual Delivery Agent
Note
It is recommended to use the latest VDA version for optimal performance, security, and functionality
-
Log in to Citrix.com/downloads and download the latest version of the VDA
-
Run the VDA setup file "VDAWorkstationSetup_xxxx.exe" as an administrator.
-
Select Create a master MCS image, click Next

-
If you would like the full workspace experience or to deliver virtual applications, select the Citrix Workspace App, click Next
-
If you require access to Citrix Files/Content and Collaboration select the Citrix Files for Windows (Outlook integration option is also available), click Next
Note
For a full list of VDA install options see Install VDA or use the Citrix VDA Command line Helper Tool.
-
Enter the Fully Qualified Domain Name (FQDN) of each Cloud Connector (at least two are recommended for tolerance). After initial registration, VDA retrieves a list of remaining controllers (read more about VDA Registration - Auto-Update functionality).
-
Select Test Connection and if successful select Add
-
Click Next
-
Depending on your specific requirements, select the firewall configuration accordingly, click Next
-
Review the summary and click Install
-
Confirm that everything was installed successfully, check the box to restart machine and click Finish


Citrix Optimizer
-
Log in and download Citrix Optimizer from Citrix Optimizer
-
Run Citrix Optimizer as an administrator
-
Select the appropriate Windows 11 Build
-
Select Analyze
-
Once the analyses are complete View results
-
Select all the desired optimizations and select Optimize
-
View the results and click Done


Create Machine Catalog and Deploy VMs
Note
Resources
We are using Microsoft Azure as a resource location in this scenario. For a full list of supported Hypervisors and Clouds see Hosts / virtualization resources
Hosting Connections
The available resources are based on the hosting connections already added in Citrix Studio. See the following article for information on creating DaaS hosting connections
-
Log into Citrix Cloud
-
Select the DaaS tile
-
Select Manage
-
From within Web Studio, select Machine Catalogs, then Create Machine Catalog
-
Select Multi-session OS for Windows 10 AVD or Operating System as appropriate based on your deployment, click Next
-
Select Machines that are power managed
-
Deploy machines using Citrix Machine Creation Services, select the appropriate Resource, click Next
-
Select Master Image previously created
-
Select the minimum functional level and click Next
-
Select Storage and License Types based on your environment
-
Enter the number of Virtual Machines you would like to create, along with the machine size, click Next
-
Select Network Interface Card to be associated with the VM, click Next
-
Configure Disk Settings and Write Back Cache as appropriate, click Next
-
Select the appropriate Resource Group provisioning method, click Next
-
Select whether to create new AD accounts, where to create them and the naming convention to be used, click Next
-
Add the Domain credentials to be used to perform the account operations, click Next
-
Verify the Summary, add a Machine Catalog name and Machine Catalog description, then click Finish


Note
Wait for the machine catalog to create and the new VM disk. Time depends on the number of VMs specified
Create Delivery Group
-
Log into Citrix Cloud and select the DaaS tile
-
Select Manage
-
From within Web Studio, select Delivery Group, then Create Delivery Group, click Next
-
Select the Machine Catalog you created (previously)
-
Choose the number of machines that you created or want to add to the Delivery Group, click Next
-
Select the Users assignment method (We are using Citrix Cloud for assignment in this scenario). Click Next
-
If adding applications to be published separately add these here (We are only publishing a desktop in this scenario). Click Next
-
Select the Scope if appropriate, click Next
-
Select the appropriate License Type, click Next
-
Provide the Delivery Group name and Display name, click Finish
-
Once created, view the machines and check their registration status


Assign Users to Desktop
-
Log in to Citrix Cloud and from the landing page select View Library
-
Locate the new Windows 10 Desktop resource in the Library, select the ellipsis (3 dot menu item in the top right corner), and select Manage Subscribers
-
Add users or groups to assign desktop


Client Configuration
Note
Best practice is to automate the configuration of the Citrix Workspace App and Citrix Files clients
Once the user has launched the virtual desktop and logged in they are able to carry out the following tasks
Citrix Workspace app
-
From the start menu launch Citrix Workspace
-
Add the URL to your Citrix environment
-
Enter your User name and Password
-
Once authenticated you see any assigned resources in the workspace or populated in the start menu


Citrix Files
Note
This assumes the option to install Citrix Files was selected when installing the VDA above
If not the latest version can be downloaded from Citrix Files for Windows
-
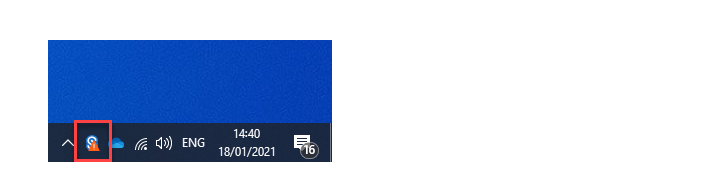
Check Citrix Files status from the icon in the system tray. If offline, right-click the icon and select login
-
Open Windows Explorer and check Citrix Files S: drive is available

Citrix Files For Outlook
Note
This assumes the option to install Citrix Files for Outlook was selected when installing the VDA above
If not the latest version can be downloaded from Citrix Files for Outlook
-
Open Outlook and the Citrix files plug-in is visible along the Outlook tool bar. If you are logged on to the VM with a valid Citrix Files account, the authentication passes through and enables Citrix files functionality
-
Select the icon to view the default settings


Note
Best practice would be to have Citrix Files and Citrix Files for Outlook settings configured centrally
For information on deploying and configuring Citrix Content and collaboration see the following article Citrix Content and Collaboration
There are no comments to display.
Create an account or sign in to comment
You need to be a member in order to leave a comment
Create an account
Sign up for a new account in our community. It's easy!
Register a new accountSign in
Already have an account? Sign in here.
Sign In Now