Security
Password requirements
You can control password requirements for users here. By default, all passwords must contain at least 8 characters, containing at least 1 number, 1 upper case letter, and 1 lower case letter.
To create other password requirements for your users, fill out the form on this page. Any changes you make go into effect the next time a user changes their password.
For all users, passwords:
- Must contain a minimum of 8 characters with a maximum number of 50 characters.
- Must contain 1 upper case and 1 lower case letter.
- Must contain at least 1 number.
- Must contain at least 1 of these special characters: !
# $ % ^ & * ( ) - _ + = / . ? \ [ ] | ' ~ @ ' - Cannot be the same as their last 25 passwords.
Forced Password Reset
In response to an increase in internet-account credential (user name and password) theft, ShareFile might require a password reset and will continue to incorporate a regularly scheduled forced password reset into our normal operating procedures.
Login and security policy
Trusted domains
You can enter one or more domains to allow iframe embedding and Cross-Origin Resource Sharing (CORS).
Account lock-out configuration
This allows you to select the number of times a user can enter an invalid password before being locked out of the account for a specific time period of your choosing.
Terms and conditions
Terms and conditions can be added to the sign-in page for customers. We recommend single sign-on customers also implement the terms and conditions on their sign-in page for full coverage. You have the option of including customizable terms and conditions that must be accepted to indicate compliance with the terms before entering the account.
Authentication
Inactive users can be signed out of the account after a chosen duration of inactivity. By default, this duration is set to 1 hour.
OAuth tokens are used by apps and the API to authenticate. After the period selected here, users will be required to reauthenticate with all apps. If set to Never, oAuth tokens can still be manually expired through My Connections under Personal Settings, or by an administrator on the user’s profile page using the Users menu.
Two-step verification
Two-step verification uses your phone to provide an extra layer of security for your user name. After you sign in, you are asked to enter a verification code that is sent to your phone using a text message (SMS) or voice call. Supported Authenticator apps like Google and Microsoft can be used as an option instead of your usual password.
Notes:
Two-step verification is enforced for all employee users in all ShareFile accounts.
Admins who prefer to disable the two-step verification enforcement for employee users can opt out of this enforcement by selecting Complete Opt-Out Waiver on the Two-step verification pop-up. This disables the enforcement, however, employee users are able to enable it for themselves to improve the security of their account.
Client users can use two-step verification even if the admin did not enforce the use of the feature.
This feature is available to both Client and Employee users. Two-step verification is supported on iOS and Android mobile devices.
Some apps require an app-specific password that must be generated each time you want to sign in to the app.
Limitations
- This feature is not available for trial accounts.
- This feature cannot be used with company credentials or a custom sign-in page.
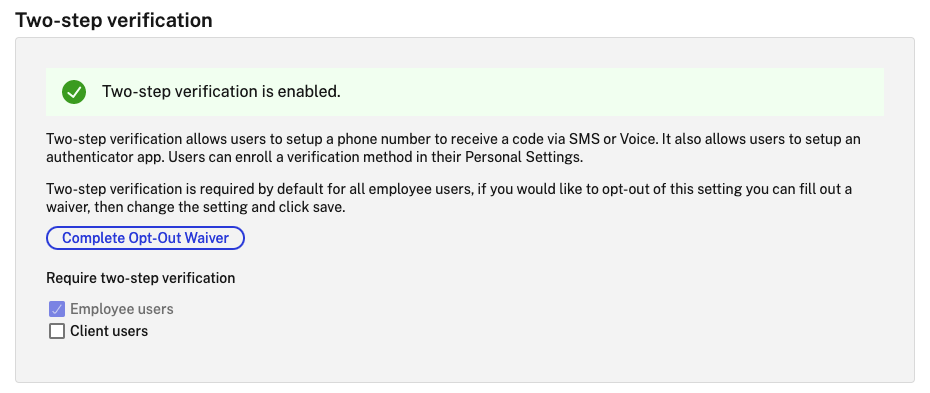
Require two-step verification requires that the user group enrolls and opts in for two-step verification. When enabled, the setting is enabled for all Employee Users or Client Users or both. By default, it is required for all employee users on all ShareFile accounts.
For new users, the activation process requires that the user enter a phone number that is enabled for text message (SMS) or voice. For existing users, the user is prompted to enter the phone number that is enabled for text message (SMS) or voice on the next sign-in from the web, desktop, or mobile app.
Device security
You can use these options to control the security level for devices used to access the ShareFile account by other users. These settings override any individual user preferences.
Modifiable device security settings include:
File self destruct - Determines the number of days without the user logging in or accessing the account before the account is automatically removed from the mobile device. Self-Destruct occurs even if the user is offline. Options are: Never, 1, 3, 7, 14, 30, 45, or 60 days. When self-destruct is triggered on a device, users with mobile push notifications enabled might receive a notification referencing a Poison Pill activation.
Require user passcode - Controls whether users are required to enter a 4-digit PIN or a password to access their content. When set, all content is encrypted. Options are: PIN, Password, or User-Selected Passcode.
Enable external applications - Determines whether users can open downloaded files outside of the ShareFile application.
Enable offline access to files - Controls whether users can see ShareFile content when the device is offline.
Restrict modified devices - Enabling this restricts users from being able to use ShareFile on a jailbroken device. Citrix cannot fully troubleshoot issues encountered by users that have chosen to jailbreak their device.
Enable automatic login - Determines whether users can opt to save their password on their device.
Device security presets
You can configure each setting individually at the Configure Device Security menu. In addition to a Custom setting option, Citrix offers several presets with various differences.
- Standard
- Secure
- Online Only
- Custom
Super user group
Administrators, also known as super users, are automatically added to all new and existing folders on a given ShareFile account. Super users have upload, download, delete, and administrator permissions on all folders. Super user group access to a folder cannot be modified or removed in the folder access menu. This feature is enabled on your account by default.
Manage super user group
Management of super users requires the Manage Super User Group membership permission.
- Go to Manage > Security > Edit Super User Group.
- To add a user, click Add New User.
- Select a user from the menu from the list of employees on your account.
- Use the check boxes to select the users you want to add. Click *Add**.
- Click Save.
You can also remove all users from the super user group. The group can be edited by any employee user with the Allow this user to manage Super User Group admin permission. Super users appear in the Folder Access section on each folder. Admin users can choose not to display the group in the access list.
To hide super users from the Folder Access section, go to Manage > Security > Edit Super User Group, then select the Hide Super Group from Folder Access List check box.
Download or upload alerts can be enabled for the super user group in the folder access menu on a folder-by-folder basis.
Single sign-on (SSO)
Single sign-on (SSO) can be configured using various IdPs and certain SAML 2.0 or 3.0-based federation tools using basic, integrated, or forms authentication. This feature is available for Business and Enterprise plans.
Supported configurations
The following configurations have been tested and are supported for most environments.
More configurations
These configurations have been successfully configured and tested by our engineering teams. The following configuration documentation is subject to change due to continued product enhancements and improvements. The following configuration guides are presented as is:
Data loss prevention
ShareFile integrates with third-party Data Loss Prevention (DLP) systems to identify files that contain sensitive information. To limit access and sharing of items based their content, enable DLP scanning on your storage zone controller and then configure the settings on this page.
Enable the Limit access to files based on their content setting if you have one or more private storage zones configured to use a third party DLP system to scan and classify documents. With this setting enabled, sharing and access filters are applied to documents based on the results of the DLP scan. Use the settings on this page to define the sharing and access filters for each classification.
- Unscanned documents - Allow these actions for documents that your DLP system has not scanned. This includes all documents stored in Citrix-managed storage zones or other storage zones where DLP is not enabled.
- Scanned: OK - Allow these actions for documents that your DLP system accepted.
- Scanned: Rejected - Allow these actions for documents that your DLP system rejected because they contain sensitive data.
For more information on Data Loss Prevention, see Data Loss Prevention.