Security
This article outlines security best practices for the Citrix SD-WAN solution. It provides general security guidance for Citrix SD-WAN deployments.
Citrix SD-WAN deployment guidelines
To maintain security through the deployment lifecycle, Citrix recommends the following security consideration:
- Physical Security
- Appliance Security
- Network Security
- Administration and Management
Physical security
Deploy Citrix SD-WAN Appliances in a Secure Server Room - The appliance or server on which Citrix SD-WAN is installed, should be placed in a secure server room or restricted data center facility, which protects the appliance from unauthorized access. At the minimum, access should be controlled by an electronic card reader. Access to the appliance is monitored by CCTV that continuously records all activity for auditing purposes. If a break-in, electronic surveillance system should send an alarm to the security personnel for immediate response.
Protect Front Panel and Console Ports from Unauthorized Access - Secure the appliance in a large cage or rack with physical-key access control.
Protect Power Supply - Make sure that the appliance is protected with an uninterruptible power supply (UPS).
Appliance security
For appliance security, secure the operating system of any server hosting a Citrix SD-WAN virtual appliance (VPX), perform remote software updates, and following secure lifecycle management practices:
- Secure the Operating System of Server Hosting a Citrix SD-WAN VPX Appliance - A Citrix SD-WAN VPX appliance runs as a virtual appliance on a standard server. Access to the standard server should be protected with role based access control and strong password management. Also, Citrix recommends periodic updates to the server with the latest security patches for the operating system, and update-to-date antivirus software on the server.
- Perform Remote Software Updates - Install all security updates to resolve any known issues. Refer to the Security Bulletins web page to sign up and receive up-to-date security alerts.
- Follow Secure Lifecycle Management Practices - To manage an appliance when redeploying, or initiating RMA, and decommissioning sensitive data, complete the data-reminisce countermeasures by removing the persistent data from the appliance.
Network Security
For network security, do not use the default SSL certificate. Use Transport Layer Security (TLS) when accessing the administrator interface, protect the appliance’s non-routable management IP address, configure a high availability setup, and implement Administration and Management safeguards as appropriate for the deployment.
- Do not use the Default SSL Certificate - An SSL certificate from a reputable Certificate Authority simplifies the user experience for Internet-facing Web applications. Unlike the situation with a self-signed certificate or a certificate from the reputable Certificate Authority, web browsers do not require users to install the certificate from the reputable Certificate Authority to initiate secure communication to the Web server.
- Use Transport Layer Security when Accessing Administrator Interface - Make sure that the management IP address is not accessible from the Internet or is at least protected by a secured firewall. Make sure that the LOM IP address is not accessible from the Internet or is at least protected by a secured firewall.
- Secure Administration and Management Accounts – Create an alternative admin account, set strong passwords for admin and viewer accounts. When configure remote account access, consider configuring externally authenticated administrative management of accounts using RADIUS and TACAS. Change the default password for the admin user accounts, configure NTP, use the default session timeout value, use SNMPv3 with SHA Authentication and AES encryption.
Citrix SD-WAN overlay network protects data traversing the SD-WAN overlay network.
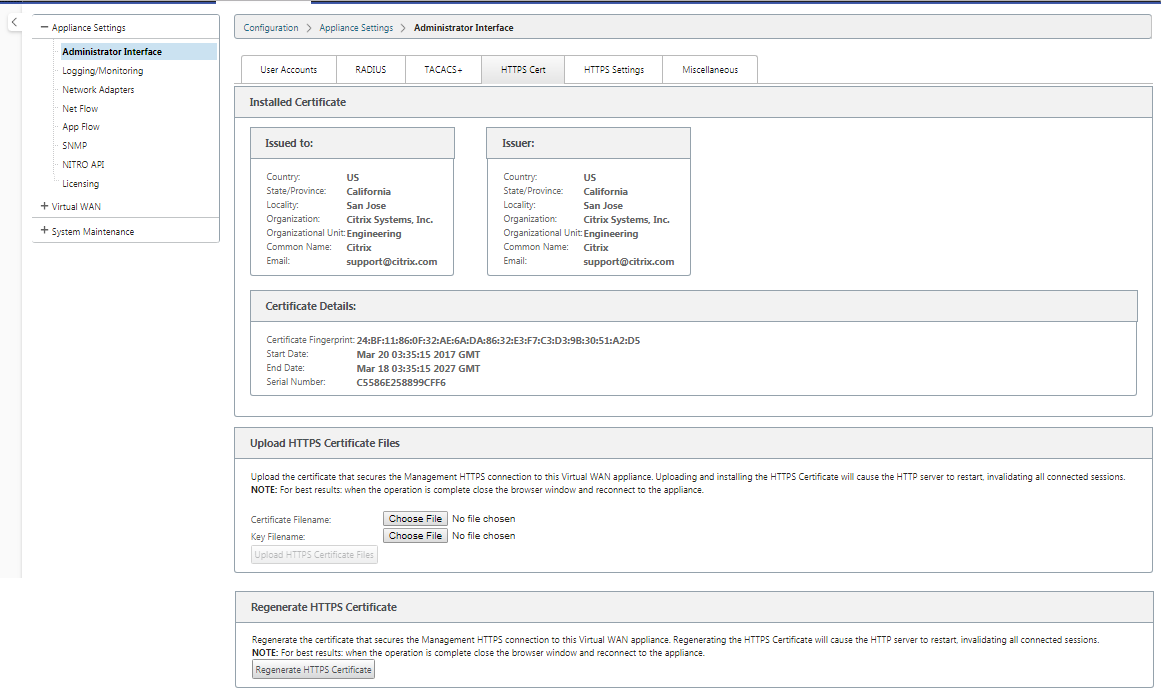
Secure administrator interface
For secure web management access, replace default system certificates by uploading and installing certificates from a reputable Certificate Authority. Go to, Configuration> Appliance Settings> Administrator Interface in the SD-WAN appliance GUI.
User accounts:
- Change local user password
- Manage users
HTTPS Certs:
- Certificate
- Key
Miscellaneous:
- Web Console Timeout
Configuration Editor > Global > Network Settings
Global firewall settings:
- Global Policy Template
- Default Firewall Actions
- Default Connection State Tracking
Global virtual path encryption settings:
- AES 128-bit (default)
- Encryption Key Rotation (Default)
- Extended Packet Encryption Header
- Extended Packet Authentication Trailer
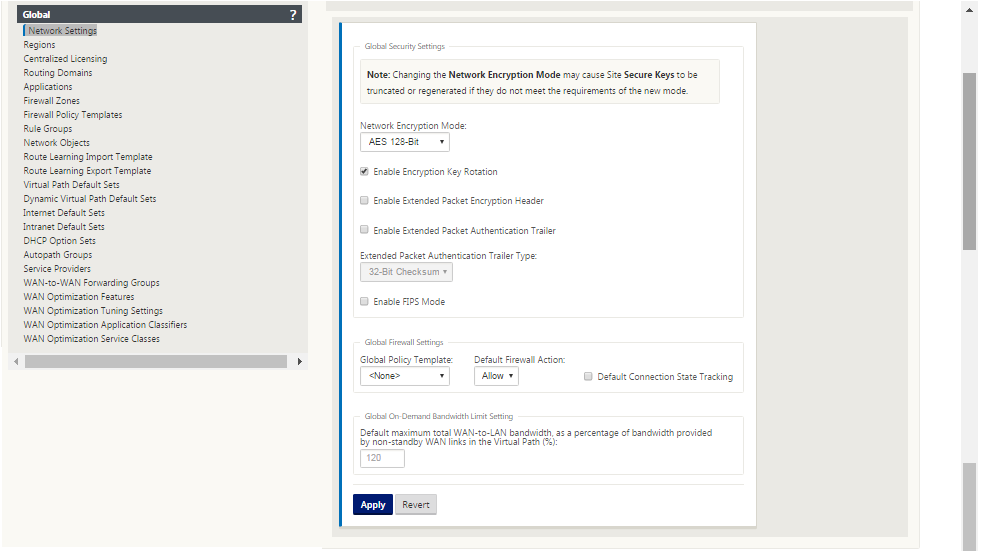
Global virtual path encryption settings
- AES-128 data encryption is enabled by default. It is recommended to use AES-128 or more protection of AES-256 encryption level for path encryption. Ensure that “enable Encryption Key Rotation” is set to ensure key regeneration for every Virtual Path with encryption enabled using an Elliptic Curve Diffie-Hellman key exchange at intervals of 10-15 minutes.
If the network requires message authentication in addition to confidentiality (that is, tamper protection), Citrix recommends using IPsec data encryption. If only confidentiality is required, Citrix recommends using the enhanced headers.
- Extended Packet Encryption Header enables a randomly seeded counter to be prepended to the beginning of every encrypted message. When encrypted, this counter serves as a random initialization vector, deterministic only with the encryption key. This randomizes the output of the encryption, providing strong message indistinguishably. Keep in mind that when enabled this option increases packet overhead by 16 bytes
- Extended Packet Authentication Trailer appends an authentication code to the end of every encrypted message. This trailer allows for the verification that packets are not modified in transit. Keep in mind this option increases packet overhead.
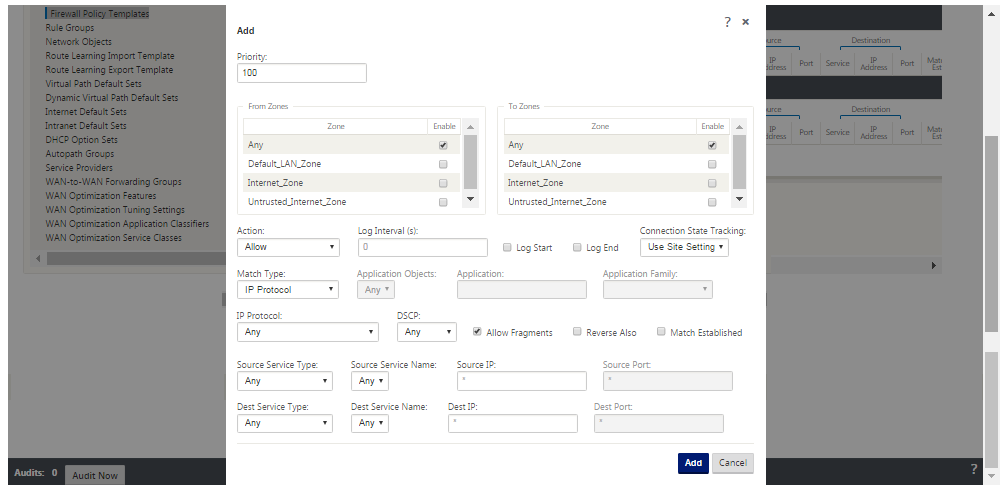
Firewall Security
The recommended Firewall configuration is with a default Firewall action as deny all at first, then add exceptions. Prior to adding any rules, document and review the purpose of the firewall rule. Use Stateful inspection and Application level inspection where possible. Simplify rules and eliminate redundant rules. Define and adhere to a change management process that tracks and allows for review of changes to Firewall settings. Set the Firewall for all appliances to track connections through the appliance using the global settings. Tracking connections verifies that packets are properly formed and are appropriate for the connection state. Create Zones appropriate to the logical hierarchy of the network or functional areas of the organization. Keep in mind that zones are globally significant and can allow geographically disparate networks to be treated as the same security zone. Create the most specific policies possible to reduce the risk of security holes, avoid the use of Any in Allow rules. Configure and maintain a Global Policy Template to create a base level of security for all appliances in the network. Define Policy Templates based on functional roles of appliances in the network and apply them where appropriate. Define Policies at individual sites only when necessary.
Global Firewall Templates - Firewall templates allow for the configuration of global parameters that impact the operation of the firewall on individual appliances operating in the SD-WAN overlay environment.
Default Firewall Actions – Allow enables packets not matching any filter policy are permitted. Deny enables packets not matching any filter policy are dropped.
Default Connection State Tracking – Enables bidirectional connection state tracking for TCP, UDP, and ICMP flows that do not match a filter policy or NAT rule. Asymmetric flows are blocked when this is enabled even when there are no Firewall policies defined. The settings may be defined at the site level which will override the global setting. If there is a possibility of asymmetric flows at a site, the recommendation is to enable this at a site or policy level and not globally.
Zones - Firewall zones define logical security grouping of networks connected to the Citrix SD-WAN. Zones can be applied to Virtual Interfaces, Intranet Services, GRE Tunnels, and LAN IPsec Tunnels.
WAN link security zone
Untrusted security zone should be configured on WAN links directly connected to a public (unsecure) network. Untrusted will set the WAN link to its most secure state, allowing only encrypted, authenticated, and authorized traffic to be accepted on the interface group. ARP and ICMP to the Virtual IP Address are the only other traffic type allowed. This setting will also ensure that only encrypted traffic is sent out of the interfaces associated with the Interface group.
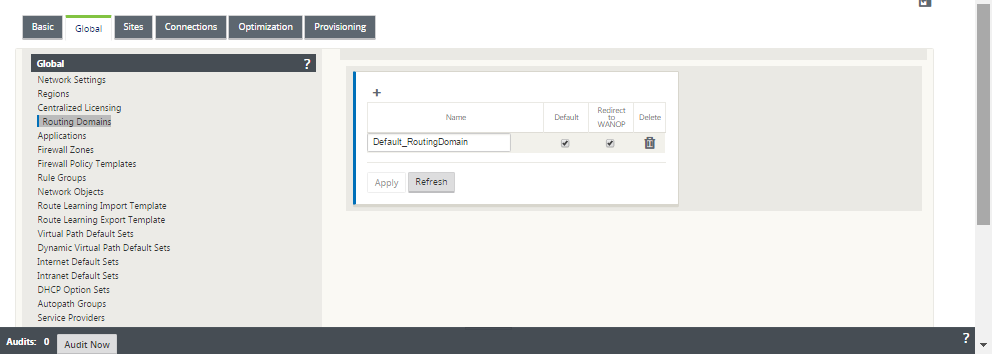
Routing domains
Routing Domains are network systems that include a set of routers that are used to segment network traffic. Newly created sires are automatically associated with the default Routing Domain.
Configuration Editor > Global
Routing Domains
- Default_RoutingDomain
IPsec Tunnels
- Default Sets
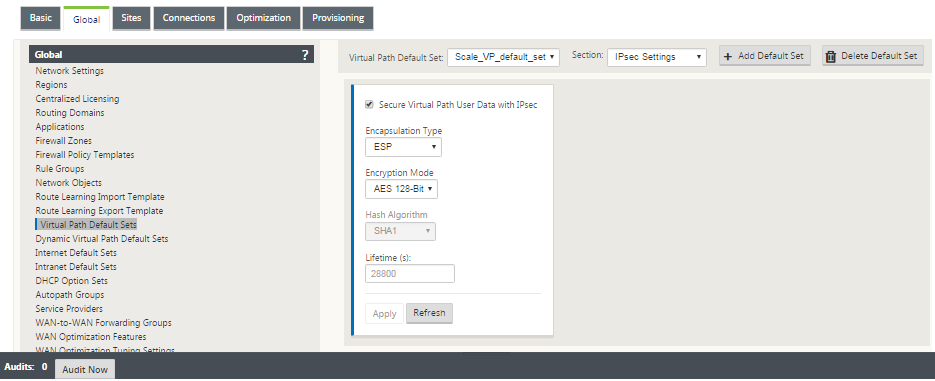
- Secure Virtual Path User Data with IPsec
IPSec Tunnels
IPsec Tunnels secure both user data and header information. Citrix SD-WAN appliances can negotiate fixed IPsec tunnels on the LAN or WAN side with non-SD-WAN peers. For IPsec Tunnels over LAN, a Routing Domain must be selected. If the IPsec Tunnel uses an Intranet Service, the Routing Domain is pre-determined by the chosen Intranet Service.
IPsec tunnel is established across the Virtual Path before data can flow across the SD-WAN overlay network.
- Encapsulation Type options include ESP - data is encapsulated and encrypted, ESP+Auth – data is encapsulated, encrypted, and validated with an HMAC, AH – data is validated with an HMAC.
- Encryption Mode is the encryption algorithm used when ESP is enabled.
- Hash Algorithm is used to generate an HMAC.
- Lifetime is a preferred duration, in seconds, for an IPsec security association to exist. 0 can be used for unlimited.
IKE settings
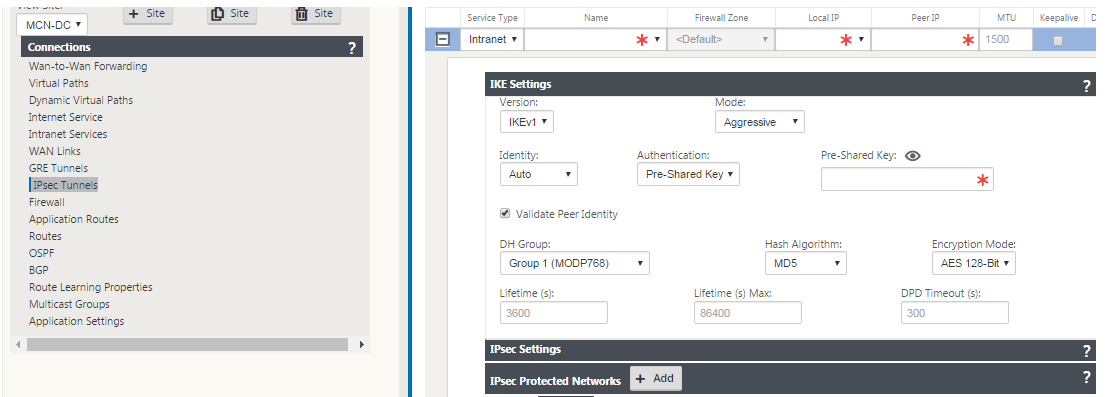
Internet Key Exchange (IKE) is an IPsec protocol used to create a security association (SA). Citrix SD-WAN appliances support both IKEv1 and IKEv2 protocols.
- Mode can be either Main Mode or Aggressive Mode.
- Identity can be automatic to identify peer, or an IP address can be used to manually specify peer’s IP address.
- Authentication enables Pre-Shared Key authentication or certificate as the method of authentication.
- Validate Peer Identity enables validation of the IKE’s Peer Identity if the peer’s ID type is supported, otherwise do not enable this feature.
- Diffie-Hellman Groups are available for IKE key generation with group 1 at 768-bit, group 2 at 1024-bit, and group 5 at 1536-bit group.
- Hash Algorithm includes MD5, SHA1, and SHA-256 has algorithms are available for IKE messages.
- Encryption Modes include AES-128, AES-192, and AES-256 encryption modes are available for IKE messages.
- IKEv2 settings include Peer Authentication and Integrity Algorithm.
Configuring firewall
Following common issues can be identified by verifying upstream Router and Firewall configuration:
- MPLS Queues/QoS settings: Verify that UDP encapsulated traffic between SD-WAN Virtual IP addresses does not suffer due to QoS settings on the intermediate appliances in the network.
- All traffic on the WAN links configured on the SD-WAN network should be processed by the Citrix SD-WAN appliance using the right service type (Virtual Path, Internet, Intranet, and Local).
- If traffic has to bypass the Citrix SD-WAN appliance and use the same underlying link, proper bandwidth reservations for SD-WAN traffic should be made on the router. Also, the link capacity should be configured accordingly in SD-WAN configuration.
- Verify that the intermediate Router/Firewall does not have any UDP flood and/or PPS limits enforced. This throttles the traffic when it is sent through the Virtual Path (UDP encapsulated).