-
-
Configuring the virtual path service between the MCN and client sites
-
Installing the SD-WAN appliance packages on the clients
-
Deploy Citrix SD-WAN standard edition in OpenStack using CloudInit
-
Configuration guide for Citrix Virtual Apps and Desktops workloads
-
Citrix SD-WAN Orchestrator on-premises configuration on Citrix SD-WAN appliance
-
-
This content has been machine translated dynamically.
Dieser Inhalt ist eine maschinelle Übersetzung, die dynamisch erstellt wurde. (Haftungsausschluss)
Cet article a été traduit automatiquement de manière dynamique. (Clause de non responsabilité)
Este artículo lo ha traducido una máquina de forma dinámica. (Aviso legal)
此内容已经过机器动态翻译。 放弃
このコンテンツは動的に機械翻訳されています。免責事項
이 콘텐츠는 동적으로 기계 번역되었습니다. 책임 부인
Este texto foi traduzido automaticamente. (Aviso legal)
Questo contenuto è stato tradotto dinamicamente con traduzione automatica.(Esclusione di responsabilità))
This article has been machine translated.
Dieser Artikel wurde maschinell übersetzt. (Haftungsausschluss)
Ce article a été traduit automatiquement. (Clause de non responsabilité)
Este artículo ha sido traducido automáticamente. (Aviso legal)
この記事は機械翻訳されています.免責事項
이 기사는 기계 번역되었습니다.책임 부인
Este artigo foi traduzido automaticamente.(Aviso legal)
这篇文章已经过机器翻译.放弃
Questo articolo è stato tradotto automaticamente.(Esclusione di responsabilità))
Translation failed!
Installing the SD-WAN Appliance Packages on the Clients
After you have prepared the appliance packages and connected the MCN, and the branch site administrators have connected their respective client appliances to the LAN and WAN, the next step is to upload and activate the appropriate SD-WAN appliance package on each client. The Change Management wizard guides you through this process.
To install and activate the software and configuration on a client appliance, do the following
-
On a connected PC, open a browser and log on to the MCN appliance Management Web Interface.
Enter the Management IP Address for the MCN in the browser address field. This displays the Management Web Interface Dashboard page for the MCN appliance.
-
Select the Configuration tab. In the navigation pane on the left, select Virtual WAN and then select Change Management.
This displays the Change Process Overview page (the first page of the Change Management wizard).
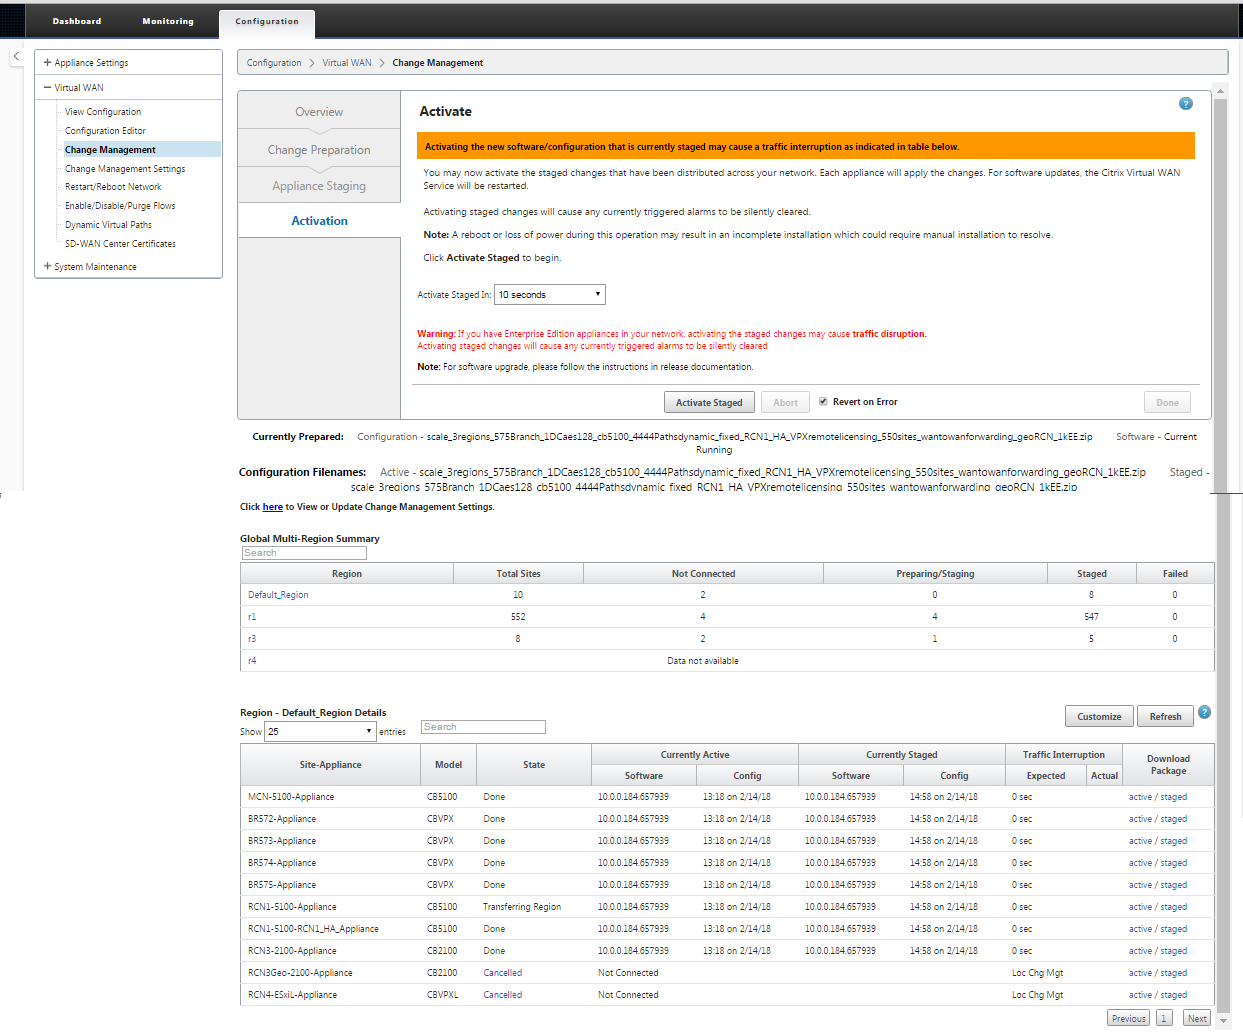
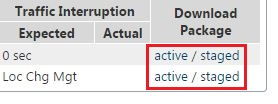
At the bottom of this page, you can see a table listing the individual sites and appliances. At the far right of the table in the Download Package column, are links for the Active (if available) and Staged appliance packages.
Note
If this is an initial installation, the Active links are not yet available, and are replaced by a plain text marker none.
-
Click the Staged link for the package you want to download.
In the Site-Appliance table, locate the entry for your site appliance, and click the Staged link in the Download Package column of that entry. A file browser for selecting the download location (on the local PC) displays.
-
Select the download location and click OK.
-
(Optional.) After the download completes, log out of the MCN Management Web Interface.
-
Open a browser, and enter the IP Address for the client to which you want to upload the appliance package .zip file.
Note
Please ignore any browser certificate warnings for the Management Web Interface.
This opens the Citrix SD-WAN Management Web Interface Login screen on the client appliance.
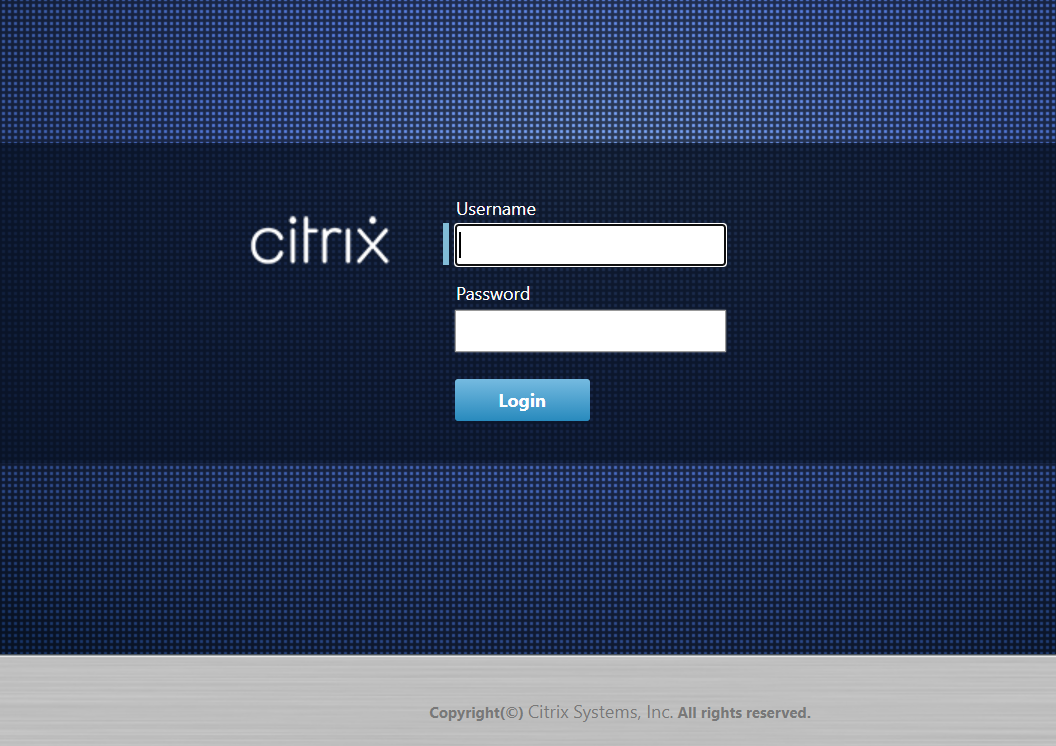
-
Enter the Administrator user name and password and click Login. The default Administrator user name is admin. The default password is password.
This displays the Management Web Interface Dashboard page for the client appliance.
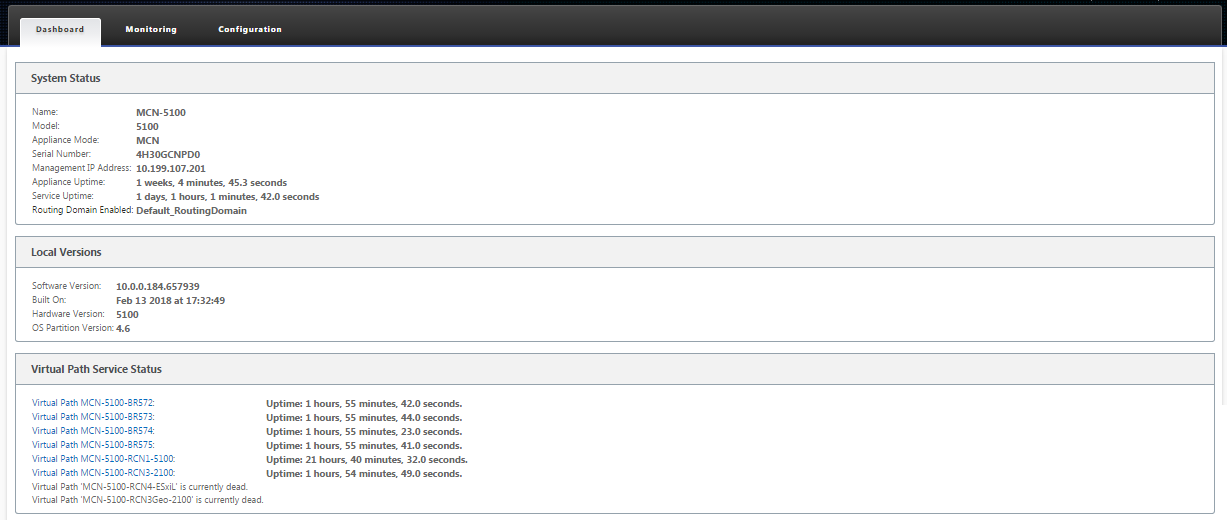
Note
If this is an initial installation, or if you have temporarily disabled the Virtual WAN Service on this appliance, you can see a goldenrod Audit Alert icon with a status message indicating that the Virtual WAN Service is inactive or disabled. You can ignore this alert for now. The alert will remain on the Dashboard page until you manually start the service, after completing the installation.
-
Select the Configuration tab.
-
Open the System Maintenance branch in the navigation tree (left pane), and select Local Change Management.
This displays the Local Appliance Change Process Upload page for uploading an Appliance Package.
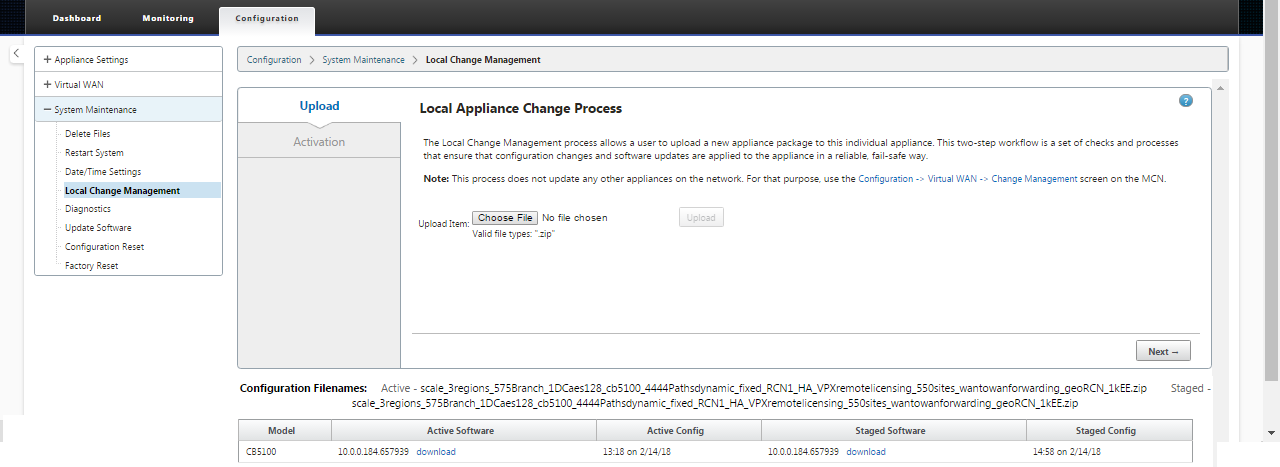
-
Click Choose File next to the Upload Item label.
This opens a file browser for selecting the Appliance Package you want to upload to the client.
-
Navigate to the SD-WAN appliance package zip file you just downloaded from the MCN, select it, and click OK.
-
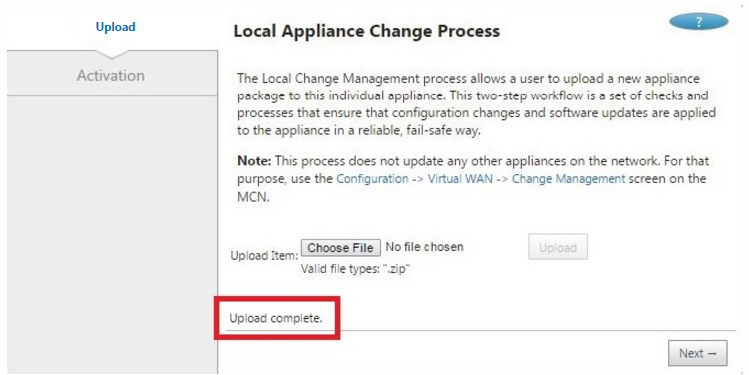
Click Upload.
The upload process takes a few seconds to complete. When completed, a status message displays (left middle of page), stating Upload complete.
-
Click Next.
This uploads the specified software package, and displays the Local Change Management Activation page.
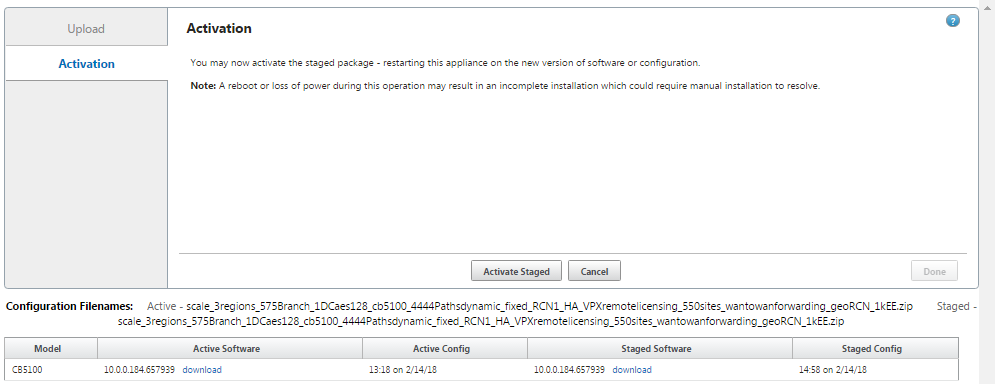
-
Click Activate Staged.
This displays a dialog box prompting you to confirm the activation operation.
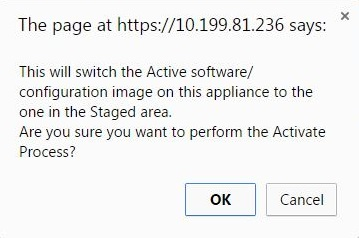
-
Click OK.
This activates the newly installed package and, if this is not an initial deployment, starts the Virtual WAN Service on the client appliance. This process takes several seconds, during which a progress status message displays.

When the activation completes, a status message displays stating Activation complete, and the Done button becomes available.
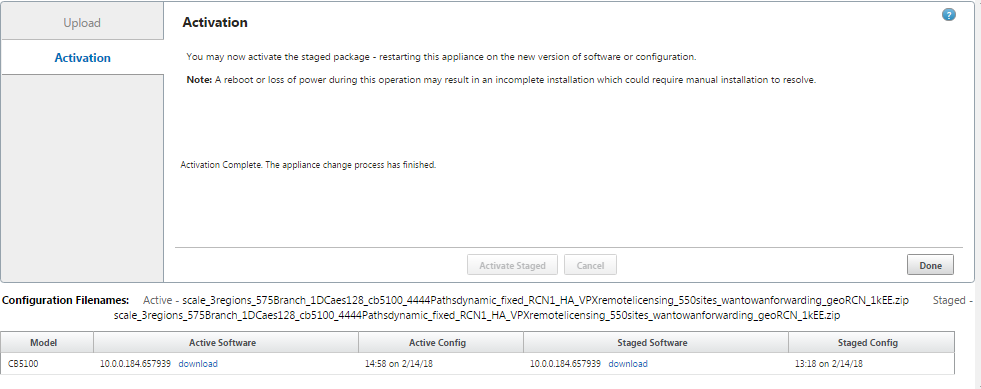
-
Click Done to exit the wizard and view the activation results.
After the activation completes, click Done on the Activation page to return to the Management Web Interface Dashboard page.
If this is not an initial deployment, this page should now display updated information for the currently active version of the software package, the OS partition, and the status of the Virtual Path. If this is an initial installation, there will be a goldenrod Audit Alert icon, along with a status message indicating that the Virtual WAN Service is inactive or disabled. In this case, you must manually enable the service, as described in Enabling the Virtual WAN Service.
The below figure shows a sample client Dashboard page displaying the alert icon and status message.
The final step to complete an initial SD-WAN deployment, is to enable the Virtual WAN Service. Instructions are provided in the section Enabling the Virtual WAN Service.
Share
Share
In this article
This Preview product documentation is Cloud Software Group Confidential.
You agree to hold this documentation confidential pursuant to the terms of your Cloud Software Group Beta/Tech Preview Agreement.
The development, release and timing of any features or functionality described in the Preview documentation remains at our sole discretion and are subject to change without notice or consultation.
The documentation is for informational purposes only and is not a commitment, promise or legal obligation to deliver any material, code or functionality and should not be relied upon in making Cloud Software Group product purchase decisions.
If you do not agree, select I DO NOT AGREE to exit.