This content has been machine translated dynamically.
Dieser Inhalt ist eine maschinelle Übersetzung, die dynamisch erstellt wurde. (Haftungsausschluss)
Cet article a été traduit automatiquement de manière dynamique. (Clause de non responsabilité)
Este artículo lo ha traducido una máquina de forma dinámica. (Aviso legal)
此内容已经过机器动态翻译。 放弃
このコンテンツは動的に機械翻訳されています。免責事項
이 콘텐츠는 동적으로 기계 번역되었습니다. 책임 부인
Este texto foi traduzido automaticamente. (Aviso legal)
Questo contenuto è stato tradotto dinamicamente con traduzione automatica.(Esclusione di responsabilità))
This article has been machine translated.
Dieser Artikel wurde maschinell übersetzt. (Haftungsausschluss)
Ce article a été traduit automatiquement. (Clause de non responsabilité)
Este artículo ha sido traducido automáticamente. (Aviso legal)
この記事は機械翻訳されています.免責事項
이 기사는 기계 번역되었습니다.책임 부인
Este artigo foi traduzido automaticamente.(Aviso legal)
这篇文章已经过机器翻译.放弃
Questo articolo è stato tradotto automaticamente.(Esclusione di responsabilità))
Translation failed!
Deploy plug-ins on windows systems
The WANOP Client Plug-in is an executable Microsoft installer (MSI) file that you download and install as with any other web-distributed program. Obtain this file from the MyCitrix section of the Citrix.com website.
Note:
The WANOP Client Plug-in user interface refers to itself as Citrix Acceleration Plug-in Manager.
The only user configuration needed by the plug-in is the list of appliance addresses. This list can consist of a comma-separated list of IP or DNS address. The two forms can be mixed. You can customize the distribution file so that the list points to your appliance by default. Once installed, operation is transparent. Traffic to accelerated subnets is sent through an appropriate appliance, and all other traffic is sent directly to the server. The user application is unaware that any of this is happening.
Installation
Prerequisites:
Windows 10 requires all drivers to have a valid digital signature to perform the installation without any error.
To install WANOP Client Plug-in Plug-in accelerator on Windows system:
-
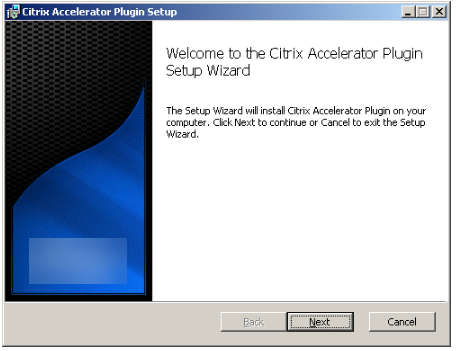
The Repeater*.msi file is an installation file. Close all applications and any windows that might be open, and then launch the installer it in the usual way (double-click on in a file window, or use the run command).
Figure 1. Initial Installation Screen:
The steps below are for an interactive installation. A silent installation can be performed with the command:
“msiexec /i client_msi_file /qn”
-
The installation program prompts for the location in which to install the software. The directory that you specify is used for both the client software and the disk-based compression history. Together, they require a minimum of 500 MB of disk space.
-
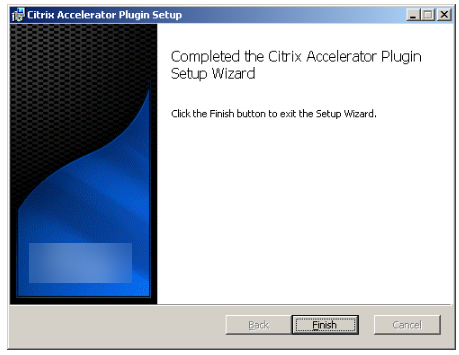
When the installer finishes, it might ask you to restart the system. After a restart, the WANOP Client Plug-in Plug-in starts automatically.
Figure 2. Final Installation Screen
-
Right-click the Accelerator icon in the task bar and select Manage Acceleration to launch the Citrix Plug-in Accelerator Manager.
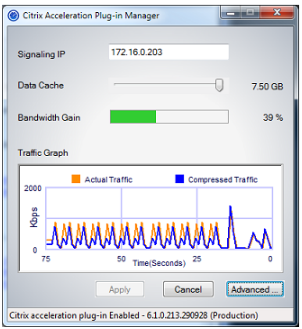
Figure 3. Citrix Accelerator Plug in Manager, Initial (Basic) Display
-
If the .MSI file has not been customized for your users, specify the signaling address and the amount of disk space to use for compression:
-
In the Appliances: Signaling Addresses field, type the signaling IP address of your appliance. If you have more than one Plug-in-enabled appliance, list them all, separated by commas. Either IP or DNS addresses are acceptable.
-
Using the Data Cache slider, select the amount of disk space to use for compression. More is better. 7.5 GB is not too much, if you have that much disk space available.
-
Press Apply.
The WANOP Client Plug-in accelerator is now running. All future connections to accelerated subnets will be accelerated
On the plug-in’s Advanced Rules tab, the Acceleration Rules list should show each appliance as Connected and each appliance’s accelerated subnets as Accelerated. If not, check the Signaling Addresses IP field and your network connectivity in general.
-
Troubleshoot plug-ins
Plug-in installation generally goes smoothly. If not, check for the following issues:
Common problems:
-
If you do not reboot the system, the WANOP Client Plug-in will not run properly.
-
A highly fragmented disk can result in poor compression performance.
-
A failure of acceleration (no accelerated connections listed on the Diagnostics tab) usually indicates that something is preventing communication with the appliance. Check the Configuration: Acceleration Rules listing on the plug-in to make sure that the appliance is being contacted successfully and that the target address is included in one of the acceleration rules. Typical causes of connection failures are:
-
The appliance is not running, or acceleration has been disabled.
-
A firewall is stripping WANOP Client Plug-in TCP options at some point between the plug-in and appliance.
-
The plug-in is using an unsupported VPN.
-
Deterministic network enhancer locking error
On rare occasions, after you install the plug-in and restart your computer, the following error message appears twice:
Deterministic Network Enhancer installation requires a reboot first, to free locked resources. Please run this install again after restarting the computer.
If this occurs, do the following:
-
Go to Add/Remove Programs and remove the WANOP Client Plug-in, if present.
-
Go to Control Panel > Network Adapters > Local Area Connection > Properties, find the entry for Deterministic Network Enhancer, clear its check box, and click OK. (Your network adapter might be called by a name other than “Local Area Connection.”)
-
Open a command window and go to c:\windows\inf (or the equivalent directory if you have installed Windows in a non-standard location).
-
Type the following command:
find “dne2000.cat” oem*.inf
-
Find the highest-numbered oem*.inf file that returned a matching line (the matching line is CatalogFile= dne2000.cat) and edit it. For example:
notepad oem13.inf
-
Delete everything except the three lines at the top that start with semicolons, and then save the file. This will clear out any inappropriate or obsolete settings and the next installation will use default values.
-
Retry the installation.
Other installation problems
Any problem with installing the WANOP Client Plug-in is usually the result of existing networking, firewall, or antivirus software interfering with the installation. Usually, once the installation is complete, there are no further problems.
If the installation fails, try the following steps:
-
Make sure the plug-in installation file has been copied to your local system.
-
Disconnect any active VPN/remote networking clients.
-
Disable any firewall and antivirus software temporarily.
-
If some of this is difficult, do what you can.
-
Reinstall the WANOP Client Plug-in.
-
If this doesn’t work, reboot the system and try again.
Share
Share
This Preview product documentation is Cloud Software Group Confidential.
You agree to hold this documentation confidential pursuant to the terms of your Cloud Software Group Beta/Tech Preview Agreement.
The development, release and timing of any features or functionality described in the Preview documentation remains at our sole discretion and are subject to change without notice or consultation.
The documentation is for informational purposes only and is not a commitment, promise or legal obligation to deliver any material, code or functionality and should not be relied upon in making Cloud Software Group product purchase decisions.
If you do not agree, select I DO NOT AGREE to exit.