Configure access policies for the applications
Access policies within Secure Private Access allow you to enable or disable access to the apps based on the context of the user or user’s device.
Access restrictions must be configured through the Google Admin console rather than within the Secure Private Access interface.
Rules are configured in the Google Admin console > Rules. These rules are advanced settings related to DLP, such as adding a watermark, blocking the download of files with social security numbers, and URL filtering.
For details on creating policies and rules for Google Chrome in the Google Admin console, see the following topics:
Configure access policies
- In the admin console, click Access Policies.
- Click Create Policy.
-
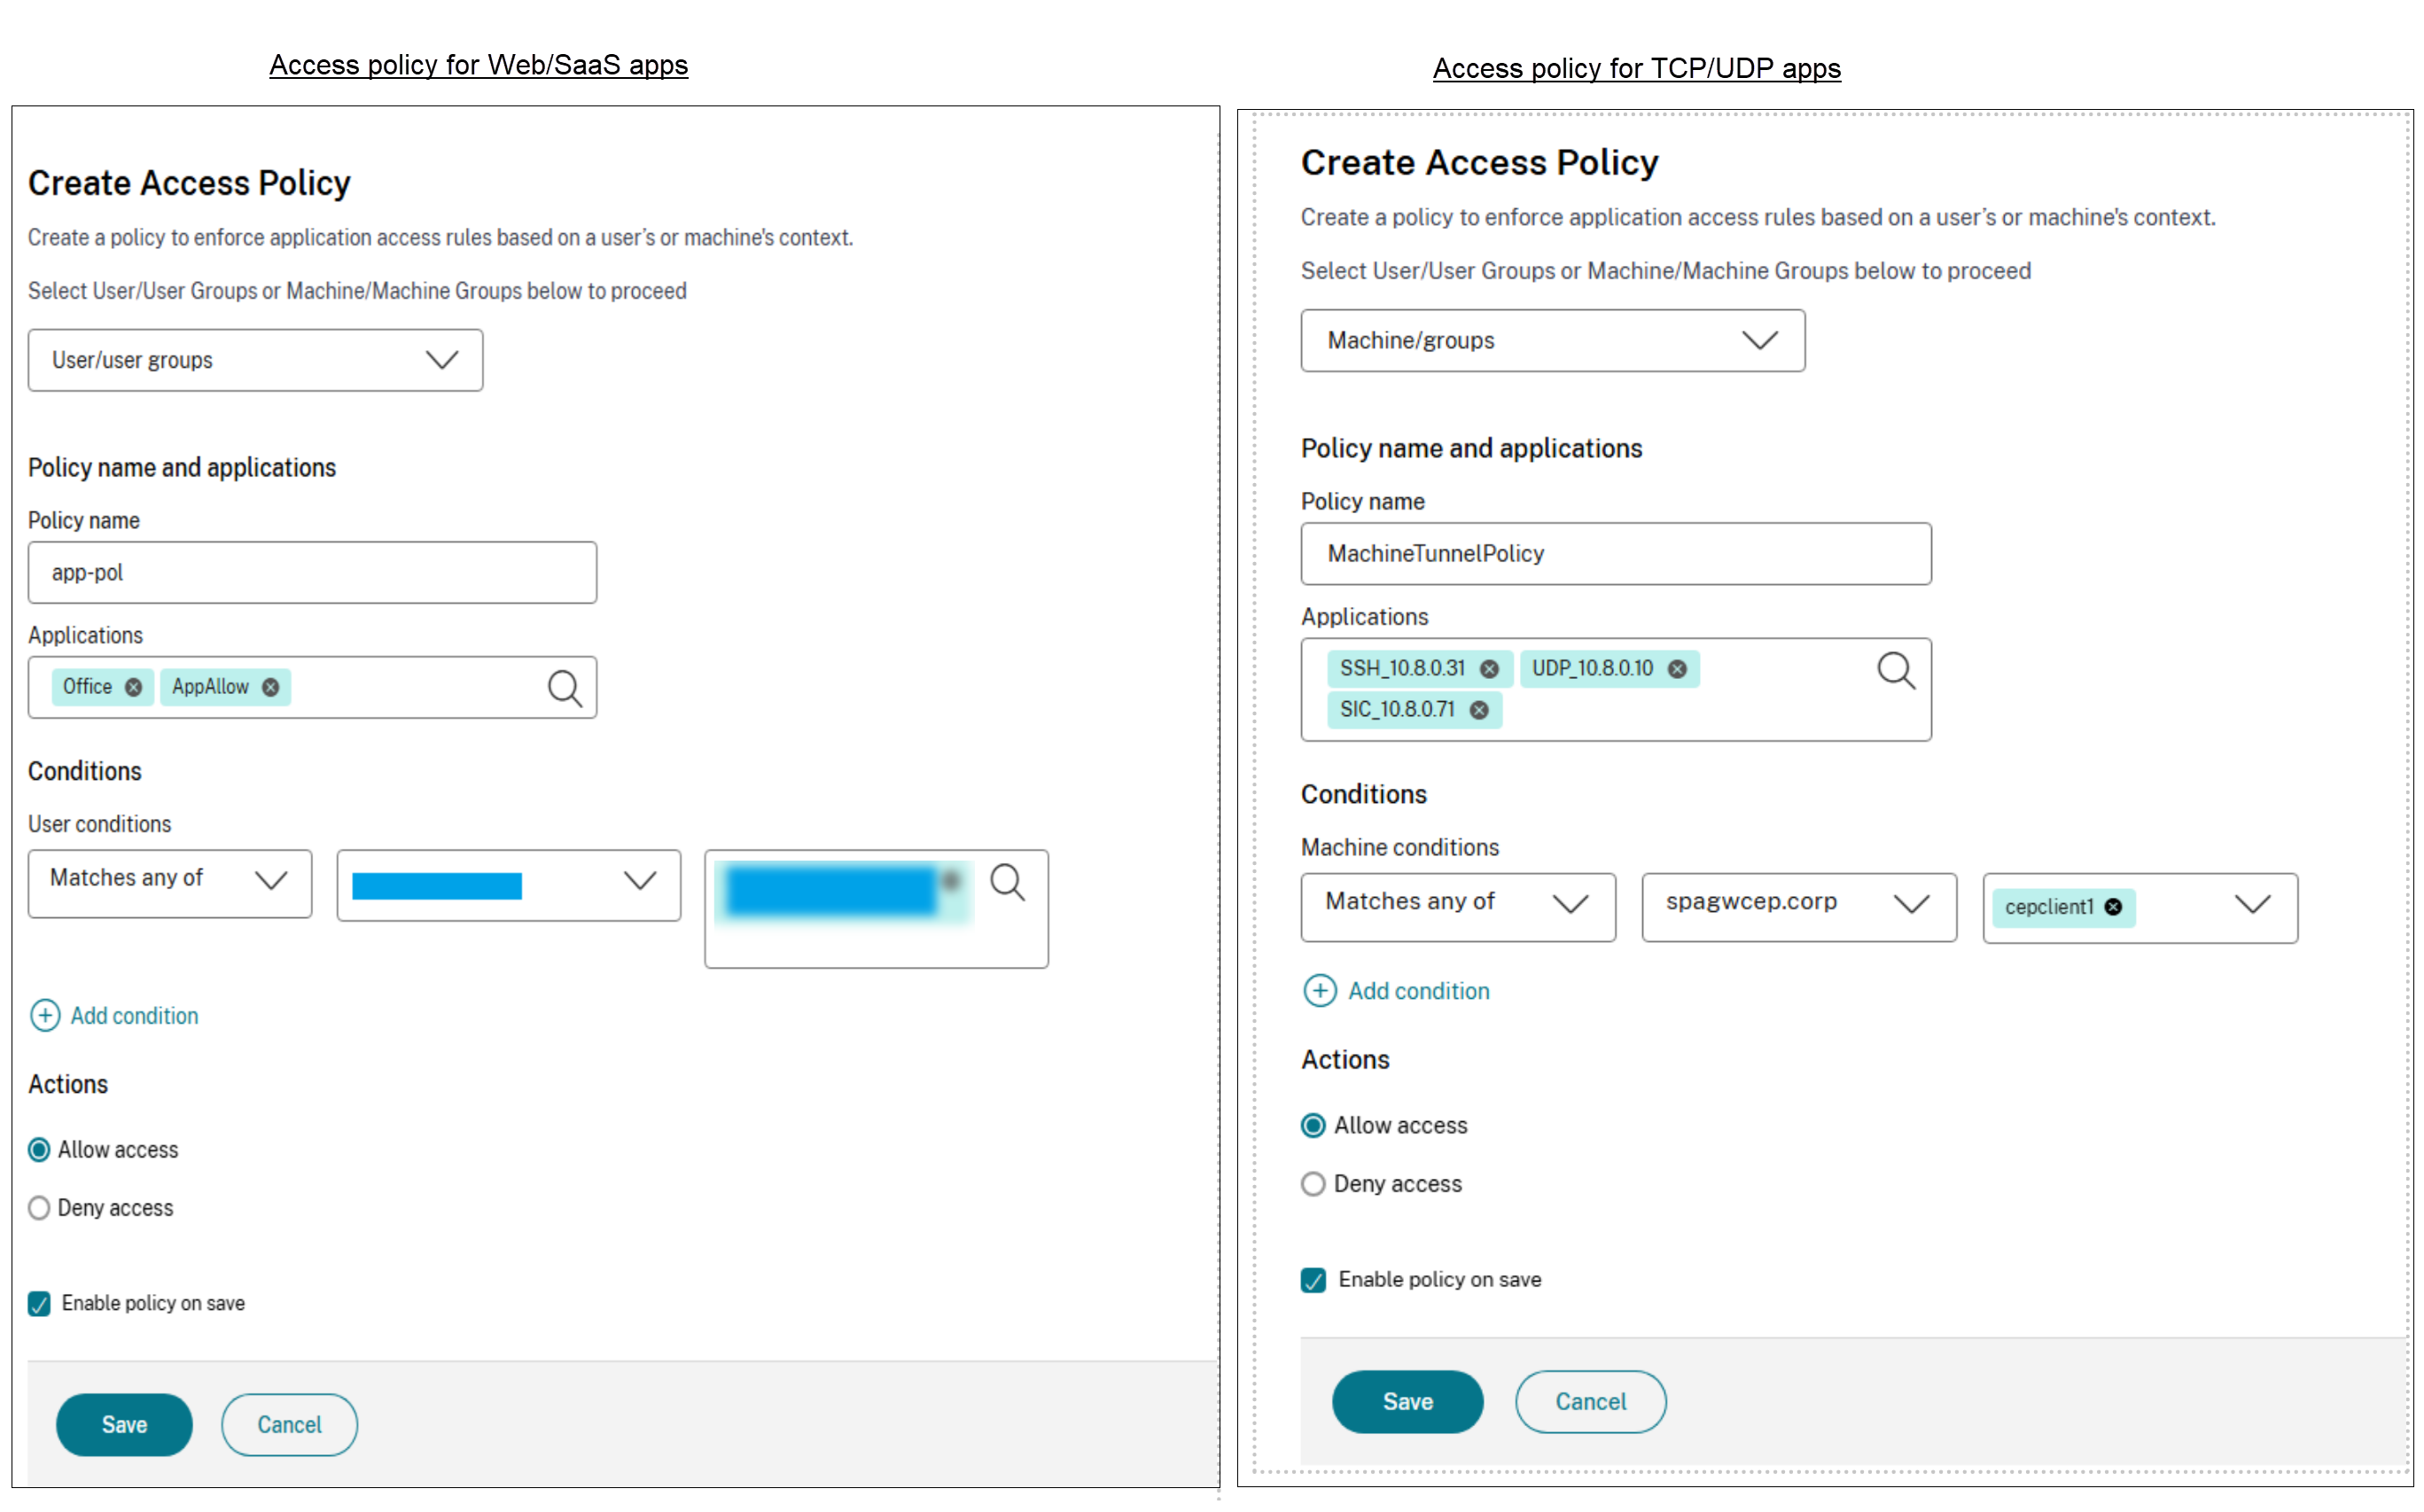
In the Create Access Policy page, select one of the following:
- Users/User groups
- Machines/Machine groups
Application access rules are enforced based on a user’s or machine’s context, based on the selection in the access policy.
You can select Machine/Machine groups to enable Always On connectivity. For Always On connectivity, you must have the device certificates enrolled. For details see Device certificate enrollment configuration.
For more information on the machine tunnel, see Always On VPN before Windows Logon.
-
- In Policy name, enter a name for the policy.
- In Applications, select the apps for which you want to enforce the access policies.
-
In Users conditions – Select the conditions and users or user groups based on which app access must be allowed or denied.
- Matches any of: Only the users or groups that match any of the names listed in the field are allowed access.
- Does not match any: All users or groups except those listed in the field are allowed access.
You can search for users by display name, email ID, or user principal name. This search option allows admins to accurately identify and grant access to the correct user, even if they have multiple accounts. For details, see Policy conditions.
-
(Optional) Click + to add multiple conditions based on the context.
When you add conditions based on a context, an AND operation is applied on the conditions, and the policy is evaluated only if the Users and the optional contextual based conditions are met. You can apply the following conditions based on context.
-
Network Location - Select the condition and the network using which the users access the apps.
- Matches any of: Only users or user groups accessing the apps from any of the network locations listed are enabled for access to the apps.
- Does not match any: All users or user groups other than those from the listed network locations are enabled for access.
-
Device Posture - Select the conditions that the user device must fulfill to access the apps.
For details, see Policy conditions.
-
-
In Actions, select one of the following actions that must be enforced on the app based on the condition evaluation.
- Allow access
- Deny access
- Select Enable policy on save. If you do not select this option, the policy is only created and not enforced on the applications. Alternatively, you can also enable the policy from the Access Policies page by using the toggle switch.
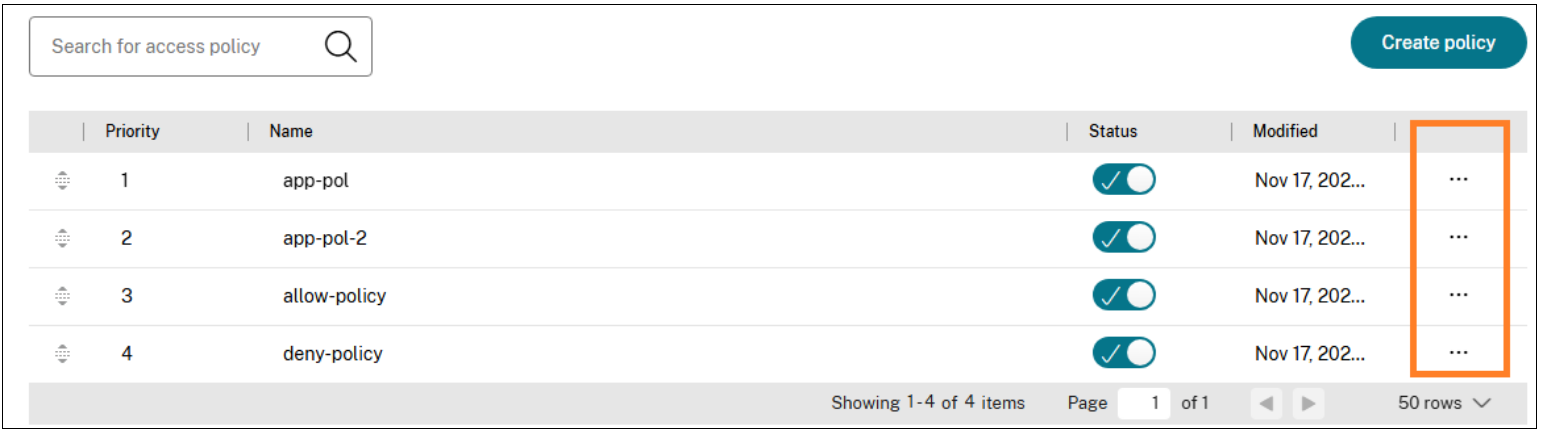
Edit an access policy
- In the Secure Private Access admin console, click Access Policies.
- Click the ellipsis button in line with the policy that you want to modify, and then click Edit access policy.
- Edit the policy details.
- Click Update.
Change access policy priority
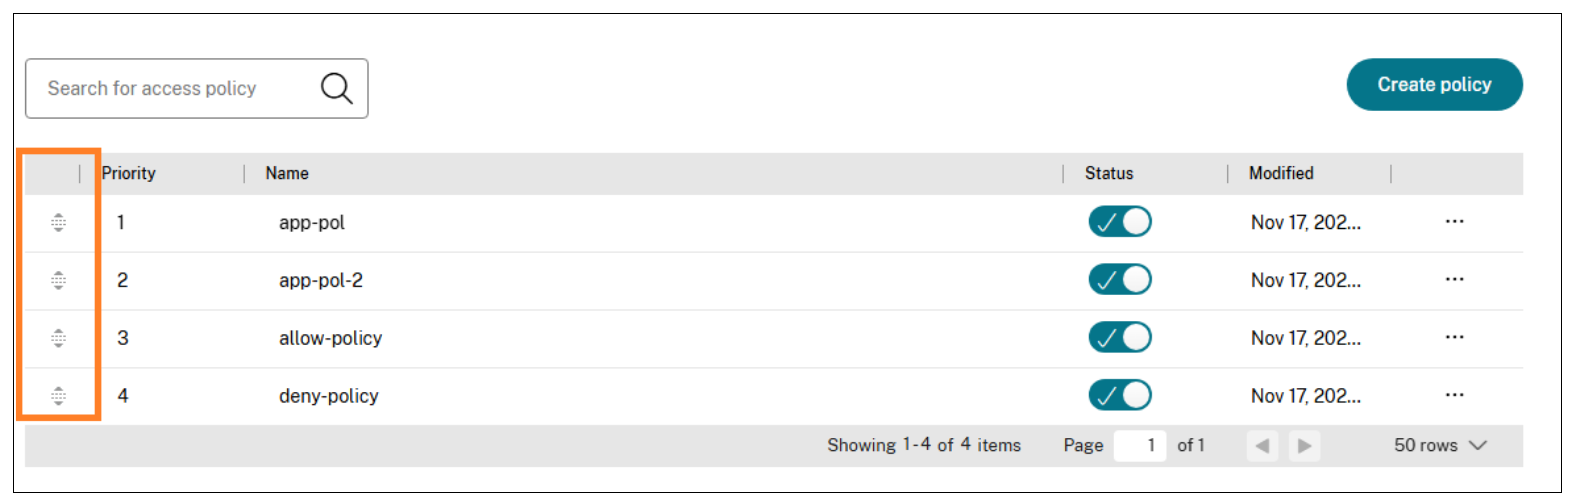
After an access policy is created, a priority number is assigned to the access policy, by default. You can view the priority on the Access Policies home page.
A priority with a lower value has the highest preference and is evaluated first. If this policy does not match the conditions defined, the next policy with the lower priority number is evaluated and so on.
You can change the priority order by moving the policies up or down by using the up-down icon in the Priority column.
Next steps
- Validate your configuration from the client machines (Windows and macOS).
- For the TCP/UDP apps, validate your configuration from the client machines (Windows and macOS) by logging into the Citrix Secure Access client.