Direct Import
Aug 14, 2017
You can directly import desktop applications for which an .msi, .appv, or .sft file is available.
If you have both a standard Windows installer (.msi) file and an App-V (.sft or .appv) package file, it is better to import the .msi. This is because the App-V package is prepared for the virtual environment and therefore does not include all of the application DNA for a native Windows environment. For example, it might omit information about drivers and registry settings. Therefore Citrix recommends that you import the .msi file if one is available.
To import applications:
- From the AppDNA side bar, choose Import > Applications.
- Click the Direct Import tab.
- Specify the .msi, .appv, or .sft files to import, click Browse, Search, or Import from list.
- Select the applications to import.
- Click Import.
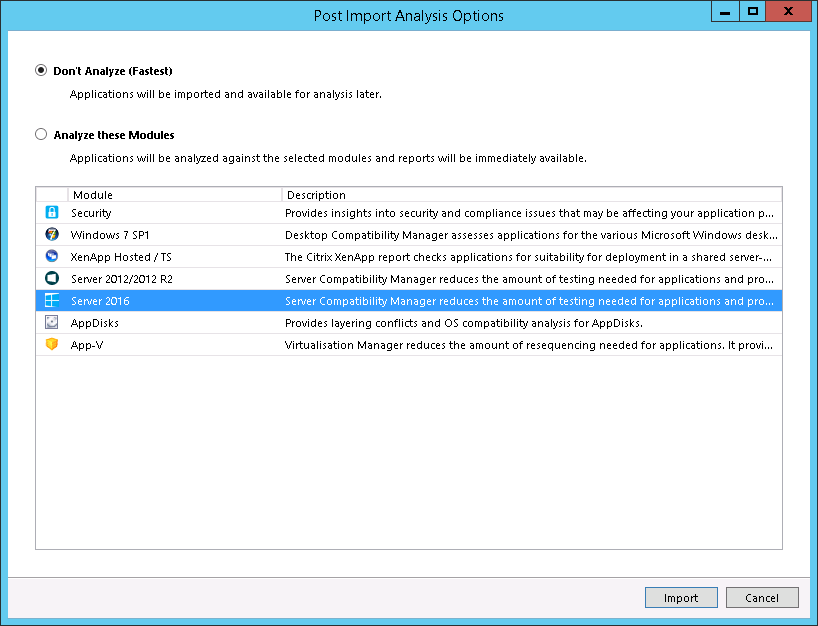
- In the dialog, select Don’t Analyze > Import.

You can add new imports at the same time as other application imports are in progress. Note: The Import button is available when the cursor highlights any application import which is not in progress. If your selection includes multiple applications where some import processes are in progress and others complete, then the Import button is disabled until all processing has completed.
Track the progress of the import in:
- Progress column.
- Log icon to the right of the application progress message.
- View Server Queue link in the lower right-hand corner.
To cancel an import, click the Cancel button. If the import is canceled during client-side processing, the Canceled status displays once the MSI extraction is complete.
Apply MST files during import
You can use .mst files with .msi files to transform or manipulate the installation package.
If an .mst file is available in the same location as the .msi file, you can choose to apply it during the import. To apply for all applications for which an .mst file is available, select the Select All MSTs check box.
Alternatively, you can select .mst files for specific applications. To select .mst files for specific applications, click the + to the left of the application and select the .mst file to apply.
Add applications to a group during import
- In the Import Applications screen, select the applications to add to the group.
- Open the application properties.
- From the Groups tab, select one or more groups.
Alternatively, you can click in the Group column to select a group for an individual application.
Re-imported applications
When a desktop application is first imported into AppDNA, its fingerprint is stored. The fingerprint is a combination of the application product name, manufacturer name, version number, and the number of files and registry entries it has. If the application is imported into AppDNA again, by default the application is considered the same if the fingerprint is the same or has not changed by more than 10%. If you modify an application as part of the remediation process and then re-import it, it is considered the same application. Similarly, AppDNA considers new versions of an application to be the same application.
You can, however, change this behavior so that the application is always considered different even if there is no change in the fingerprint. To do this, select the Finger print override check box in Import and Analyze Settings. However, this action has licensing implications because AppDNA licensing controls the number of applications for which you can view reports.
If you re-import an application from the same location, AppDNA shows the text in the Path column in bold to indicate that the application was previously imported from the same location.
 View PDF


