License Server administration without a console
There are several administration procedures that you can do without using the Citrix Licensing Manager. We recommend that you use the console whenever possible. This article describes the procedures required if you are unable to use a console.
- Configure the Vendor Daemon log (CITRIX.log) from being overwritten
- Customer Success Services renewal files
- Delete license files
- Disable the domain name truncation on Windows
- Find renewal and maintenance expiration dates
You can use the licensing management tool on citrix.com to download, allocate, install, modify allocations, return, and hide licenses. For more information, see Manage Licenses at citrix.com My Account.
You can use licensing commands to perform licensing tasks. For more information, see Licensing commands.
Configure the Vendor Daemon log (CITRIX.log) from being overwritten
In License Sever version 11.16.6 build 34000 that does not support the License Administration Console, you can configure the Vendor Daemon log (CITRIX.log) from being overwritten as follows:
- Go to
LMGRD_LOG_FILElocation (HKEY_LOCAL_MACHINE\SOFTWARE\WOW6432Node\FLEXlm License Manager\Citrix Licensing\LMGRD_LOG_FILE) in your system. -
Add a
+in front of the path. For example, example:C:\Program Files (x86)\Citrix\Licensing\LS\Logs\lmgrd.logchanges to+C:\Program Files (x86)\Citrix\Licensing\LS\Logs\lmgrd.logas seen in the following image.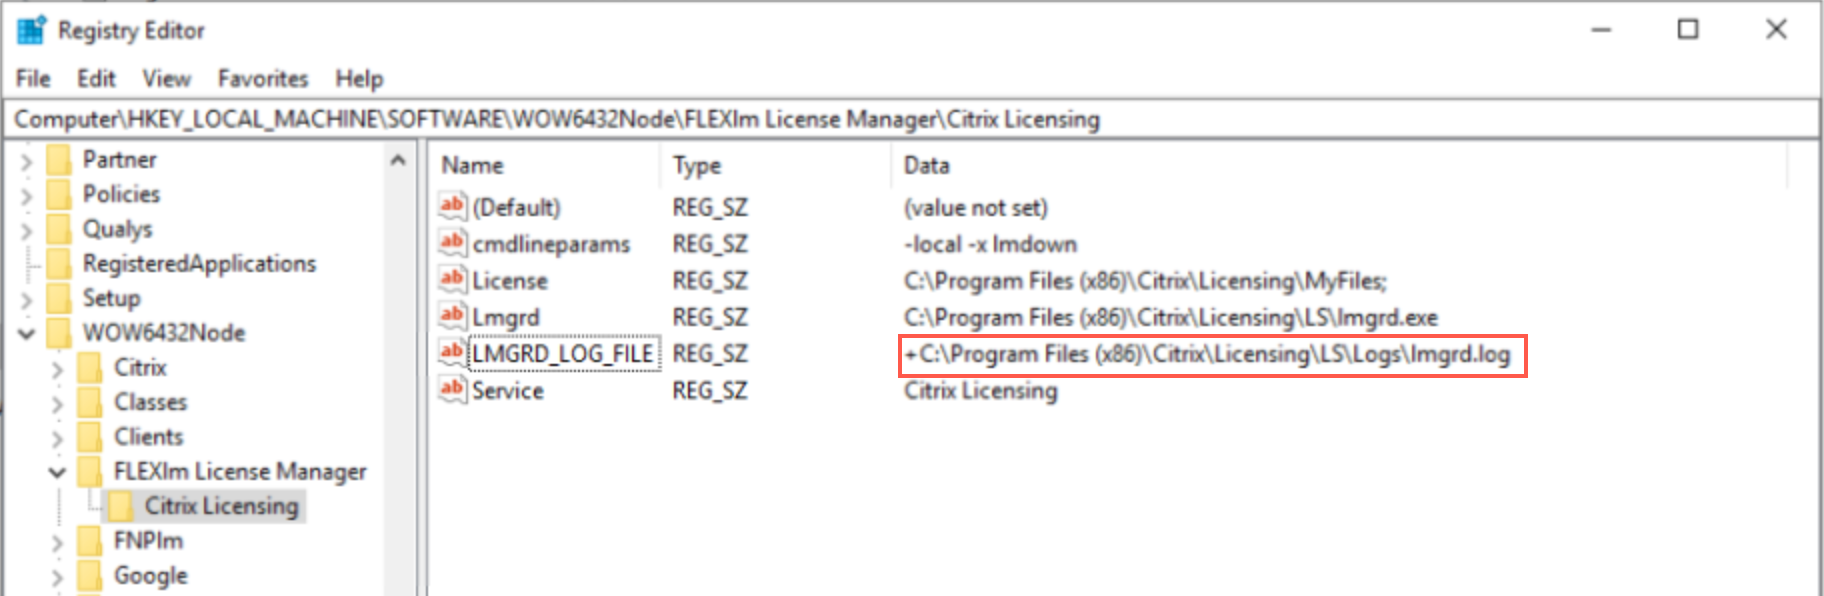
Customer Success Services
After you download your Customer Success Services renewal license file from citrix.com, you must add it to your License Server. Copy the Customer Success Services renewal license files to the same directory as your existing license files and reread (using lmreread) the license files. For more information about the lmreread command, see Reread license and options files (lmreread).
By default, this location is:
C:\Program Files\Citrix\Licensing\MyFiles on a 32-bit server
C:\Program Files (x86)\Citrix\Licensing\MyFiles on a 64-bit server
After you add the renewal license to your License Server, the license automatically unlocks any subsequent versions of the product released during the Customer Success Services period.
To separate your licenses (two different licenses on two different servers):
- Select a second server and install the License Server software.
- Go to citrix.com to modify and allocate your original licenses into two new files. These original licenses are contained in your current license file on the original License Server.
- Allocate licenses to your first License Server for your first deployment.
- Allocate licenses to create another license file for the second License Server for your second deployment.
- Generate and download your Customer Success Services files and then copy them to the server to which you want them applied.
- Point all computers to the License Server running the version of the Citrix product you want them to use. For information about pointing your Citrix product server to the License Server, see your Citrix product’s administrator guide.
Delete license files
When you upgrade your edition (for example, Standard to Advanced, or Advanced to Premium) you receive new Citrix product licenses. You can allocate these licenses to one or many Citrix License Servers through license files created at citrix.com. Rescinded licenses must be deleted from License Servers within 90 days of new license purchase. Deleting the licenses enables:
- License asset management
- License compliance
- Delete unnecessary alerts from appearing in the management console
Considerations when deleting files:
- Incorrect removal of license files might inadvertently lower the total licenses available.
- Place any new license files on the License Server before deleting any licenses.
- Delete a license file only when all INCREMENT lines in the file are obsolete or unnecessary. For example, every increment line was replaced with a new license because of an upgrade.
Important
Never delete the options file (citrix.opt) or startup license (
citrix_startup.lic).
- At the License Server, open the Services panel and stop the Citrix Licensing service.
- Open the Windows Explorer and navigate to where the license files are stored. By default license files are stored in:
-
C: \Program Files\Citrix\Licensing\MyFileson a 32-bit server -
C: \Program Files(x86)\Citrix\Licensing\MyFileson a 64-bit server
-
- Back up all license (.lic) files.
- Using a text editor (we recommend Microsoft WordPad), open each license (.lic) file and identify one or more obsolete license feature INCREMENT lines.
- Ensure that all increment lines are obsolete or unnecessary. See License file format for information about increment lines.
- Close the file and change the file name extension from .lic to .old.
- In the Services panel, restart the Citrix Licensing service.
- Delete the renamed .old file.
Disable the domain name truncation
Warning
Editing the registry incorrectly can cause serious problems that might require you to reinstall your operating system. Citrix cannot guarantee that problems resulting from the incorrect use of Registry Editor can be solved. Use Registry Editor at your own risk. Be sure to back up the registry before you edit it.
When you host multiple domains and multiple users who have the same user name on different domains, you can leave the domain name truncation enabled. For example, jack@mycompany.com and jack@newplace.com. If you have unique users on various domains, ensure that the License Server does not truncate @domain.com.
The License Server detects Citrix Service Provider licenses and enables this functionality.
-
Locate the registry key:
For 32-bit machines:
HKEY_LOCAL_MACHINE\SOFTWARE\Citrix\licenseserverFor 64-bit machines:
HKEY_LOCAL_MACHINE\SOFTWARE\Wow6432Node\Citrix\licenseserverName: UDUseDomain
-
Set the registry key to 1.
Data Description 0 The domain field is truncated. (default) 1 The domain field is not truncated.
Find renewal and maintenance expiration dates
You must have unrestricted access to My Account.
- From a web browser, go to www.citrix.com.
- Select Sign In > My Account and type your user ID and password.
- Select Renew and Manage Maintenance Programs.
- Select Manage Renewal Contacts at top of page.
- Renewal dates are listed next to each license under Current Expiration.