Securing StoreFront with HTTPS
Citrix strongly recommends securing communications between StoreFront and users’ devices using HTTPS. This ensures that passwords and other data sent between the client and StoreFront are encrypted. Furthermore, plain HTTP connections can be compromised by various attacks, such as man-in-the-middle attacks, particularly when connections are made from insecure locations such as public Wi-Fi hotspots. In the absence of the appropriate IIS configuration, StoreFront uses HTTP for communications.
Depending on your configuration, users may access StoreFront via a gateway or load balancer. You can terminate the HTTPS connection at the gateway or load balancer. However in this case Citrix still recommends that you have secure connections between the gateway and StoreFront using HTTPS. When using a NetScaler load balancer, for certificate requirements, see the link Server certificate support matrix on the ADC appliance.
If StoreFront is not configured for HTTPS it displays the following warning:

Create or import certificate
-
Ensure that the base URL FQDN used to access StoreFront is included in the DNS field as Subject Alternative Name (SANs). When using a load balancer in front of your StoreFront servers, the base URL is the load balancer FQDN rather than the StoreFront server FQDN. The Create Domain Certificate… option in IIS does not set the SAN so should not be used.
-
Sign the certificate using a third party CA such as Verisign or an enterprise root CA for your organization.
-
If using an internal certificate authority and devices connect directly to the StoreFront server, you must ensure that you install the root certificate on those devices. If users access StoreFront via a load balancer or gateway, then the root certificate only needs to be installed on that load balancer or gateway.
Create certificate using Windows Certification Authority
If you have an Active Directory Certificate Services server on your domain, you can use it to create certificates from your StoreFront server or another computer on the domain.
-
Press Start and in the search field type Manage Computer Certificates.
-
Expand Personal > Certificates.
-
Right-click on Certificates and from the menu choose All Tasks > Request new certificate.
-
On the Select Certificate Enrolment Policy screen, choose Active Directory Enrollment Policy.
-
Choose template Web server exportable, or another suitable template.
-
Click on More information is require to enroll this certificate. Click here to configure settings.
-
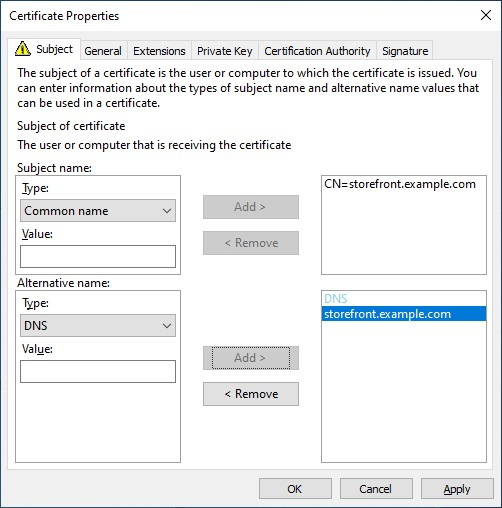
On the Certificate Properties screen:
- Under Subject name choose Common name and enter the FQDN.
- Under Alternative name choose DNS and enter the FQDN.
- Optionally go to the General tab and enter a friendly name.
- Press OK.
-
Press Enroll.
If you created the certificate on your StoreFront server then it is now available to use in IIS. If you created it on another machine then you must export it and import it to the StoreFront server.
Import existing certificate
You can import a certificate created in another system. The certificate must be in PFX format and contain the private key.
-
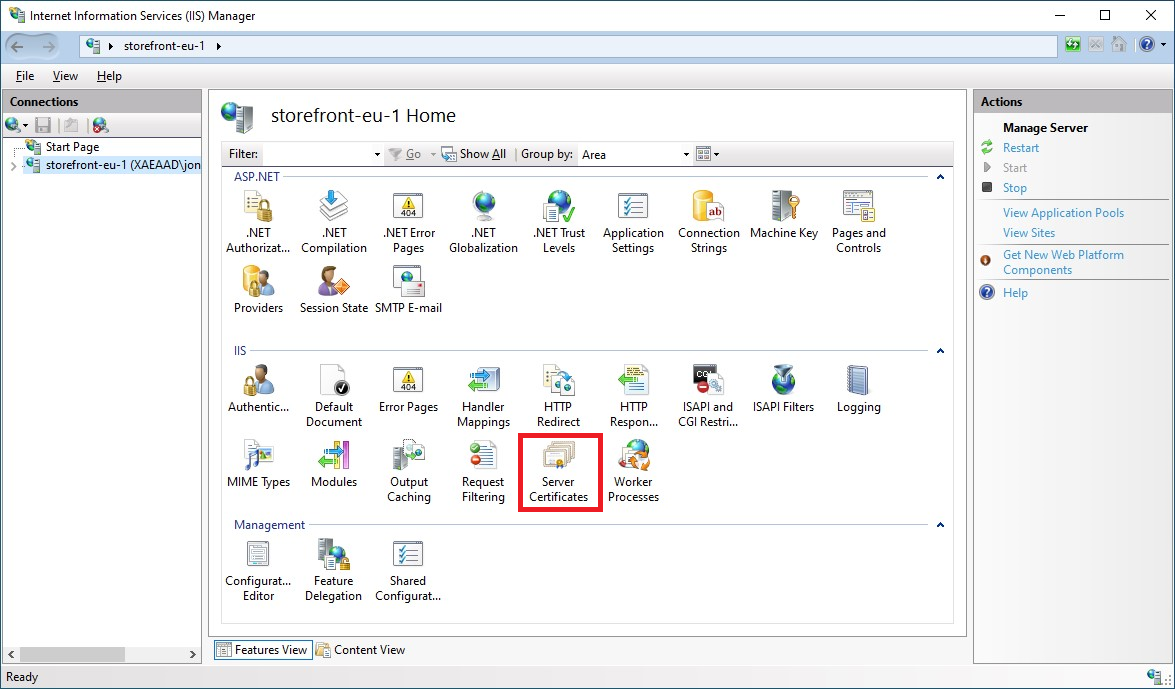
Open Internet Information Services (IIS) Manager console
-
In the tree view on the left select the server.
-
In the right hand pane double click Server Certificates
-
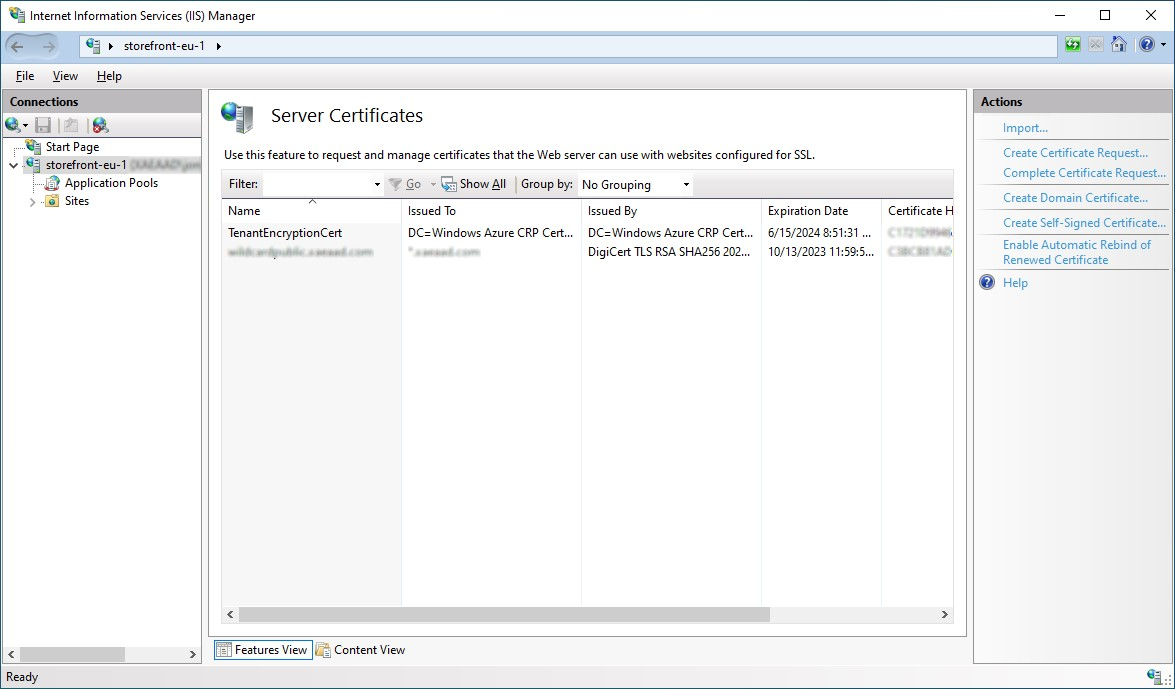
From the Server Certificates screen press Import… and choose a certificate file.
Configure IIS for HTTPS
To configure Microsoft Internet Information Services (IIS) for HTTPS on the StoreFront server:
-
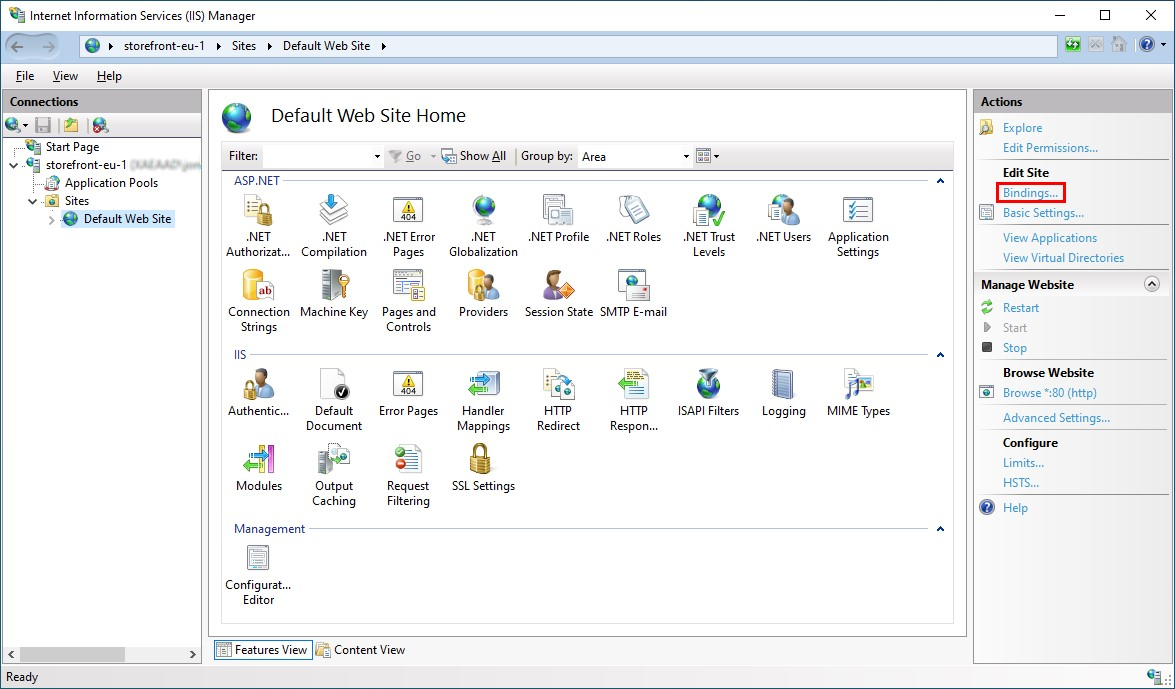
In the tree view on the left select Default Web Site (or the appropriate website)
-
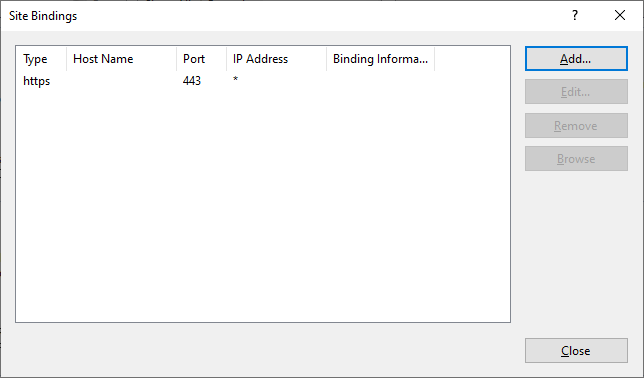
In the Actions pane click Bindings…
-
In the bindings window click Add…
-
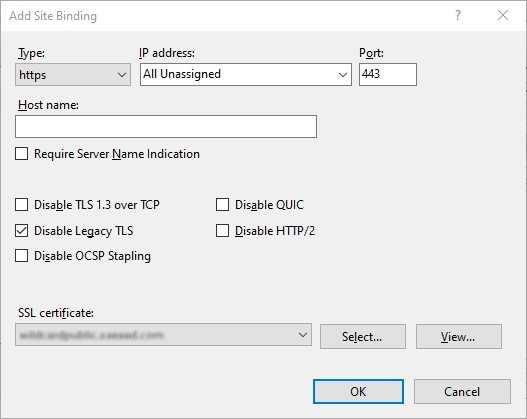
In the Type drop down select https
-
On Windows Server 2022 or above, click Disable Legacy TLS to disable TLS older than 1.2.
On older Windows Server versions, you can disable legacy TLS versions using Windows registry settings, see Windows Server Documentation.
-
Select the certificate previously imported. Press OK
-
To remove HTTP access, select HTTP and click Remove.
Change StoreFront server base URL from HTTP to HTTPS
If you install and configure Citrix StoreFront without first installing and configuring an SSL certificate, StoreFront uses HTTP for communications.
If you install and configure an SSL certificate at some time later, use the following procedure to ensure StoreFront and its services use HTTPS connections.
- In the Citrix StoreFront management console, in the left pane select Server Group.
- In the Actions pane, select Change Base URL.
-
Update the base URL to start
https:and click OK.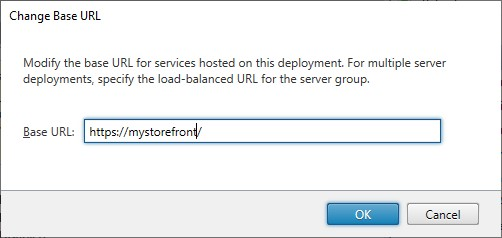
HSTS
The user’s client device is vulnerable even after you enable HTTPS on the server side. For example, a man-in-the-middle attacker could spoof the StoreFront server and trick the user into connecting to the spoof server over plain HTTP. They could then get access to sensitive information such as the user’s credentials. The solution is to ensure that the user’s browser doesn’t attempt to access the server over HTTP. You can achieve this with the HTTP Strict Transport Security (HSTS).
When HSTS is enabled, the server indicates to web browsers that requests to the web site should only ever be made over HTTPS. If a user attempts to access the URL using HTTP, the browser will automatically switch to using HTTPS instead. This ensures client-side validation of a secure connection as well as the server-side validation in IIS. The web browser maintains this validation for a configured period.
Note:
Enabling HSTS affects all web sites on the same domain. For example, if the website is accessible at
https://www.company.com/Citrix/StoreWeb, then the HSTS policy will apply to all web sites underhttps://www.company.com, which might not be desired.
There are a number of options for enabling HSTS. You should choose only one option to avoid setting the same header multiple times.
Option 1 - IIS
On Windows Server 2019 and above you can configure HSTS in IIS.
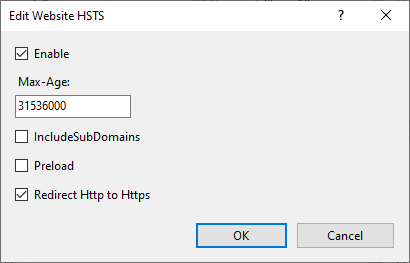
- Open Internet Information Services (IIS) Manager.
- Select Default Web Site (or the appropriate website).
- In the Actions pane on the right hand side, click HSTS….
- Select Enable.
- Enter a max age, e.g. 31536000 for one year.
- Optionally select Redirect HTTP to HTTPS.
- Press OK
Option 2 - StoreFront™ management console
For each store website:
- Select the store and click Manage Receiver for Web Sites.
- Select the website and click Configure…
- Go to the Advanced Settings tab
- Select Enable strict transport security.
- Update Strict transport security policy duration to the required value.
- Click OK.
Option 3 - NetScaler® load balancer
If you are using a NetScaler load balancer in front of your StoreFront servers then you can configure HSTS on the virtual server. For more information, see NetScaler documentation.
Option 4 - NetScaler Gateway
If users connect to StoreFront via a NetScaler Gateway then you can configure HSTS on the VPN virtual server. This has the benefit that it also applies to the NetScaler log on form as well as the pages hosted by StoreFront.