Creating and saving a new report
| Requires |
|---|
| Base right [Create, edit and delete database reports] |
-
Click File > New Report or click
 New report.
 -
Enter a name, and then select the storage location and report type.
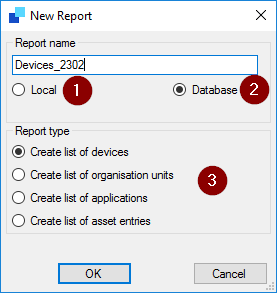
- The report will be saved to the local user directory of the logged-on user (
<User>\Documents\Unicon\Scout\Report).
- The report will be saved in the Scout database and can then be viewed, used and edited by other authorized Scout administrators. See also Sharing reports.
- The type defines the kind of data you filter on with the report.
Confirm with OK.
- The report will be saved to the local user directory of the logged-on user (
-
For the selected report, click
Edit > Layoutor, on the toolbar, click the Layout.
In the [Report Layout] dialog, define the desired layout features. For further information, see Report layout.
Layout.
In the [Report Layout] dialog, define the desired layout features. For further information, see Report layout. -
For the selected report, click
Edit > Filteror, on the toolbar, click the Filter.
In the Report Filter dialog, define the desired filter values. For further information, see Report filter.
Filter.
In the Report Filter dialog, define the desired filter values. For further information, see Report filter.
Note:
You can easily change the name later on, but not the report type and storage location. To change the storage location, create a new version by choosing Save as.
Creating and saving a new report
In this article
Copied!
Failed!