Using the XenServer PowerShell module
This article describes how to use the XenServer PowerShell module to manage XenServer resource pools. The article includes an overview of the module cmdlets and their structure, followed by a number of walk-throughs on how to perform certain specialized tasks.
Getting Started
For information about the system requirements for the PowerShell module and how to download and install it, see Getting Started - PowerShell.
XenServer PowerShell module overview
XenServer sessions
The first cmdlet you will need is Connect-XenServer to open a session to a server:
Connect-XenServer -Url https://<servername> -UserName user -Password pwd
<!--NeedCopy-->
It is possible to connect to multiple servers using the same credentials as well
as open more than one sessions to the same server. All open sessions can be listed
using the cmdlet Get-XenSession. If more than one sessions are to be used, you can
set the most frequently used session as the default one as follows:
Connect-XenServer -Server srv -UserName usr -Password pwd -SetDefaultSession
<!--NeedCopy-->
or
$XenServer_Default_Session = Get-XenSession -Server srv
<!--NeedCopy-->
All XenAPI calls are made in the context of a login session, so all cmdlets
accept the parameter -SessionOpaqueRef which allows you to specify which of the
open XenServer sessions to use:
Verb-Noun [-SessionOpaqueRef [<String>]]
<!--NeedCopy-->
This parameter is not necessary when only one open session exists or when a default session has been specified.
Once you have finished interacting with a server, it is good practice to log out
using the cmdlet Disconnect-XenServer:
Get-XenSession | Disconnect-XenServer
<!--NeedCopy-->
Managing XenAPI objects
The cmdlets fall into the following categories:
1. Class getters
These retrieve a XenAPI object and have names such as Get-XenT, where T is an
exposed XenAPI class. The object to get can be specified by -Ref or, for those
that have a uuid or name, -Name or -Uuid. If no parameters are specified, all
objects of this type are returned. Example:
Get-XenHost -Name "Demo Host"
<!--NeedCopy-->
2. Constructors
These create a new XenAPI object and have names such as New-XenT, where T is
an exposed XenAPI class. Example:
$vm = Get-XenVM -Name "Demo VM"
New-XenVBD -VM $vm -VDI $null -Userdevice 3 -Bootable $false -Mode RO `
    -Type CD -Unpluggable $true -Empty $true -OtherConfig @{} `
    -QosAlgorithmType "" -QosAlgorithmParams @{}
<!--NeedCopy-->
3. Class removers
These destroy a XenAPI object and have names such as Remove-XenT, where T is
an exposed XenAPI class. To specify the object to remove use the parameter
-T, where T is the exposed XenAPI class, or -Ref or, for those objects that
have a uuid or name, -UUID or -Name. Example:
Get-XenSR -Name "Demo SR" | Remove-XenSR
<!--NeedCopy-->
4. Property setters
These set a field of a XenAPI object and have names such as Set-XenT, where
T is an exposed XenAPI class. To specify the object use the parameter -T, where
T is the exposed XenAPI class, or -Ref or, for those objects that have a uuid
or name, -UUID or -Name. The field to set can be specified as an accordingly
named parameter. Note that more than one fields at a time can be set in a
synchronous call. Example:
Get-XenVM -Name "Demo VM" |`
    Set-XenVM -NameLabel "New name" -NameDescription "New description"
<!--NeedCopy-->
5. Property adders
These add an element to a field of a XenAPI object and have names such as
Add-XenT, where T is an exposed XenAPI class. To specify the object use the
parameter -T, where T is the exposed XenAPI class, or -Ref or, for those objects
that have a uuid or name, -UUID or -Name. The field to which the element
will be added can be specified as an accordingly named parameter. Note that
elements can be added to more than one fields at a time in a synchronous call.
Example:
Add-XenHost -Name "Demo Host" -Tags "Tag1"
<!--NeedCopy-->
6. Property removers
These remove an element from a field of a XenAPI object and have names such
as Remove-XenTProperty, where T is an exposed XenAPI class. To specify the
object use the parameter -T, where T is the exposed XenAPI class, or -Ref or,
for those objects that have a uuid or name, -UUID or -Name. The field from
which the element will be removed can be specified as an accordingly named
parameter. Note that elements can be removed from more than one fields at a
time in a synchronous call. Example:
Remove-XenHostProperty -Name "myHost" -Tags "tag1" -OtherConfig "myKey"
<!--NeedCopy-->
7. Property getters
These retrieve the value of a field of a XenAPI object and have names such as
Get-XenTProperty, where T is an exposed XenAPI class. To specify the object
use the parameters -T, where T is the exposed XenAPI class, or -Ref. To specify
the field use the enum parameter -XenProperty. Example:
Get-XenPIFProperty -Ref OpaqueRef:f433bf7b-2b0c-5f53-7018-7d195addb3ca `
    -XenProperty Network
<!--NeedCopy-->
8. Invokers
These invoke operations on XenAPI objects and have names such as Invoke-XenT,
where T is an exposed XenAPI class. To specify the object use the parameter
-T, where T is the exposed XenAPI class, or -Ref or, for those objects that
have a uuid or name, -UUID or -Name. To specify the call to invoke, use the
enum parameter -XenAction. Example:
Get-XenPBD -Uuid 1871ac51-ce6b-efc3-7fd0-28bc65aa39ff |`
    Invoke-XenPBD -XenAction Unplug
<!--NeedCopy-->
Most of the XenAPI calls can be run synchronously or asynchronously. To run a
cmdlet asynchronously use the parameter -Async where available.
Note that, in the case of the setters, only one field can be set asynchronously at a time, and in the case of the adders and removers, elements can be added or removed asynchronously to only one field at a time.
Also, note that the cmdlets that are not explicit “getters” but return objects,
do so only when the standard parameter -PassThru is specified. These cmdlets are
Connect-XenServer, the constructors, adders, setters, certain invokers,
the property removers, as well as all the asynchronous calls from any category.
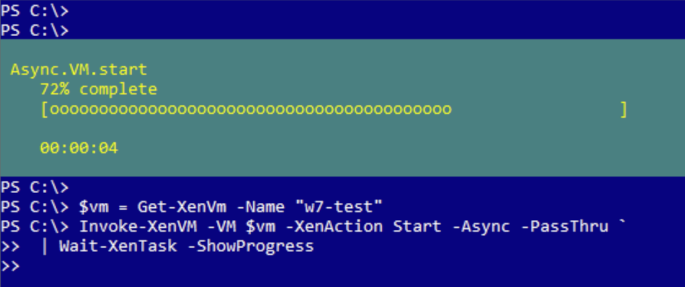
In the latter case, the cmdlet returns a Task object, the progress of which can
be tracked by piping it into the cmdlet Wait-XenTask:
Invoke-XenVM -Name $vm_name -XenAction Start -Async -PassThru |`
    Wait-XenTask -ShowProgress
<!--NeedCopy-->
Wait-XenTask, too, can be used with the -PassThru parameter and, where applicable,
it returns the opaque reference of the object that would be returned if the call
were run synchronously.
Finally, as many of the cmdlets handle objects of type XenRef<T>, where T is an
exposed API class, the cmldet ConvertTo-XenRef can be used to aid conversion
between the two. Example:
Get-XenVM -Name "Demo VM" | ConvertTo-XenRef
<!--NeedCopy-->
Complete walk-throughs
How to configure vGPU and GPU pass-through
The following example is a tutorial of a typical vGPU configuration use case using the XenServer PowerShell SDK cmdlets. The example output provided is from a server with both a NVIDIA Grid K1 and K2 card installed.
We start by connecting to the server:
Connect-XenServer -Server server -UserName username -Password password
<!--NeedCopy-->
The first thing we probably want to check is which GPU groups exist (these have been created automatically once the graphics hardware is installed):
PS> Get-XenGPUGroup | select name_label, GPU_types, allocation_algorithm

name_label                                             GPU_types   allocation_algorithm
----------                                             ---------   --------------------
Group of NVIDIA Corporation GK104GL [GRID K2] GPUs   {10de/11bf}            depth_first
Group of NVIDIA Corporation GK107GL [GRID K1] GPUs   {10de/0ff2}          breadth_first
<!--NeedCopy-->
The allocation_algorithm is the placement policy for assigning VMs to GPUs in order to achieve either maximum density by placing as many VMs as possible on the same GPU (depth_first), or maximum performance by placing VMs on as many GPUs as possible (breadth_first). For example, the following command sets the allocation_algorithm to achieve maximum performance:
PS> Get-XenGPUGroup | Set-XenGPUGroup -AllocationAlgorithm breadth_first
PS> Get-XenGPUGroup | select name_label, GPU_types, allocation_algorithm

name_label                                             GPU_types    allocation_algorithm
----------                                             ---------    --------------------
Group of NVIDIA Corporation GK104GL [GRID K2] GPUs   {10de/11bf}           breadth_first
Group of NVIDIA Corporation GK107GL [GRID K1] GPUs   {10de/0ff2}           breadth_first
<!--NeedCopy-->
Now we can list some information about the vGPU types. The vGPU types are pre-sets which can be used to create different kinds of vGPUs.
PS> Get-XenVGPUType | ft vendor_name, model_name, framebuffer_size, max_heads, `
    max_resolution_x, max_resolution_y

vendor_name           model_name   framebuffer_size    max_heads   max_resolution_x   max_resolution_y
-----------           ----------   ----------------    ---------   ----------------   ----------------
NVIDIA Corporation    GRID K100           268435456            2               1920               1200
NVIDIA Corporation    GRID K140Q         1006632960            2               2560               1600
NVIDIA Corporation    GRID K240Q         1006632960            2               2560               1600
NVIDIA Corporation    GRID K260Q         2013265920            4               2560               1600
NVIDIA Corporation    GRID K200           268435456            2               1920               1200
                      passthrough                 0            0                  0                  0
<!--NeedCopy-->
The vGPU type passthrough is supported for all PCI display devices, and can be used to create pass-through vGPUs.
We can see for which PCI display devices a vGPU type is supported as follows:
PS> Get-XenVGPUType | Where {$_.model_name -eq "GRID K100"} |`
    Get-XenVGPUTypeProperty -XenProperty SupportedOnPGPUs |`
    Get-XenPGPU | Get-XenPCI -Ref {$_.PCI} | select device_name, pci_id

device_name          pci_id
-----------          ------
GK107GL [GRID K1]    0000:0a:00.0
GK107GL [GRID K1]    0000:07:00.0
GK107GL [GRID K1]    0000:08:00.0
GK107GL [GRID K1]    0000:09:00.0
<!--NeedCopy-->
A vGPU type will show up as supported or enabled in a GPU group if it is supported or enabled respectively on at least one of the pGPUs in the group. We can query the GPU groups to find out which vGPU types are supported or enabled. For example:
PS> Get-XenGPUGroup | Where {$_.name_label -match "GRID K2"} |`
    Get-XenGPUGroupProperty -XenProperty EnabledVGPUTypes |`
    Get-XenVGPUType | select model_name

model_name
----------
GRID K200
passthrough
GRID K260Q
GRID K240Q
<!--NeedCopy-->
We may want to disallow a certain vGPU type on a pGPU. For example, the following commands disable and then re-enable the vGPU type Grid K240Q:
PS> $vgpuType = Get-XenVgpuType | where {$_.model_name -eq "GRID K240Q"}
PS> $vgpuType | Get-XenVGPUTypeProperty -XenProperty EnabledOnPGPUs |`
    Get-XenPGPU | select uuid

uuid
----
a913a90d-0be9-aea3-862f-3fbfe1823a3f
8a0d1316-0f09-1ee9-f95b-c778c759ee40

PS> Remove-XenPGPUProperty -Uuid a913a90d-0be9-aea3-862f-3fbfe1823a3f `
    -EnabledVGPUTypes $vgputype.opaque_ref

PS> $vgpuType | Get-XenVGPUTypeProperty -XenProperty EnabledOnPGPUs |get-xenpgpu | select uuid

uuid
----
8a0d1316-0f09-1ee9-f95b-c778c759ee40

PS> Add-XenPGPU -Uuid a913a90d-0be9-aea3-862f-3fbfe1823a3f -EnabledVGPUTypes $vgputype.opaque_ref
PS> $vgpuType | Get-XenVGPUTypeProperty -XenProperty EnabledOnPGPUs |get-xenpgpu | select uuid

uuid
----
a913a90d-0be9-aea3-862f-3fbfe1823a3f
8a0d1316-0f09-1ee9-f95b-c778c759ee40
<!--NeedCopy-->
We may want to find out how many vGPUs of a certain type can be started on the pGPUs in a group, in addition to the vGPUs which are already running:
PS> $gpuGroups = Get-XenGPUGroup
PS> Get-XenVGPUtype | % {Get-XenGPUGroupProperty $gpuGroups[0] -XenProperty RemainingCapacity -VgpuType $_}

0
0
8
4
16
2
<!--NeedCopy-->
Now suppose we want to assign a vGPU of type Grid K260Q to a VM which has no vGPU yet. This can be done as follows:
PS> $vm = Get-XenVm -Name "w7-test"
PS> $vgpuTypes = Get-XenVGPUtype
PS> Get-XenVMProperty -VM $vm -XenProperty VGPUs
PS>
PS> New-XenVGPU -VM $vm -GPUGroup $gpuGroups[0] -Device 0 -Type $vgpuTypes[3] -PassThru

uuid               : f1122947-3b11-3fd3-0630-779701b37265
VM                 : XenAPI.XenRef`1[XenAPI.VM]
GPU_group          : XenAPI.XenRef`1[XenAPI.GPU_group]
device             : 0
currently_attached : False
other_config       : {}
type               : XenAPI.XenRef`1[XenAPI.VGPU_type]
resident_on        : XenAPI.XenRef`1[XenAPI.PGPU]
opaque_ref         : OpaqueRef:15b2d1a9-8944-2f28-53df-6b8274d4d6fb
Changed            : True
<!--NeedCopy-->
At this stage we can boot the VM, install the in-guest NVIDIA drivers, and enable RDP. Then we may want to disable the VNC console as this has a significant performance overhead. To do this we need to shut down the VM, set the flag vgpu_vnc_enabled to false and then boot the VM.
PS> Invoke-XenVM -VM $vm -XenAction Shutdown –Async –PassThru | Wait-XenTask –ShowProgress

PS> $p = Get-XenVMProperty -VM $vm -XenProperty Platform
PS> $p["vgpu_vnc_enabled"]="false"
PS> Set-XenVM -VM $vm -Platform $p
PS> Invoke-XenVM -VM $vm -XenAction Start –Async –PassThru | Wait-XenTask –ShowProgress
<!--NeedCopy-->
Before finishing we should remember to disconnect from the server:
Get-XenSession | Disconnect-XenServer
<!--NeedCopy-->
How to copy or live migrate a VM across pools
The following tutorial shows how to use the XenServer PS module to migrate a running VM or copy a halted VM from a pool or standalone server, hereafter referred to as the source server, to a different pool or standalone server, hereafter referred to as the destination server.
This example also displays how to work with multiple sessions and use implicitly
the global variable $XenServer_Default_Session.
We’re starting by connecting to the source server. The session created with the source server will be more frequently used, so it makes sense to set it as the default session:
Connect-XenServer -Url $sourceServerUrl -UserName $sourceServerUsername -Password $sourceServerPwd -SetDefaultSession
<!--NeedCopy-->
Let’s select the VM we are going to copy or live migrate from the source pool:
$theVM = Get-XenVM -Name $nameOfSourceVmToCopy
<!--NeedCopy-->
Note that in the above call we did not need to specify the -Session parameter
since we have set the source session as the default one.
Then we need to connect to the destination pool and obtain its coordinator. Note
that we will need to specify the -Session parameter in all calls made to the
destination pool since this session is not the default one.
$destSession = Connect-XenServer -Url $destServerUrl -UserName $destServerUsername -Password $destServerPwd -PassThru

$destCoordinator = Get-XenPool -Session $destSession.opaque_ref | `
    select -ExpandProperty master | `
    Get-XenHost -Session $destSession.opaque_ref
<!--NeedCopy-->
The coordinator of the destination pool has to be prepared to receive the VM that will be live migrated or copied. For this, we will also need to obtain the details of the network on the destination pool through which migration traffic will be received.
$destTransferNetwork = Get-XenNetwork -Name $destTransferNetworkName -Session $destSession.opaque_ref

$destMap = Invoke-XenHost -XenAction MigrateReceive -XenHost $destCoordinator -Network $destTransferNetwork -Session $destSession.opaque_ref -options @null -PassThru
<!--NeedCopy-->
The next step is to map the VM’s VIFs to networks on the destination pool. Let’s consider a case where the destination pool has as many networks as the VIFs on the VM we want to live migrate or copy, so we can create a one-to-one mapping of VIFs to networks as follows:
$targetNetworkRefs = Get-XenNetwork -SessionOpaqueRef $destSession.opaque_ref | ConvertTo-XenRef

$vmVifRefs = $theVM.VIFs | Get-XenVIF | ConvertTo-XenRef

$vifmap = @{}

for ($i = 0; $i -lt $vmVifRefs.Count; $i++) {
    $vifmap[$vmVifRefs[$i]] = $targetNetworkRefs[$i]
}
<!--NeedCopy-->
Similarly, we proceed to map the VM’s disks to storage repositories on the
destination pool. Let’s consider a simple case where we want to place all VM
disks on the same storage repository with name $destSrName.
$targetSrRef = Get-XenSR -name $destSrName -SessionOpaqueRef $destSession.opaque_ref | ConvertTo-XenRef

$vdiRefs = $theVM.VBDs | Get-XenVBD | `
    where { $_.type -eq [XenAPI.vbd_type]::Disk} | `
    select -ExpandProperty VDI

$vdimap = @{}

foreach ($vdiRef in $vdiRefs) {
    $vdimap[$vdiRef] = $targetSrRef
}
<!--NeedCopy-->
Now we are ready to live migrate or copy the VM to the destination pool. Both operations are performed using the same cmdlet. However, we need to specify different options in each case. The call is run on the source pool session. Due to the long duration of the operation, it is recommended to run it asynchronously.
To live migrate a running VM:
$theTask = Invoke-XenVM -VM $theVM -XenAction MigrateSend -Live $true `
    -Dest $destMap -VifMap $vifmap -VdiMap $vdimap `
    -Options @{} -Verbose -Async -PassThru
<!--NeedCopy-->
Or, to copy a halted VM:
$theTask = Invoke-XenVM -VM $theVM -XenAction MigrateSend -Live $false `
    -Dest $destMap -VifMap $vifmap -VdiMap $vdimap `
    -Options @{"copy"="true"} -Verbose -Async -PassThru
<!--NeedCopy-->
In either case, we can monitor the task progress:
Wait-XenTask -Task $theTask -ShowProgress
<!--NeedCopy-->
Once the task is finished, we can query it to obtain the new VM on the destination pool:
$theTask = Get-XenTask -uuid $theTask.uuid

if ($theTask.status -eq [XenAPI.task_status_type]::success) {
    $doc = [xml]$theTask.result
    $newVmRef = $doc.value
    Get-XenVM -Ref $newVmRef -SessionOpaqueRef $destSession.opaque_ref
}
else {
    Write-Host "Operation failed: " $theTask.error_info
}
<!--NeedCopy-->
Finally, we need to disconnect from the source and the destination pools:
Get-XenSession | Disconnect-XenServer
<!--NeedCopy-->