Citrix Workspace app for ChromeOS - Preview
This documentation describes the features and configuration of Citrix Workspace app for ChromeOS 2405. This version is the preview for the latest version of Citrix Workspace app for ChromeOS.
Early Adopter Release (EAR) build for 2405 is available on the:
EAR build is for the purpose of testing or validation with the intent to make organizations ready for the upcoming release and is NOT advised to be deployed in production environments.
For more information on how to install the EAR build, see To access the EAR build.
What’s new in 2405
Improved in-session toolbar [Technical Preview]
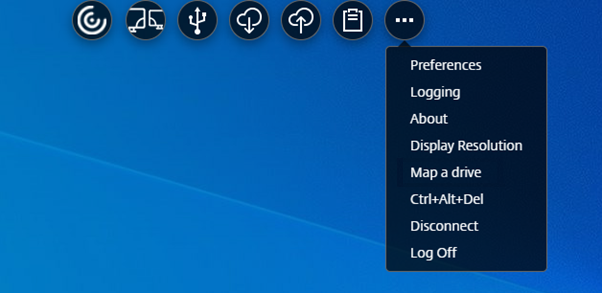
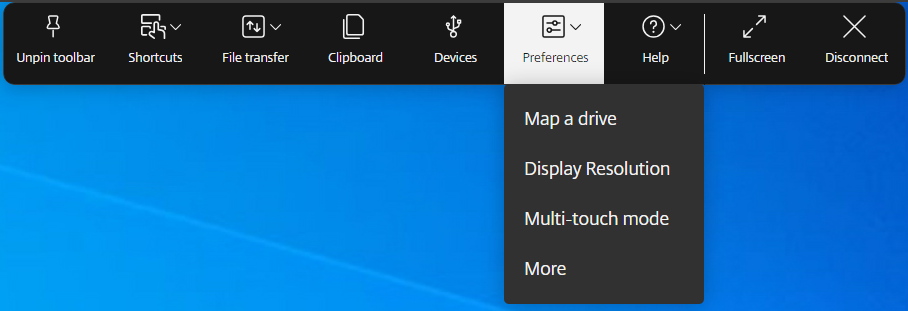
Starting with the 2405 version, a enhanced toolbar UI appears when you start a desktop session. The look and feel of the in-session toolbar UI has changed. The toolbar UI is specifically designed to enhance the end user experience by organizing the options in a user-friendly manner.
Old toolbar UI

New toolbar UI

Note:
This feature is disabled by default. To enable the feature, follow the configuration steps. To provide feedback about this feature, click the Podio form.
Configuration
You can enable the new toolbar UI by using the Google Admin Policy.
Google Admin Policy
For managed devices and users, administrators can enable the feature using the Google Admin Policy as follows:
- Sign in to the Google Admin Policy.
- Go to Device management > Chrome Management > User Settings.
-
Add the following strings to the policy.txt file under the engine_settings key.
Note:
You can apply this configuration on the following as well:
- Device > Chrome > Apps and extensions > Users and browsers > Search for the extension > Policy for extensions.
- Device > Chrome > Apps and extensions > Kiosks > Search for the extension > Policy for extensions.
- Device > Chrome > Apps and extensions > Managed guest sessions > Search for the extension > Policy for extensions.
The following is an example of JSON data:
{ "engine_settings": { "ui": { "toolbar": { "switchToNewToolbar": true } } } } <!--NeedCopy--> - Save the changes.
Icons and actions
End users can perform the following actions:
Note:
The icons are visible to the end users only if their organization’s admin has enabled the specific feature.
-
Toolbar notch – when you start an app or a desktop session, the toolbar notch appears at the top the screen. When you click the notch, the toolbar appears in the unpinned state. Drag and reposition the toolbar notch onto any side of the screen. After you release the mouse, the notch will automatically align itself with the nearest edge.
-
Pin – when you pin it, you can drag and reposition the toolbar onto any side of the screen. After you release the mouse, the notch will automatically align itself with the nearest edge. The advantage of pinning the toolbar is that it doesn’t minimize into a notch after you complete an action that involves toolbar icons.
-
Unpin – when you unpin the toolbar, it minimizes into a notch after you complete an action that involves toolbar icons.
-
Shortcut keys – you can perform the Ctrl+Alt+Del function with the click of a button. This option facilitates users to sign out, switch users, lock the system, or access the Task Manager.

-
File transfer – you can upload or download a file between a user device and a session. For more information, see File handling.

-
Clipboard – you can use the clipboard option to copy and paste plain text and HTML data from the VDA to the local device and back. For more information, see Clipboard.
-
Devices – click to open the USB Devices dialog box. Click Add to view the USB devices connected to the local device. The dialog box lists the devices that can be redirected to the session. To redirect the USB devices, select an appropriate device and click Connect. For more information, see USB device redirection.
Note:
You can view the Devices icon only if your IT administrator provides access to connect USB devices through policy settings.
-
Preference – You can set your preference as follows. The following four options appear:

-
Map a drive – the Client Drive Mapping (CDM) feature allows you to access your local folders and drives from Citrix Workspace app. For more information, see File handling.
-
Display Resolution – select the size of the resolution for the session display. By default, the screen resolution is set to Auto-fit screen.
-
Multi-touch mode – click to use the multi-touch mode. You can toggle between Panning and Multi-touch mode. This option is applicable to touch screen devices. For more information, see Touch and mobility support.
-
More – displays preferences about the soft keyboard button and Citrix Customer Experience Improvement Program (CEIP).
-
-
Help - the following three options appear:

-
Gesture Guide – a gesture guide appears with details on how to use finger taps. This option is applicable to touch screen devices.
-
About – displays the current version of the Citrix Workspace app that you are using.
-
-
Minimize – you can minimize the session window.
-
Fullscreen – you can switch your screen from windowed to fullscreen. If you have a multi-monitor set-up, the fullscreen button will extend the screen across the set-up and also function as a multi-monitor button.
-
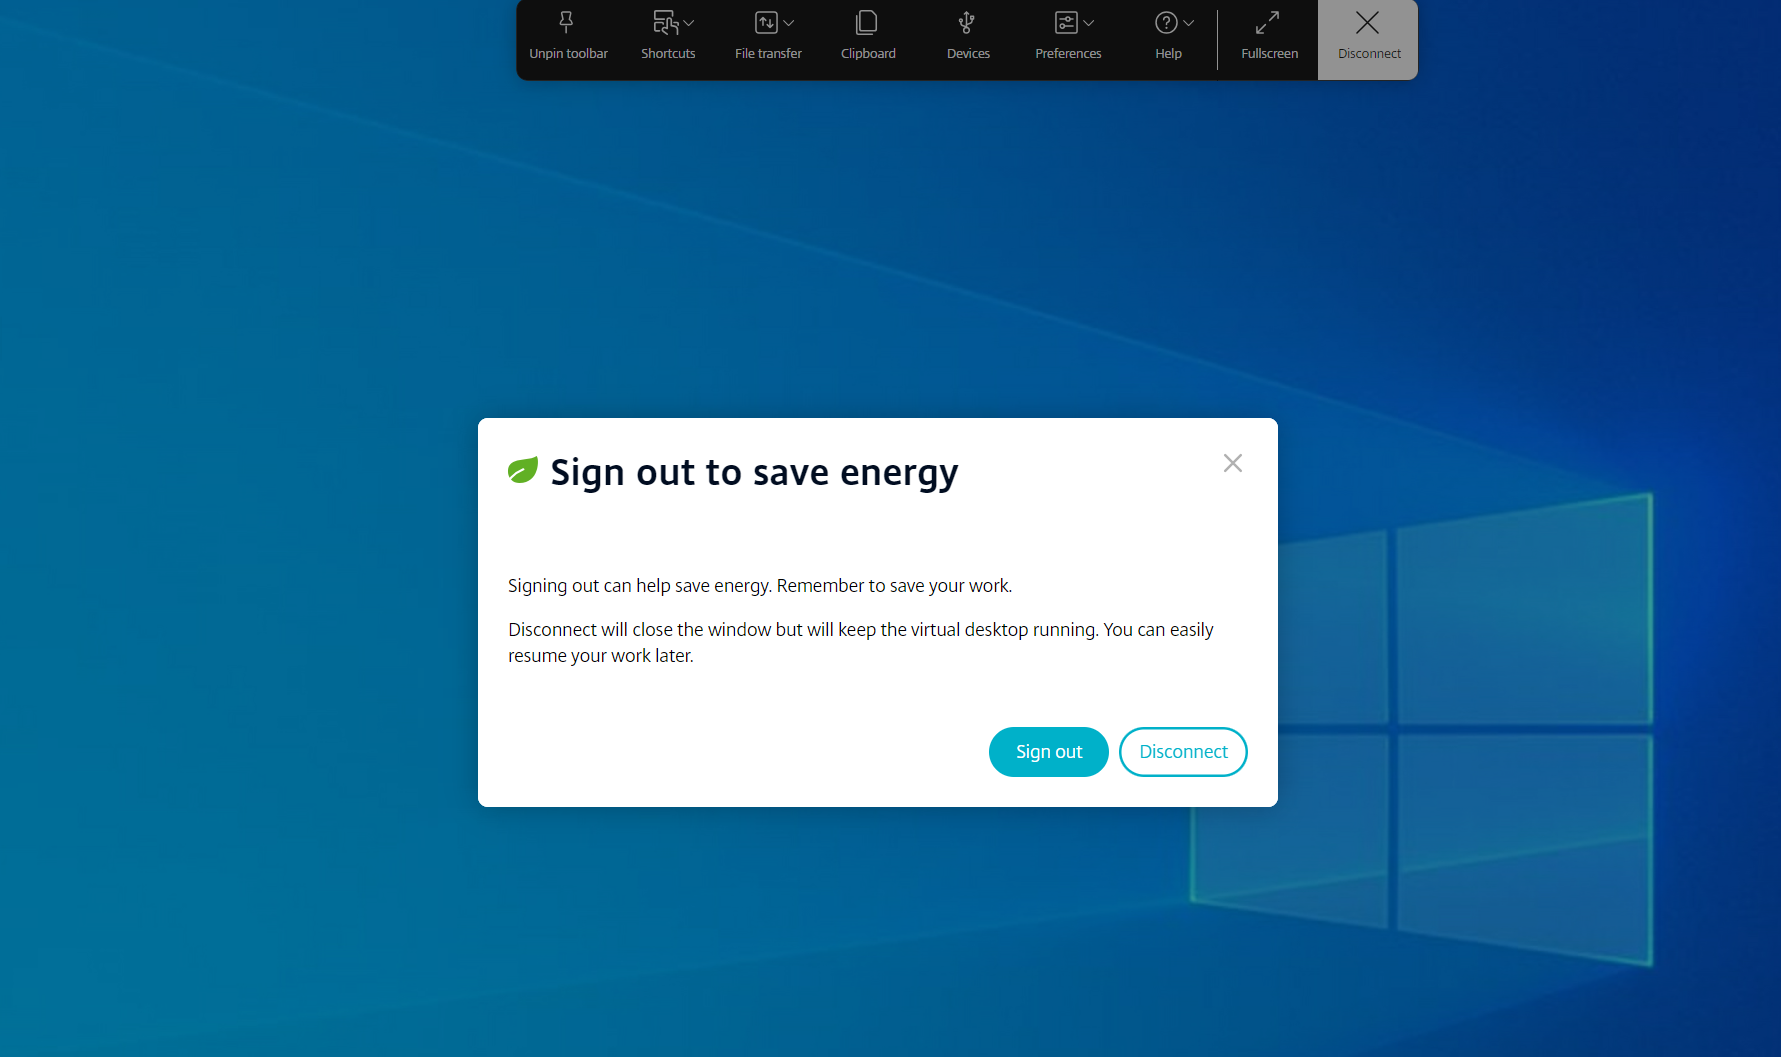
Disconnect – the disconnect action will keep the virtual desktop running. Sign out to save energy. For more information, see Sustainability initiative from Citrix Workspace app.

Fixed issues in 2405
-
In a multi-monitor setup, when you open a published app, a blank screen appears instead of the app screen. The issue occurs when you use full-screen H.264 mode. For more information, see Limitations. [CVADHELP-24883]
-
On unmanaged devices, when you start an app or desktop session, the client name sent from Citrix Workspace app for ChromeOS is HTML5-X-X. After the fix, the client name now appears as CrOS-X-X. [RFHTMCRM-12155]
-
When you enable the service continuity feature, and start a session offline, the lease files fail to download after you sign out from the Citrix Workspace and sign in again. [RFHTMCRM-12492]
-
When you start a desktop session, and open an app to enter text, when you start entering, the text disappears and reappears. You can observe that the text flickers. The issue occurs when you use full-screen H.264 mode. For more information, see Limitations. [CVADHELP-24883]
Known issues in 2405
There are no new known issues.
Technical Preview
Features in the Technical Preview are available to use in non-production or limited production environments, and to give customers an opportunity to share feedback. Citrix does not accept support cases for features in technical preview but welcomes feedback for improving them. Citrix might act on feedback based on its severity, criticality, and importance.
Citrix Workspace app for ChromeOS - Preview feedback
You can give the EAR feedback at: https://podio.com/webforms/19653047/1329504.
Important:
The Early Adopter Release (EAR) documentation is available for information purposes only. > It isn’t a commitment, promise, or legal obligation to deliver any material, code, or functionality and must not be relied upon in making Citrix product purchase decisions. The development, release, and timing of any features or functionality described in the EAR documentation remain at our sole discretion and are subject to change without notice or consultation. Citrix does not accept support cases for EAR but welcomes feedback for improving them. Citrix might act on feedback based on its severity, criticality, and importance.