Deploy
NOTE:
Starting April 30, 2023, Citrix Workspace customers with ShareFile entitlements will no longer have the embedded files experience in Citrix Workspace. Users will access their files solely through their ShareFile.com account after this date. See FAQ: Decouple your ShareFile account from your Citrix Workspace for more information.
Single sign-on for on-prem connectors
By enabling SSO for Connectors, Citrix Workspace clients will no longer prompt for authentication when accessing your Network shares or SharePoint folders behind a storage zone controller. For accounts utilizing storage zones controller version 5.7 and later, and on-premises connectors, you can enable single sign-on for your network file share or SharePoint connectors. After enabling Citrix Content Collaboration for Citrix Workspace, complete the following steps:
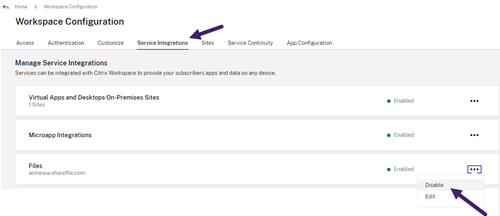
- From the Service Integrations screen, select the three dots.
- Select Edit to edit your Citrix Content Collaboration deployment.
- Check the box for Use single sign-on credentials for on-prem connectors.
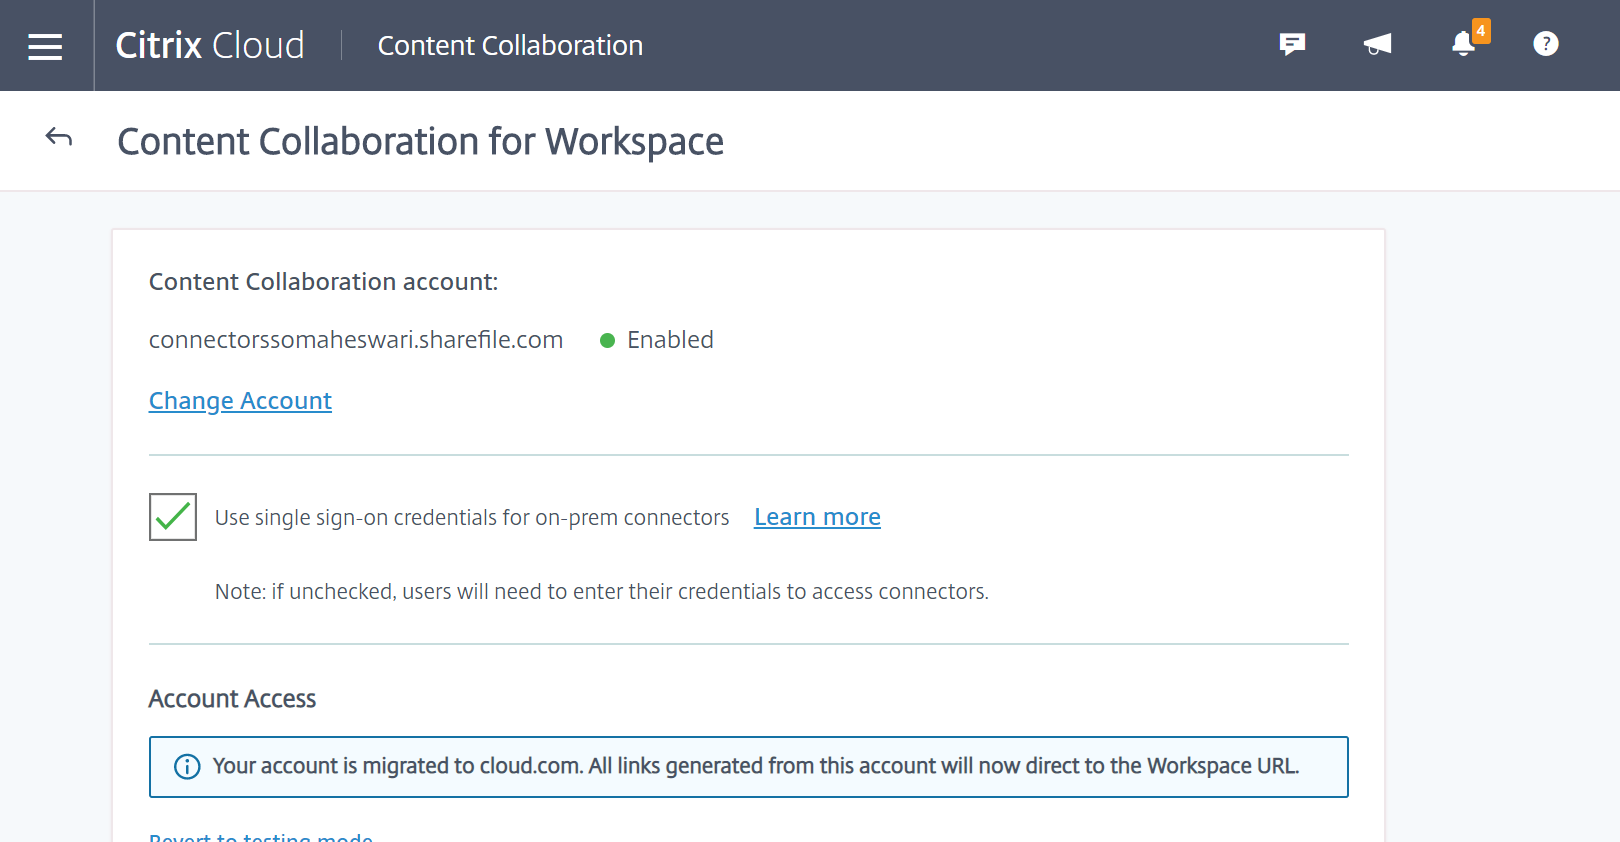
Single sign–on is currently integrated only with Active directory. Single sign-on is not supported with other authentication mechanisms present in Workspace.
After enabling Citrix Content Collaboration for Citrix Workspace for the first time, the account is in testing mode. Testing mode means that while users are now able to sign in to their workspace and see a Files tab, all new links still generate as sharefile.com links. Once the administrator completes migration to Citrix Workspace for Citrix Content Collaboration, all new links generate as cloud.com links and old sharefile.com links will redirect to the account’s respective cloud.com link.
Note:
Single sign-on is not supported when the account is in testing mode. To support single sign-on, the account should be migrated to Citrix Workspace.
To fully migrate accounts to Citrix Workspace, complete the following steps:
- Go to the hamburger menu and select Workspace Configuration.
- Go to Service Integrations and select the three dots.
- Select Edit to edit your Citrix Content Collaboration deployment.
- Under Account Access, select Migrate account to cloud.com.
You can also revert to testing mode by following the steps again and selecting Revert to testing mode.
When migrating from testing mode, not all features available under a Citrix Content Collaboration license are available in Citrix Workspace.
In order for users to see the Files tab, their employee user email address in Citrix Content Collaboration must match their email address in the company user store (Active Directory or Azure Active Directory). This is done by either manually creating the employee user or by using the User Management Tool.
NOTE:
To ensure Azure Active Directory works correctly with Citrix Content Collaboration, your Azure Active Directory must have a primary email address for each user. This requires your Microsoft subscription to include an Office 365 subscription with Exchange Online or you must connect your Azure Active Directory to your on-premises Active Directory by using Azure Active Directory Connect.
Disable Content Collaboration in Citrix Workspace
In the event you need to disable Citrix Content Collaboration in Citrix Workspace, perform the following steps:
- Under Workspace Configuration > Service Integrations > Citrix Content Collaboration, select the ellipsis.
- Click Disable.
After Citrix Content Collaboration is disabled, all users are expected to access Citrix Content Collaboration via sharefile.com and all new shares use the sharefile.com domain. It can take up to 30 minutes for disablement to fully deploy.
Content Collaboration features not supported in Workspace
When using ShareFile applications, click Sign in with Citrix Workspace to sign in with your Citrix Workspace credentials.
Not all features available under a Citrix Content Collaboration license are available in Citrix Workspace. Here is a list of those features:
Features and settings that are not currently supported
- Citrix Virtual Apps and Desktops anonymous apps are not supported when Citrix Content Collaboration (Files) is enabled in a workspace
- ShareFile virtual data room and features that are limited to ShareFile virtual data room accounts such as Folder Q&A
- External (client) user specific two-step verification
- FTP option to access files is not supported in Workspace
- Folder Invites
Feature and settings that are now configured in Citrix Cloud instead of ShareFile
- Existing ShareFile branding - instead, Workspace custom branding is available in Workspace Configuration.
- Secondary ShareFile subdomains - instead, you can customize a single Workspace URL in Workspace Configuration.
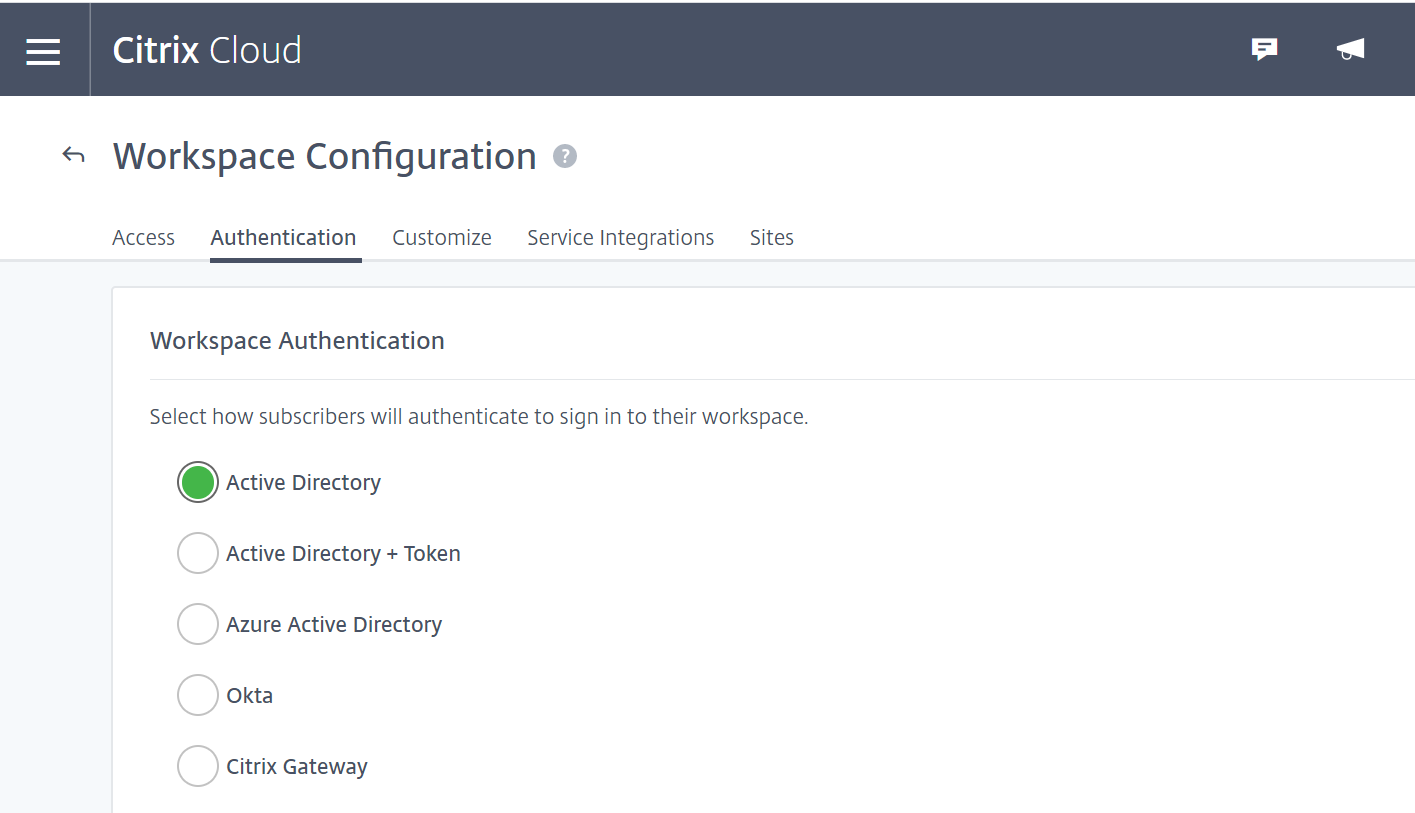
- Workspace authentication supports AD, Azure AD, or Okta. SAML and Google Identity are in Tech Preview.
Citrix Files Migration Tool
The Citrix Files Migration Tool allows users to migrate a large amount of data along with folder ownership and permission to Citrix Files from a network share or local file system.
System requirements
- .NET Framework 4.6.2 or later
- Windows 7 or later, Windows 2008 Server or later
Limitations
- This feature is unavailable to client users.
- This application adheres to Microsoft File Path limits. Files that exceed the path limitation are not migrated.
- In the unlikely event that a file transfer causes too much traffic on the Citrix Content Collaboration infrastructure, Citrix Files might pause the transfer. The transfer resumes automatically.
- Files that are currently in use by another program are not migrated.
- This tool does not support migrating more than 50,000 folders.
- You can’t use this tool to transfer files to an on-prem restricted storage zone.
- We have not tested this tool on virtual machines, and cannot be fully supported in such an environment.
Best practices
- Because files in use are not uploaded during the migration, we recommend you use the Citrix Files Migration Tool during off hours to minimize interference with your users.
- For best performance, we recommend you use the Citrix Files Migration Tool outside of United States EST business hours.
- Avoid wireless connections when possible.
- The tool has been successfully tested for up to 3 TB of data. If you have more data to migrate, we recommend you break up the data to be at or below 3 TB.
Installation
Download the Citrix Files Migration Tool. Once downloaded, run the installation file to begin setup. If you do not have .NET Framework 4.6.2 or later installed on your machine, it is installed for you. Once installed, a shortcut is added to your desktop and Start menu. For best results, we recommend you install the migration tool on the server or computer where your data resides.
By default, this app installs in C:\Program Files\Citrix\ShareFile. If you want to change the install location, click Options and specify the location.
Auto update
When you launch the Citrix Files Migration Tool, it checks for updates and prompts you to install when one is available. We recommend you always update to the latest version.
Signing in to the Citrix Files Migration Tool
When launching the Citrix Files Migration Tool, you are prompted to sign into your account. Sign in to the account where you want to upload files.
Once signed in, the account details are encrypted and stored in the app_settings.cfg file, which saves you from signing in every time you launch the app. You can either sign out or delete this file to sign in to a different account. The app_settings.cfg file is located in USERNAME\AppData\Roaming\Citrix\ShareFile\Migration Tool. There are also unique files created containing migration details for each unique user signed in.
After signing in, the Home view displays. From the Home view, you can begin a new transfer, view your migration queue, and manage your scheduled migrations, and provide feedback.
Sign in with the master administrator account to transfer data, ownership, and permissions. If the sign-in used is not the master administrator, only data is migrated.
Using the Citrix Files Migration Tool
New Transfer
Select New Transfer to initiate a new transfer. The Choose Transfer Type window appears.
Choose between Data only, Data + Permissions (Map to Personal Folders), or Data + Permissions (Map to Shared Folders) for your migration of your data from the original source to Citrix Files. The New Transfer window appears.
Use Select directory to transfer to browse for a directory to move onto Citrix Files.
When you select Data only, Choose destination allows you to choose the upload destination folder within your Citrix Files account.
When you select Data + Permissions (Map to Personal Folders) or Data + Permissions (Map to Shared Folders), Configure folder permission options allows you to transfer folder ownership and access permissions or only folder ownership during migration. You can also create folders for users who have not signed in yet.
Configure transfer options lets you choose a specific time in which to make the transfer, create a folder on the root level and migrate all folders from this transfer inside it, and to enable the option of not uploading files when a newer version of the file exists in the destination folder in Citrix Files.
When using the Data + Permissions (Map to Personal Folders), or Data + Permissions (Map to Shared Folders) options, you must sign in to your Active Directory. You can sign in either as the currently signed in user or a different user if desired.
Note:
We recommend you run the Citrix Files Migration Tool on the machine that is connected to the domain from which the user’s details are being fetched for ownership and permissions migration.
Once you choose all the options, click Continue, and the Confirm Transfer window appears.
Confirm Transfer options
- Migration type - Specifies the type of transfer selected by the administrator
- Source - Specifies the location from where the data is being migrated
- Destination - Specifies the location to which the data is being migrated
- Total Number of Files - Number of files being migrated
- Total Files Size - Total size of all the files being migrated
- Expected Time - Approximate time for the migration to complete
- File Types Excluded - Displays a list of file types excluded. Use the Exclude link provided to exclude any files from migration.
- Items Unable to Transfer - If there are any files or folders that are unable to be migrated, use the Review link to see what they are.
When you click the Exclude link, the Advanced Options: Exclude File Types window appears. You can choose to manually type in a file type to exclude from migration or choose one of the displayed file types to exclude from migration.
When you click the Review link, the Items Unable to Transfer window appears. Files and folders are here if the user who signed in does not have the required permissions for migration or if files are currently in use by other applications. Resolve the permissions issue or close any application using the files to proceed with the migration.
When using the Data + Permissions (Map to Personal Folders) or Data + Permissions (Map to Shared Folders) options and if there are any accounts or groups not present in Citrix Content Collaboration, the Review missing accounts and groups link appears. When you click the link, the List of Accounts and Groups that are not present window appears. If there are no accounts present in Citrix Content Collaboration for the users listed, those files and folders are not migrated. To avoid this happening, you can quickly create an account for the users and then proceed with migration.
Group permissions are migrated only if groups in Citrix Content Collaboration are created using the User Management Tool. If groups are manually created, then the permissions aren’t migrated.
Permission migration files are located in the USERNAME\AppData\Roaming\Citrix\ShareFile\Migration Tool\Permission Data folder.
Files and folders that remain inaccessible are not migrated. You can continue with the migration of the other files and folders even when there are inaccessible items.
Click Transfer Files to start the migration.
Queue
You can use Queue to view transfers that are Running, Pending, Cancelled, or Complete.
Running: Clicking View on a running job displays the Transferring… window. The status of the transfer of files and folders appear. You can pause or cancel the transfer from here.
Pending: Clicking View on a pending job displays the Transfer Pending window. The details of the pending transfer appear. If the transfer is scheduled, the scheduler details also appear. You can cancel the transfer from here.
Cancelled: Clicking View on a canceled job displays the Transfer Canceled window. The details of the canceled job appear. You can restart the transfer from here.
Complete: Clicking View on a completed job displays the Transfer Complete window. The details of the completed transfer appear. Links to logs for failed or canceled uploads can be viewed from here.
Manage Schedules
Manage Schedules allow you to choose when transfers are run. You can use this option to run migrations at times outside of peak usage hours.
Click Create New Schedule to make a new schedule. This menu lists created schedules. You can view, edit, or delete the schedules created using the options provided.
Note:
We recommend you handle large data migrations using the scheduler. Schedule transfers outside of peak hours for maximum bandwidth and speed.
Ensure that the correct details are added to the task scheduler. When there are multiple slots selected, multiple instances are added in the task scheduler.
It is required that the user who scheduled the migration be signed in. If the user is not signed in, the migration isn’t initiated in that specific time slot.
Transfer pause
In the unlikely event of the transfer causing too much traffic on the Citrix Content Collaboration infrastructure, Citrix Files might pause the transfer. The Citrix Files Migration Tool continuously attempts to resume transfer during this time. A warning message appears at the bottom of the transferring screen. The user can’t unpause the transfer manually, but can cancel the transfer.
If the user receives the warning message “Your account is currently not available to perform transfers,” the pause might still be enabled. The user can either wait for this issue to be resolved or try again later by closing and relaunching the application.
Migration Logs
Once the transfer is complete, you can review the migration details and any errors encountered during the migration process.
Log files generated
- SFMT
[TimeStamp][FolderName].log- This log contains the complete details of the migration starting from the launch of the Citrix Files Migration Tool. - Transfer Info
[TimeStamp][FolderName].log- This log contains verbose information for the transfer. - Transfer
[TimeStamp][FolderName].log- This log contains all the files and folders that were successfully transferred. - Transfer Failure
[TimeStamp][FolderName].log - This log contains a brief explanation as to why a file failed to transfer. - Transfer Canceled
[TimeStamp][FolderName].log - This log contains a brief explanation as to why a transfer canceled.
For debugging, the “SFMT [TimeStamp][FolderName].log and “Transfer Info [TimeStamp][FolderName].log logs are required. Logs are stored at USERNAME\AppData\Roaming\Citrix\ShareFile\Migration Tool\Logs
Uninstall the Citrix Files Migration Tool
To uninstall the Citrix Files Migration Tool, use the Programs and Features menu in the Windows Control Panel, or rerun the installation file.
Warning:
Migration logs that were created during transfers are removed during the uninstall process.