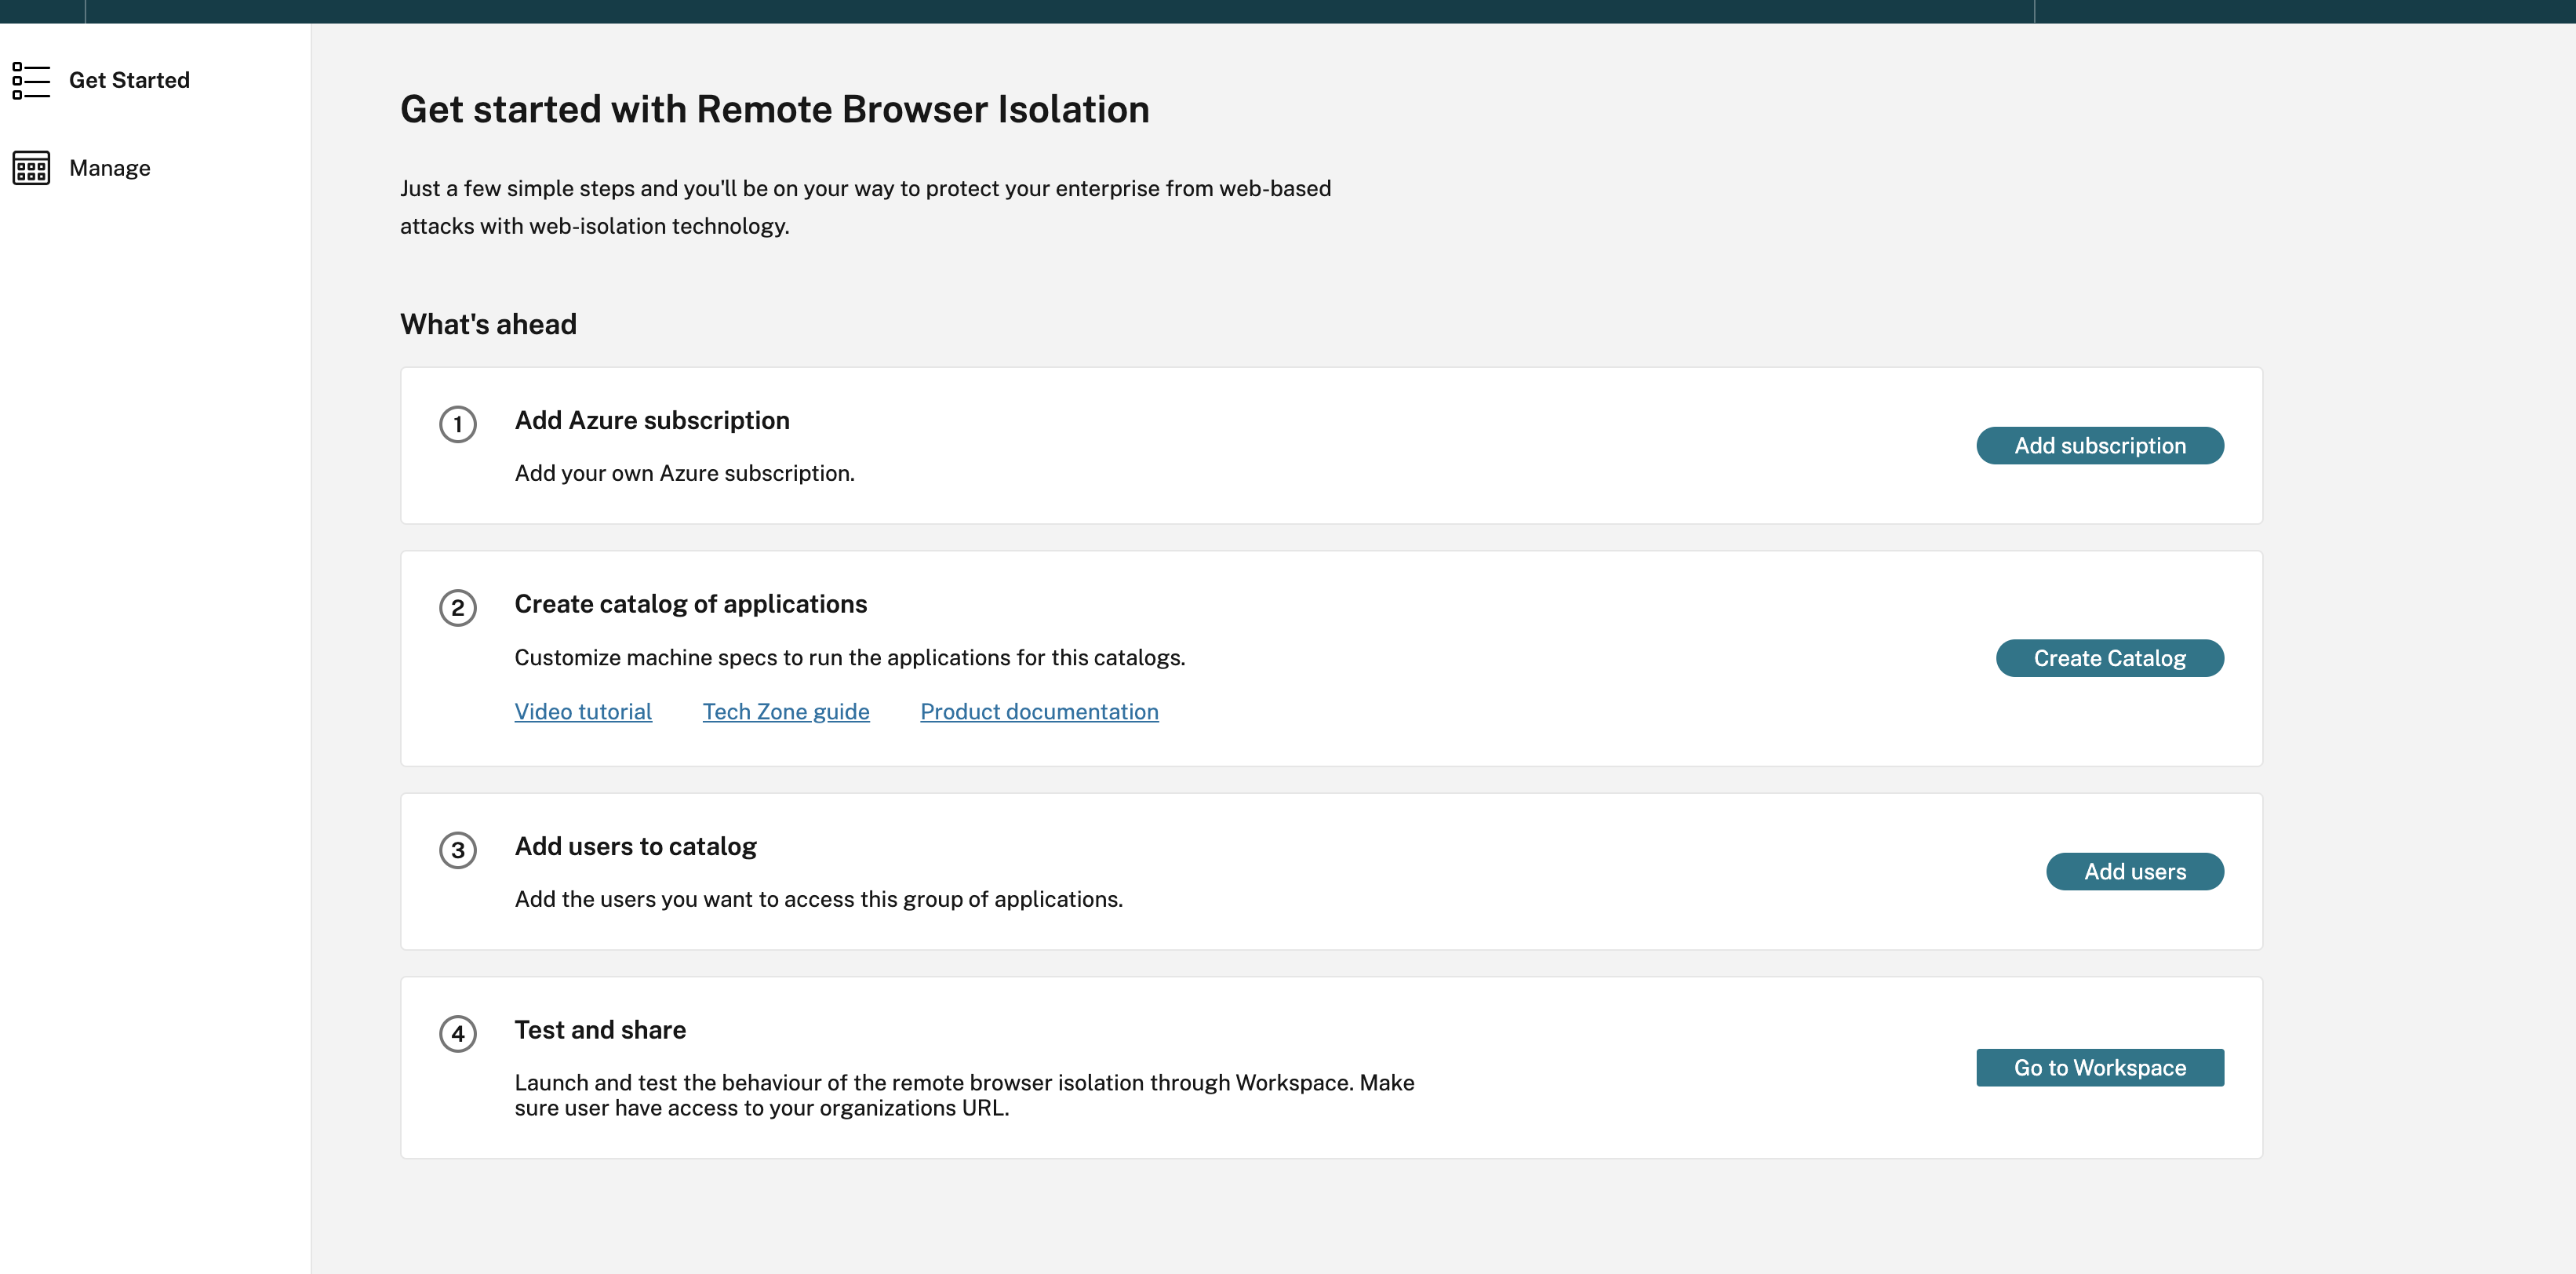
Get started with Remote Browser Isolation
Remote Browser Isolation - Self-hosted workloads
Remote Browser Isolation (RBI) Self-hosted workloads enable customers to operate remote browser workloads within their own Azure subscriptions. The data plane component (Virtual Desktop Agent) in RBI Self-hosted workloads runs in a customer-provided Azure subscription. This allows customers to scale machines and Catalogs horizontally as needed and to provision multiple Catalogs for better workload categorization.
Prerequisites:
- Citrix Platform Licenses (CPL) license or an RBI Dedicated Entitlement, and a DaaS Premium Entitlement.
- DaaS service must be enabled.
Note:
This step is possible only if the customer tenant has the necessary entitlements.
- Enable the Rendezvous protocol in DaaS.
How to Enable DaaS Service
- Sign in to Citrix Cloud.
- Navigate to the DaaS service.
- Locate and click the Enable DaaS. This step prepares the necessary DaaS infrastructure for RBI Self-hosted workloads and takes approximately 45 minutes.
Onboarding Process for RBI
On the Citrix Cloud page, click Manage RBI Service to access the Remote Browser Isolation landing page.
Step 1: Add Azure Subscription
-
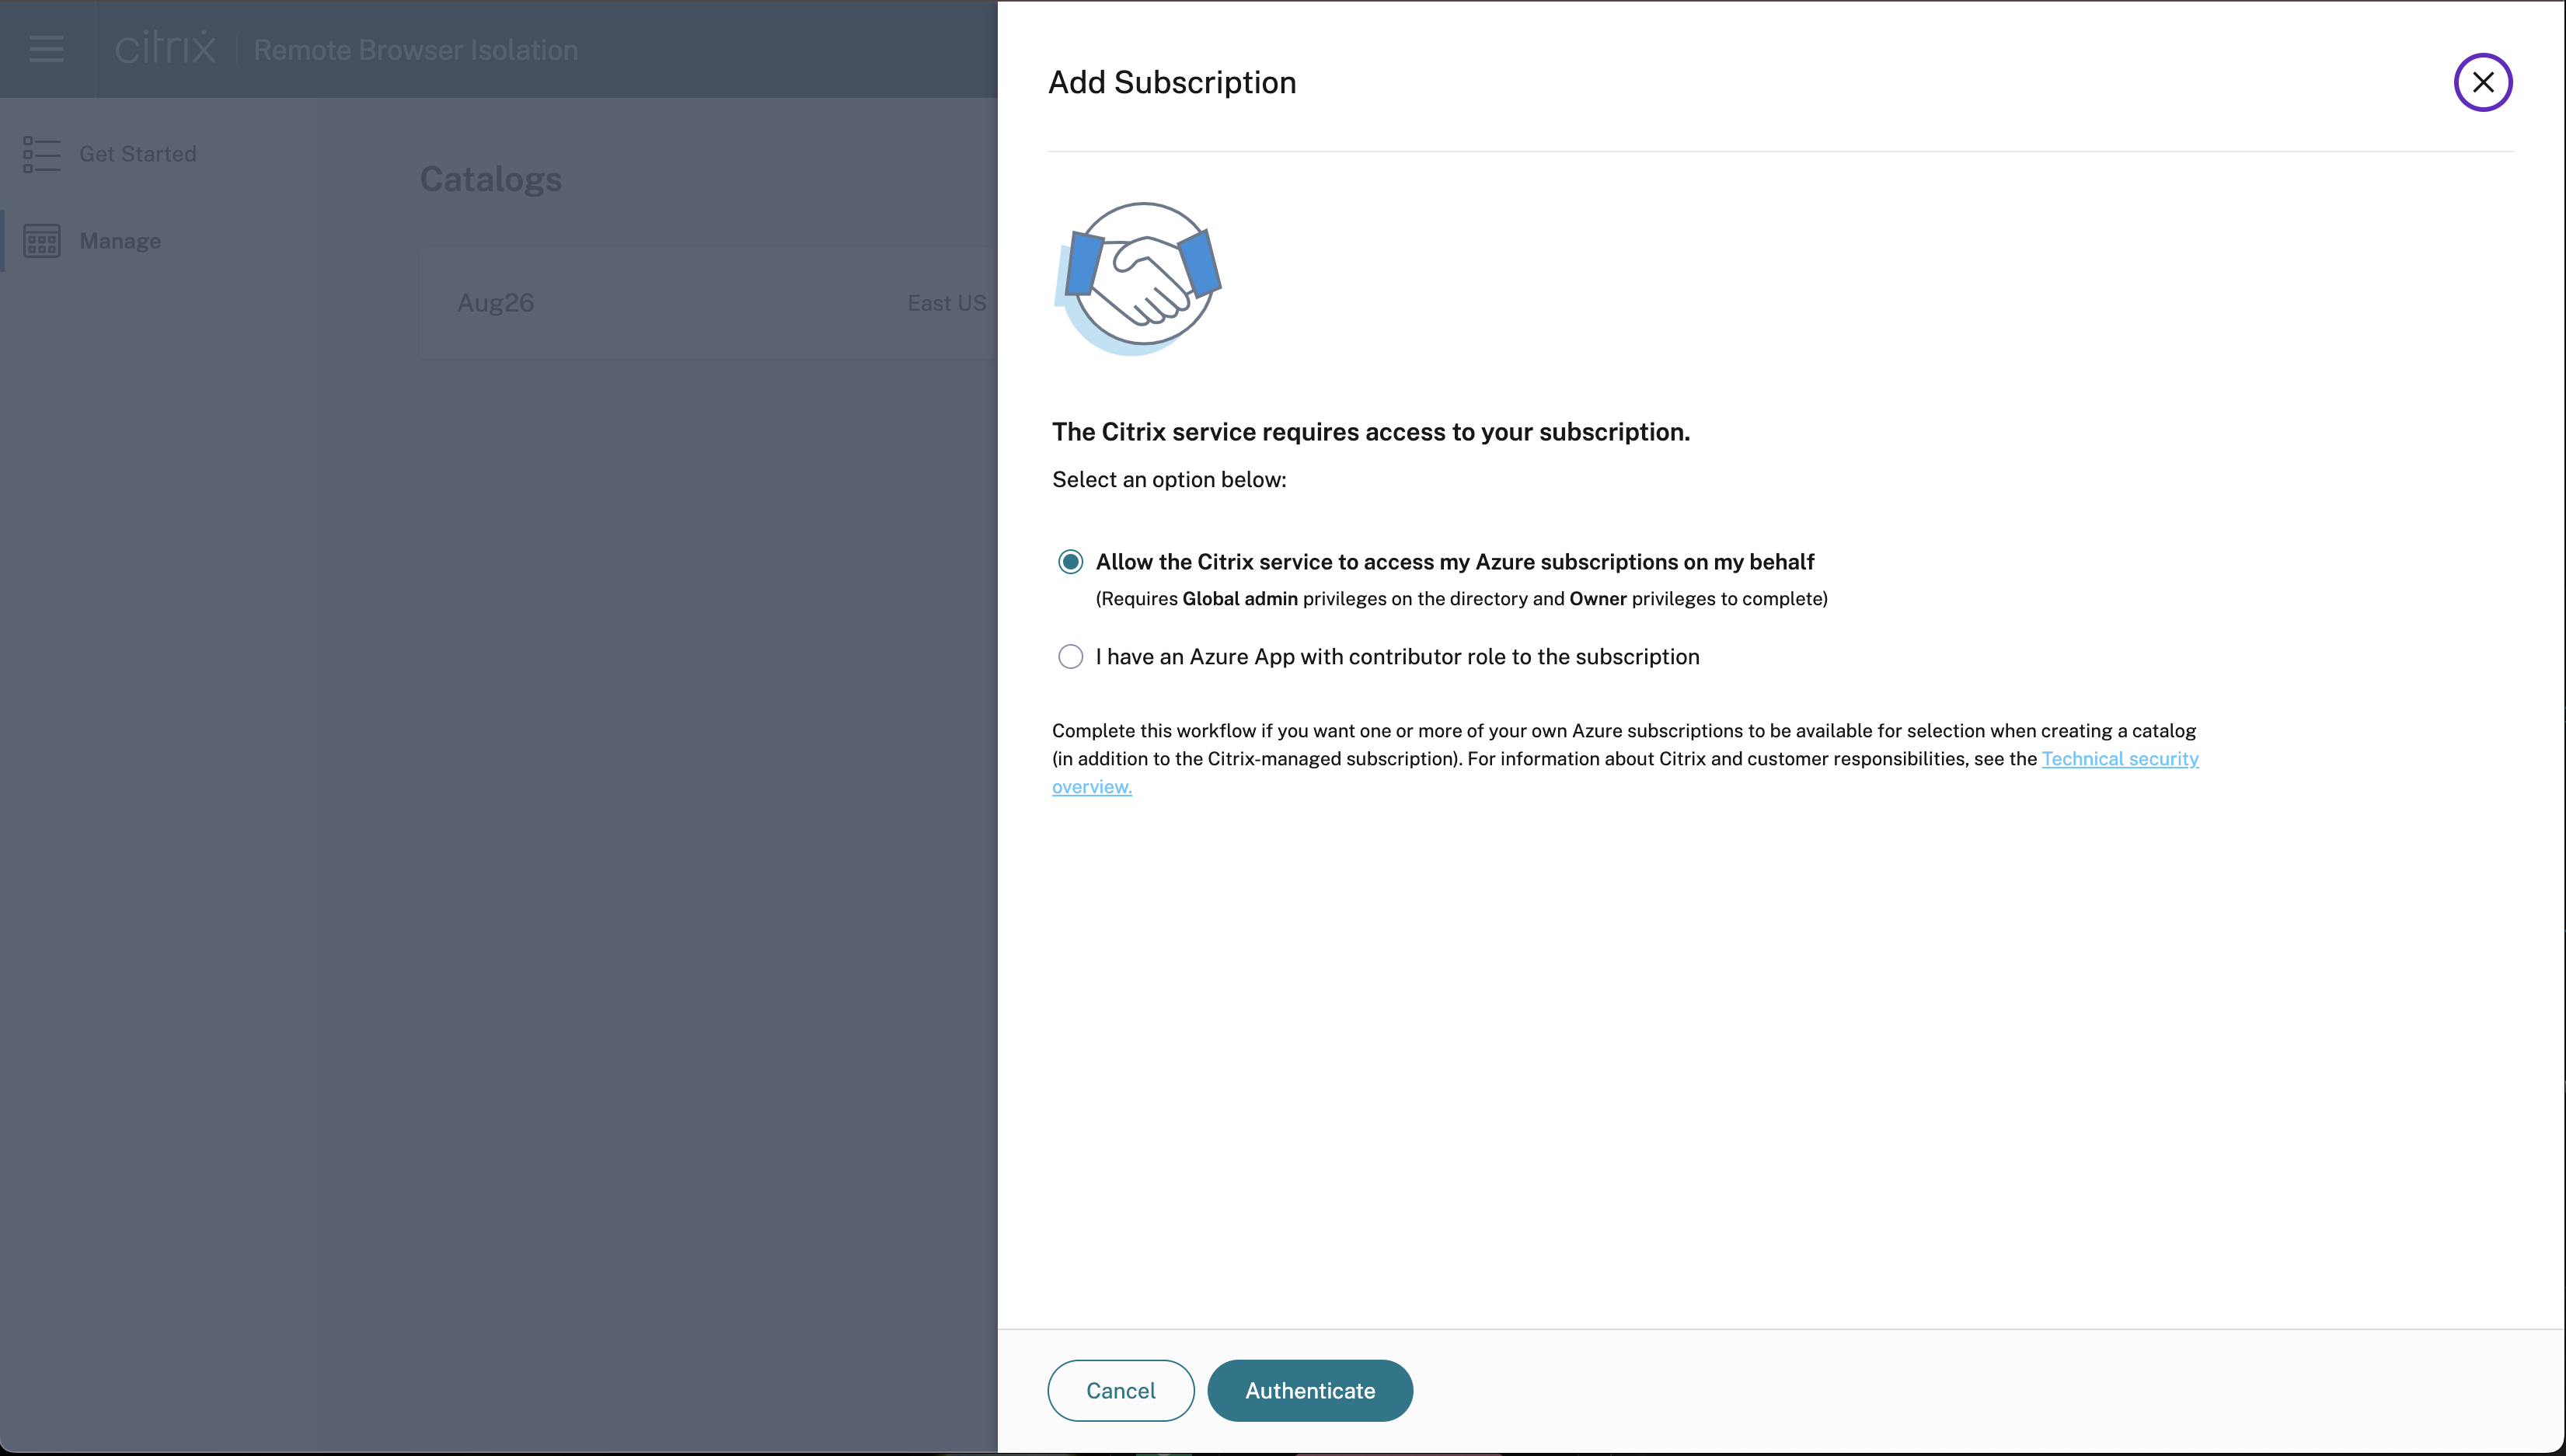
On the Get started with Remote Isolation page, click Add subscription. Azure subscriptions can be added to RBI Self-hosted workloads in two ways:
- Using global admin credentials: Allow the Citrix service to access my Azure subscription on my behalf.
- Using Enterprise App Registrations with Contributor Role on the entire subscription.
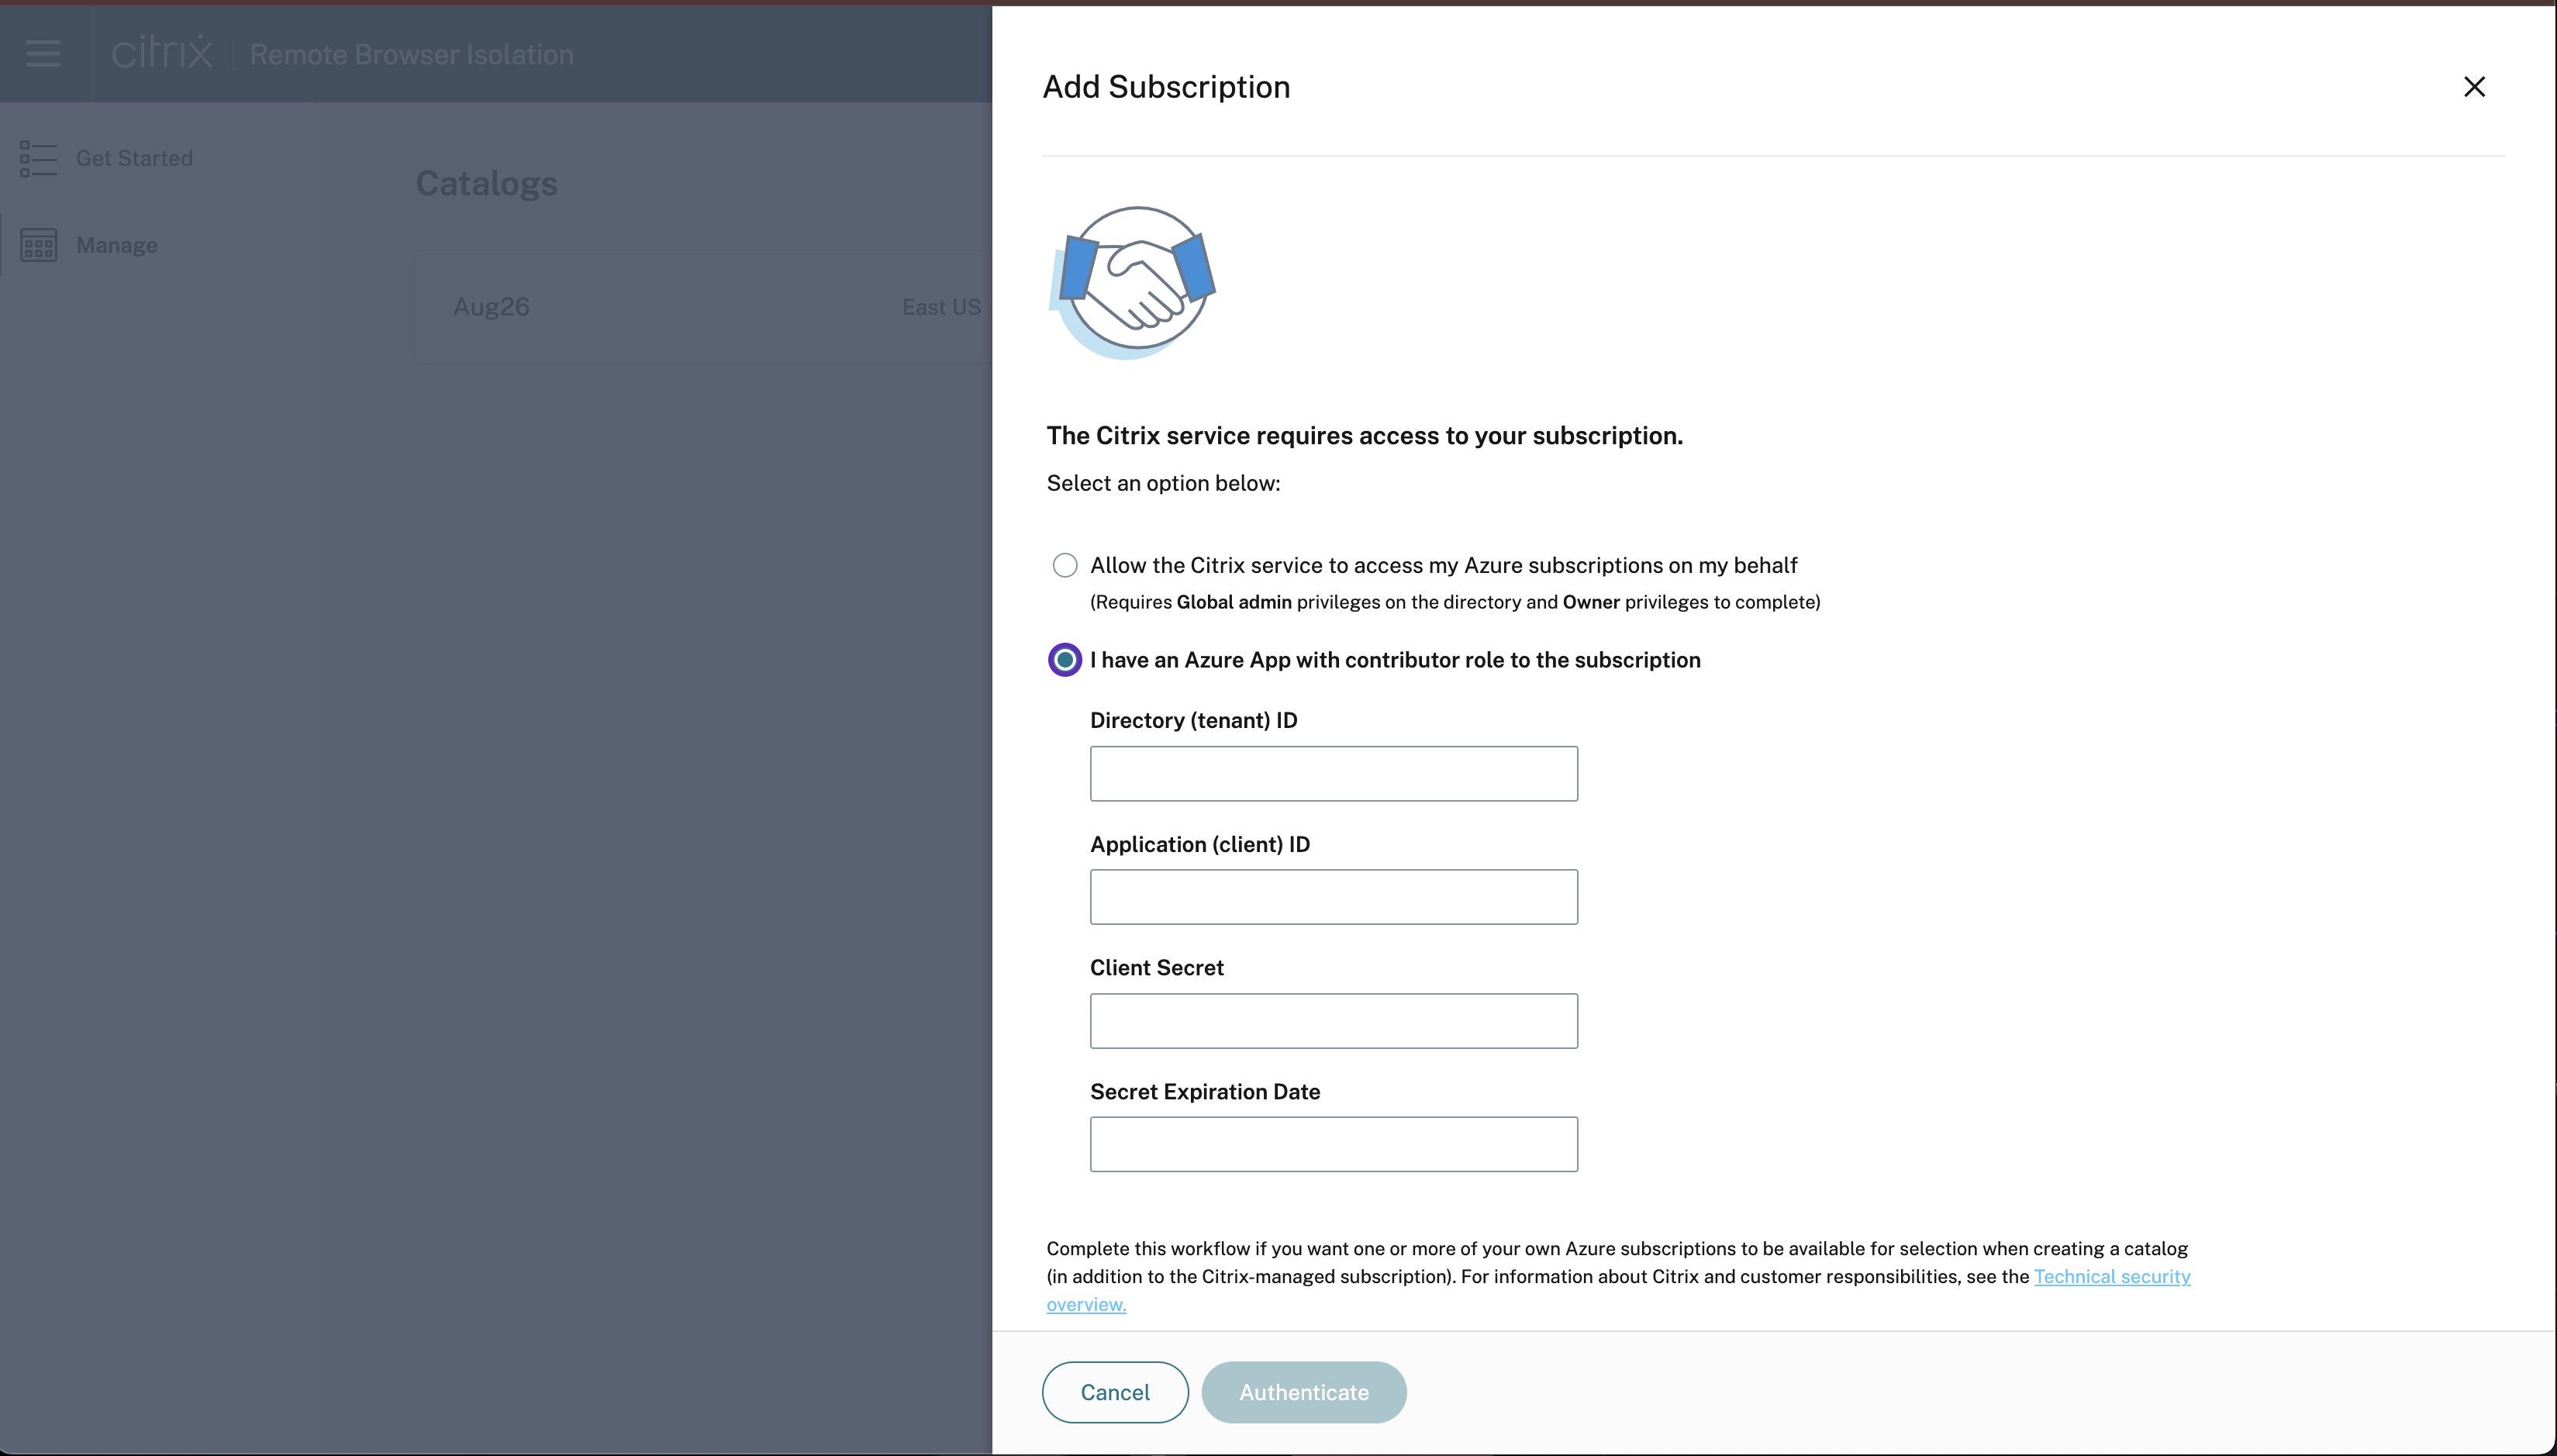
- Click I have an Azure App with contributor role to the subscription.
- Provide the Directory ID, Application ID, Client Secret, and Secret Expiration Date to enable this option and click Authenticate.
- After validating the subscription details, click Add subscription.
Note:
Multiple Azure subscriptions can be linked to RBI Self-hosted workloads. The Azure subscription can be either new or repurposed. RBI Self-hosted workloads create a virtual network (VNet) and deploy the machines within that boundary.
Step 2: Create a catalog of applications
Catalogs are containers for browser apps. You can organize browser apps by creating different catalogs for each group. The machines within a catalog are identical in size and settings, but machines in different catalogs can vary in size and settings. Additionally, the region can also vary between catalogs, which can be useful for optimizing end-user launch performance.
Creating a catalog takes about 90 minutes in a newly linked subscription. This process deploys the necessary resources in Azure, including a Resource Group for managing the machines.
- In the Citrix Cloud™ page, click Manage RBI Service > Create Catalog.
-
On the Create Remote Browser Isolation Catalog page, give a name for the Catalog and click Add remote isolated browser.
Note:
If you select create catalog, it takes the default settings for a quick deployment.
- Click Next: Machine Settings and provide the following details:
- Subscription
- Machine settings
- Region
Note:
Set a power schedule is disabled by default but the user has the option to configure this.
- Click Next: Summary > Create Catalog.
- After the catalog is created, click View Details.
Catalog Configuration Highlights:
- Catalog creation sets up everything needed for customer workloads with just one click.
- Customers can select their own power management cycles for the machines and publish browsers within the catalogs.
- If a customer has multiple subscriptions, they can choose where to deploy the catalog.
- Citrix Catalog Service manages the workloads.
- Software patches and updates are automatically deployed based on the customer-configured machine power management settings.
- The machine in the catalog operates in connectorless mode (Rendezvous V2 Policy for DaaS). This means that no connector deployment is required in the customer’s resource group.
Step 2.1: Assign Catalog for Secure Private Access (SPA) app sessions
Customer admins can select which catalog to use for SPA sessions, allowing them to dedicate a specific catalog for this purpose.
Prerequisites:
At least one catalog must be enabled for this option to successfully launch a SPA RBI app.
How to Enable Secure Private Access session:
- On the Citrix Cloud page, click Manage RBI Service.
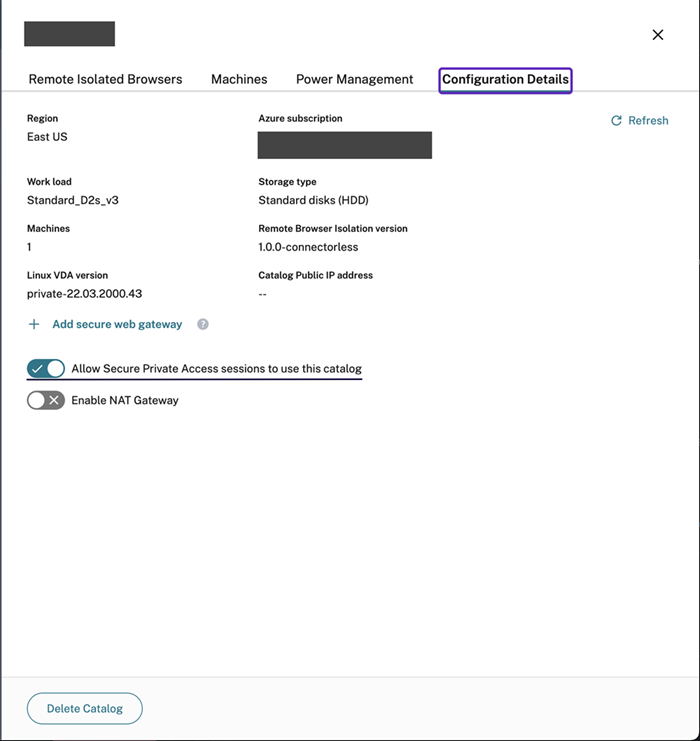
- Click Manage and navigate to the created catalog and click View Details.
- On the Configuration Details page, enable the toggle option for Allow Secure Private Access sessions to use this catalog.
Note:
You can select more than one catalog with this option. If multiple catalogs are selected, SPA launches goes to the catalog in the nearest region from where the launch request is made.
Step 3: Publish Browser Application
Create a Browser Application
Follow these steps to add a remote isolated browser:
- Click the catalog on the Manage tab of the RBI Self-hosted workloads console.
-
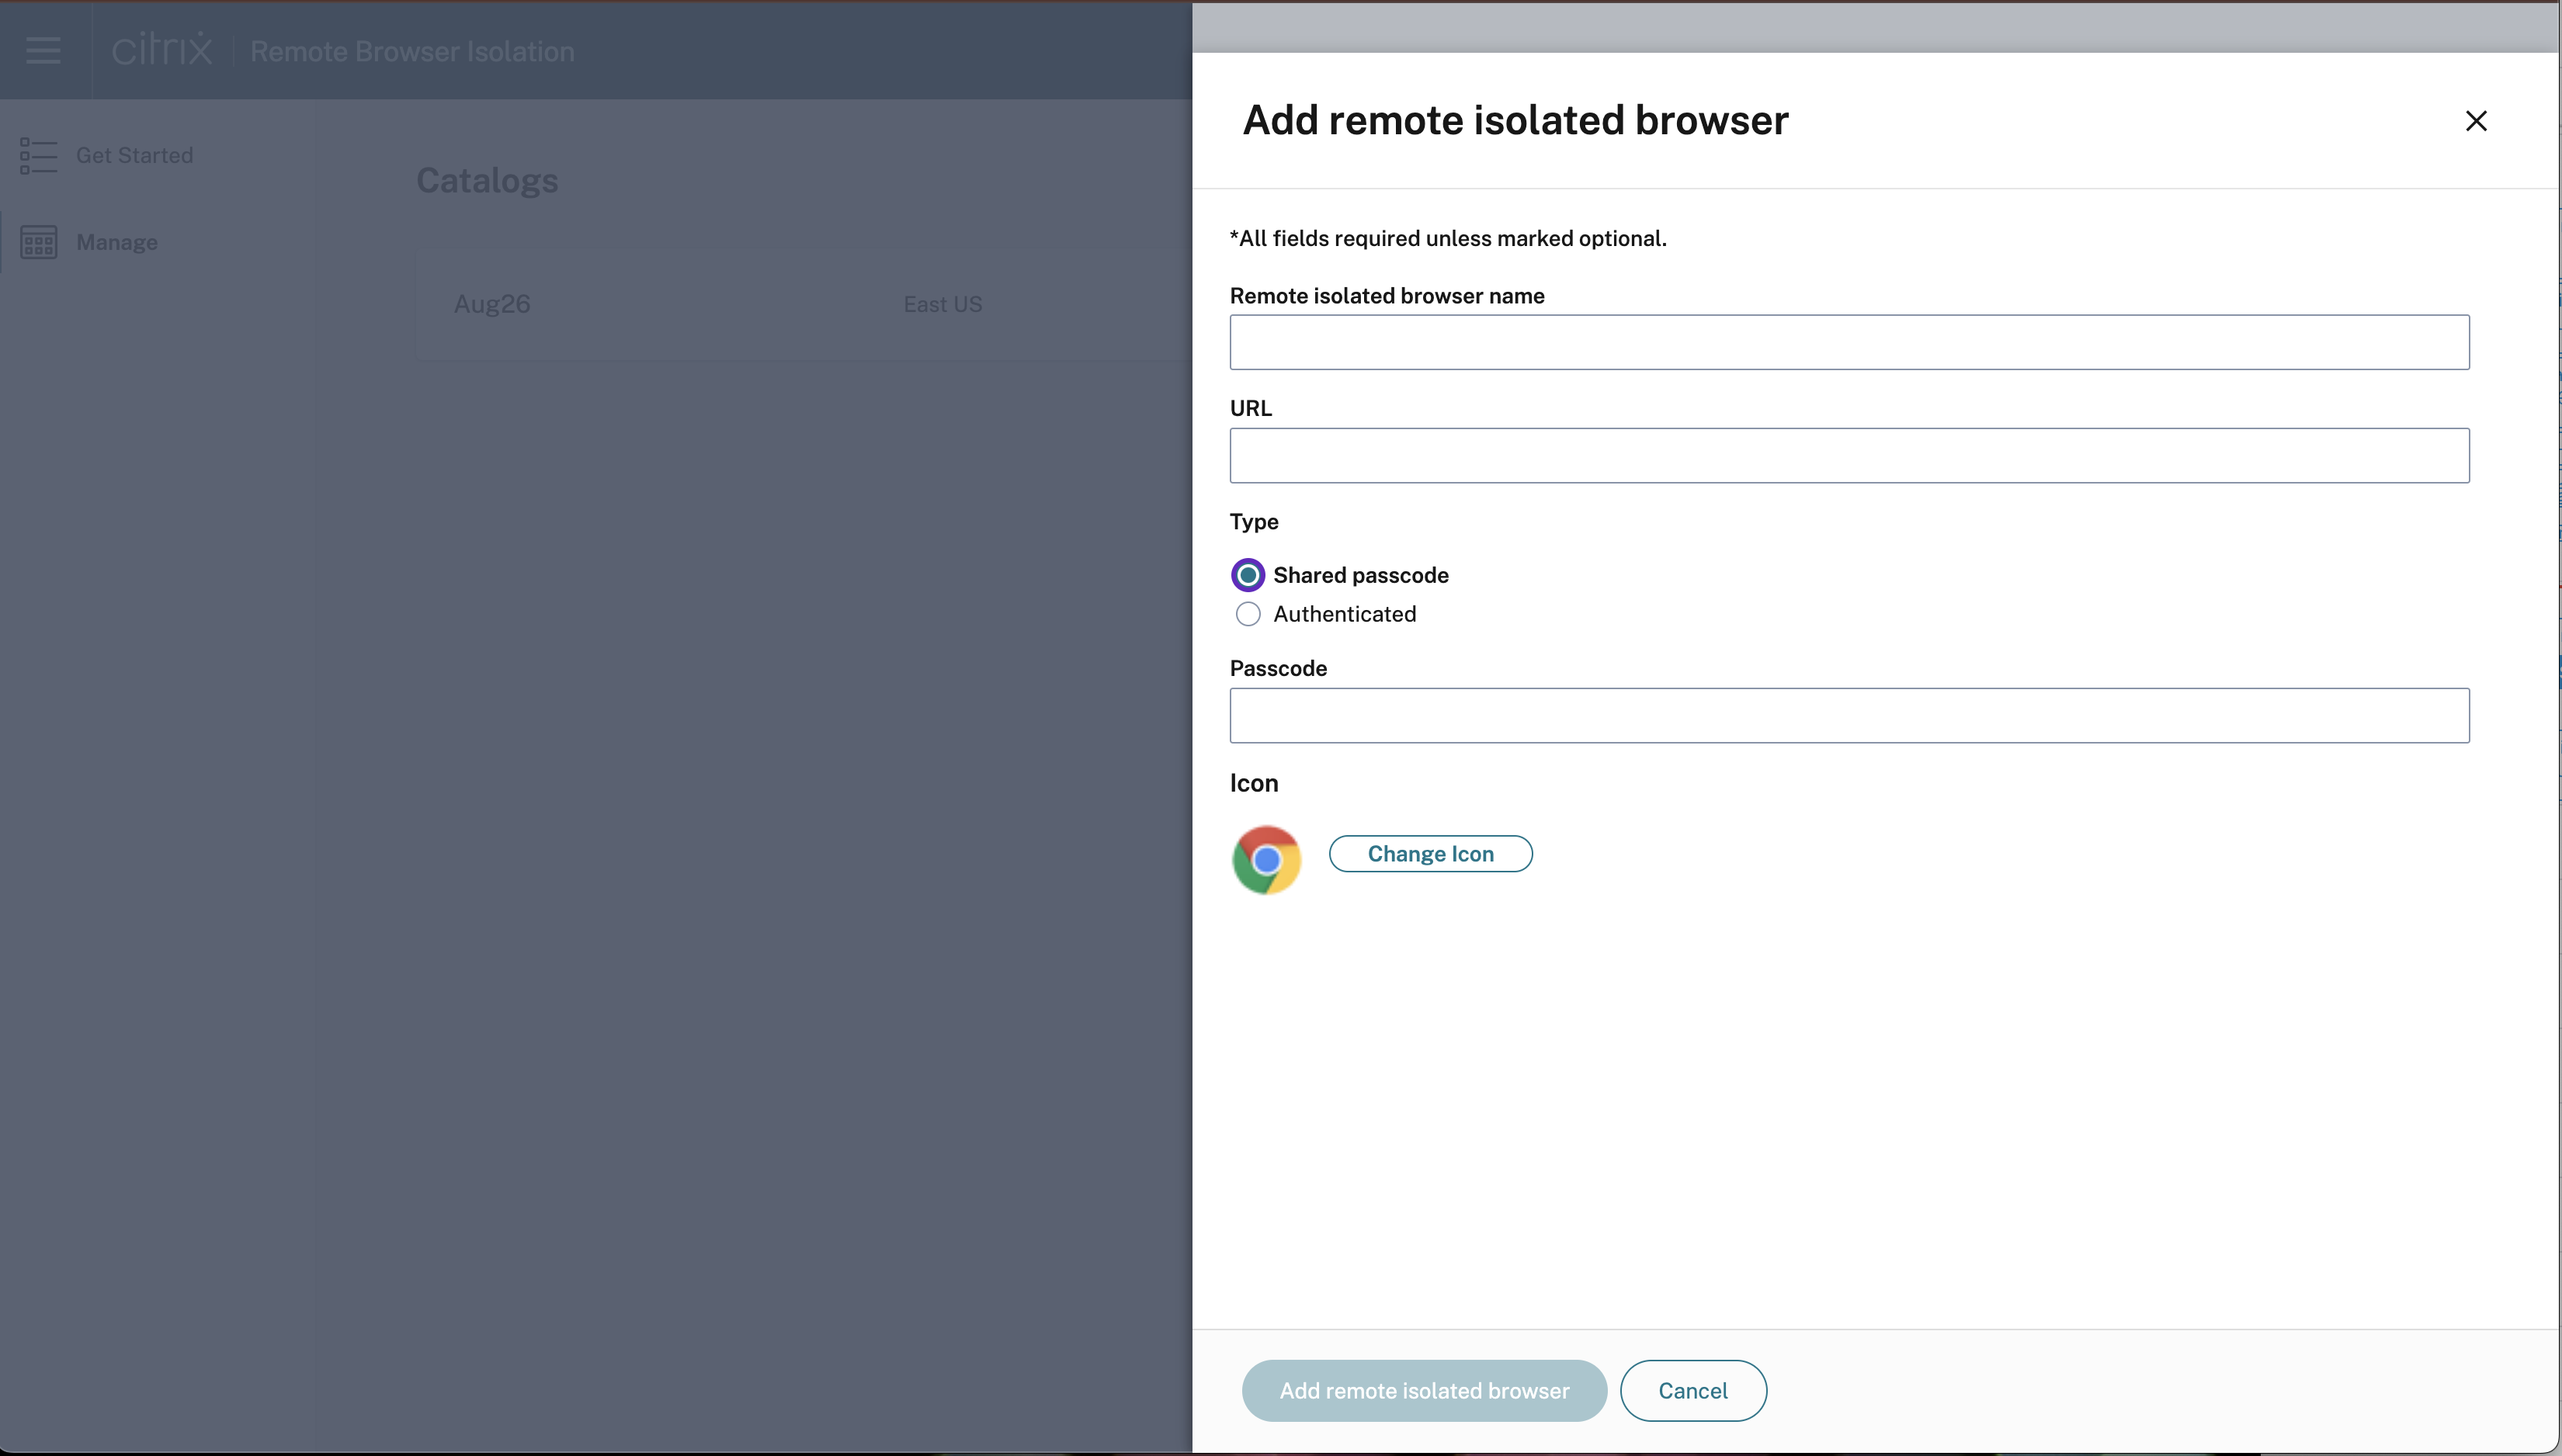
Click Add remote isolated browser and provide the following configuration details:
- Name of the Browser: Enter any name that you prefer.
-
URL: Specify the target application URL.
Note:
The remote browser is hosted in a secure isolated environment. The URL must be accessible through the internet.
- Type: Choose Shared passcode or Authenticated, which is visible to end users.
- Passcode Enter the passcode.
- Icon: Upload an app icon.
- Click Add remote isolated browser.
Assign Policies to the Browser Application
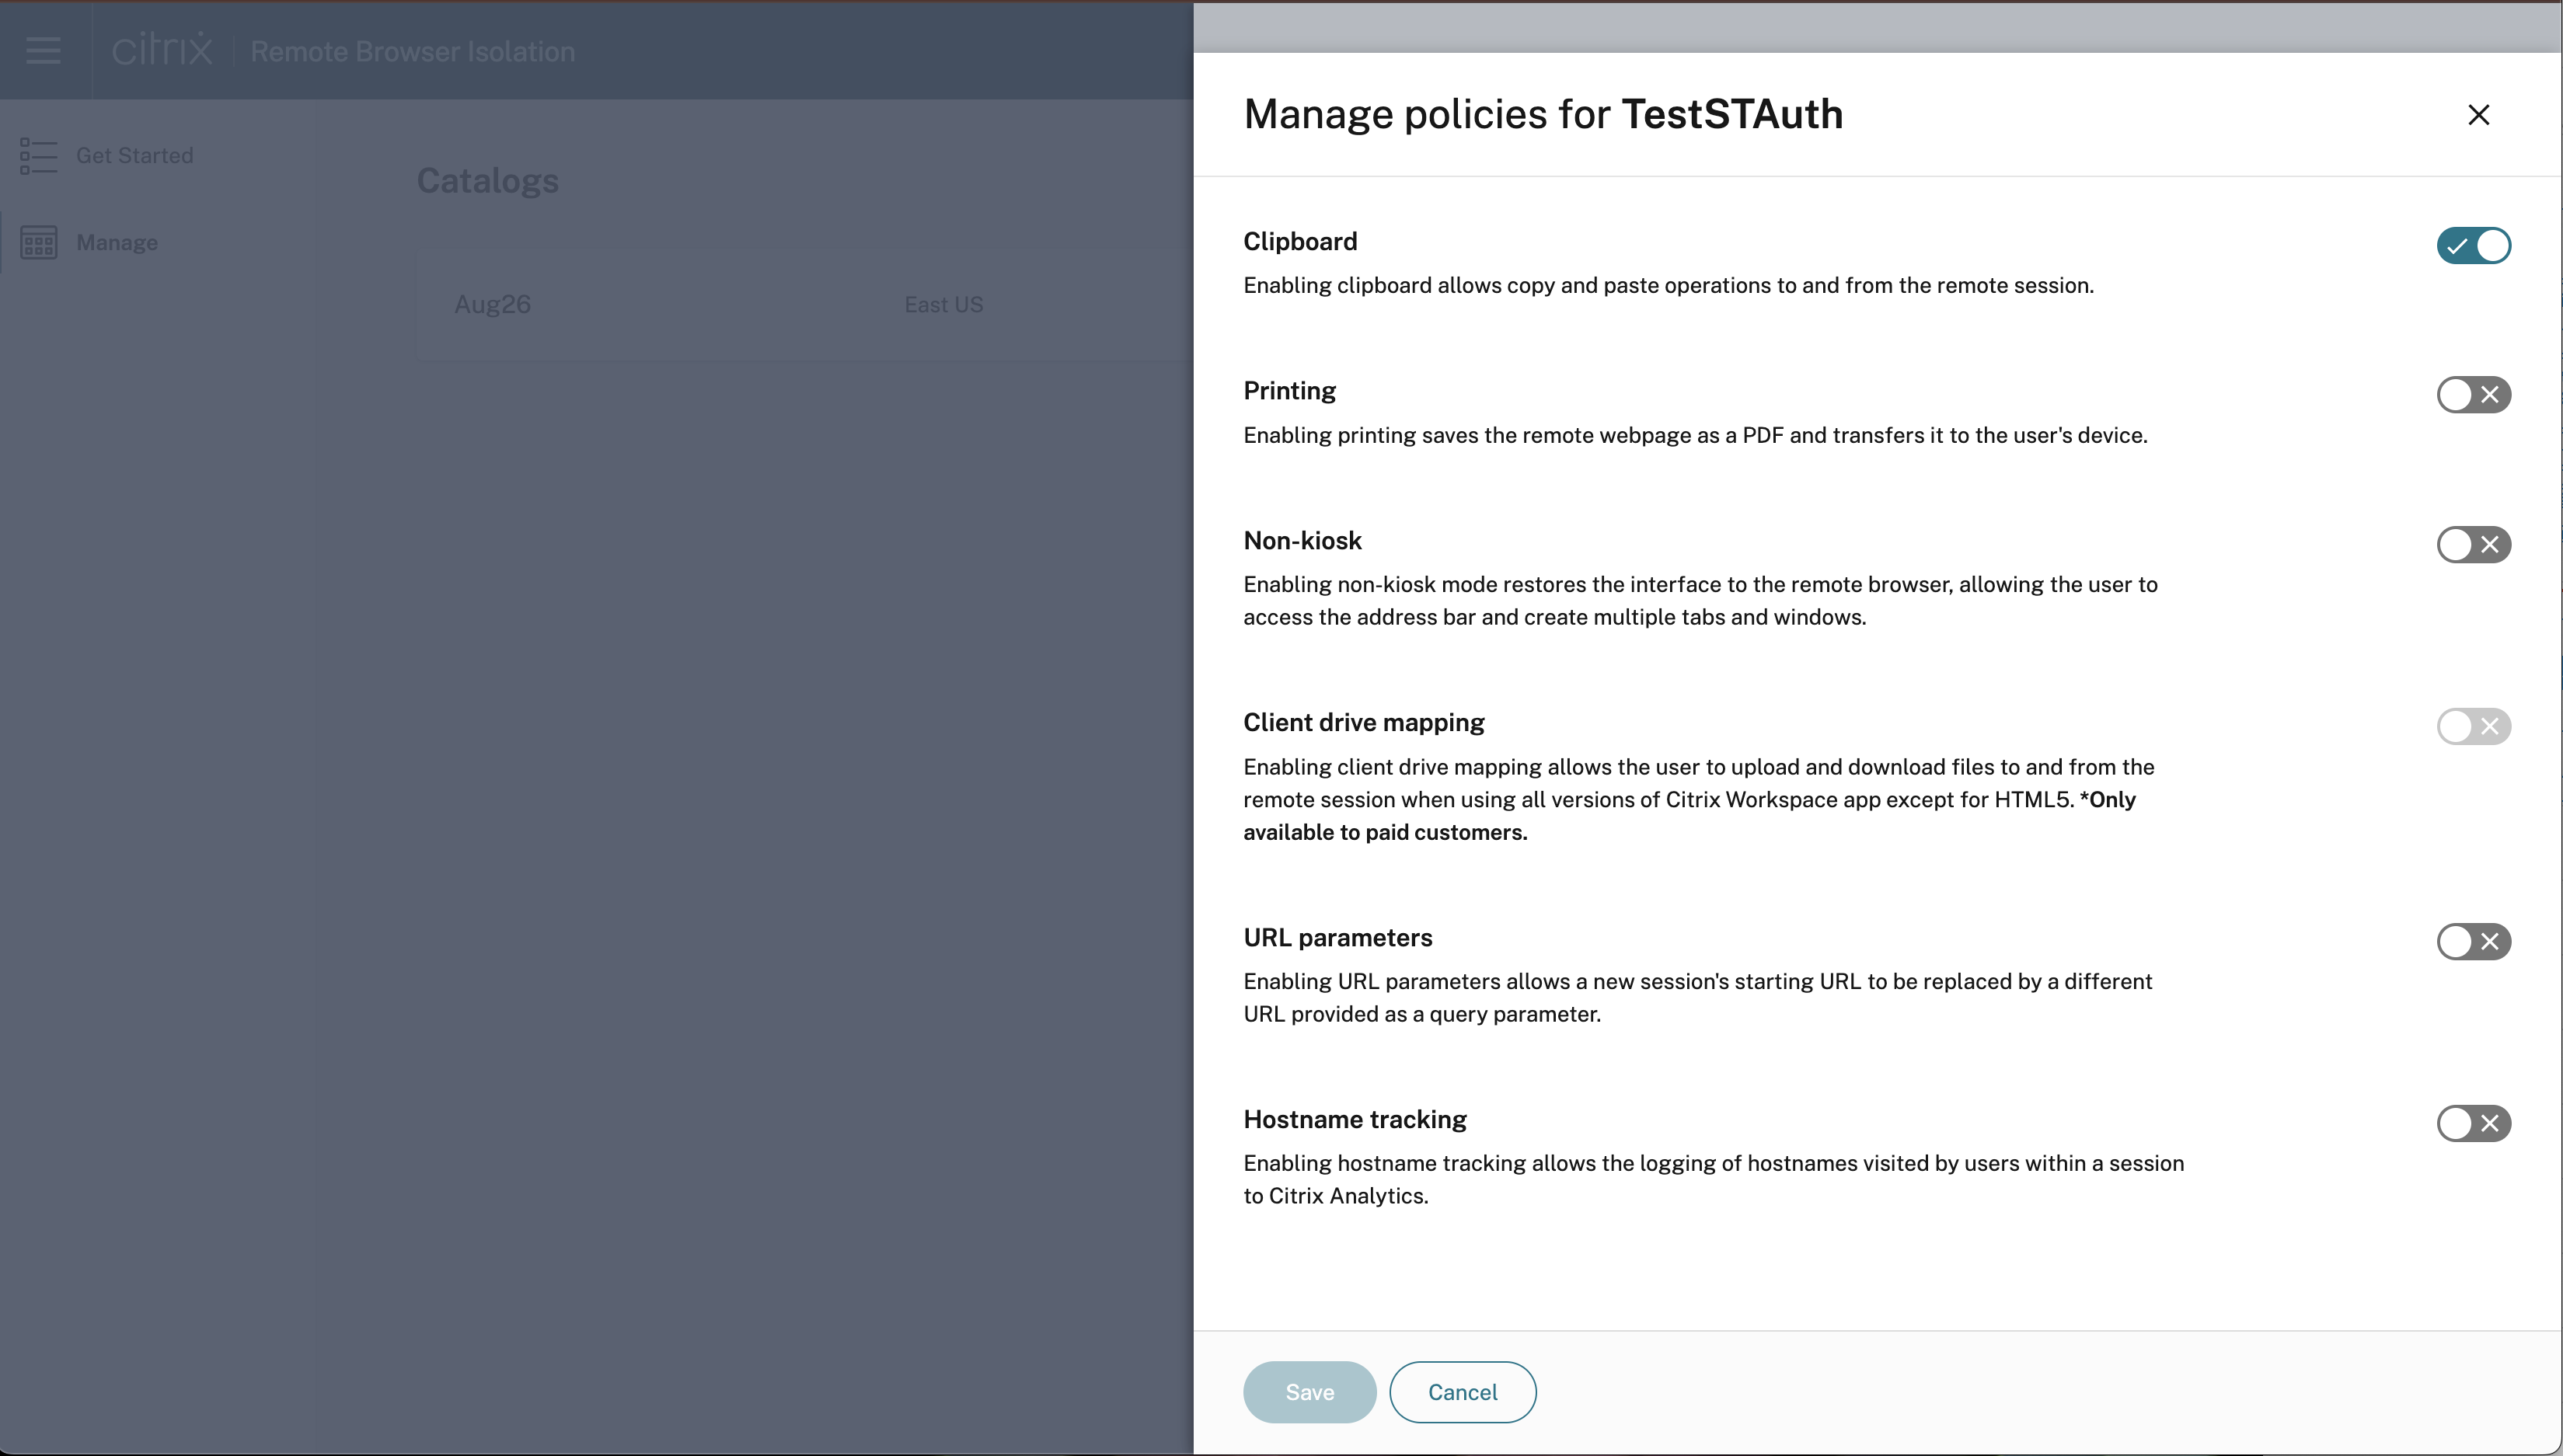
Once a browser is created, you can configure the necessary policies on the browser.
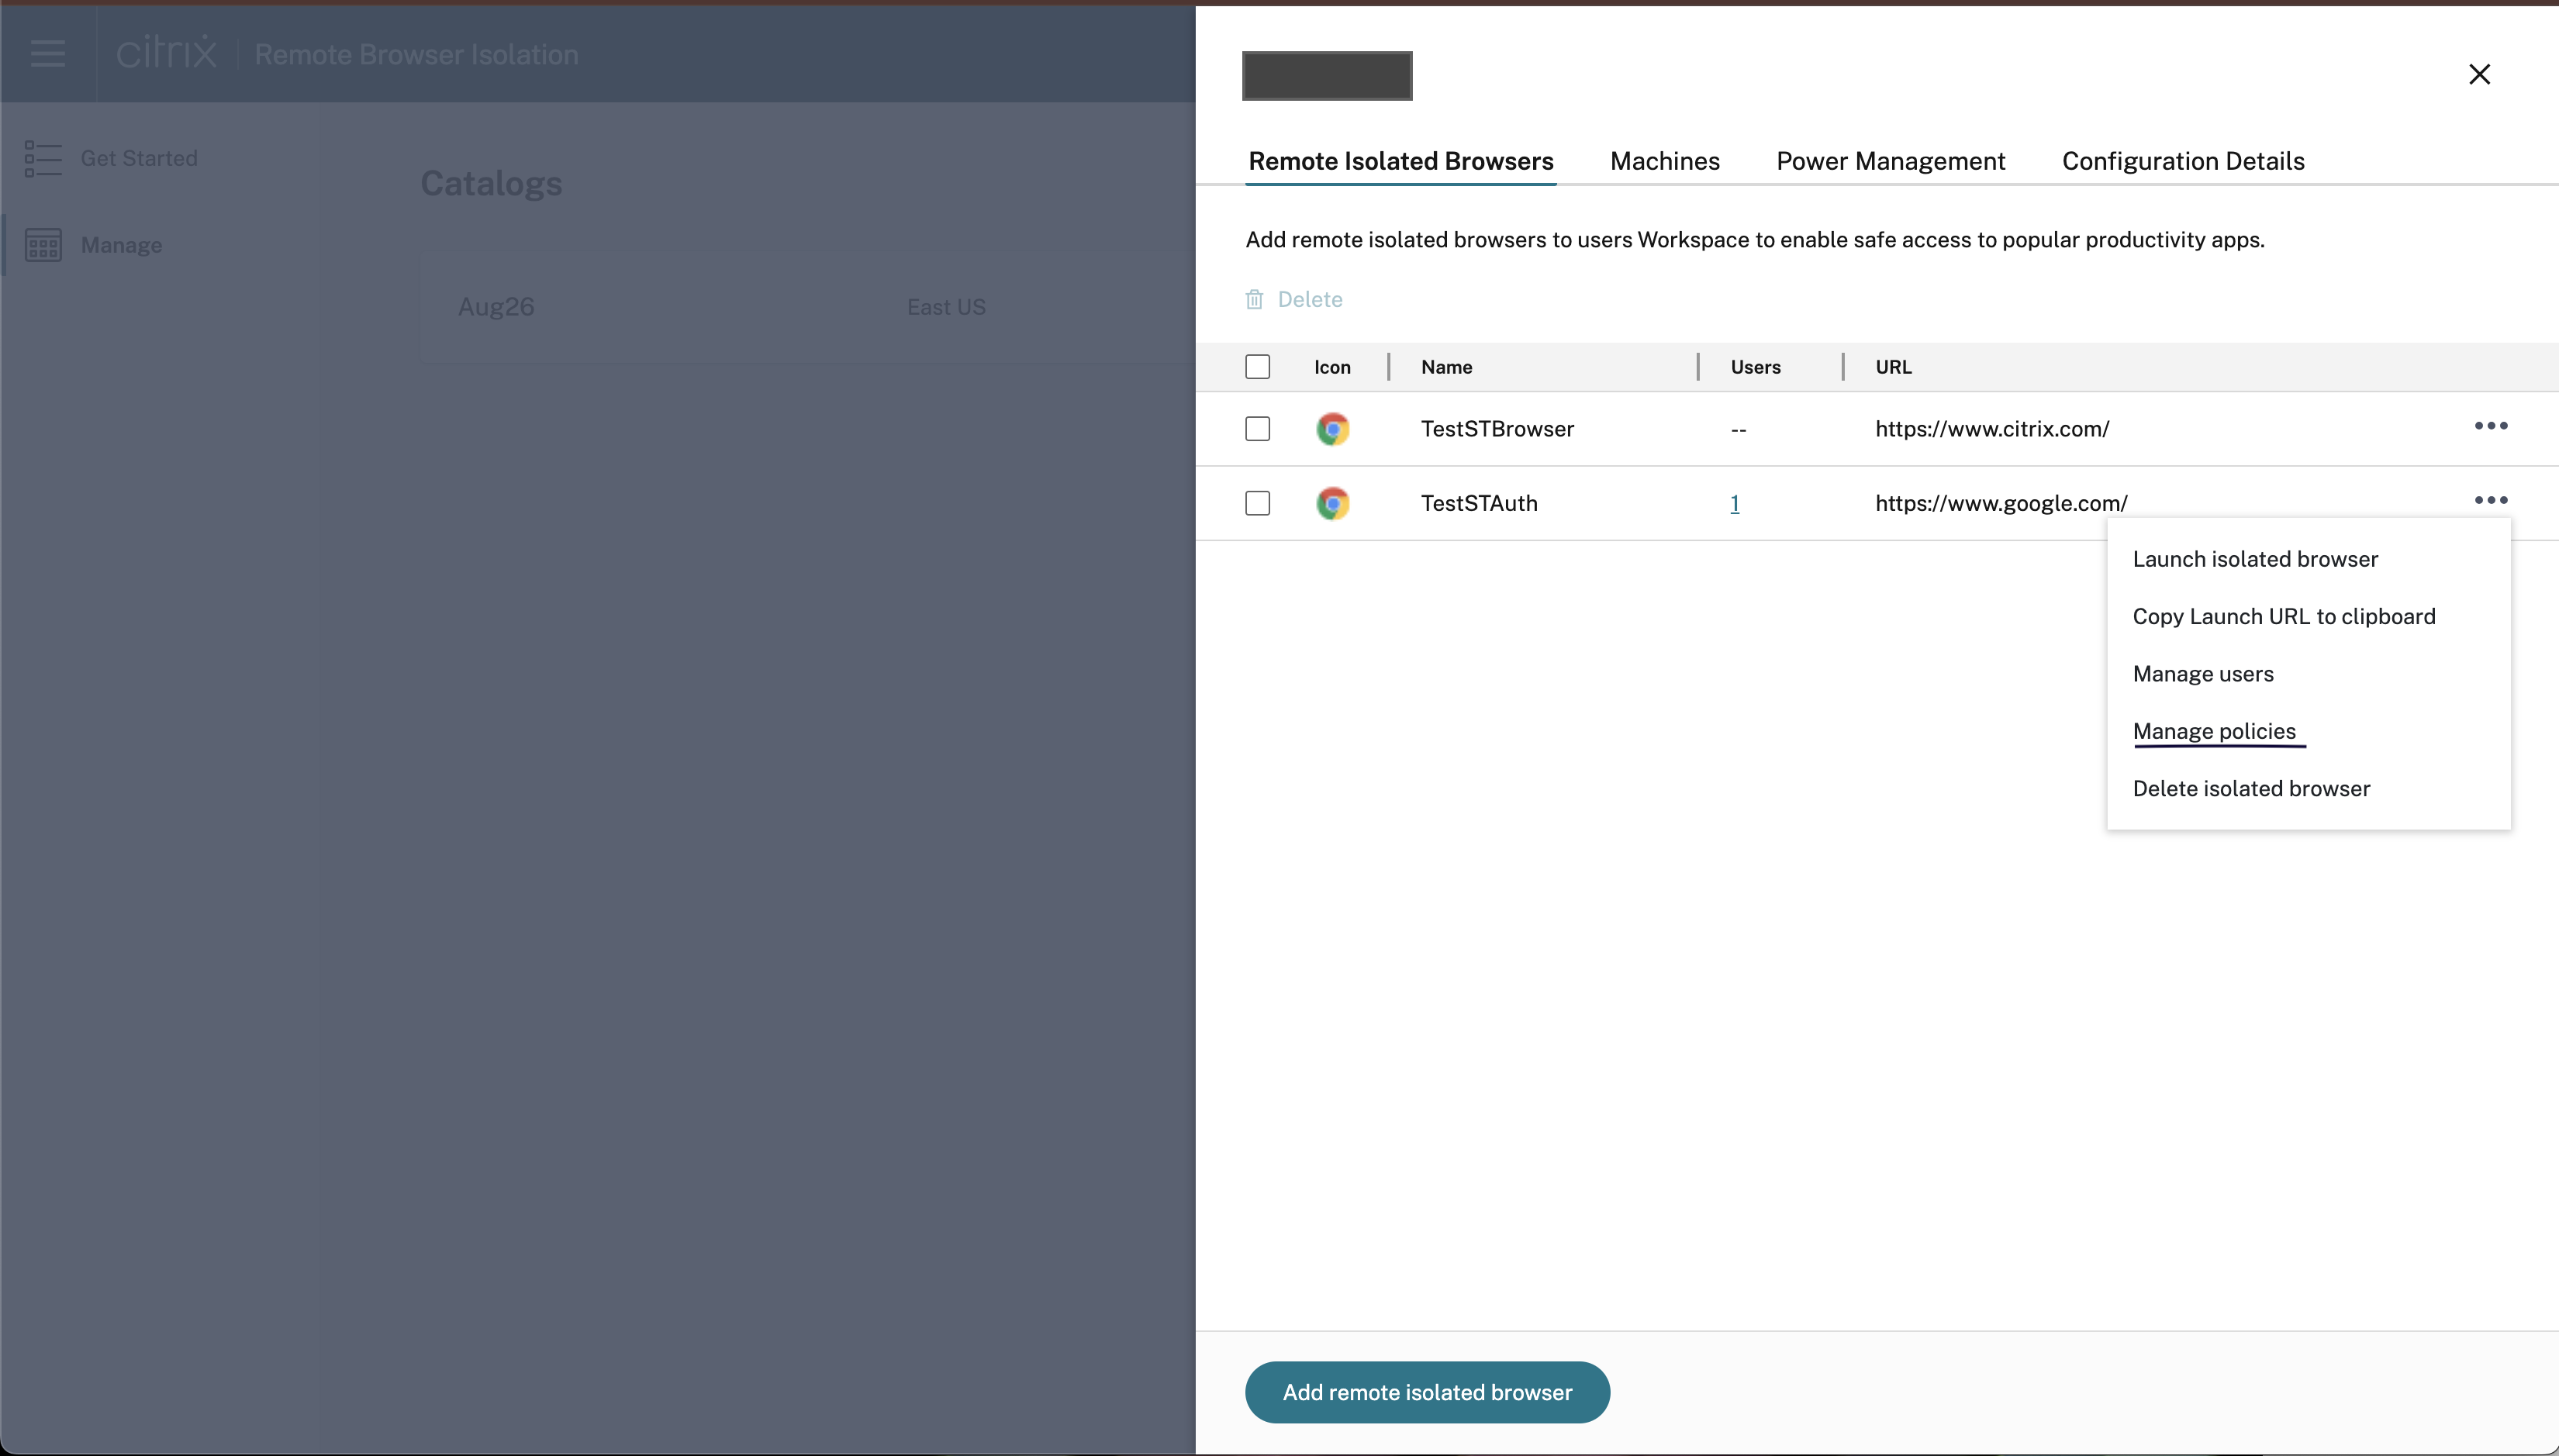
- Click the ellipses and then click Manage policies.
- Enable the desired policies and click Save.
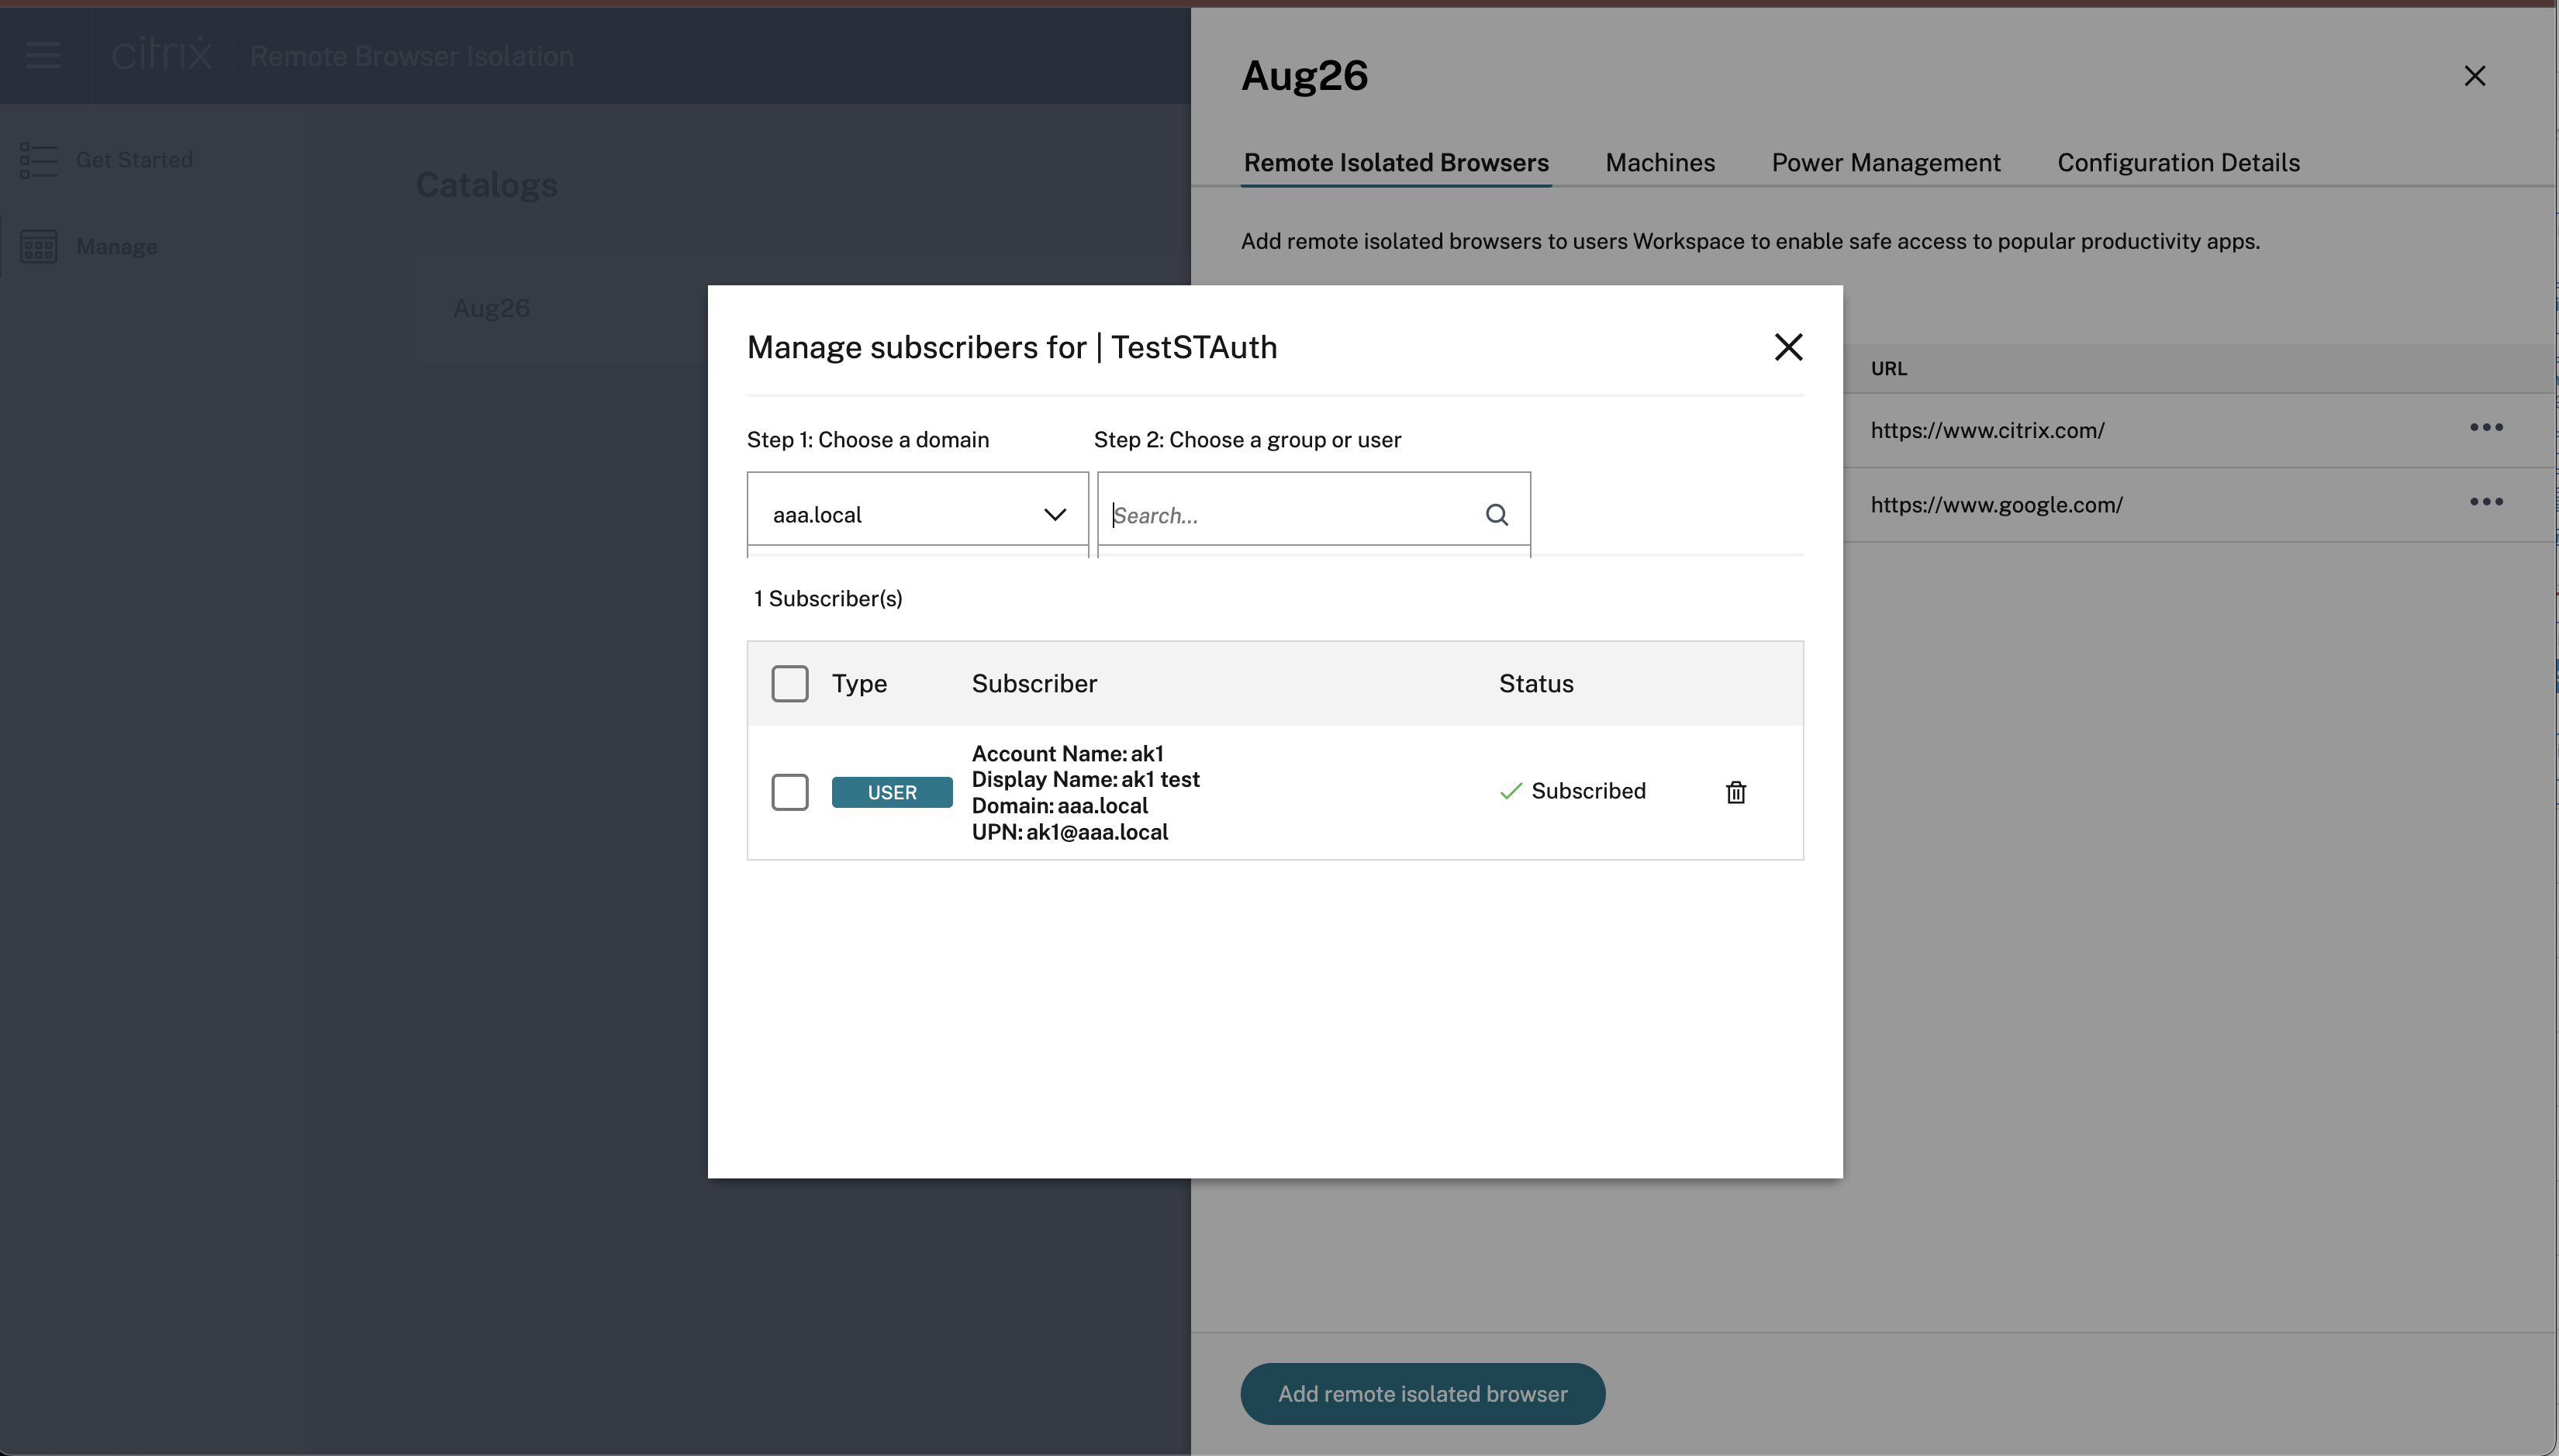
Add Users to a Browser Application
Customers need to bring in their domains and the Identity provider to assign users and groups to the published browser in the catalog.

- To subscribe a user, click the ellipsis and select Manage Users.
- Then, choose the domain and select a group or user from the drop-down menu.
Step 4: Test Browser Application and Share
You can now access published browsers through your store or by opening their URLs directly in a web browser. Launch requests are directed to the machines in the assigned catalogs in your account.
Note:
If power management for the machines hasn’t been set up for the catalog and there are no running machines, launching a session triggers the startup of a machine, which then waits to be ready to accept the session.
Delete a browser:
Select the browser that you want to delete and click the Delete icon.
Restart or Force Restart a machine:
Next to the machine name, click the ellipses and click the desired option.