-
-
Configuring the virtual path service between the MCN and client sites
-
Deploy Citrix SD-WAN standard edition in OpenStack using CloudInit
-
Configuration guide for Citrix Virtual Apps and Desktops workloads
-
Citrix SD-WAN Orchestrator on-premises configuration on Citrix SD-WAN appliance
-
-
This content has been machine translated dynamically.
Dieser Inhalt ist eine maschinelle Übersetzung, die dynamisch erstellt wurde. (Haftungsausschluss)
Cet article a été traduit automatiquement de manière dynamique. (Clause de non responsabilité)
Este artículo lo ha traducido una máquina de forma dinámica. (Aviso legal)
此内容已经过机器动态翻译。 放弃
このコンテンツは動的に機械翻訳されています。免責事項
이 콘텐츠는 동적으로 기계 번역되었습니다. 책임 부인
Este texto foi traduzido automaticamente. (Aviso legal)
Questo contenuto è stato tradotto dinamicamente con traduzione automatica.(Esclusione di responsabilità))
This article has been machine translated.
Dieser Artikel wurde maschinell übersetzt. (Haftungsausschluss)
Ce article a été traduit automatiquement. (Clause de non responsabilité)
Este artículo ha sido traducido automáticamente. (Aviso legal)
この記事は機械翻訳されています.免責事項
이 기사는 기계 번역되었습니다.책임 부인
Este artigo foi traduzido automaticamente.(Aviso legal)
这篇文章已经过机器翻译.放弃
Questo articolo è stato tradotto automaticamente.(Esclusione di responsabilità))
Translation failed!
Deploy Citrix SD-WAN Standard Edition in OpenStack using CloudInit
You can now deploy Citrix SD-WAN Standard Edition (SE) in an OpenStack environment. For this, Citrix SD-WAN image must support config-drive functionality.
NOTE
Create Citrix image to support config-drive functionality.
Config-drive functionality supports the following parameter configuration to establish communication with Citrix Orchestrator via the management network:
- Mgmt. ipv4 address
- Mgmt. gateway
- Name-server1
- Name-server2
- Serial number - Used for authentication and it must be reused for the new instance. Serial number passed in clouding must overwrite the autogenerated trial number in the VPX instance.
Note
To reuse the serial number, an init script is incorporated in SD-WAN that run on an OpenStack and change the serial number in /etc/default/family.
Orchestrator must have a unique serial number with SD-WAN appliances to work.
Cloudinit script supports contextualization for SD-WAN deployment in OpenStack with config-drive.
In the process of contextualization, the infrastructure makes the context available to the virtual machine and the virtual machine interprets the context. On contextualization, the virtual machine can start certain services, create users, or set networking and configuration parameters.
For an SD-WAN instance in OpenStack, the inputs needed for Management IP, DNS, and serial number from the users. The Cloudinit script parses these inputs and provision the instance with the given information.
While launching instances in an OpenStack cloud environment, Citrix SD-WAN appliance need to support two technologies that are User Data and CloudInit to support automated configuration of instances at boot time.
Perform the following steps to provisioning SD-WAN SE in an OpenStack environment:
Pre-requisites
Go to Images and click Create Image.
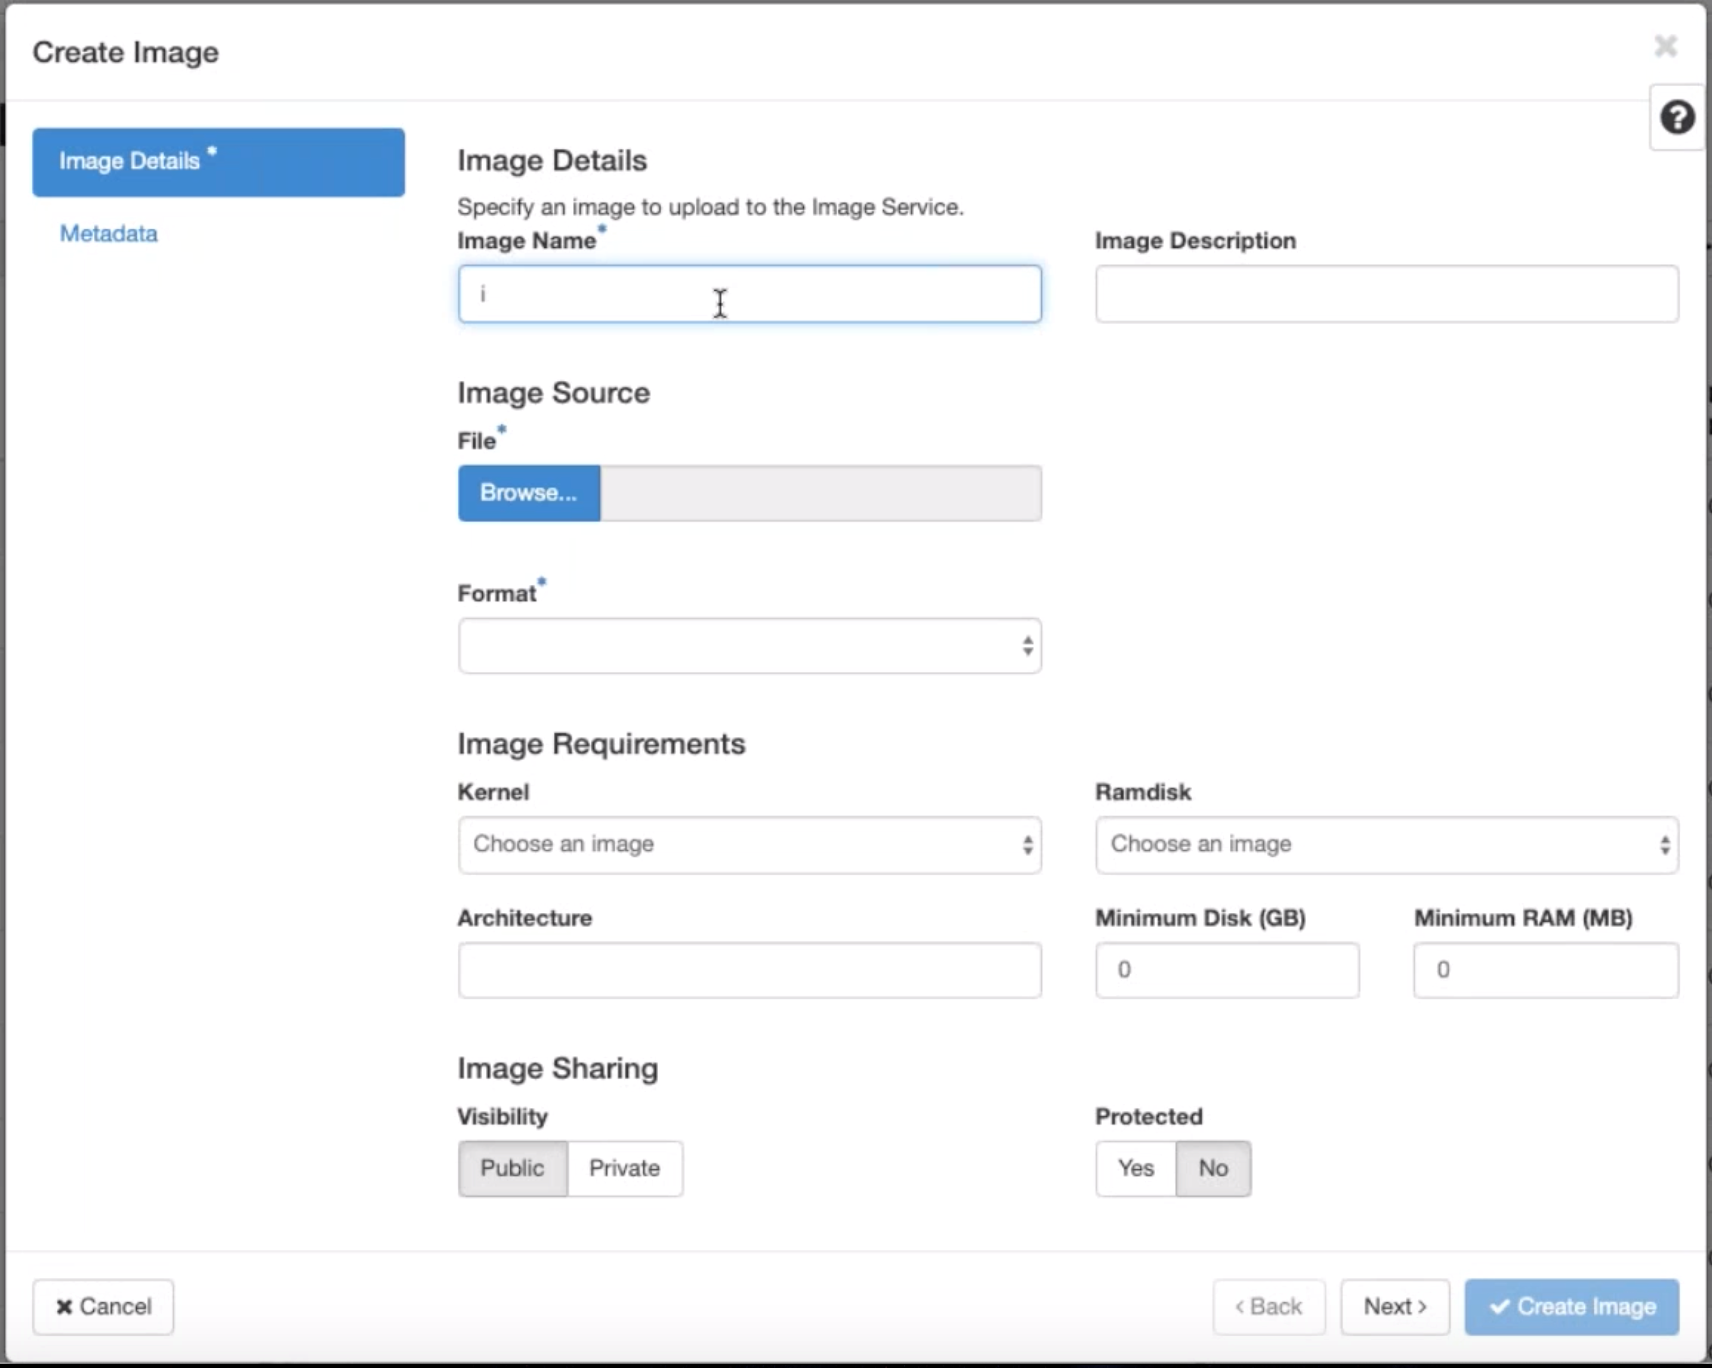
- Image Name - Provide the image name.
- Image Description – Add an image description.
- File - Browse for the kvm.qcow2 image file from your local drive and select it.
- Format – Select the QCOW2 – QEMU Emulator disk format from the drop-down list.
Click Create Image.
Both Network and network port must create initially and predefined. To create network port:
-
Select Networks under Network and go to Port tab.
-
Click Create Port and provide the necessary detail and click Create.
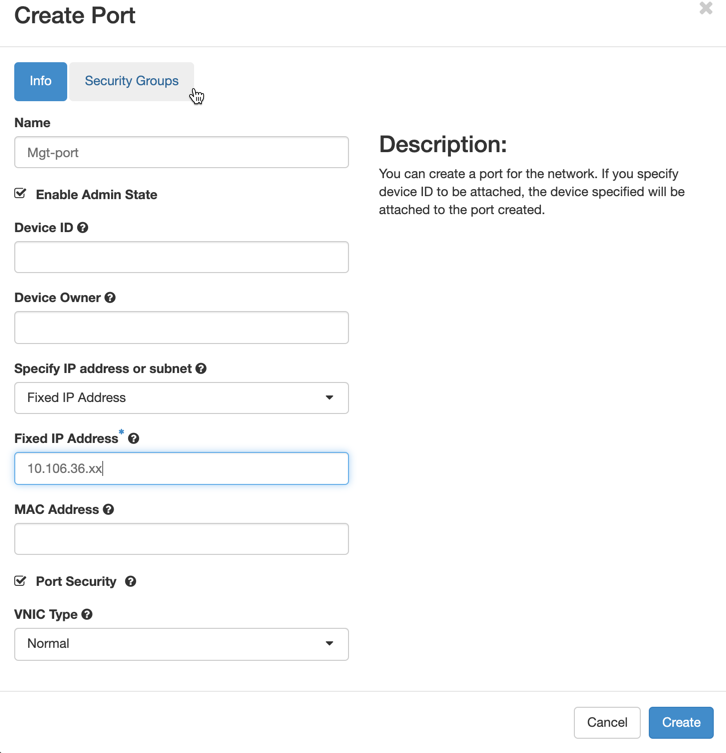
If you select Fixed IP Address, then you must provide the subnet IP address for the new port.
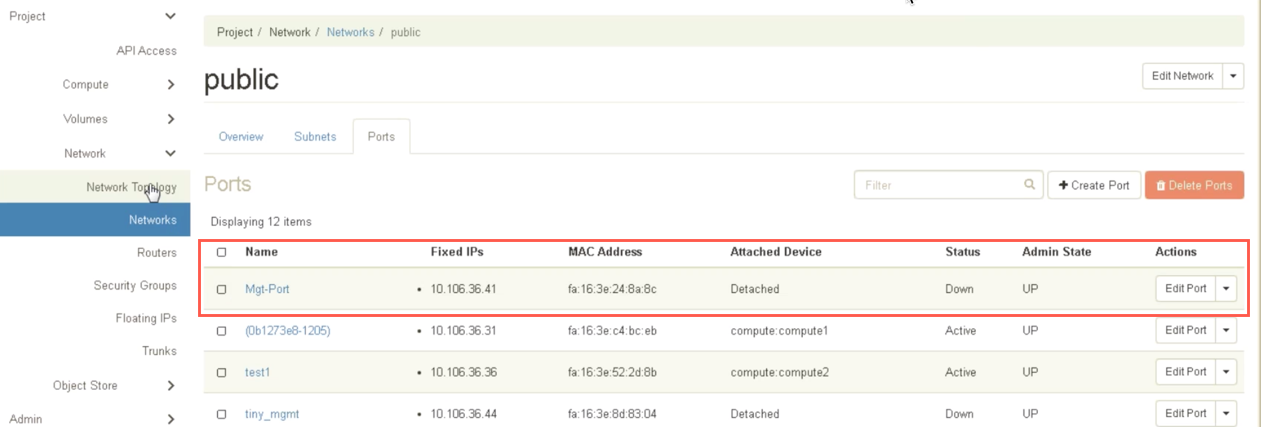
The port is created and as it is not attached to any device, the current status shows Detached.
Create OpenStack instance to enable config-drive and pass the user_data.
-
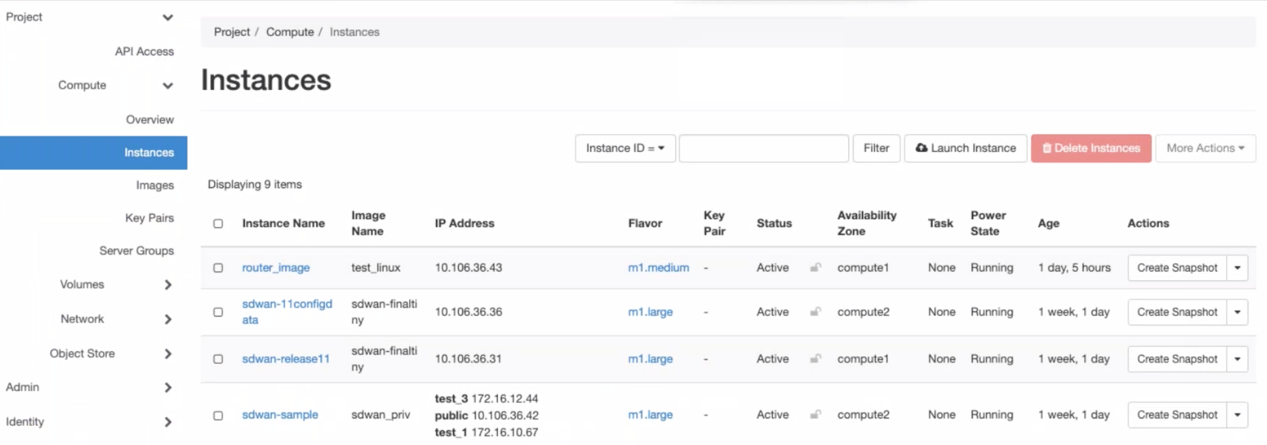
Log in to OpenStack and configure Instances.
-
Download the kvm.qcow2.gz file and untar it.
-
Go to Instances and click Launch Instance.
NOTE
You can go back to Instances and click Launch Instance or from the Images screen click Launch once the image is created.

-
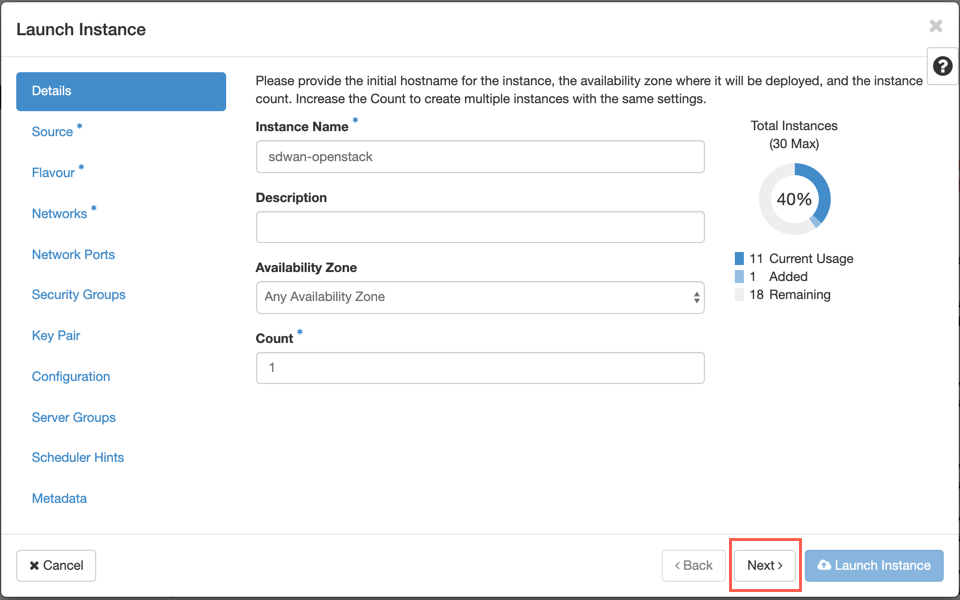
Under Details tab, provide the following information:
- Instance Name – Provide the host name for the instance.
- Description – Add description for the instance.
- Availability Zone – Select the availability zone from the drop-down list where you want to deploy the instance.
- Count – Enter the instance count. You can increase the count to create multiple instances with the same settings. Click Next.
-
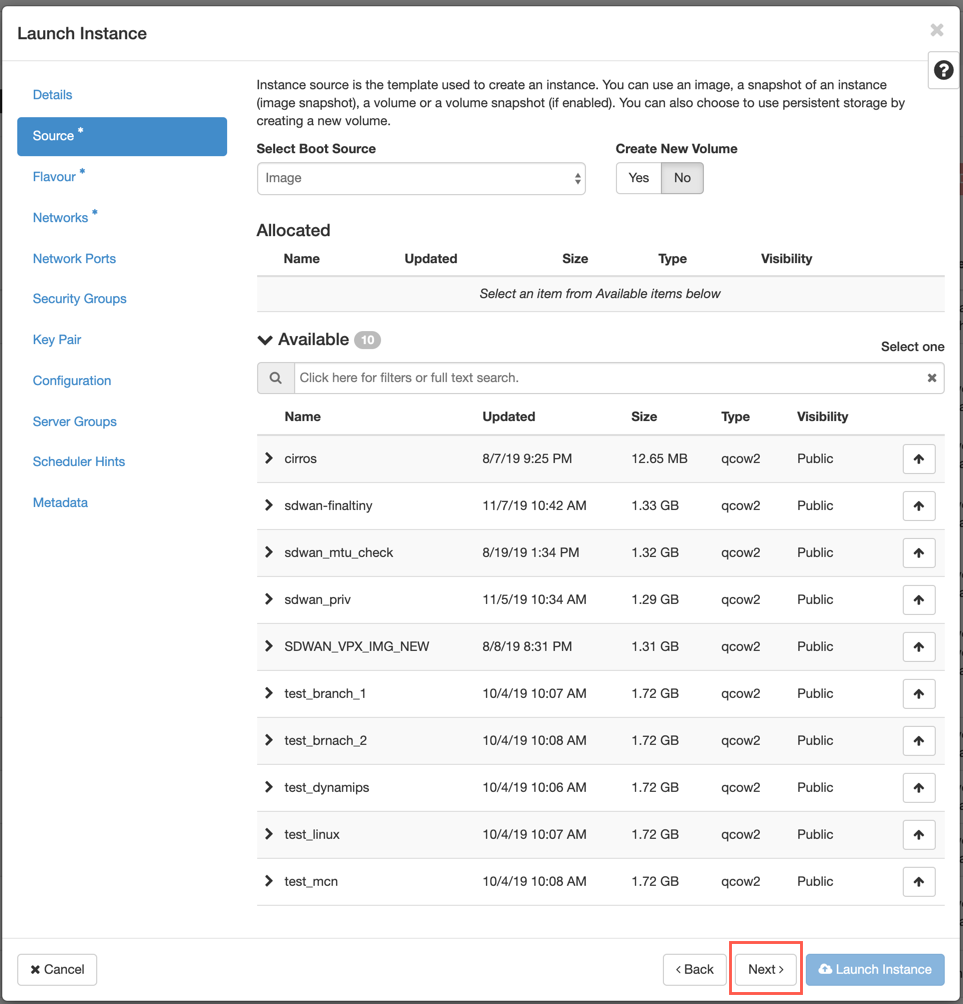
In Source tab, select No under Create New Volume and clickNext. Instance source is the template used to create an instance.
-
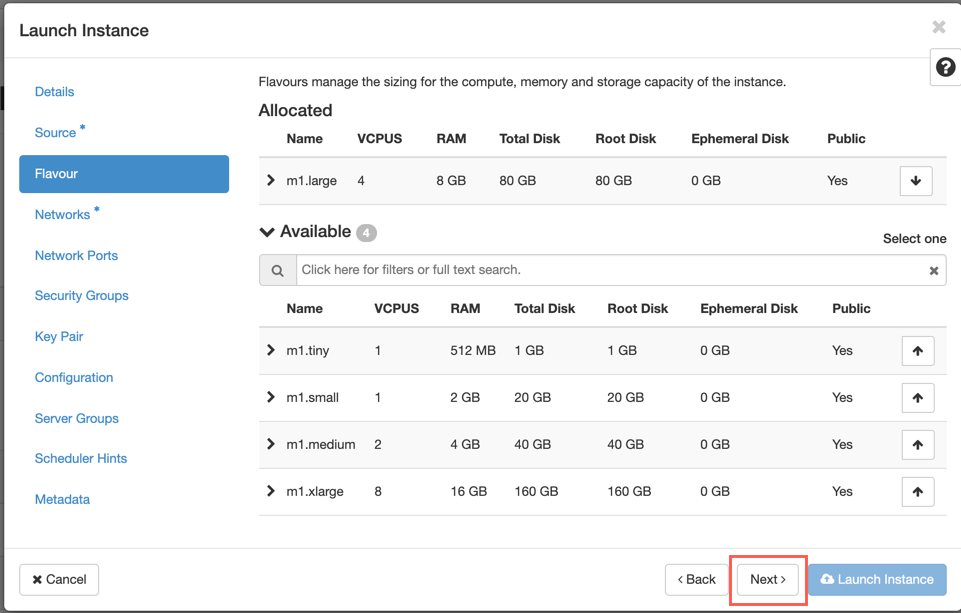
Select Flavour for the instance and click Next. The flavour you select for an instance manages the amount of compute, storage, and memory capacity of the instance.
NOTE
The flavour you select must have enough resources allocated to support the type of instance you are trying to create. Flavours that do not provide enough resources for your instance are identified on the available table with a yellow warning icon.
Administrators are responsible for creating and managing flavours. Click the arrow (at the right side) to allocate.
-
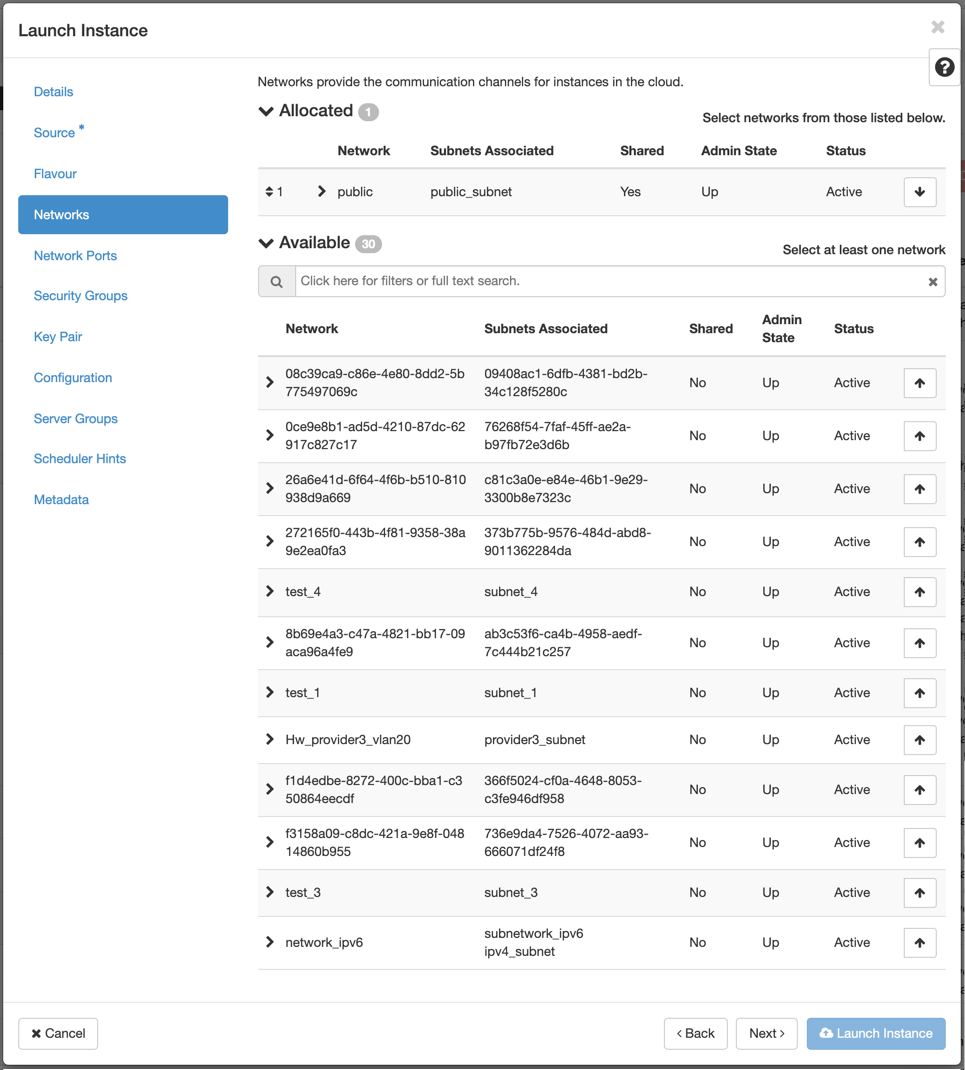
Select the network and click Next. Networks provide the communication channels for instances.
NOTE
An Administrator is created the Provider networks and these networks are map to an existing physical network in the data center. Similarly Project networks are created by Users and these networks are fully isolated and are project-specific.
-
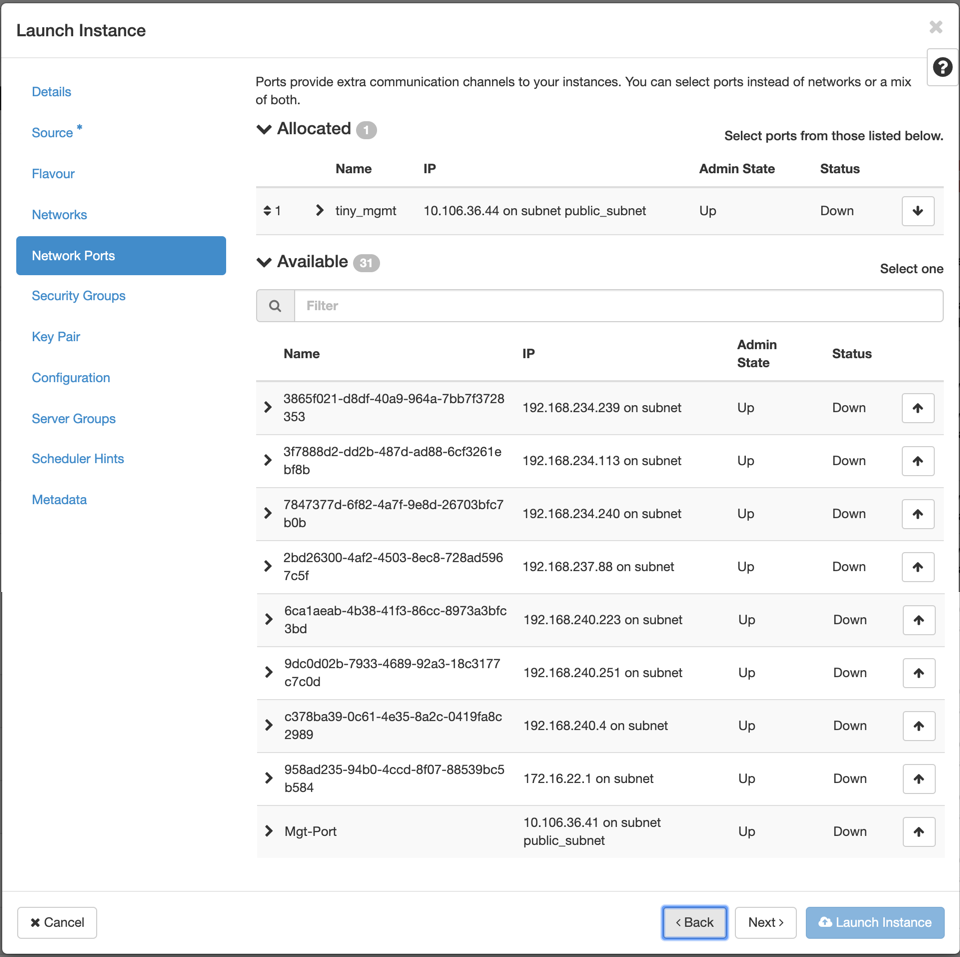
Select a network port for the instance and click Next. Network ports provide additional communication channels to the instances.
NOTE
You can select ports instead of networks or a mix of both.
-
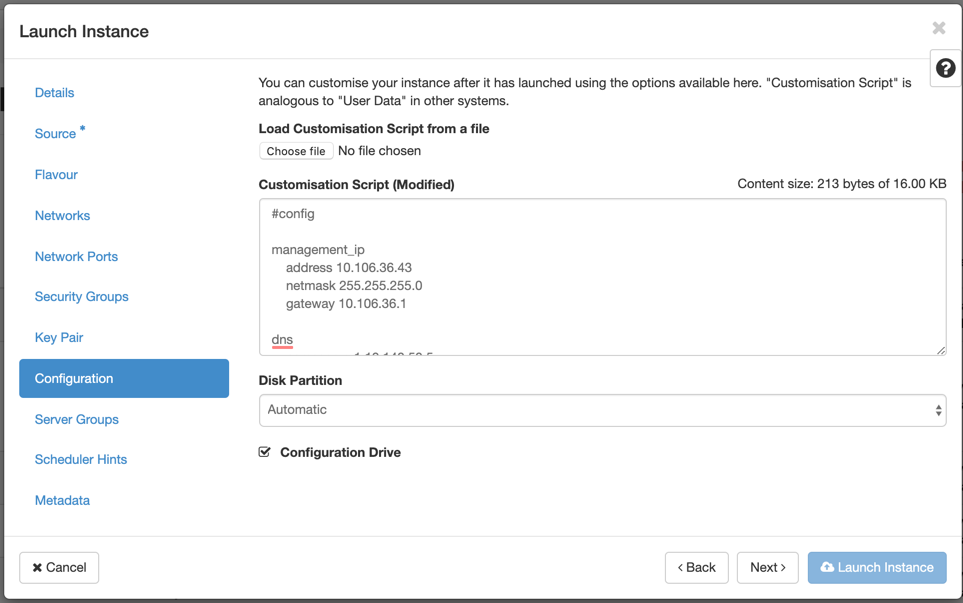
Go to Configuration and click Choose file. Select the user_data file. You can view the Management IP, DNS, and Serial Number information in the user_data file.
-
Enable the Configuration Drive check box. By enabling the configuration drive you can put the user metadata inside the image.
-
Click Launch Instance.
Share
Share
In this article
This Preview product documentation is Cloud Software Group Confidential.
You agree to hold this documentation confidential pursuant to the terms of your Cloud Software Group Beta/Tech Preview Agreement.
The development, release and timing of any features or functionality described in the Preview documentation remains at our sole discretion and are subject to change without notice or consultation.
The documentation is for informational purposes only and is not a commitment, promise or legal obligation to deliver any material, code or functionality and should not be relied upon in making Cloud Software Group product purchase decisions.
If you do not agree, select I DO NOT AGREE to exit.