iOS and Android features for Secure Mail
This article describes the iOS and Android features that are supported on Secure Mail.
Support for Azure Government Cloud Computing
Secure Mail supports Government Cloud Computing (GCC) High for modern authentication (OAuth) on the Azure Active Directory tenant. Secure Mail is registered as an endpoint on the GCC High, to meet the mandatory requirement by Microsoft for all the GCC High service. For details, see What’s new for Azure Active Directory in Microsoft 365 Government.
With this change, you are routed to GCC High on the Azure Active Directory tenant for authentication. And the admin is required to allow permissions for Secure Mail on the Azure Active Directory tenant.
Prerequisites
Ensure that the global admin of Azure Active Directory performs the following:
- Download the latest version of Secure Mail on your device.
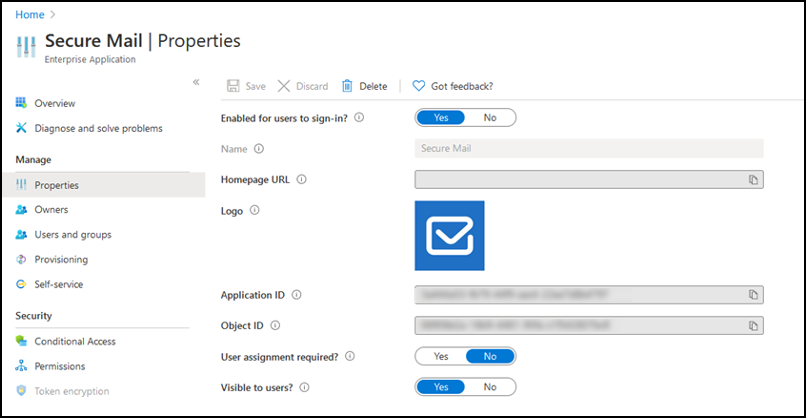
- Configure your Exchange account on the Secure Mail app, and allow app permission on Azure Active Directory for all users to sign in. Refer to the following screen.
Note:
These steps are specific only to the global admins as a one-time requirement. Once the app is granted access, you can simply upgrade from the App Store.
After the upgrade
After an upgrade, you are prompted for reauthorization after the expiration of the refresh token, which redirects you to GCC High on Azure AD. Validate the preceding workflow to ensure that the authorization request is sent to GCC High on Azure AD.
You can validate the workflow in one of the following ways:
- Secure Mail with app name Secure Mail-GCC High appears on the sign-in page in your Azure Active Directory tenant.
- Check the Secure Mail logs to confirm whether the redirects occur via https://login.microsoftonline.us after reauthentication.
Support for ICS files
In Secure Mail, you can preview the ICS files that you receive as attachments, and import it to your calendar as Events.
Contact picture in Secure Mail
In Secure Mail, view a picture of a contact when you add recipients in emails or meeting invites. For user help documentation on this feature, see the Citrix User Help Center article Show pictures of your contacts.
Manage your feeds
In Secure Mail, you can now organize your Feed card based on your requirements. For user help documentation on this feature, see the Citrix User Help Center article, Organize your email.
Use the Office 365 Exchange Server policy to define the Office 365 server address
In Secure Mail, a new policy called Office 365 Exchange Server is added under the section OAuth Support for Office 365. With this policy you can define the host name for the Office 365 mailbox present on Cloud. This policy also enables support of Office 365 for Government agencies. The host name is a single value such as outlook.office365.com. The default value is outlook.office365.com.
Support for encryption management
Encryption management allows you to use modern device platform security while also ensuring the device remains in a sufficient state to use platform security effectively. By using encryption management, you eliminate local data encryption redundancy since file system encryption is provided by the iOS or Android platform. To enable this feature, an admin must configure the Encryption type MDX policy to Platform encryption with compliance enforcement in the Citrix Endpoint Management™ console.
To use the encryption management feature, in the Citrix Endpoint Management console, set the Encryption type policy to Platform encryption with compliance enforcement. This enables encryption management and all the existing encrypted application data on users’ devices seamlessly transition to a state that is encrypted by the device and not by MDX. During this transition, the app is paused for a one-time data migration. Upon successful migration, responsibility for encryption of locally stored data is transferred from MDX to the device platform. MDX continues to check compliance of the device upon each app launch. This feature works in both MDM + MAM and MAM-only environments.
When you set the Encryption type policy to Platform encryption with compliance enforcement, the new policy supersedes your existing MDX Encryption.
For details about the encryption management MDX policies for Secure Mail, see the Encryption section in:
- MDX policies for mobile productivity apps for Android
- MDX policies for mobile productivity apps for iOS
When a device falls below the minimum compliance requirements, the Non-compliant device behavior policy allows you to select what action is taken:
- Allow app – Allow the app to run normally.
- Allow app after warning – Warn the user that an app does not meet the minimum compliance requirements and allows the app to run. This is the default value.
- Block app – Block the app from running.
Devices running iOS
The following criteria determine whether a device meets the minimum compliance requirements for devices running iOS:
- iOS 10 - An app is running operation system version that is greater than or equal to the specified version.
- Debugger access - An app does not have debugging enabled.
- Jailbroken device - An app is not running on a jailbroken device.
- Device passcode - Device passcode is ON.
- Data sharing - Data sharing is not enabled for the app.
Devices running Android
The following criteria determine whether a device meets the minimum compliance requirements for devices running Android:
- Android SDK 24 (Android 7 Nougat) - An app is running operation system version that is greater than or equal to the specified version.
- Debugger Access - An app does not have debugging enabled.
- Rooted devices - An app is not running on a rooted device.
- Device lock - Device passcode is ON.
- Device encrypted - An app is running on an encrypted device.
Support for responsive emails
Secure Mail has been optimized to deliver responsive email. Previously, email content with large tables or images were rendered incorrectly. This feature delivers email content as more readable on all supported devices irrespective of the email format and size.
Drag and drop calendar events
In Secure Mail, you can change the time of an existing calendar event by dragging and dropping the event. For user help documentation on this feature, see the Citrix User Help Center article, Change a calendar event time.
Manage your feeds
In Secure Mail, you can now organize your Feed card based on your requirements. For user help documentation on this feature, see the Citrix User Help Center article, Organize your email.
Auto Advance
In Secure Mail, when you delete a message in Conversations, you can choose which message you return to. To use this feature, navigate to Settings > Auto Advance. Then, select your preference from the available choices. For user help documentation on this feature, see the Citrix User Help Center article Delete and auto advance to an email in Conversations.
Drafts folder auto-sync
The drafts folder is automatically synced and your drafts are available across all your devices. This feature is available on devices running Office 365 or Exchange Server 2016 and later.
Note:
If your Secure Mail draft contains attachments, the attachments are not synced to the server.
For user help documentation on this feature, including a video, see the Citrix User Help Center article, Drafts folder auto-sync.
Support for single sign-on while using Microsoft Intune in MDM + MAM mode
For devices running iOS:
To be able to use this feature, ensure that Microsoft Authenticator app is installed on your device. For more information about installing the Microsoft Authenticator app, see Download and install the Microsoft Authenticator app on Docs.microsoft.com.
For devices running Android:
To be able to use this feature, ensure that Intune Company Portal app is installed on your device. Once you log in to the Intune Company Portal app, you are able to use SSO in the MDM + MAM mode without having to reauthenticate in Secure Mail using your credentials
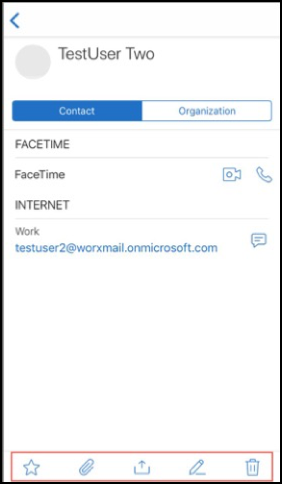
Enhancements to Contacts
In Secure Mail, when you tap Contacts and select a contact, the details of that contact appear under the Contact tab. When you tap the Organization tab, the organization hierarchy details, such as Manager, Direct Reports, and Peers appear. When you tap the more icon on the top right of the screen, the following options appear:
- Edit
- Add to VIP
- Cancel
In the Organization tab, you can tap the more icon to the right of Manager, Direct Reports, or Peers. This action allows you to either create an email or a calendar event. The To: field of the email or calendar event is automatically populated with the details of Manager, Direct Reports, or Peers. You can compose and send the email.
Prerequisites
Ensure that Exchange Web Services (EWS) is enabled on your Exchange Server.
The contact details appear based on the organizational details (Outlook contact) fetched from Active Directory. For the correct details to appear for your contacts, ensure that your admin has configured your organizational hierarchy in Active Directory.
Note:
This feature is not supported on IBM Lotus Notes server.
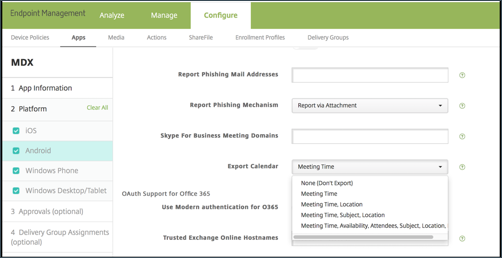
Export Meeting Time and Location to your native calendar
In Secure Mail, a new value Meeting Time, Location is added to Export Calendar MDX policy. This enhancement allows you to export meeting time and location of Secure Mail calendar events to your native calendar.
Multiple Exchange accounts
From Settings within Secure Mail, you can add multiple Exchange email accounts and switch between them. This feature allows you to monitor all your mails, contacts, and calendars in one place. The admin prerequisites are as follows:
- A user name and password is required to configure more accounts. Automatic enrollment or credential store configurations applies only to the first account setup in the app. Type the user name and password for all additional accounts.
- If the first account you create is certificate-based, you cannot add further certificate-based accounts. Additional accounts must use authentication based on Active Directory. Secure Mail does not support certificate-based authentication when configuring multiple accounts.
- To allow more accounts to connect to a domain or Exchange Server in an external network, you must set split tunneling to ON in Citrix ADC.
- Secure Mail for iOS supports Exchange and Office 365 mail servers only.
For user help documentation on this feature, see the Citrix User Help Center article, Add Exchange accounts.
Contacts
For user help documentation on Contacts, see the Citrix User Help Center article, View and sync your contacts.
Set colors in Calendars
For user help documentation on this Calendar feature, see the Citrix User Help Center article, Set colors for synchronized Secure Mail calendars.
Internal domains
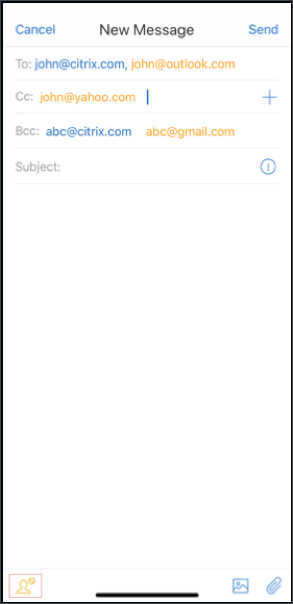
You can identify and edit mail recipients that belong to external organizations.
Prerequisite: Ensure that you have enabled the Internal Domains policy in Citrix Endpoint Management, and restarted the application.
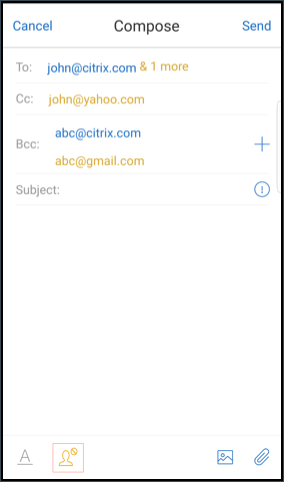
When you create, reply to, or forward an email, external recipients are highlighted in the mailing list. The Contacts icon appears as a warning at the bottom left of the screen. Tap the Contacts icon to modify the mailing list.
On devices running iOS:
On devices running Android:
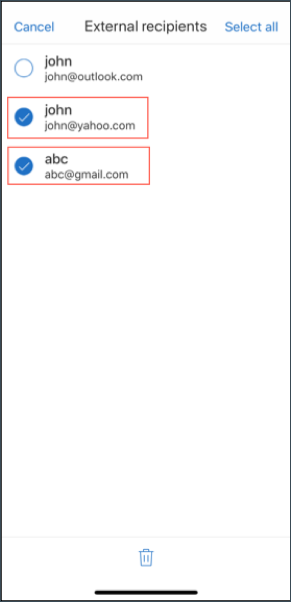
When you tap the Contacts icon, a pop-up window appears with options to edit list or remove all. Tap Edit list to choose the recipients that you want to remove. After selecting the recipients, tap the Bin icon.
On devices running iOS:

On devices running Android:


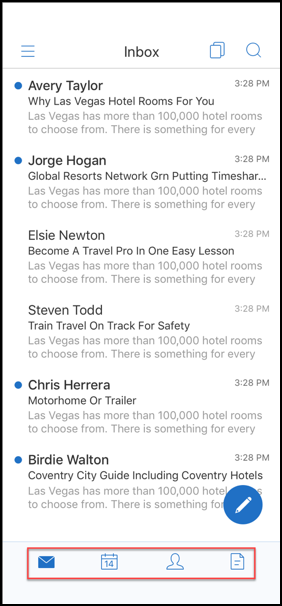
Ergonomic improvements
With this enhancement, the action buttons are moved from the top of the screen to the bottom for easy access. These changes are made to the Inbox, Calendar, and Contacts screens.
Note:
For Android, the changes are made to the Inbox and Calendar screens.
On devices running iOS
On devices running Android
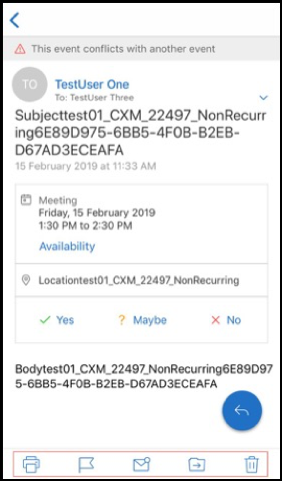
The Respond floating action button is enhanced to align with Citrix branding and style guide.
Also, with this enhancement the option to access the buttons on the main Inbox screen from an open email is removed. You have to exit from the opened email to access items such as Feeds, Calendar, Contacts, and Attachments.
The options in the footer bar of iOS have been changed, which helps maintain uniformity between both iOS and Android.
Secure Mail integration with Slack (Preview)
You can now take your email conversation over to Slack app on devices running iOS or Android. For details, see Secure Mail integration with Slack (Preview).
Report phishing email (as a forward)
In Secure Mail, you can use the Report as phishing feature to report an email (as a forward) that you suspect of phishing. You can forward the suspicious messages to email addresses that admins configure in the policy. To enable this feature, an admin must configure the Report Phishing Email Address policy and set the Report Phishing Mechanism as Report Via Forward. For user help documentation on this feature, see the Citrix User Help Center article, Report a phishing email.
Report a phishing email
You can report a phishing email based on the policy an admin configures. For user help documentation on this feature, including details on admin settings, see the Citrix User Help Center article, Report a phishing email.
Export Secure Mail calendar events
Using Secure Mail for iOS and Android, you can export Secure Mail calendar events to your device’s native calendar app. For user help documentation on this feature, see the Citrix User Help Center article, Export your Secure Mail calendar events.
The following MDX policy values are available for the calendar event fields that appear in your personal calendar:
- None (Don’t Export)
- Meeting Time
- Meeting Time, Location
- Meeting Time, Subject, Location
- (For Android) Meeting Time, Availability, Attendees, Subject, Location, Notes
- (For iOS) Meeting Time, Subject, Location, Notes
Android options:
iOS options:
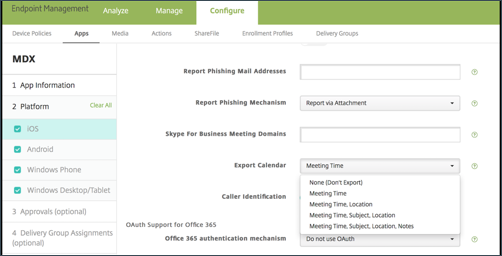
For iOS
Although calendar events exported from Secure Mail are read/write, changes made to events outside of Secure Mail are not available.
Important:
- This feature is visible but disabled in Secure Mail if one of the following is true:
- The Export Calendar policy is set to OFF.
- Your MDX version does not contain the policy
- This feature does not work if email accounts are already configured in your personal calendar app and your iCloud account is disabled. This feature works if no other account is configured in your personal calendar app.
- To launch the URL and edit the Secure Mail calendar events from your personal calendar, ensure that the value “ctxevent:” is included in the App URL Schemes MDX policy.
For Android
Calendar events that are exported from Secure Mail are read-only. To edit Secure Mail events, tap the Secure Mail Event link in your calendar event.
Important:
- This feature is visible but disabled in Secure Mail if one of the following is true:
- The Export Calendar policy is set to OFF.
- Your MDX version does not contain the policy.
- Ensure that the Inbound Document Exchange MDX policy is set to Unrestricted.
- The Secure Mail Event link is not available on Samsung and Huawei devices.
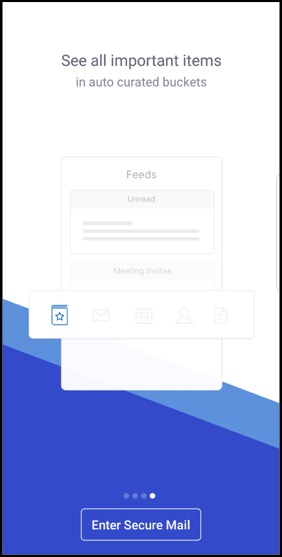
Feed folders
Secure Mail features all your unread emails, meeting invites that require your attention, and your upcoming meetings in the Feeds folder.
To view your feed cards
Tap the Feeds icon at the bottom right in the footer tab bar.
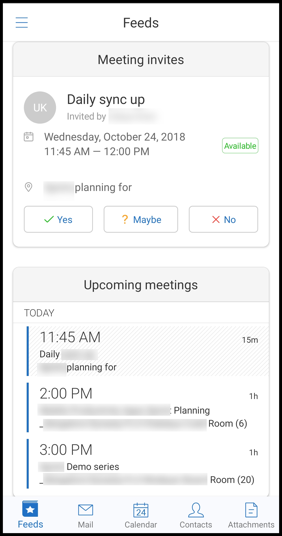
The following feed cards appear:
- Unread
- Meeting invites
- Upcoming meetings
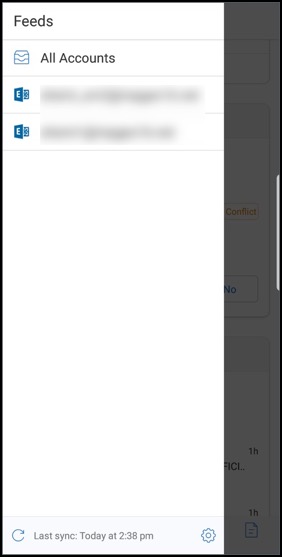
By default, Secure Mail displays feeds from your primary account only. If you have configured more than one account, you can view feeds from another account. To view feeds from other account, tap Feeds, tap the hamburger icon, and then select the respective account.
Feeds are sorted based on the timestamp of the item and appear with the following upper limit:
- Five unread emails
- Two meeting invites
- Three upcoming meetings
To view all the items in a feed card, tap See all.
Note:
The number of feeds displayed in each card depends on the sync mail period you have set on your device.
Enhancements to the Feeds folder
Following are the enhancements to the existing Feeds folder:
- Meeting invites from all auto-synced folders appear in your Feeds card.
- View up to five upcoming meetings in your Feeds card.
- Upcoming meetings for the next 24-hour period appear in the Feeds card and are categorized into Today and Tomorrow sections.
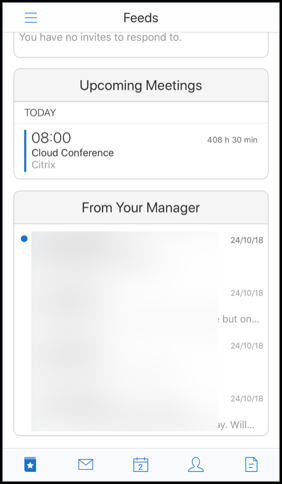
Feeds from your Manager
In Secure Mail, you can view emails from your manager in the Feeds screen. Up to five emails appear under the From Your Manager feeds, based on your Sync mail period settings. To view more emails from your manager, tap See all.
Prerequisites:
Ensure that Exchange Web Services (EWS) is enabled on your Exchange Server.
The manager card appears based on the organizational details (Outlook contact) fetched from Active Directory. For the correct details to appear in the manager feed, ensure that your admin has configured your organizational hierarchy in Active Directory.
Note:
This feature is not supported on IBM Lotus Notes server.
Joining meetings from calendar
In Secure Mail, users can join meetings directly from invitations in Calendar. The following tables list which meeting types and phone number formats are supported, and dial-in requirements for each.
Supported meeting types
| Meeting type | Identification requirements | Action after tapping Join Meeting |
|---|---|---|
| Microsoft Teams | If the Microsoft Teams app is installed, the app opens and the user joins meeting. If the app is not installed, the user sees an option to install Microsoft Teams from the app store. | |
| GoToMeeting (GTM) | One of the following in the meeting content: 1) This type of URL: https://www1.gotomeeting.com/join/1234567892; 2) GTM access code in any of these formats: GTM: 123456789, GTM – 123456789, G2M – 123456789, G2M: 123456789 |
If the GTM app is installed, the app opens and user joins meeting. If the app is not installed, the user sees an option to go the app store to install GTM. For GTMs in the gotomeet.me/username format, the app opens and the user joins the meeting. |
| WebEx | Citrix Secure Web™ opens and opens the unwrapped WebEx app, if installed on the device. WebEx must be added as an exception in the Secure Web Restricted Open-in exception list on Android and in the Allowed URLs policy on iOS. | |
| Skype for Business | Users can click a link that opens in Secure Web, which then opens the unwrapped Skype for Business app if installed on the device. Add the Skype for Business app as an exception in the Secure Web Restricted Open-In exception list policy on Android. Add the exception in the Allowed URLs policy on iOS. |
Configuring the following list of policies allows users to tap a meeting link to open the relevant app.
Microsoft Teams app
- **iOS - “Allow URLs” Policy”: ^msteams:
- **Android - “Open-in Exclusions” Policy: {action=android.intent.action.VIEW scheme=msteams package=com.microsoft.teams}
Zoom app
- iOS - “Allow URLs” Policy”: +^zoomus:
- Android - “Open-in Exclusions” Policy:{action=android.intent.action.VIEW scheme=zoomus package=us.zoom.videomeetings}
Webex (unwrapped app)
- iOS - “Allow URLs” Policy”: +^wbx: Example policy string is ^http:,^https:,^mailto:=ctxmail:,+^citrixreceiver:,+^telprompt:,+^tel:,+^col-g2m-2:,+^col-g2w-2:,+^wbx:,+^maps:ios_addr:
- Android - “Open-in Exclusions” Policy: {action=android.intent.action.VIEW scheme=wbx package=com.cisco.webex.meetings}
Skype for Business
- iOS - “Allow URLs” Policy”: +^lync:
- Android - “Open-in Exclusions” Policy:{action=android.intent.action.VIEW scheme=lync package=com.microsoft.office.lync15}
Skype
- iOS - “Allow URLs” Policy”: +^skype:
- Android - “Open-in Exclusions” Policy: {action=android.intent.action.VIEW scheme=skype package=com.skype.raider}
Dial-in specifications
The following list indicates the type of meeting and the respective supported phone number format and conference code format for each.
GoToMeeting (GTM):
Supported phone number formats:
- Any phone number in GTM formats. Examples:
- India (toll-free): 000 800 100 7855
- United States (toll-free): 1 877 309 2073
- Any phone number that satisfies RFC 3966 format standards. For details, see the Internet standards track protocol document.
Supported conference code formats:
The conference code is picked up from any of the following formats in the meeting body:
- URL (*.gotomeeting.com/join/123456789)
- URL (
gotomeet.me/usernameformat) - “GTM” formats, such as “GTM:123456789”
- “G2M” formats such as “G2M:123456789”
- Formats, such as “Access Code: 123456789”
WebEx:
Supported phone number formats:
- Any phone number in WebEx Call-in formats. Examples (both Verizon and U.S.):
- 1-866-652-5088
- 1-517-466-3109
- Any phone number in WebEx Audio Connection formats. Example:
- 1-650-479-3207 (US toll)
- Any phone number that satisfies RFC 3966 format standards.
Supported conference code formats:
The meeting content must contain one of these formats:
- Meeting number: 123 456 789
- Access code: 123 456 789
Note:
For conference codes that are nine digits or fewer, the # key is added automatically to dial in to the meeting.
Skype for Business
Supported phone number formats:
- Any phone number in RFC 3966 formats. For details, see the Internet standards track protocol document.
Supported conference code formats:
The meeting body contains this text: “Conference ID: 123456789”
Note:
The # key is added automatically for Skype for Business meetings.
Generic audio conference information
Supported phone number formats:
-
Any phone number in RFC 3966 formats For details, see the Internet standards track protocol document. Examples:
- 5555555555
- (555) 555-5555
- 555-555-5555
- 555-555-555-5555 (in case of country code)
- 1-555-555-5555
- +1-555-555-5555
Note:
Use a single separator between digits in the phone number. For example, “) –” can cause the number not to be recognized.
Supported conference code formats:
Recommended format: “(phone number)”,”(code)”
You can specify up to four commas and provide the # key if necessary. See the table later in this document for a list of supported formats.
For an audio conference, the following formats let users tap Dial In. If they tap the phone number from the body of the calendar meeting, however, they can dial into the meeting. They must then type conference codes manually. The following phone number and conference code formats are supported.
| Supported phone number formats | Conference code separator | Example |
|---|---|---|
| Any phone number in RFC 3966 formats. Examples: 5555555555; (555) 555-5555; 555-555-5555; 555-555-555-5555 (in case of country code); 1-555-555-5555;+1-555-555-5555 | Participant Code | 1-888-999-9999 Participant Code: 9999999 |
| Participant PIN | 1-888-999-9999 Participant PIN: 99999999 | |
| Guest Code | 1-888-999-9999 Guest Code: 99999999 | |
| Guest PIN | 1-888-999-9999 Guest PIN:99999999 | |
| Participant/Guest Code | 1-888-999-9999 Participant/Guest Code:99999999 | |
| Chair Code | 1-888-999-9999 Chair Code:99999999 | |
| Chair PIN | 1-888-999-9999 Chair PIN:99999999 | |
| Chairperson Code | 1-888-999-9999 Chairperson Code:99999999 | |
| Chairperson PIN | 1-888-999-9999 Chairperson PIN:99999999 | |
| Host PIN | 1-888-999-9999 Host PIN:99999999 | |
| PIN | 1-888-999-9999 PIN:99999999 | |
| Access Code | 1-888-999-9999 Access Code:99999999 | |
| Code | 1-888-999-9999 Code:99999999 | |
| Conference Code | 1-888-999-9999 Conference Code:99999999 | |
| Conference ID | 1-888-999-9999 Conference ID:99999999 | |
| , | +1 (631) 992-3240,958209234# | |
| ,, | +1 (631) 992-3240,,958209234# | |
| ,,, | +1 (631) 992-3240,,,958209234# | |
| ,,,, | +1 (631) 992-3240,,,,958209234# | |
| passcode | +1 (631) 992-3240 passcode 958209234# | |
| ext | +1 (631) 992-3240 ext:958209234# | |
| ext. | +1 (631) 992-3240 ext. 958209234# | |
| ;ext= | +1 (631) 992-3240; ext. 958209234# | |
| extn | +1 (631) 992-3240 extn 958209234# | |
| HC | +1 (631) 992-3240 HC 958209234# | |
| xtn | +1 (631) 992-3240 xtn 958209234# | |
| xt | +1 (631) 992-3240 xt 958209234# | |
| x | +1 (631) 992-3240 x 958209234# | |
| PC | +1 (631) 992-3240 PC 958209234# | |
| pc | +1 (631) 992-3240 pc 958209234# |
Personal calendar overlay
On iOS and Android devices, you can import your personal calendar from the native calendar app and view your personal events in Secure Mail. For user help documentation on this feature, see the Citrix User Help Center article, View your personal calendar events.
Insert an inline image
The following procedure describes how to insert an inline image.
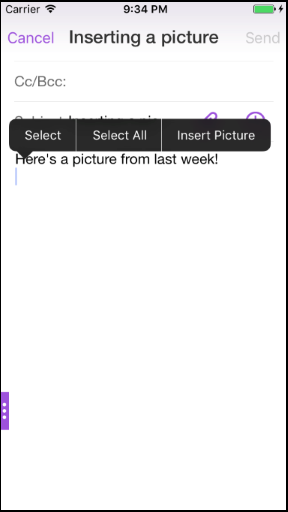
-
To attach an inline image to your email, long press in the mail body. From the options that appear, tap Insert Picture.
-
Secure Mail may prompt you for access to your Photos. The Photos gallery appears. Navigate to the gallery and tap picture you want to insert.

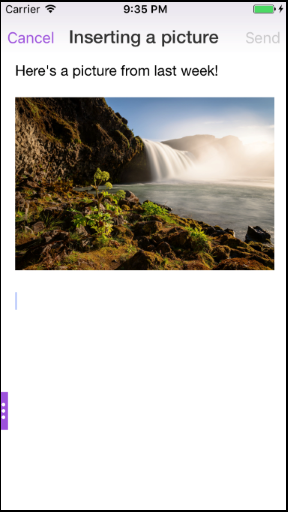
-
The mail now contains the image you selected.
Swiping actions
On iOS and Android devices, you perform actions by swiping an email either left or right. For user help documentation on this feature, see the Citrix User Help Center article, Use swipe actions.
Join Skype for Business meetings on iOS and Android
You can join Skype for Business meetings seamlessly through Secure Mail. This feature requires the Skype for Business app to be installed on your device.
To join a Skype for Business meeting
- Tap on the Skype for Business meeting reminder or calendar event.
-
In the Event Details screen, tap the Skype Join Meeting. The Skype for Business meeting starts in a new window.
If you have not installed Skype for Business on your device, tap Install Skype to install the app.
In-app preview of attachments and other enhancements to attachments
You can now preview attachments (MS Office and images) in Secure Mail in-app, rather than by opening it by using third-party apps, such as QuickEdit.
You can perform the following actions when viewing attachments:
- Select an existing message from your mailboxes to attach the file to.
- Select a new message to attach the file to.
- Save attachment for offline access.
- Delete attachment from offline files.
- Open attachment using a different application.
- View the source email or calendar event of the attachment.
Note:
You can view the source email or calendar event when viewing attachments from the Attachments repository only.
You can also preview attachments in the following cases:
- Viewing a message.
- Composing a new message.
- Attachments folder.
- Calendar events.
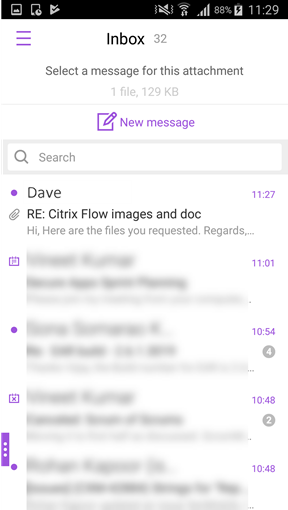
To select a message to attach the file to
-
Open the email with the attachment.
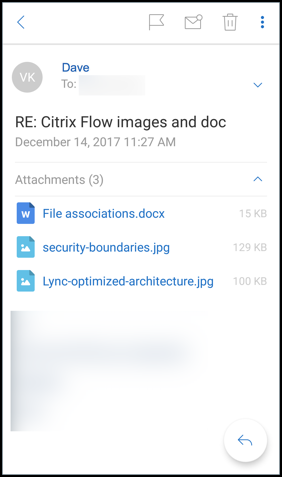
-
Tap the attachment.
-
Tap the Attach icon.
The Inbox appears.
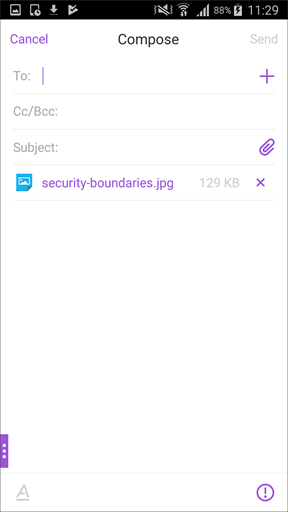
-
Select an existing message to attach this file to or tap New message to attach this file to a new message.
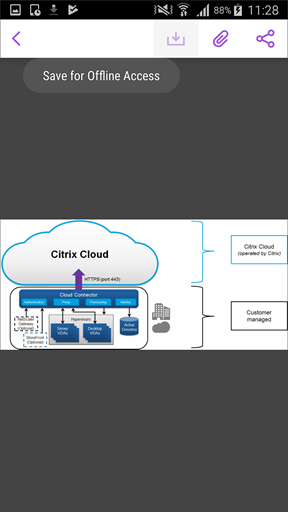
To save the attachment for offline access
- Open the attachment.
- Tap the More icon on the top right of the page and tap Save for Offline Access to save the attachment for offline access.
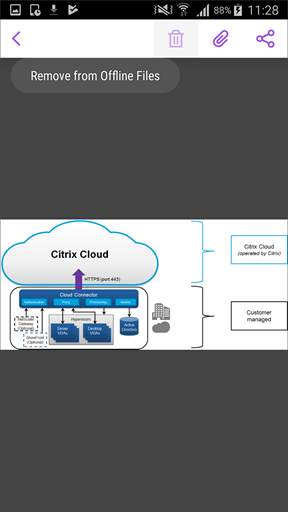
To delete the attachment from offline files
- Open the attachment.
- Tap the More icon on the top right of the page and tap Remove from Offline Files to delete the attachment from the offline files.
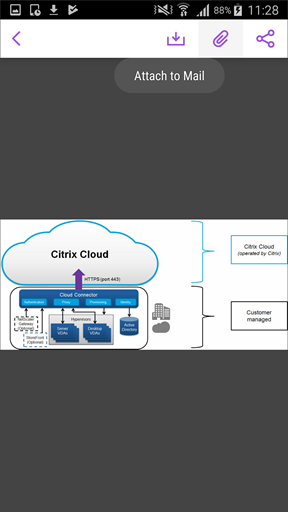
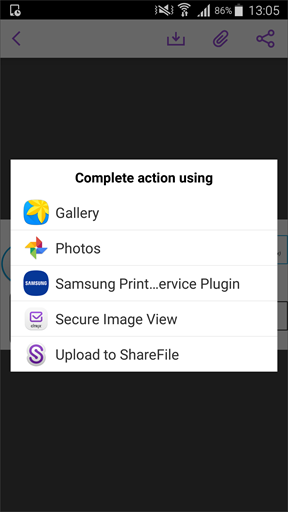
To open the attachment by using a different application
- Open the attachment.
-
Tap the More icon on the top right of the page and tap Open with. to open the attachment using a different application.
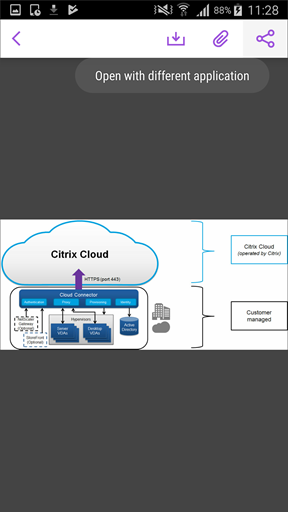
-
From the options that appear, tap on the one you want to open the attachment with.
To view the source email or calendar event of the attachment
- Tap the Attachments icon in the bottom right of your screen.
-
Tap OFFLINE.
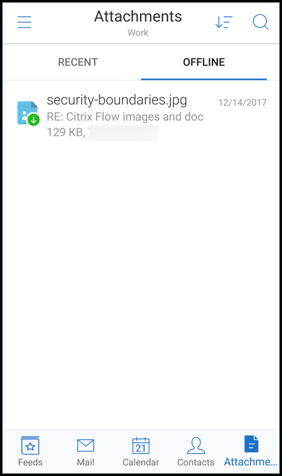
-
Tap the attachment and then tap the More icon on the top right of the screen.
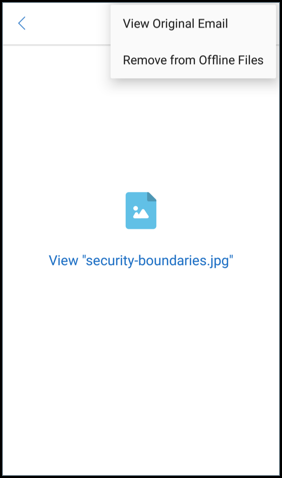
-
The source email appears.
Migrating user names to email addresses (UPN)
In Secure Mail for iOS and Android, you can migrate from an Exchange user name and password based authentication to a UPN and password based authentication.
With this feature enabled, you do not have to do any of the following:
- Reinstall Secure Mail.
- Delete and add the account in Secure Mail.
- Change the user name in Secure Mail.
Prerequisites
Before you proceed with this migration, ensure that users are running Secure Mail version 10.7.25 or later. To use this feature, you must enable the Attempt Username Migration On Auth Failure policy.
To migrate to UPN-based authentication
- Enable the Attempt Username Migration On Auth Failure policy in Endpoint Management.
- Migrate your Exchange user account to a new UPN that matches the user’s primary SMTP email address. This triggers an Authentication Failure. Secure Mail attempts authentication by using the primary SMTP email address.
On successful authentication, the user account is migrated to the updated UPN.
To verify the migration
On iOS devices: Go to Settings and then tap the account to view the details. On successful migration, the primary SMTP email address appears in the User Name field in the ACCOUNT screen.
On Android devices: Go to Settings and then tap the account to view the details. On successful migration, the primary SMTP email address appears in the Username field in the Account details screen.
Personal distribution lists
Prerequisites
- Exchange Web Services (EWS) is enabled on your Exchange Server.
- Microsoft Exchange Server version 10 SP1 or later.
Secure Mail for iOS and Android supports Personal Contact Groups. You can view contact groups that you have created on your Outlook desktop client in Secure Mail. The contact groups that you have created appear in Contacts in Secure Mail.
Note:
You cannot view members of a nested contact group in Secure Mail.
You can use the Personal distribution lists when you compose an email or create a calendar event. If you have created a Personal Contact Group (Distribution List) using Exchange, you can view the list in Secure Mail.
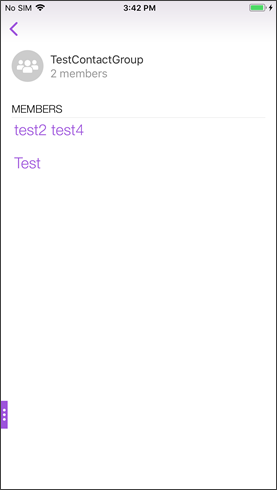
To view a personal distribution list
- In Secure Mail, open Contacts.
- Type the name of the contact group. The group appears in the search result.
-
Tap the contact group to view the members.
Note:
You cannot edit a contact group in Secure Mail.
To compose a mail to a contact group
- Open Secure Mail and tap the Edit floating action button to compose a mail.
- In the New Message screen, type the contact group’s name in the To: field.
-
From the list of contacts that appear, select the contact group.
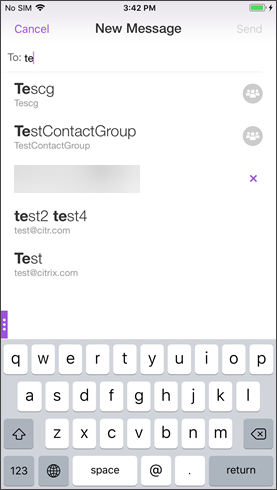
Contact groups are denoted by the following icon:

To send a calendar invite to a contact group
- Open Secure Mail and navigate to Calendar.
- Tap the + icon to create a calendar event.
- In the New Event screen, tap Invitees to add members.
-
Type the contact group’s name to send the invite to the group.
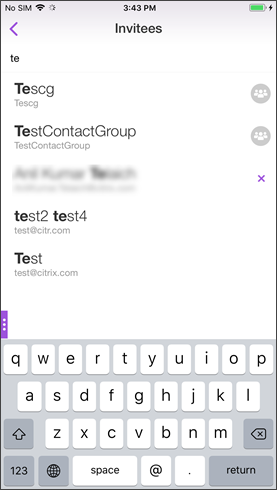
- From the list of contacts that appear, select the contact group.
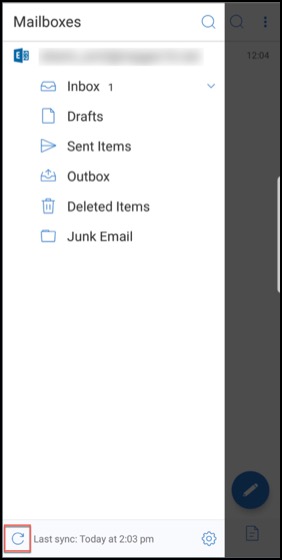
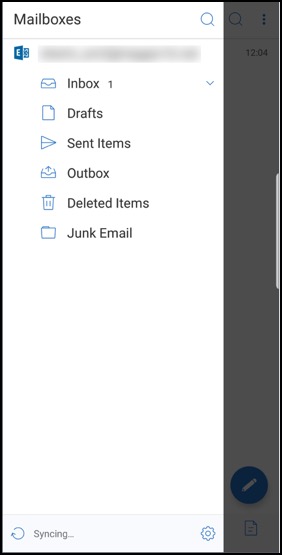
Folder sync
In Secure Mail for iOS and Android, you can tap the Sync icon to refresh all Secure Mail content. The Sync icon is present in Secure Mail slide outs, such as Mailboxes, Calendars, Contacts, and Attachments. When you tap the Sync icon, those folders that you have configured to auto refresh such as Mailboxes, Calendars, Contacts are updated. The timestamp of the last sync appears next to the Sync icon.
To sync your folders
-
Open Secure Mail.
-
From the available folders at the footer tab bar, tap the folder you want to sync.
-
Tap the hamburger icon in the top left of your screen.
-
Tap the Sync icon in the bottom left of your screen.
-
The folder is synced and your content is refreshed. The timestamp appears next to the Sync icon.
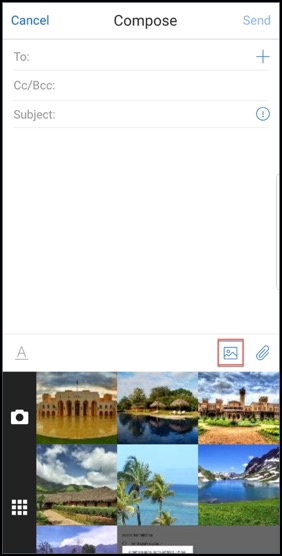
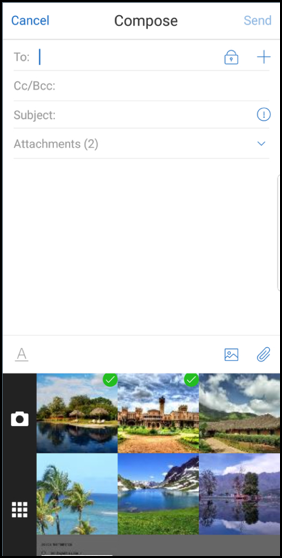
Photo attachment improvements
In Secure Mail for iOS and Android, you can attach photos easily by tapping the new Gallery icon.
To attach photos to your email
-
Open Secure Mail.
-
Tap Compose to create a mail or tap the Respond floating action button to respond to an email.
-
Tap the Gallery icon next to the Attachments icon in the bottom right of your screen.
-
Your gallery appears at the bottom of your screen along with the Camera and Recent icons.
-
Navigate and select the images you want to attach from your gallery or tap the Camera icon to take a picture.
Note:
When you tap the Attachments icon, the following options appear:
- Files
- ShareFile (now, Citrix Files)
- From Mail Attachments

Secure Mail renders embedded resources while viewing an email
If the resources are present in your internal network, such as mails with image URLs that are internal links, Secure Mail connects to the internal network to fetch the content and render it.
Support for modern authentication
Modern authentication is OAuth token-based authentication with user name and password. This support includes support for Office 365 for internal and external Active Directory Federation Services (AD FS) or identity provider (IdP).
Allow Secure Web domains MDX policy for Secure Mail
In Secure Mail, some external URLs must open in a native browser rather than in Secure Web. As a result, by default, all URLs open in a native browser. You can, however, create a list of URLs that you specifically want to open in Secure Web. To do so, you configure an MDX policy in the Citrix Endpoint Management console called Allowed Secure Web Domains.
After you deploy the policy, a list of comma-separated URL host domains are matched against the host name portion of any URL the application would normally send to an external handler. Typically, you configure this policy as a list of internal domains for Secure Web to handle.
If you leave the policy blank, which is the default setting, all web traffic is sent to Secure Web, until you explicitly exclude the URLs from filtering or otherwise redirect the URLs. To redirect the URLs, you configure the Exclude URL filter for domains MDX policy. This policy indicates the URLs that must open in the native browser. This policy takes priority over the Secure Web domains policy.
You can configure these MDX policies for Android and iOS.
Example configuration of Secure Web domains policy
The following procedures show how to prompt users with Secure Mail for Android to open URLs in the native Chrome browser or Secure Web. On iOS, the steps show that URLs that would normally open in a Safari browser open automatically in Secure Web.
For Secure Mail for Android
- In the App Interaction policy list, in Restricted Open-In exception list, enter {package=com.android.chrome}.
- In the App Interaction (Outbound URL) policy list, in Allow Secure Web domains, add the DNS suffix of the internal site.
For other third-party browsers, use the following format, accordingly:
{package=<packageID of the browser>}
For Secure Mail for iOS
- In the App Interaction (Outbound URL) policy list, in Allowed URLs, add +^safari:
- In App URL schemes, add safari:
- In Allow Secure Web domains, add the DNS suffix of the internal site.
In this article
- Support for Azure Government Cloud Computing
- Support for ICS files
- Contact picture in Secure Mail
- Manage your feeds
- Use the Office 365 Exchange Server policy to define the Office 365 server address
- Support for encryption management
- Support for responsive emails
- Drag and drop calendar events
- Manage your feeds
- Auto Advance
- Drafts folder auto-sync
- Support for single sign-on while using Microsoft Intune in MDM + MAM mode
- Enhancements to Contacts
- Export Meeting Time and Location to your native calendar
- Multiple Exchange accounts
- Contacts
- Set colors in Calendars
- Internal domains
- Ergonomic improvements
- Secure Mail integration with Slack (Preview)
- Report phishing email (as a forward)
- Report a phishing email
- Export Secure Mail calendar events
- Feed folders
- Feeds from your Manager
- Joining meetings from calendar
- Personal calendar overlay
- Insert an inline image
- Swiping actions
- Join Skype for Business meetings on iOS and Android
- In-app preview of attachments and other enhancements to attachments
- Migrating user names to email addresses (UPN)
- Folder sync
- Photo attachment improvements
- Secure Mail renders embedded resources while viewing an email
- Support for modern authentication
- Allow Secure Web domains MDX policy for Secure Mail