Citrix® integration with Nutanix Prism Central on AHV (Preview)
This feature enables Citrix integration with Nutanix AHV Prism Central (PC) through a Citrix-managed Prism Central host connection.
It allows you to connect Citrix DaaS™ to Nutanix PC-managed multi-cluster environments in hybrid cloud setups, create machine catalogs, and perform power management, provisioning, and lifecycle management for VMs within those catalogs.
The benefits of using the Citrix-managed Nutanix AHV Prism Central (PC) connection are:
- Enhanced Hybrid Cloud Connectivity: Connects Citrix to Nutanix Prism Central AHV environments in hybrid cloud, including on-premises private clouds, Nutanix Clusters (NC2) on AWS, and NC2 on Azure.
- Multi-Cluster Management: Supports multiple AHV clusters managed by a Prism Central instance under a single host connection.
- Cross-Cluster VM Templates: Supports cross-cluster sharable VM templates as the MCS master image.
- Streamlined TLS certificate trust: Simplifies configuration for TLS certificate trust for new and existing Nutanix Prism Central connections.
This preview feature is currently only available to the Citrix DaaS customers.
Feedback form
To provide feedback for this feature, fill out the form.
Prerequisites
- Upgrade to Prism Central version PC 2023.3 or later before enabling Citrix integration with Nutanix AHV Prism Central.
-
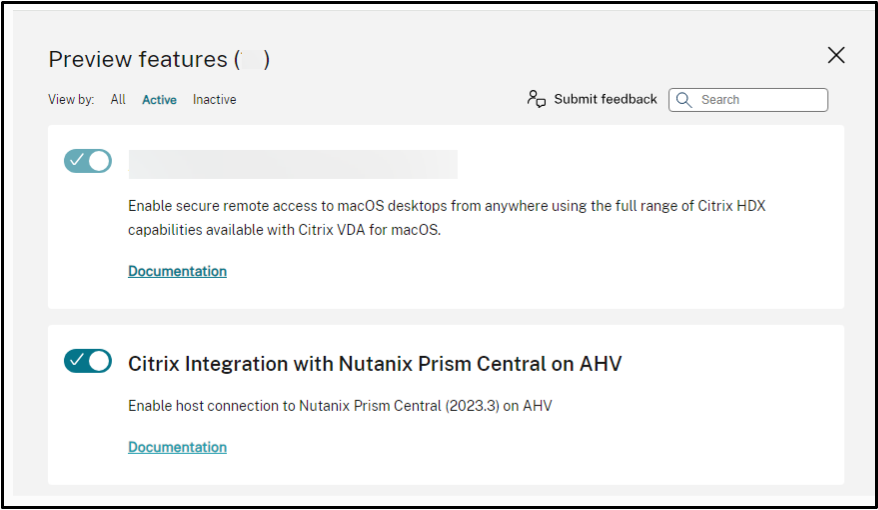
On the Studio > Preview features, enable Citrix Integration with Nutanix Prism Central on AHV using the toggle button.
Firewall requirement
To help you ensure that all the required fully qualified domain names (FQDNs) are allowed through your firewall, Citrix provides the following resources:
allowlist.json- CTX270584: Citrix Gateway Service – Points of Presence (PoPs)
For more information, see Allowed FQDNs for Cloud Connector.
For communication with Nutanix clusters, use port 9440.
| Port number | Source | Destination | Transfer Protocol |
|---|---|---|---|
| 9440 | Cloud Connector | Prism Central | TCP |
Limitation
- In a Nutanix Prism Central managed AHV environment, power actions, like Restart or Shutdown on a VM might fail for a Windows VM. To resolve this issue, follow the instructions in the document Power actions initiated from Prism or API may fail for Windows VMs to apply settings on VDAs.
Key steps
- Set up your Nutanix virtualization environments. For information, see Set up resource locations.
-
Create a connection to the Nutanix AHV Prism Central. This connection is a Citrix-managed Prism Central host connection. For steps, see Connection to Nutanix AHV Prism Central. You can add multiple hosting units to an existing host connection. While doing so, you can select multiple networks that belong to different clusters for that hosting unit. See Create a hosting unit from an existing host connection.
If you have existing Nutanix AHV PC host connections connecting to Nutanix Cloud (NC2) on Azure, you must edit those host connections to trust the certificate on Prism Central after you enable Citrix Nutanix Prism Central Integration feature toggle.
If you do not migrate your existing connections, then:
- the power state of the existing VM appears as unknown, and
- you cannot provision new VMs and manage the lifecycle of the VM in the machine catalogs associated with these connections.
For information, see Migrate an existing connection to Nutanix AHV Prism Central.
- Create a machine catalog. For steps, see Create a machine catalog using a VM template.
Connection to Nutanix AHV Prism Central
You can create a new connection using one of the following:
You must also edit an existing hosting connection to have a Nutanix AHV Prism Central connection. For steps, see Migrate an existing connection to Nutanix AHV Prism Central.
Create a connection using Studio
- Sign in to Citrix Cloud.
- In the DaaS tile, click Manage to open Studio.
- Select Hosting in the left pane.
- Click Add Connections and Resources in the action bar.
- Select a zone. The options are all resource locations you configured.
-
Select Nutanix AHV Prism Central as the connection type.
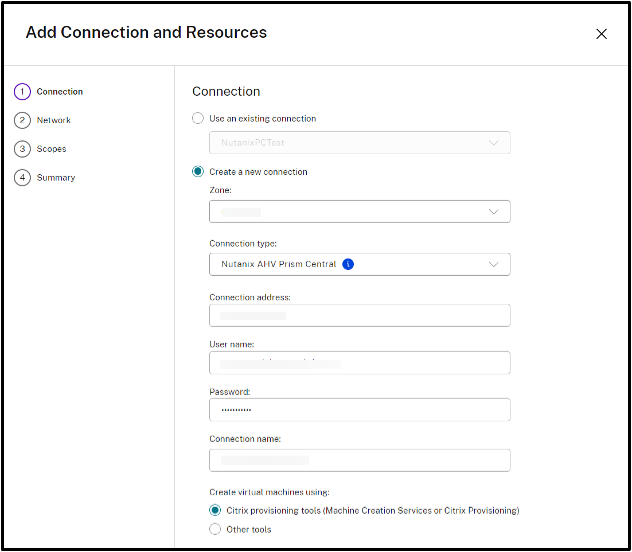
- Add Connection address, User name, Password, Connection name, and the provisioning method. Click Next.
-
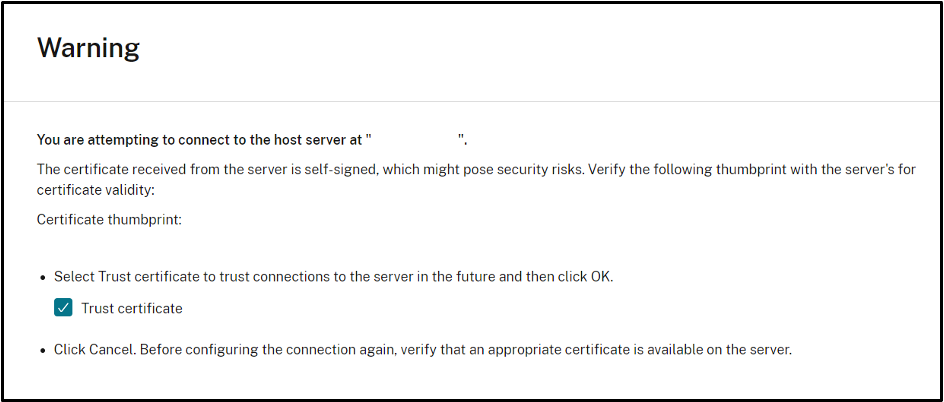
Select Trust certificate to accept SSL thumbprint to establish a connection.
-
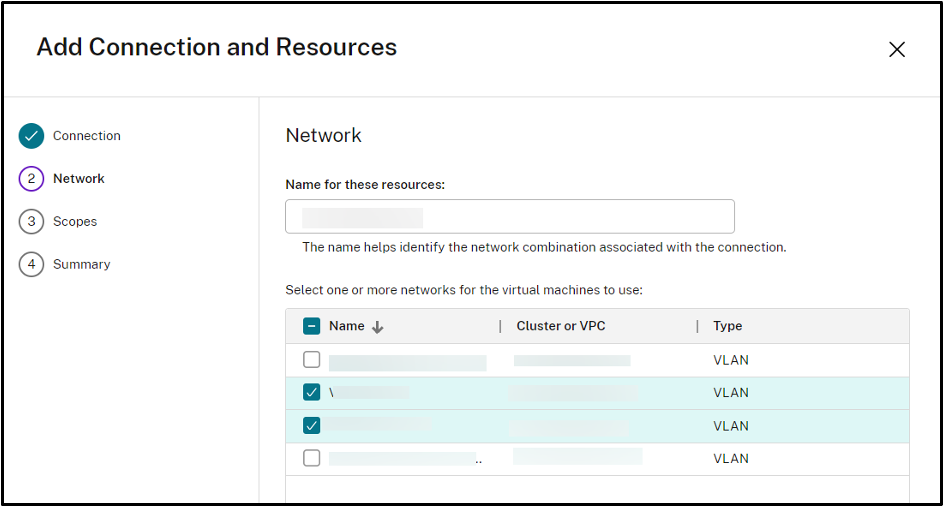
On the Network page, add a name of the resources and select one or more networks for the VMs to use.
- On the Scopes page, select one or more scopes for this host.
- On the Summary page, check the configuration and click Finish.
- You can also add hosting units to an existing host connection.
Create a hosting unit from an existing host connection
- From Manage, select Hosting in the left pane.
- Click Add Connections and Resources in the action bar.
- Click Use an existing connection, select an existing connection from the drop-down list, and click Next.
- On the Network page, enter a name for the resource. Select one or more networks for the VM to use. Click Next.
- Check the summary and click Finish.
Create a connection using PowerShell
- Open the PowerShell window.
- Run
asnp citrix*. -
Run the following PowerShell commands. For example:
New-Item  -ConnectionType "Custom" -HypervisorAddress @("Address")  -Path @("XDHyp:\Connections\connection") -Persist -PluginId "PluginID" -Scope @() -SecurePassword "Password" -SSLThumbprint @("SSLThumbprint") -UserName "name" -ZoneUid "GUID"

New-BrokerHypervisorConnection  -HypHypervisorConnectionUid   "GUID"
<!--NeedCopy-->
Create a hosting unit from an existing host connection using PowerShell
- Open the PowerShell window.
- Run
asnp citrix*. -
Run the following PowerShell commands. For example:
New-Item -HypervisorConnectionName "<Name of the hypervisor connection>" -NetworkPath @("XDHyp:\Connections\<ConnectionName>\<Name of the network>.network") -Path @("XDHyp:\HostingUnits\<Name of Hosting Unit>") -PersonalvDiskStoragePath @() -RootPath "XDHyp:\Connections\<Name of the hypervisor connection>\" -StoragePath @()
<!--NeedCopy-->
Migrate an existing connection to Nutanix AHV Prism Central
Note:
- If you have existing Nutanix AHV PC host connections connecting to Nutanix Cloud (NC2) on Azure, you must edit those host connections to trust the certificate on Prism Central after you enable Citrix Nutanix Prism Central Integration feature toggle. If you do not migrate your existing connections, then the power state of the existing VM appears as unknown and you cannot provision new VMs and manage the lifecycle of the VM in the machine catalogs associated with these connections.
- You can see a warning sign next to the hosting connections that are not migrated to Citrix-managed Nutanix AHV Prism Central.
- From Manage, select Hosting in the left pane.
-
Select the connection and then select Edit Connection in the action bar.
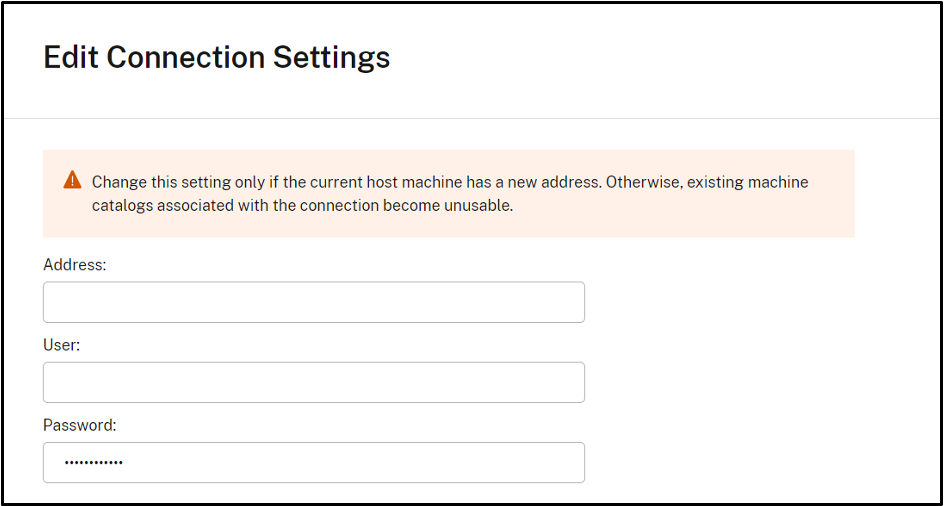
- Re-Enter your credentials (including password) and click Save.
- Select Trust certificate to accept SSL thumbprint and save the connection.
Create a machine catalog using a VM template
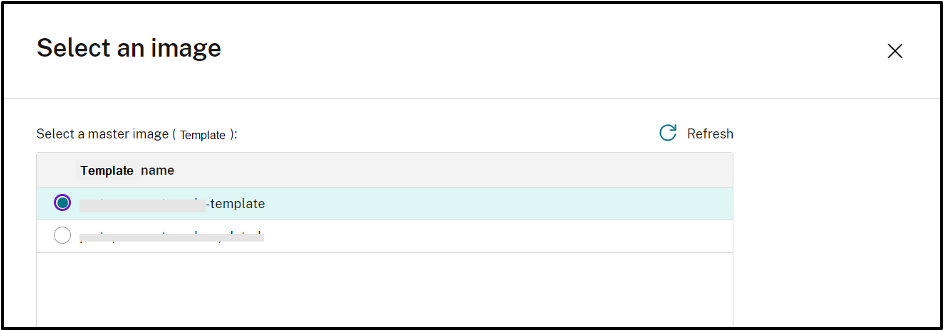
The master image that you select is the VM template used to create the VMs in the catalog. Before creating the catalog, create VM templates and versions in Nutanix.
Note:
- Use only an active version of the VM template.
- You can use the same master image template across multiple clusters.
- Power actions, like Restart or Shutdown on a VM might fail for a Windows VM. To resolve this issue, follow the instructions in the document Power actions initiated from Prism or API may fail for Windows VMs to apply settings on VDAs.
You can create a catalog using:
- Studio. You can also create a catalog using existing VMs. See Create a machine catalog using existing machines (power managed)
- PowerShell commands
Create a machine catalog using Studio
In the Machine Catalog Setup wizard:
- On the Machine Type page, select Multi-session OS, Single-session OS, or Remote PC Access.
- On the Machine Management page, select Machines that are power managed and Citrix Machine Creation Services™ as the deployment method.
- On the Desktop Experience page, select one of the two options.
-
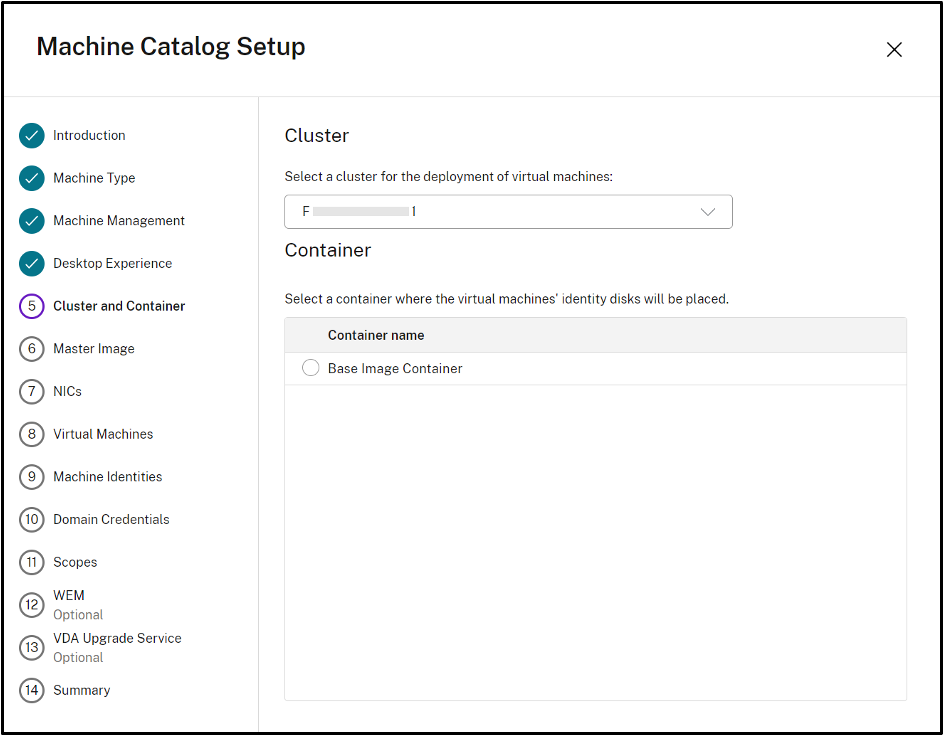
On the Cluster page,
- Select a cluster for the deployment of the VMs.
- Select a container to place the VMs’ identity disks
-
On the Image page, select the image template version.
-
On the NICs page:
- Select the NIC type to filter associated networks.
- Select one or more NICs that the master image contains and then select an associated virtual network for each NIC.
- On the Virtual Machines page, indicate the number of virtual CPUs and the number of cores per vCPU.
- Complete the settings on the following pages.
- On the Summary page, check the details of the machine catalog. Enter a name and description for the machine catalog. Click Finish.
Create a machine catalog using existing machines (power managed)
In the Machine Catalog Setup wizard:
- On the Operating System page, select Multi-session OS or Single-session OS.
- On the Machine Management page, select Machines that are power managed and Other service or technology.
-
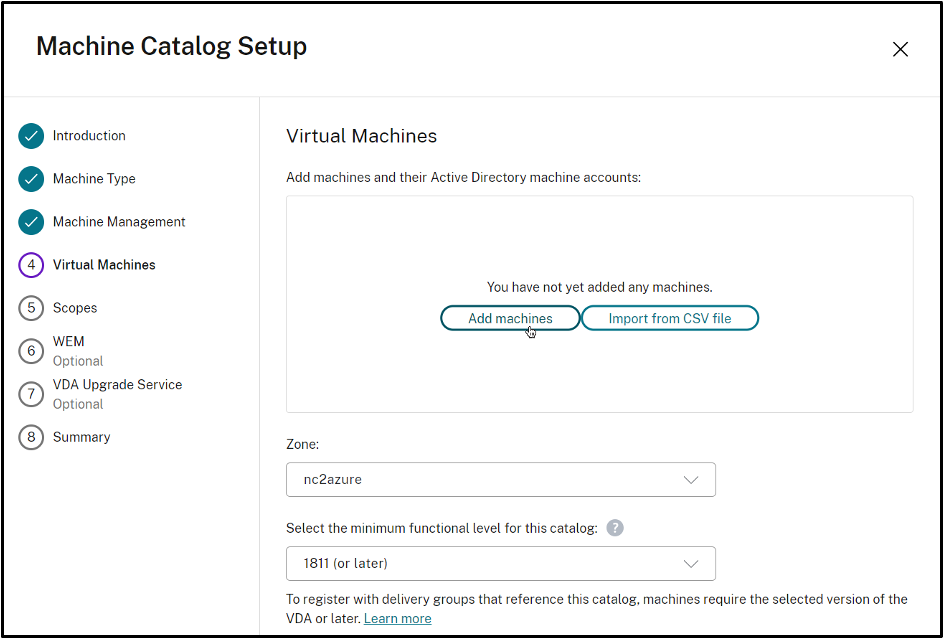
On the Virtual Machines page, add machines and their Active Directory machine accounts. You can do either of the following:
- Click Add Machines to add machines manually. The Select VMs window appears. Expand the Nutanix AHV Prism Central connection that you created earlier and select the VMs you want to add. Then add the associated machine account names.
-
Click Import from CSV file to bulk add machines. For information about using CSV files to add machines, see Use CSV files to bulk add machines to a catalog.
- The Scopes and Summary pages do not contain information specific to Nutanix AHV Prism Central.
Create a machine catalog using PowerShell commands
- Open the PowerShell window.
- Run
asnp citrix*. -
Create an identity pool if not already created. For example:
New-AcctIdentityPool -Domain "<string>" -IdentityPoolName "<string>" -IdentityType "ActiveDirectory" -NamingScheme "DemoVM-##" -NamingSchemeType "Numeric" -ZoneUid "GUID" -Scope @() <!--NeedCopy--> -
Create a provisioning scheme. For example:
New-ProvScheme -ProvisioningSchemeName "<Catalog name>" -ProvisioningSchemeType "MCS" -MasterImageVM "XDHyp:\HostingUnits\<Hosting Unit Name>\<template name>.template" -IdentityPoolName "<string>" -HostingUnitName "<string>" -CleanOnBoot -InitialBatchSizeHint 1 -NetworkMapping @{"0"="XDHyp:\HostingUnits\<Hosting unit name>\<Network name>.network"} -VMCpuCount 2 -VMMemoryMB 4096 -CustomProperties "<CustomProperties xmlns=`"http://schemas.citrix.com/2014/xd/machinecreation`">`r`n <StringProperty Name=`"ClusterId`" Value=`"000565e2-xxxx-xxxx-xxxx-xxxxxxxxxx`"/>`r`n <StringProperty Name=`"ContainerPath`" Value=`"/Base Image Container.storage`"/>`r`n <StringProperty Name=`"vCPU`" Value=`"2`"/>`r`n <StringProperty Name=`"RAM`" Value=`"4096`"/>`r`n <StringProperty Name=`"CPUCores`" Value=`"2`"/>`r`n</CustomProperties>" -Metadata @{"NutanixCoresPerCpu"="2";"NutanixContainerId"="Base Image Container";"NutanixClusterId"="000565e2-xxxx-xxxx-xxxx-xxxxxxxxxx"} -RunAsynchronously -Scope @() <!--NeedCopy--> -
Register a provisioning scheme as a broker catalog. For example:
New-BrokerCatalog -AllocationType "Random" -IsRemotePC $False  -MinimumFunctionalLevel "L7_20" -Name "<Catalog Name>" -PersistUserChanges "Discard" -ProvisioningType "MCS"    -SessionSupport "MultiSession" -ZoneUid "GUID"  -ProvisioningSchemeId fe7df345-244e-4xxxx-xxxxxxxxx `  -Scope @()
<!--NeedCopy-->