Session Recording web player
Overview
The web player lets you use a web browser to view and play back recordings, and configure cache memory for storing recordings while playing. Using the web player, you can:
-
Search for recordings by using filters, including host name, client name, user name, application, client IP address, event text, event type, and time. For more information, see the View recordings section in this article.
-
View and play back both live and completed recordings with tagged events listed in the right pane. For more information, see the View recordings section in this article.
Note:
Internet Explorer, Google Chrome, and Firefox are supported.
Enable the web player
The web player is disabled by default.
-
To enable the web player, start a Windows command prompt and run the
<Session Recording Server installation path>\Bin\TestPolicyAdmin.exe -enablewebplayercommand. -
To disable the web player, start a Windows command prompt and run the
<Session Recording Server installation path>\Bin\TestPolicyAdmin.exe –disablewebplayercommand.
Logon and password
The URL of the web player website is http(s)://<FQDN of Session Recording Server>/WebPlayer. To ensure the use of HTTPS, add an SSL binding to the website on IIS and update the SsRecWebSocketServer.exe.config configuration file. For more information, see the HTTPS configuration section in this article.
Note:
When logging on to the web player website, domain users do not need to enter credentials while non-domain users must.
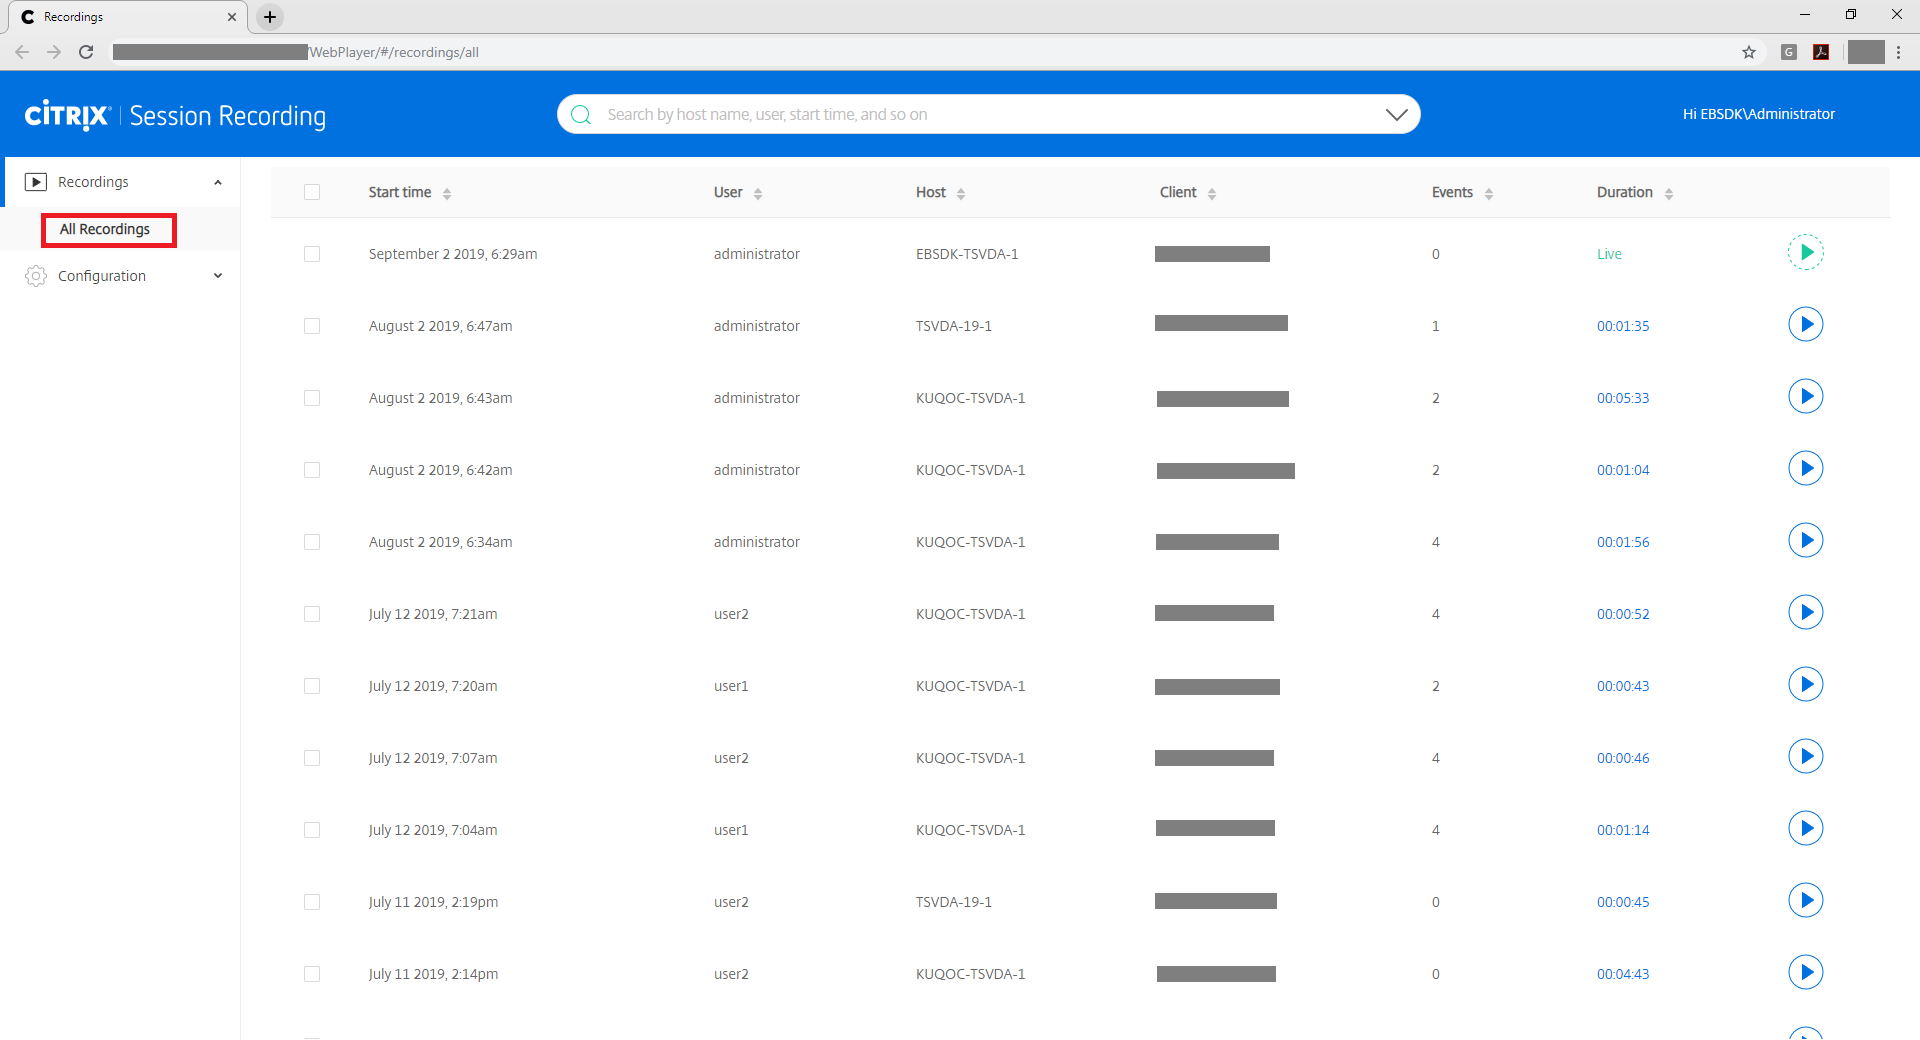
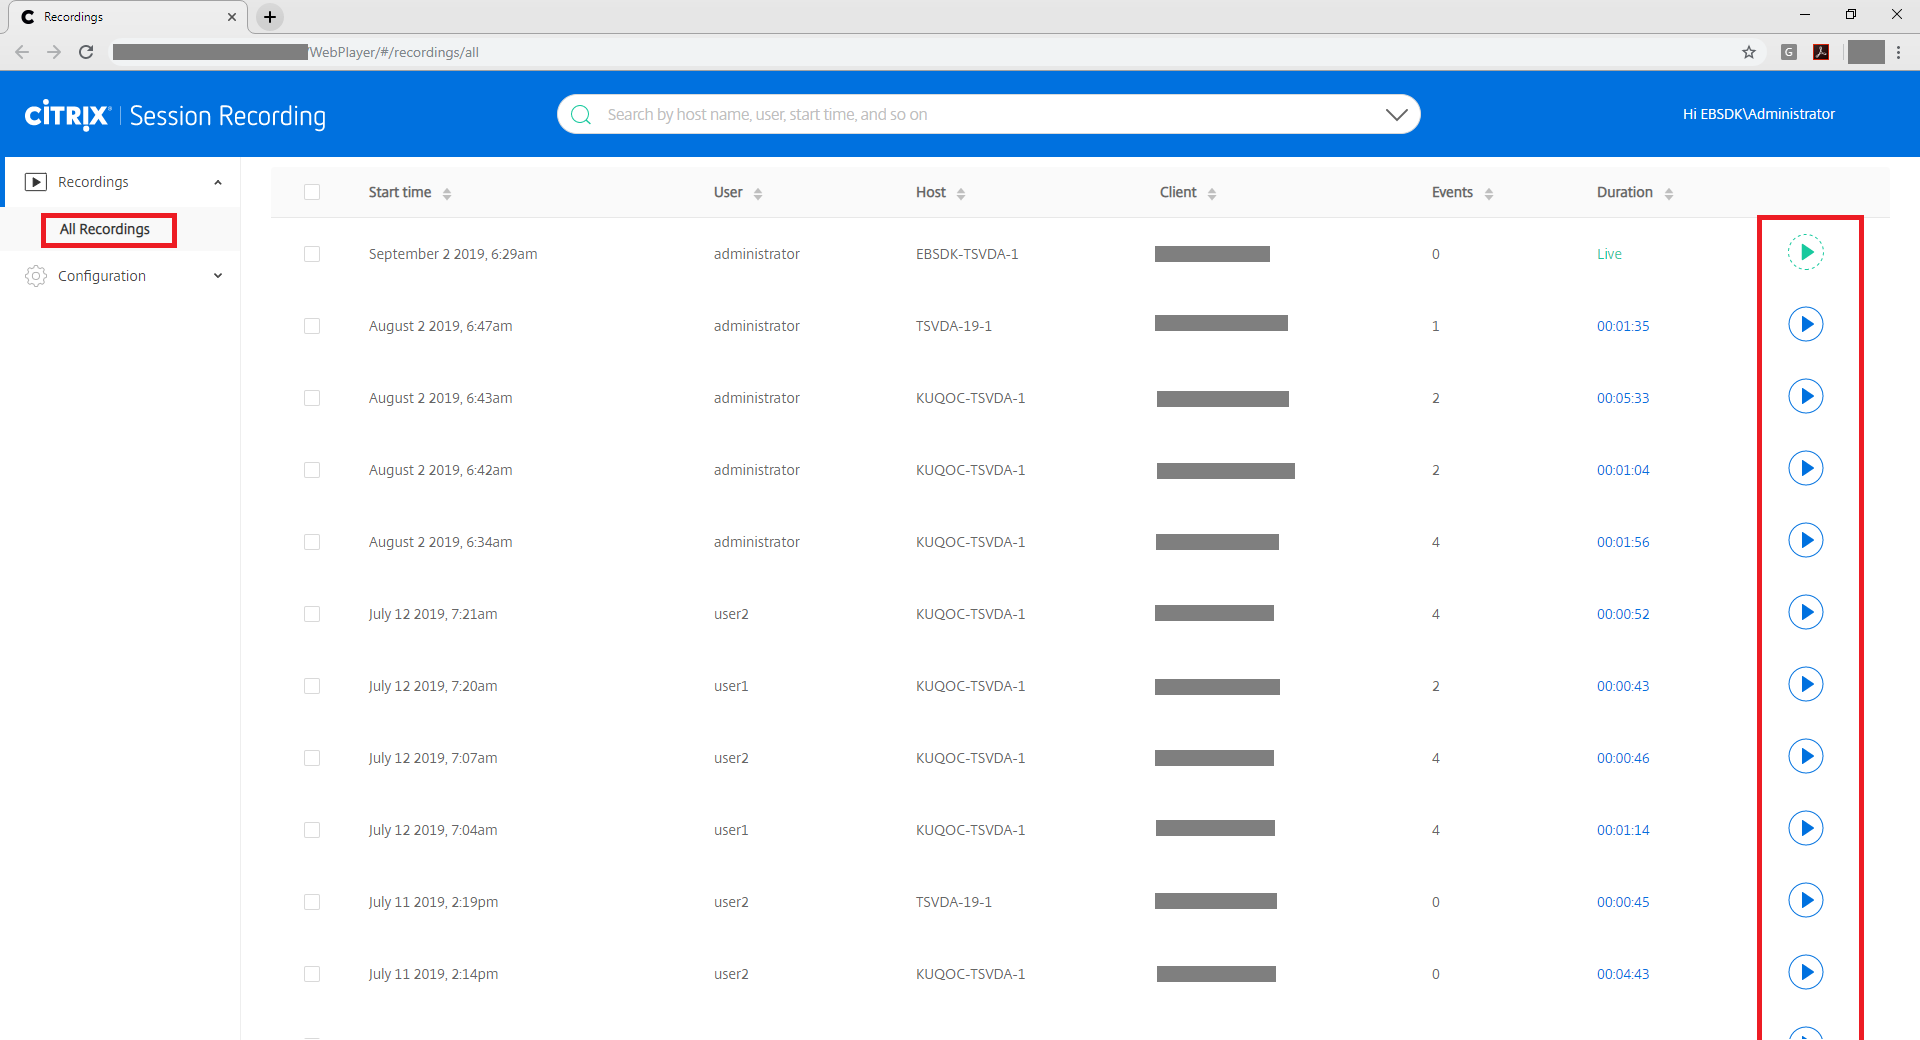
After you log on to the web player website, all recordings appear, listed. Clicking All Recordings in the left navigation refreshes the page and displays new recordings if there are any.
Installation
As with the other Session Recording components, you can use the Citrix Virtual Apps and Desktops™ installer to install the web player.
During installation, selecting Session Recording Administration on the Core Components page installs the web player on the same machine with the Session Recording Server. For more information about installing Session Recording, see Install, upgrade, and uninstall.
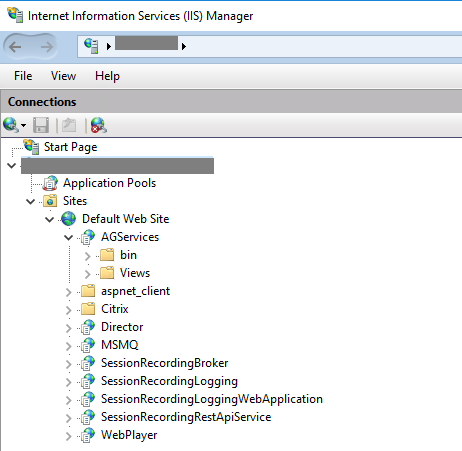
With the web player installed, the SessionRecordingRestApiService and the WebPlayer applications appear on IIS.
HTTPS configuration
To use HTTPS to access the web player website:
-
Add an SSL binding on IIS.
-
Obtain an SSL certificate in PEM format from a trusted Certificate Authority (CA).
Note:
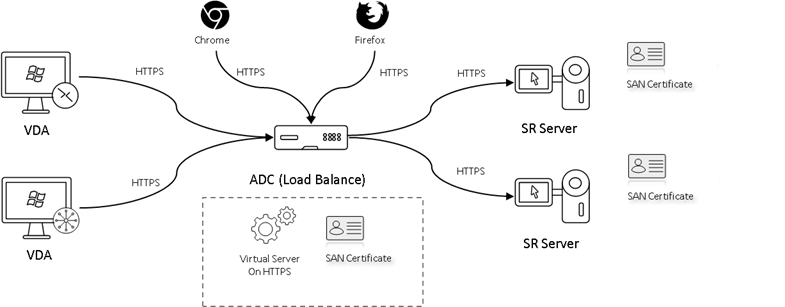
Most popular browsers such as Google Chrome and Firefox no longer support the common name in a Certificate Signing Request (CSR). They enforce Subject Alternative Name (SAN) in all publicly trusted certificates. To use the web player over HTTPS, take the following actions accordingly:
-
When a single Session Recording Server is in use, update the certificate of the Session Recording Server to a SAN certificate.

-
When load balancing is in use, ensure that a SAN certificate is available both on Citrix ADC and each Session Recording Server.
-
-
On IIS, right-click the website and select Add Bindings. The Site Bindings dialog box appears.
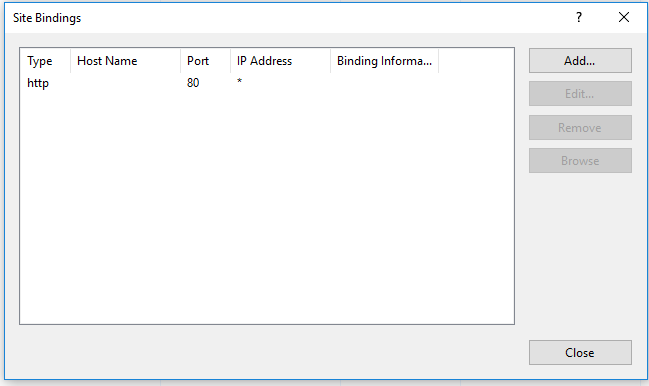
-
Click Add in the upper right corner. The Add Site Binding dialog box appears.
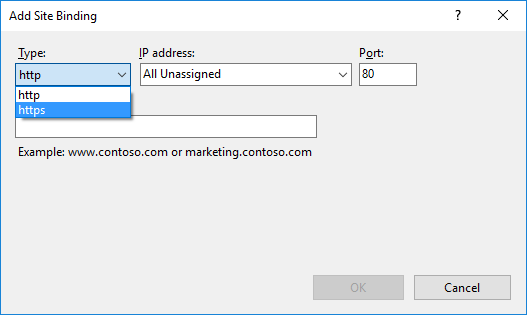
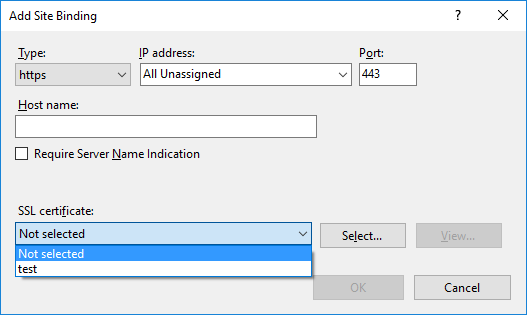
-
Select https from the Type list and select your SSL certificate.
-
Click OK.
-
-
Update the
SsRecWebSocketServer.exe.configconfiguration file.-
Locate and open the
SsRecWebSocketServer.exe.configconfiguration file.The
SsRecWebSocketServer.exe.configconfiguration file is typically located in the<Session Recording Server installation path>\Bin\folder. -
Enable TLS by editing TLSEnable=1, and fill in the paths to the SSL certificate and its key, respectively.
Note:
Only the PEM format of SSL certificates and key files is supported.
The ServerPort field indicates the port number that the web player uses to collect recording files. In the following screen capture, it is set to the default value (22334).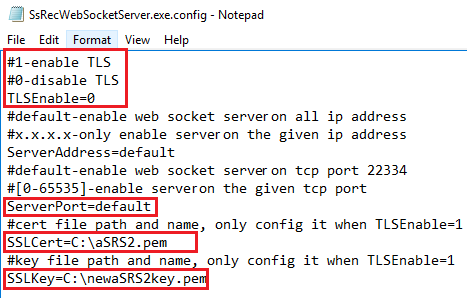
To extract the separate certificate and key files used in the WebSocket server configuration:
-
Ensure that OpenSSL is installed on your Session Recording Server that contains the SSL certificate.
-
Export the SSL certificate as a .pfx file. The .pfx file includes both the certificate and the private key.
-
Open the command prompt and go to the folder that contains the .pfx file.
-
Start OpenSSL from the OpenSSL\bin folder.
-
Run the following command to extract the certificate:
openssl pkcs12 -in [yourfile.pfx] -clcerts -nokeys -out [aSRS2.pem]
<!--NeedCopy-->
Enter the import password that you created when exporting the .pfx file.
-
Run the following command to extract the private key:
openssl pkcs12 -in [yourfile.pfx] -nocerts -out [newaSRS2keyWithPassword.pem]
<!--NeedCopy-->
Enter the import password that you created when exporting the .pfx file. Provide a new password for protecting your key file when prompted for the PEM pass phrase.
-
Run the following command to decrypt the private key:
openssl rsa -in [newaSRS2keyWithPassword.pem] -out [newaSRS2key.pem]
<!--NeedCopy-->
-
-
Save your changes.
-
Check your firewall settings. Allow SsRecWebSocketServer.exe to use the TCP port (22334 by default) and allow access to the web player URL.
-
Run the
TestPolicyAdmin –stopwebsocketservercommand.
-
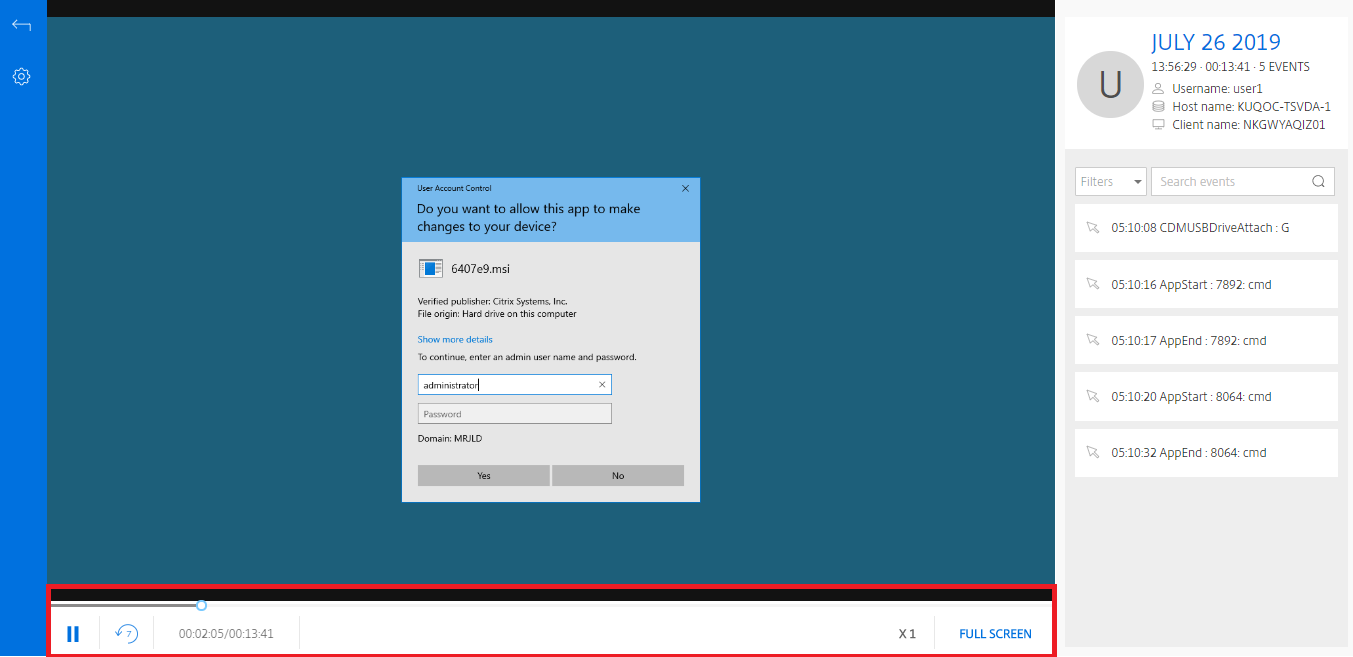
View recordings
After you log on to the web player, all available recordings are listed. You can scroll down the webpage to select recordings to view or use filters to customize your search results. For live recordings, the Duration item shows Live and the play button appears green.
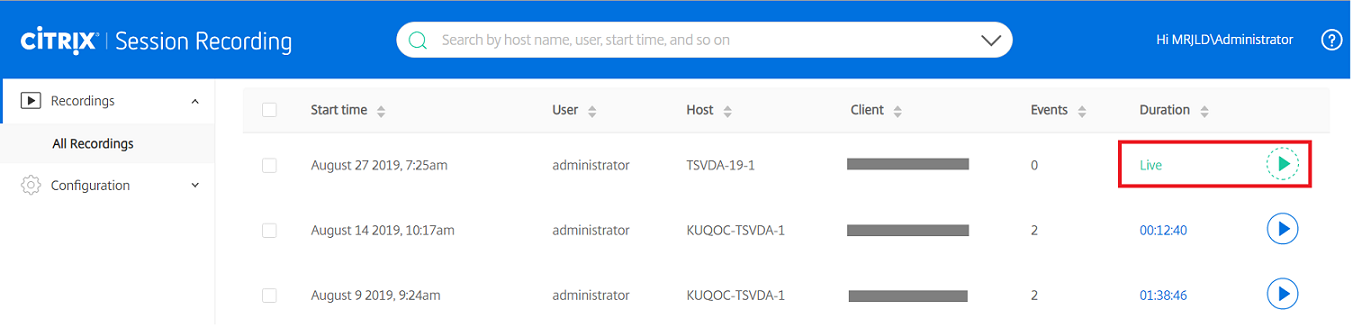
For a description of the recording items, see the following table.
| Item | Description |
|---|---|
| Start time | The recording start time. Click the up and down arrows to list recordings in chronological order. |
| User | The user whose session was recorded. Click the up and down arrows to concentrate recordings of a user on the list and arrange users in alphabetical order. |
| Host | The host name of the VDA where the recorded session was hosted. Click the up and down arrows to arrange the VDA host names in alphabetical order. |
| Client | The name of the client device where the session was running. Click the up and down arrows to arrange the client host names in alphabetical order. |
| Events | The quantity of events in the recording. Click the up and down arrows to arrange recordings on the list by event quantity. |
| Duration | The time length of the recording. Click the up and down arrows to arrange recordings on the list by time length. |
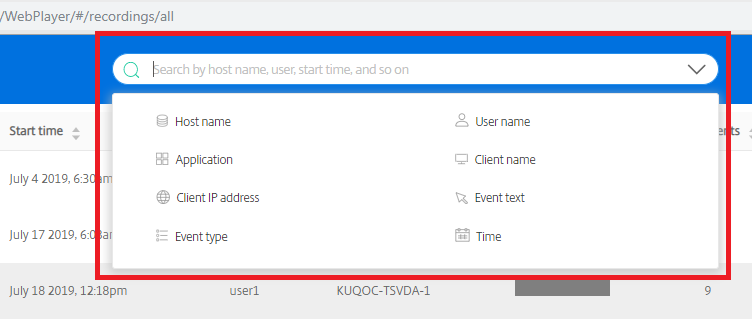
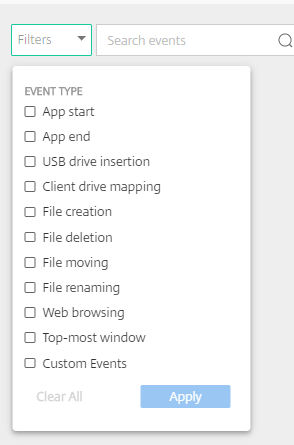
Search for recordings by using filters
You can search for recordings by using filters. The available filters include host name, client name, user name, application, client IP address, event text, event type, and time.
For example, after you select the host name filter, the following dialog box appears. You can type in the host name (of the VDA where recorded sessions are hosted) and click Search to filter out irrelevant recordings and display only the relevant ones.

You can change to a different filter by clicking the currently selected Host name, as shown in the following screen capture. All filters are listed after you click Host name. Select a different filter as needed.

You can also click the + symbol to add filters.

For example, you can add the Time filter as shown in the following screen.
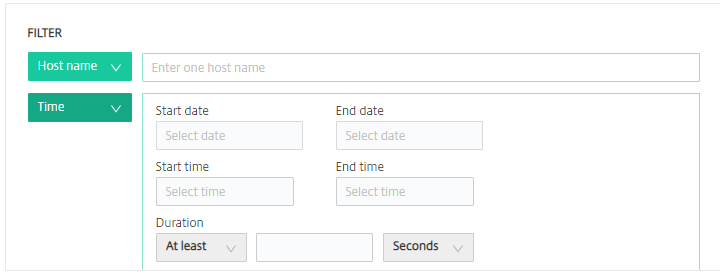
The Time filter consists of recording start date, start time, and duration.
Open and play recordings
On the recordings page, each recording has a play button on the right side, next to the Duration item.
Click the play button. The playback page appears. Playback starts after memory caching.
For a description of the player controls, see the following table:
| Player Control | Description |
|---|---|
 |
Plays the selected recording file. |
 |
Pauses playback. |
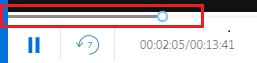 |
You can drag the progress bar during playback. |
 |
Seeks backward 7 seconds. |
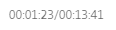 |
Indicates the current position of the recording playback and the total recording duration. The time format is HH:MM:SS. |
 |
Indicates the current speed of playback. Click the icon to switch between options including X0.5, X1, X2, and X4. |
 |
Displays the playback in full screen. |
 |
Displays the playback within the webpage. |
In the right pane of the playback page, the following recording data, event filters, and the quick search box are available:
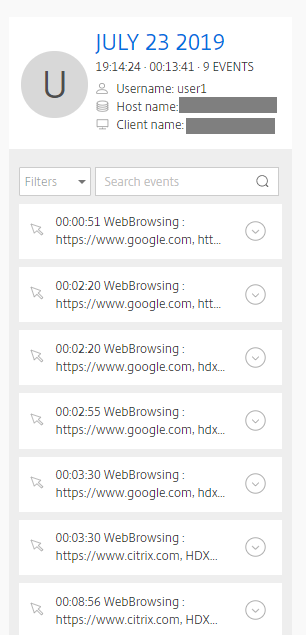
- The date and time on the web player machine. In this example, JULY 23, 2019 and 19:14:24.
- The duration of the recording in playback. In this example, 00:13:41.
- The number of events in the recording. In this example, 9 EVENTS.
- The name of the user whose session was recorded.
- The host name of the VDA where the recorded session was hosted.
- The name of the client device where the session was running.
-
Event filters. You can select more than one filter to search for events in the current recording.
Click the icon to expand folded displays of events.
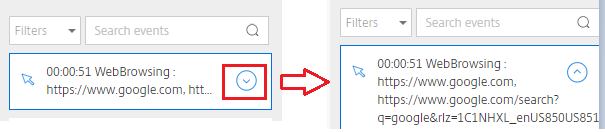
- Event list. Clicking an event on the list takes you to the position of the event in the recording.
- Quick search box. The search events quick search box helps to quickly narrow down a list of events in the current recording.
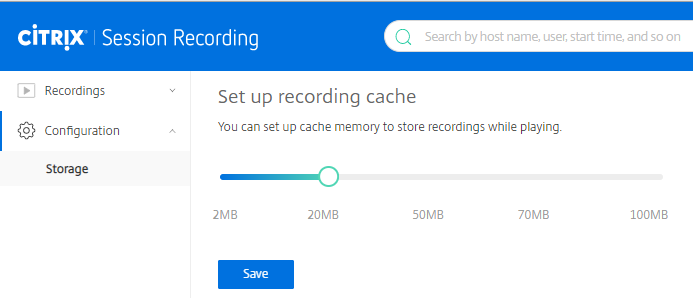
Configure cache memory for storing recordings while playing
On the Configuration page of the web player, you can click the slider to set up the cache memory for storing recordings while playing.