Configure Group Managed Service Account (gMSA) support for Session Recording
Session Recording supports Group Managed Service Accounts (gMSAs) to simplify service principal name (SPN) management for services running on multiple servers. This feature enhances security and simplifies the management of service accounts.
Step 1: Create a gMSA on the domain controller
Note:
This section describes how to create a gMSA using Server Manager on the domain controller. Alternatively, you can run the following script to achieve the same purpose:
Add-KdsRootKey -EffectiveImmediately
Install-WindowsFeature -Name RSAT-AD-PowerShell
NEW-ADGroup –name "gMSA"  –path "DC=ajj,DC=test" -GroupCategory Security -groupscope Global
Add-ADGroupMember "gMSA" -Members "Server-3$"(The dollar sign $ is must)
New-ADServiceAccount IIS1SvC -DNSHostName IIS1Svc.ajj.test -PrincipalsAllowedToRetrieveManagedPassword gMSA
<!--NeedCopy-->
The Effective time parameter allows time for keys to propagate to all domain controllers (DCs) before use. Using Add-KdsRootKey -EffectiveImmediately adds a root key to the target DC for immediate use by the Key Distribution Service (KDS) service. However, other domain controllers will not be able to use the root key until replication is complete.
-
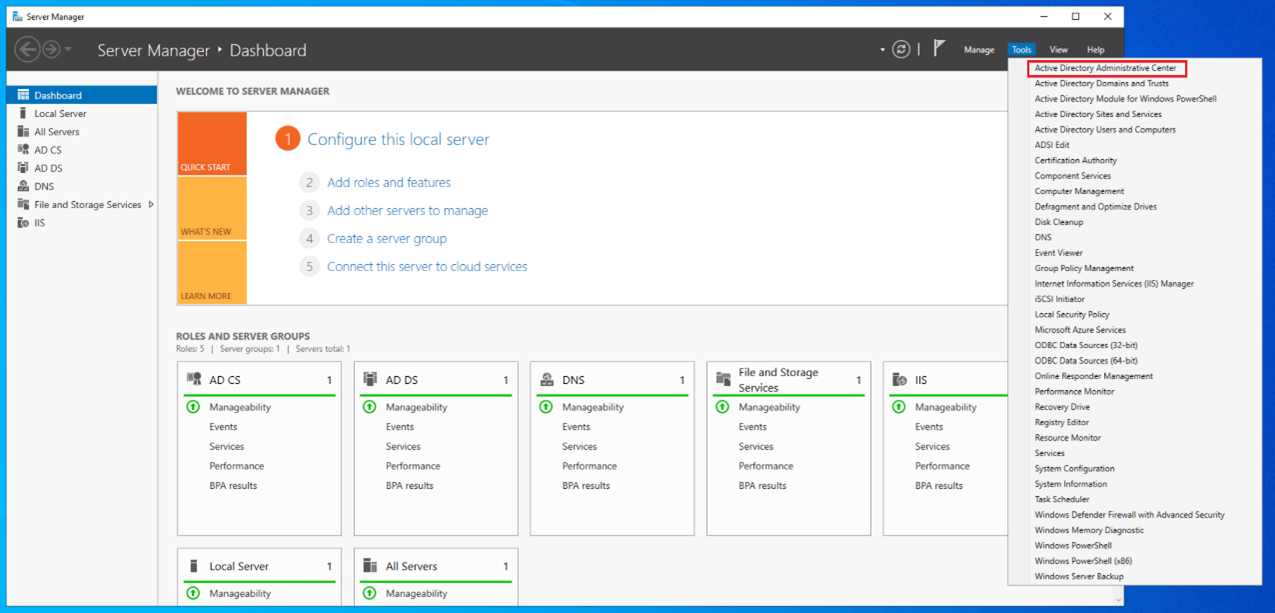
On the domain controller, open the Active Directory Administrative Center.
-
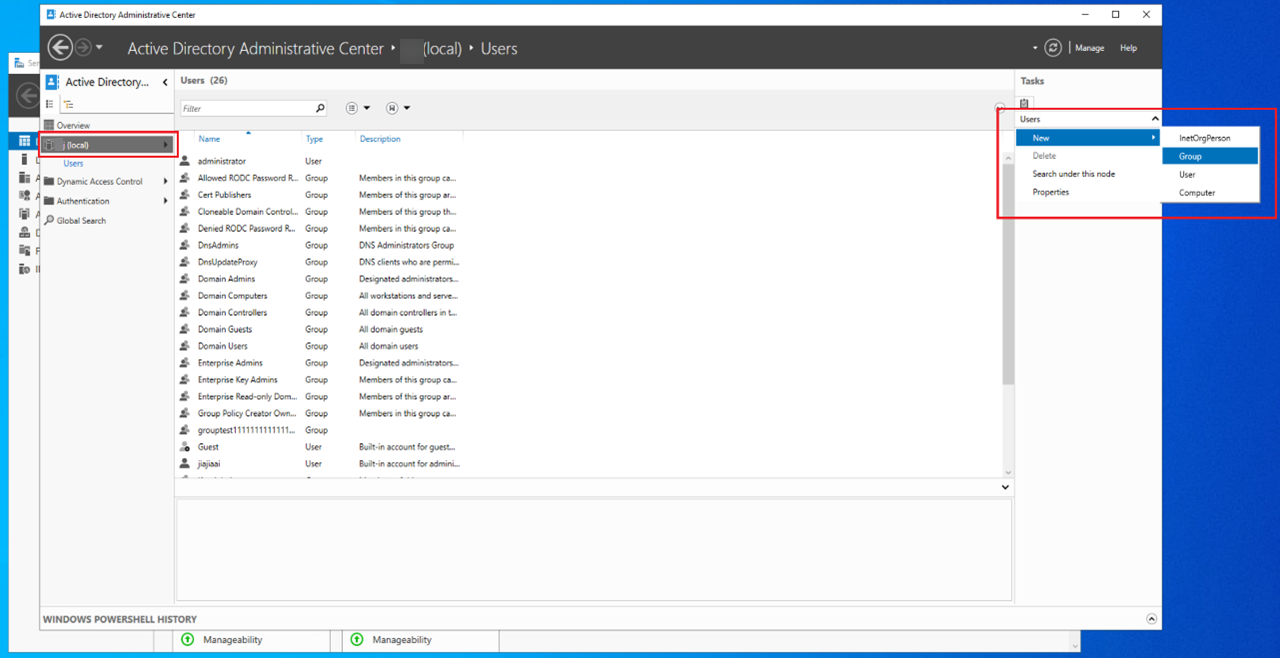
Select the domain and create a group.
-
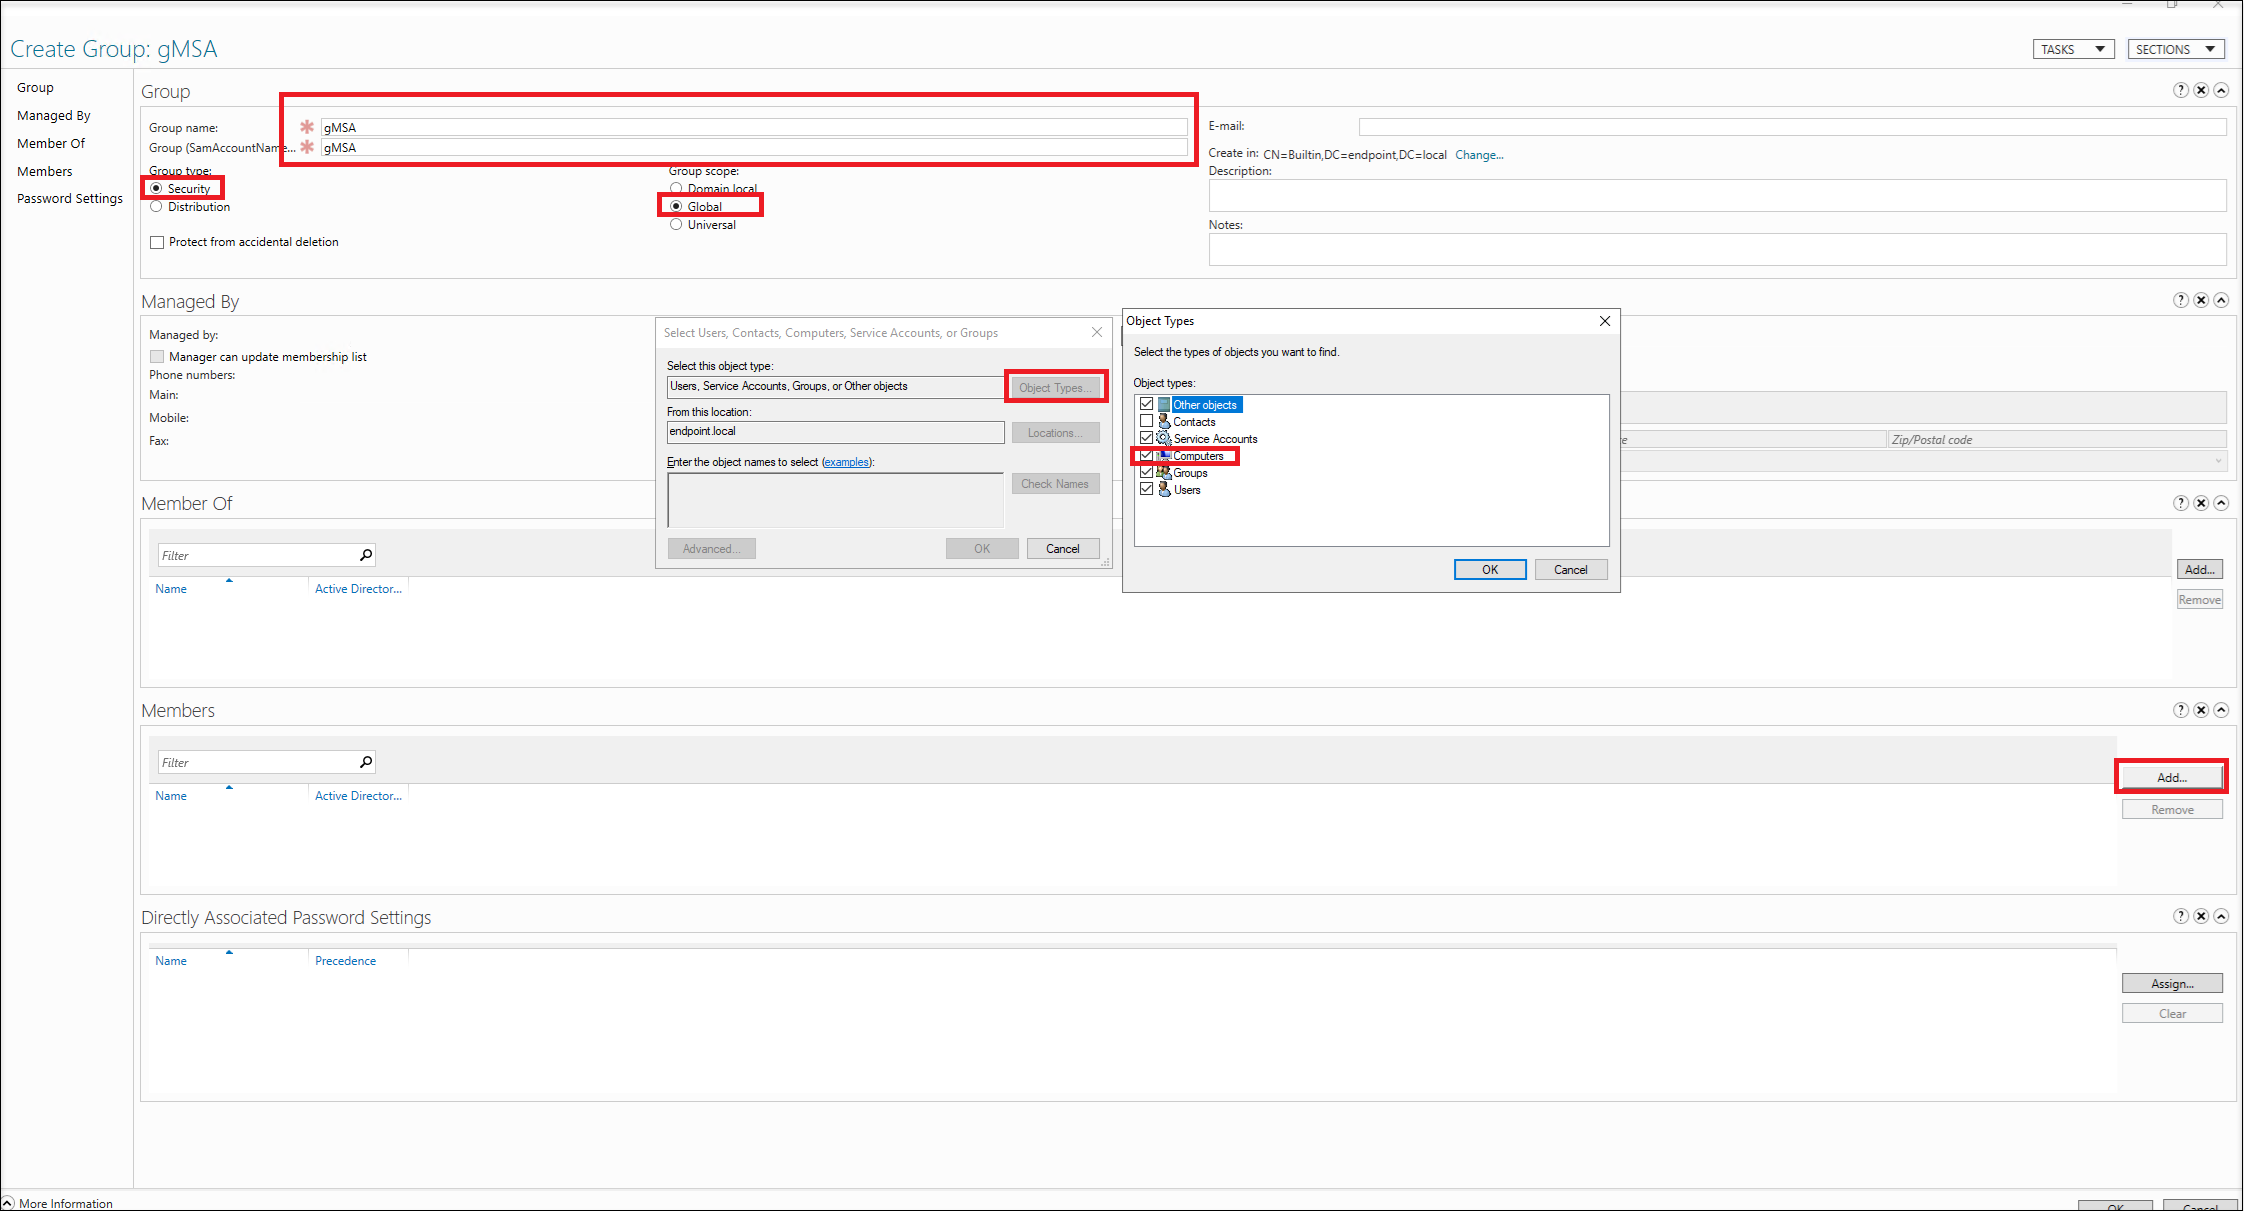
Name the group (using gMSA as an example). Set Group type to Security and Group scope to Global. Add member servers to it. The member servers include machines where the Session Recording servers and Session Recording database are installed.
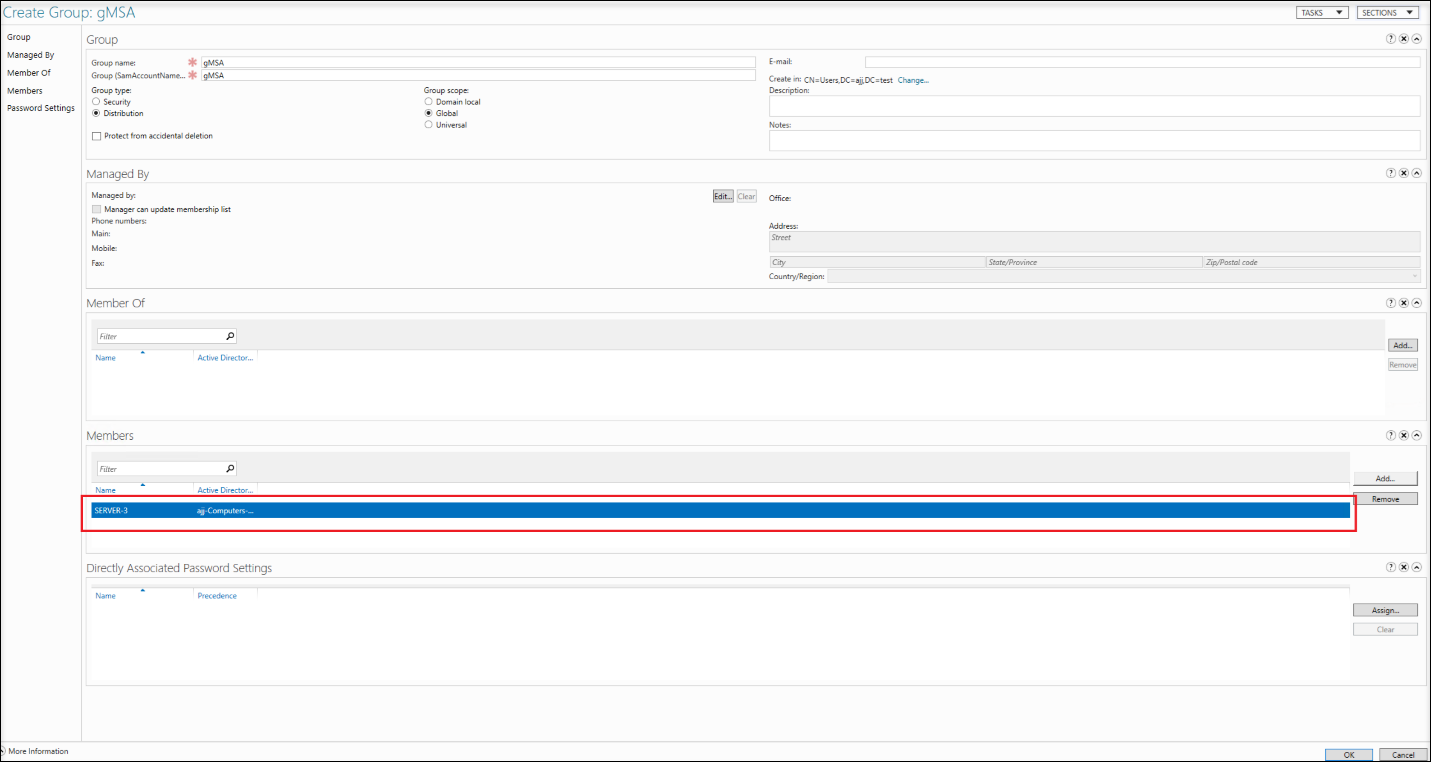
For example, a group member is added as follows:
-
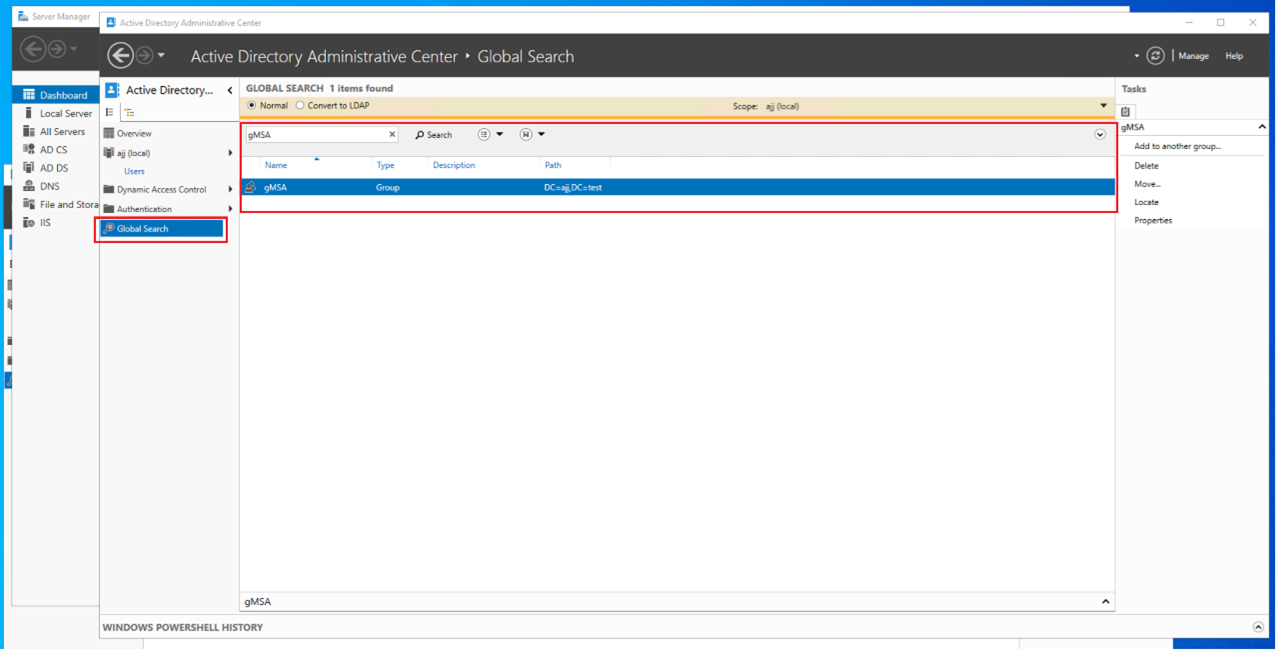
After successfully adding a security group, you can search for it using the global search in the Active Directory Administrative Center. You can view the member servers, and remember to restart all of them.
-
Create a gMSA account using the New-ADServiceAccount PowerShell cmdlet.
On the domain controller, Open Windows PowerShell and run the following command to create a gMSA:
New-ADServiceAccount $serviceAccountName -DNSHostName $DNSHostName -PrincipalsAllowedToRetrieveManagedPassword $groupName
<!--NeedCopy-->
Where,
-
$serviceAccountName specifies the name of the gMSA. This article uses IIS1SvC as an example.
-
$DNSHostName specifies the DNS host name, in the format of $serviceAccountName followed by the domain name of the domain controller.
-
$groupName specifies the group allowed to retrieve the managed password. This article uses gMSA as an example.
-
Step 2: Install the gMSA on each member server
You must install the gMSA on each server that will use it.
-
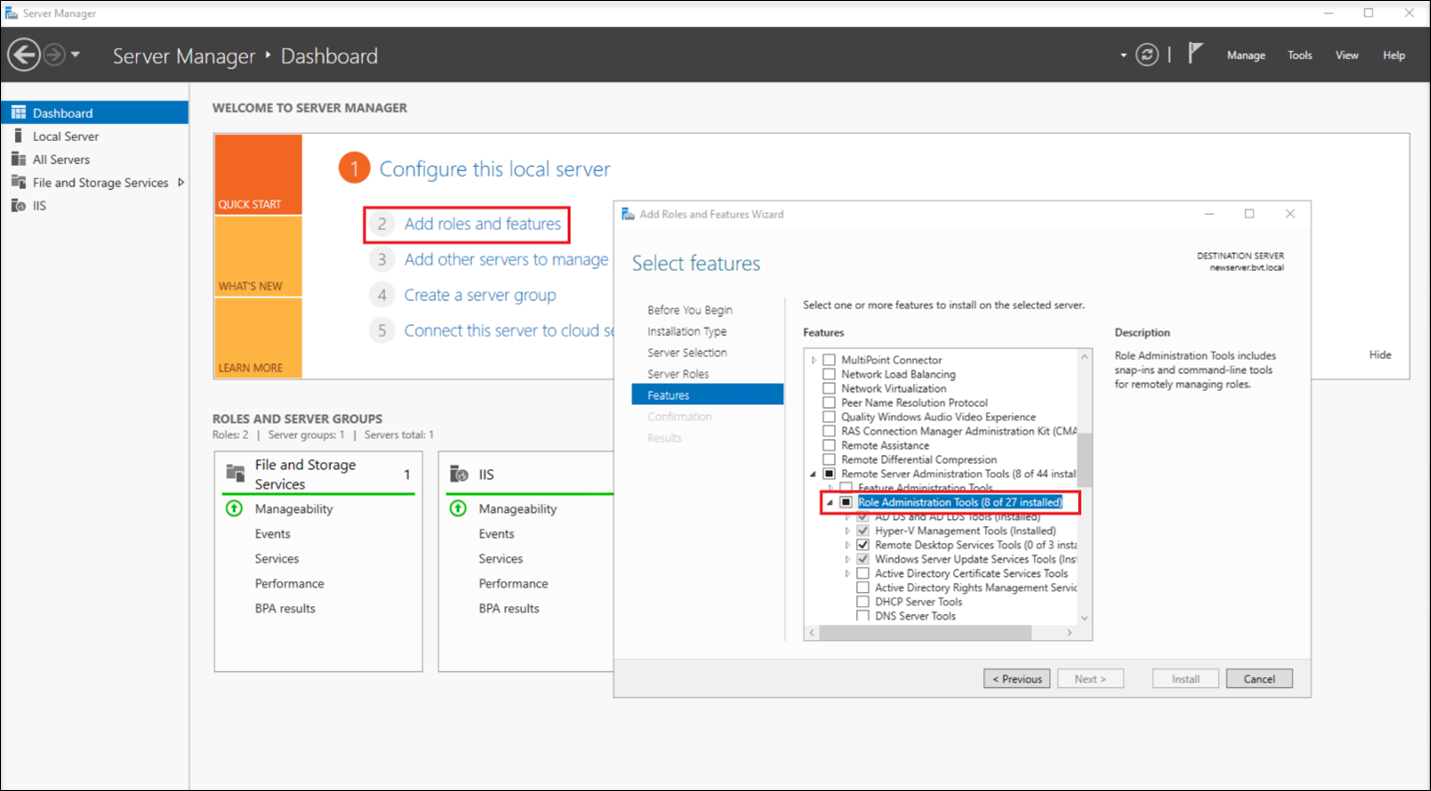
Install the Active Directory module for Windows PowerShell, using either the Server Manager or PowerShell with administrative privileges.
-
For an example of using the Server Manager:
-
If you use PowerShell with administrative privileges, run the following command:
 Install-WindowsFeature -Name RSAT-AD-PowerShell
 <!--NeedCopy-->
-
-
Open Windows PowerShell and run a command similar to the following to install the gMSA.
Install-ADServiceAccount IIS1SvC
<!--NeedCopy-->
If you encounter an “Access Denied” error similar to the following, make sure that the current member server has been added to the allow list of the gMSA and the server has been restarted afterwards.

-
Verify that you have installed the gMSA successfully by running a command similar to the following in PowerShell. If the command returns True, the gMSA has been installed successfully.
Test-ADServiceAccount IIS1SvC
 <!--NeedCopy-->
Step 3: Enable the gMSA to access the Session Recording database and Session Recording logging database
-
Create a login for the gMSA. Use the SQL Server Management Studio (SSMS) to connect to the SQL instance of the Session Recording database.
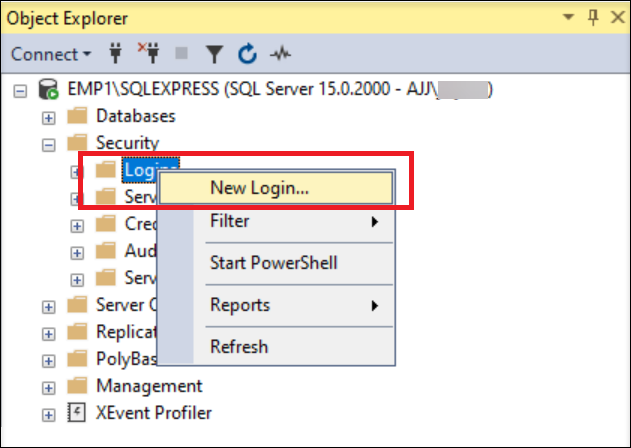
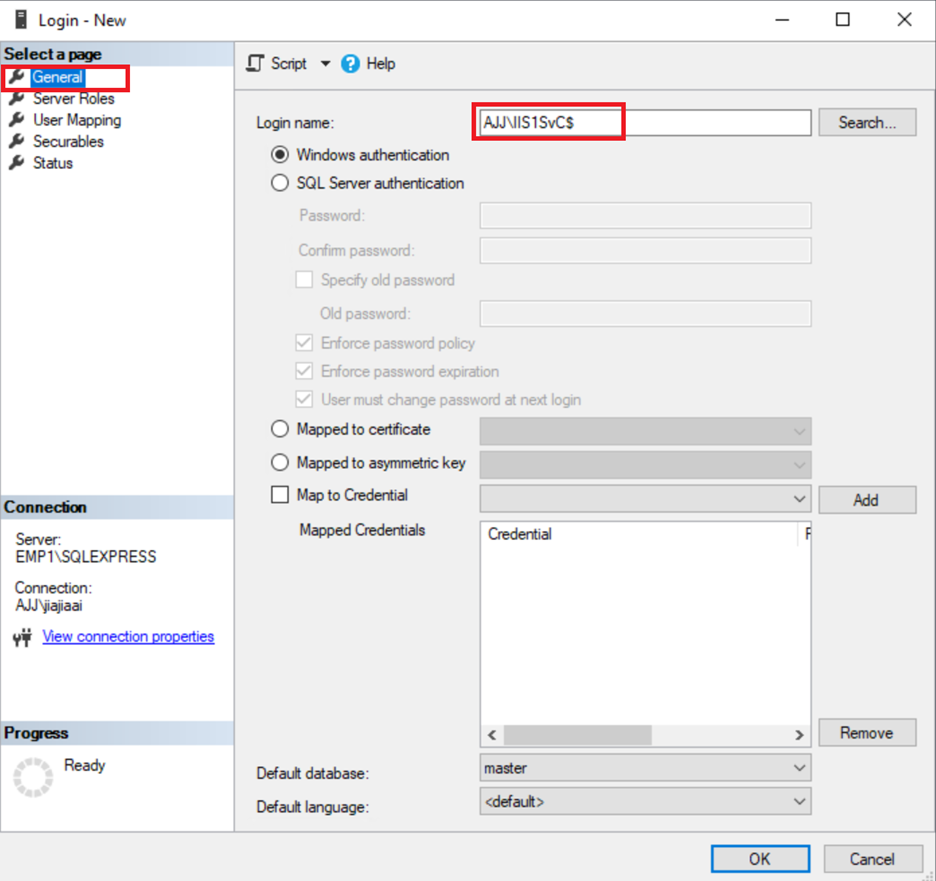
Name the new login in the format of <domain name of the domain controller>\<name of the gMSA>. For example:
-
Enable the gMSA to access the Session Recording database and Session Recording logging database.
-
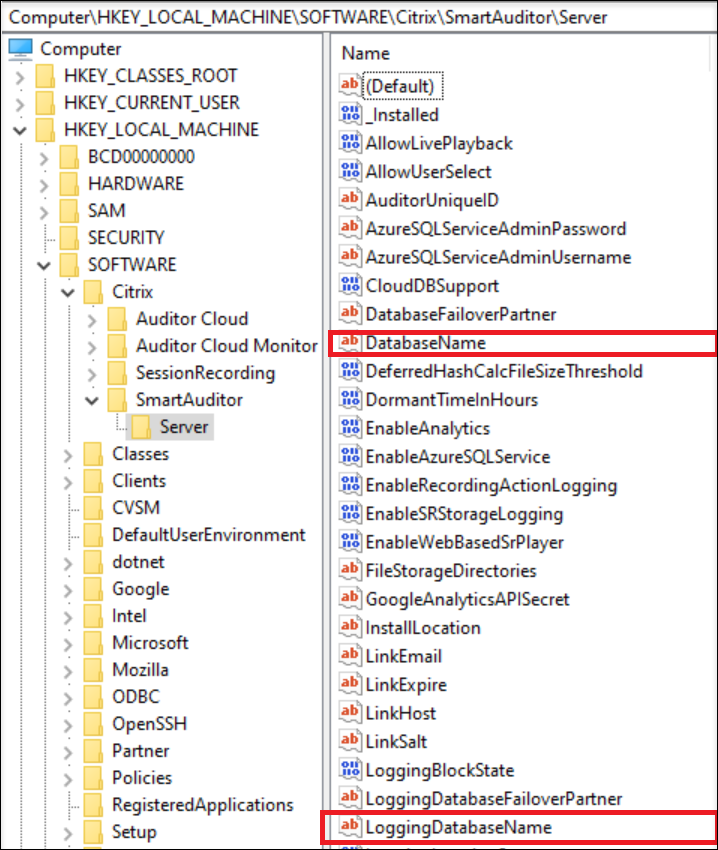
Find the names of the Session Recording database and Session Recording logging database through the Registry. For example, double-click the following registry keys to get the value data.
-
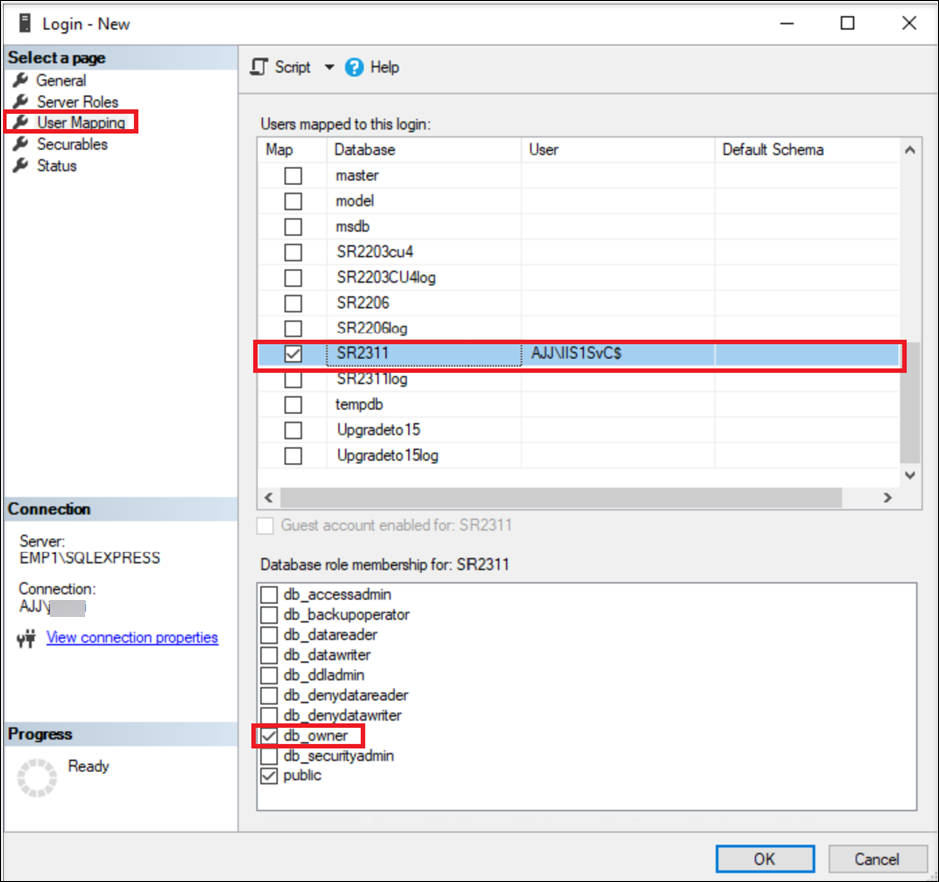
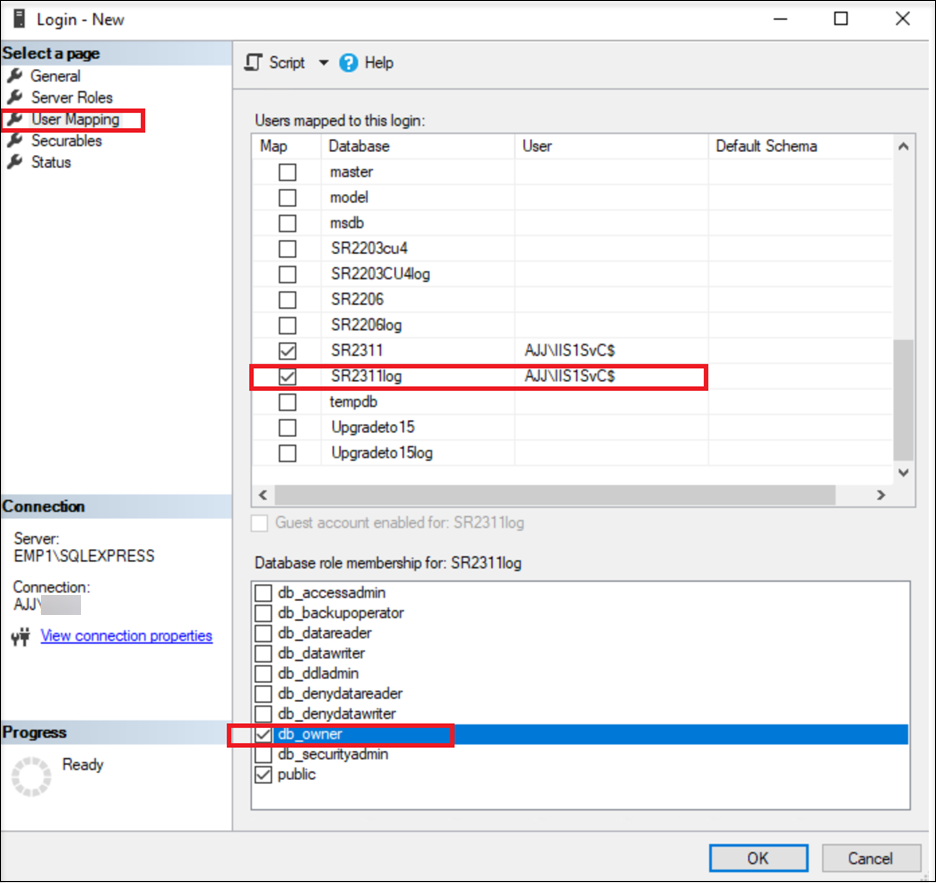
Grant the db_owner permission of the Session Recording database and Session Recording logging database to the gMSA.
Note:
If you grant db_datareader and db_datawriter permissions instead of db_owner permission, you must also grant the execution permission on the databases to the gMSA. For example:
use SR2311 grant execute to [name of the login created earlier] use SR2311log grant execute to [name of the login created earlier] <!--NeedCopy--> -
Step 3: Enable the gMSA to access the Session Recording servers
Complete the following steps on each Session Recording server:
-
Open Internet Information Services (IIS) Manager on the machine where the Session Recording server is installed, set the application pool identity to the gMSA, and the restart IIS.
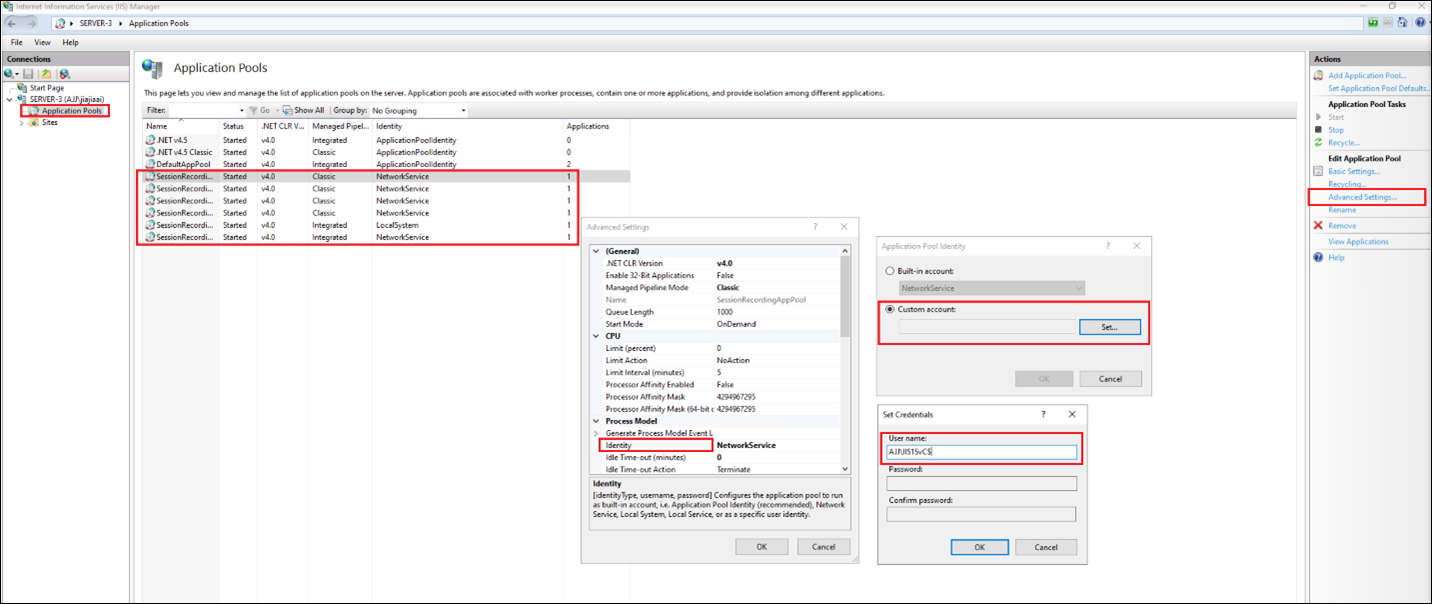
For example, the following application pool identities have been set to the gMSA

Note:
Alternatively, you can set the application pool identity by running a command similar to the following using Windows PowerShell:
Import-Module WebAdministration -ErrorAction Stop $webapps = Get-ChildItem -Path IIS:\AppPools foreach ($webapp in $webapps) { if ($webapp.Name.Contains("SessionRecording")){ $Pool = "IIS:\AppPools\" + $webapp.Name Write-Host $Pool Set-ItemProperty -Path $Pool -Name processModel -Value @{userName="AJJ \IIS1SvC$";identitytype=3} } } <!--NeedCopy--> -
Open the Registry Editor on the machine where the Session Recording server is installed, and then grant Read permission on the Session Recording server to the gMSA.
-
Locate the service account object type.
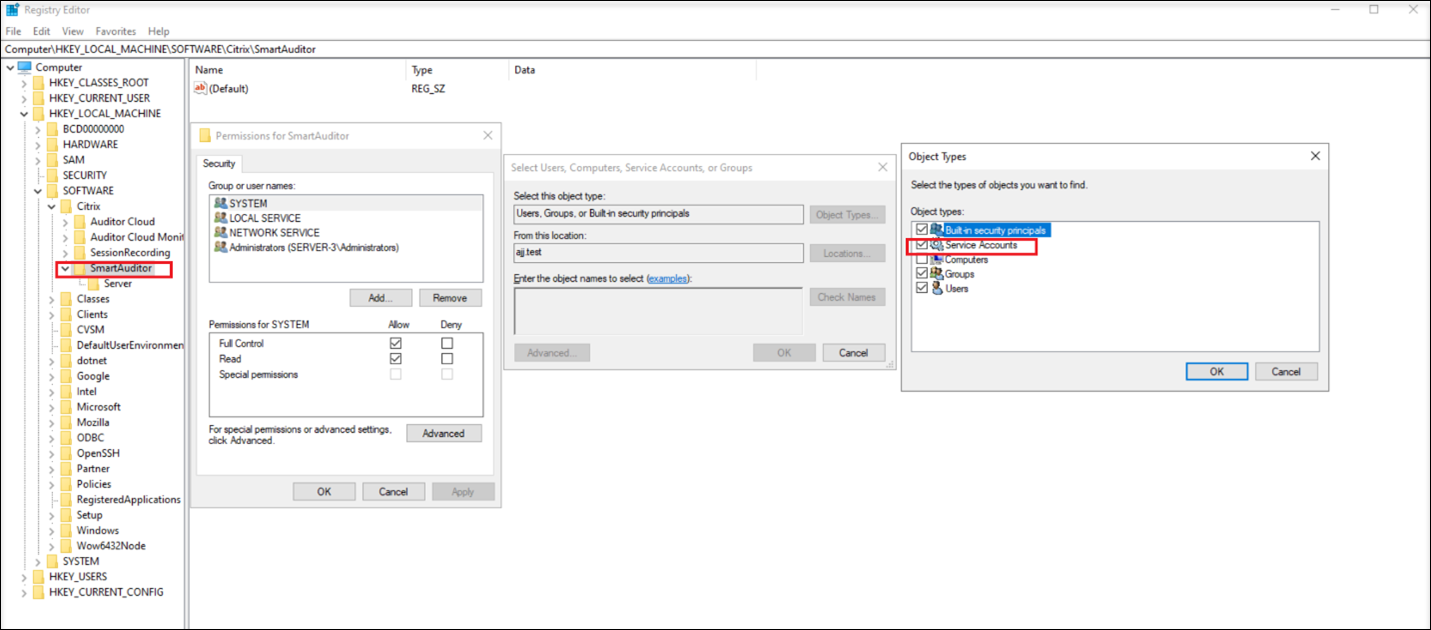
-
Enter the name of the gMSA.
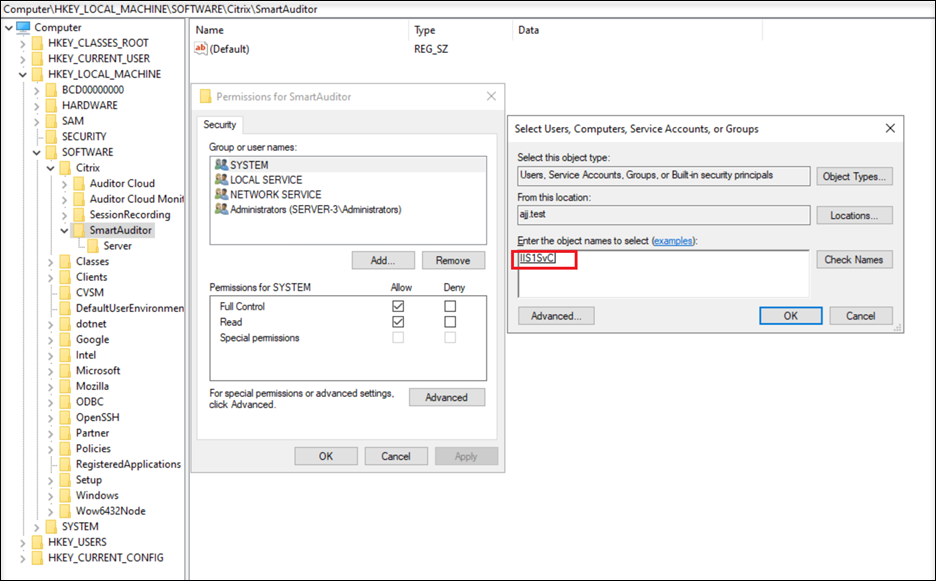
-
Grant Read permission to the gMSA.
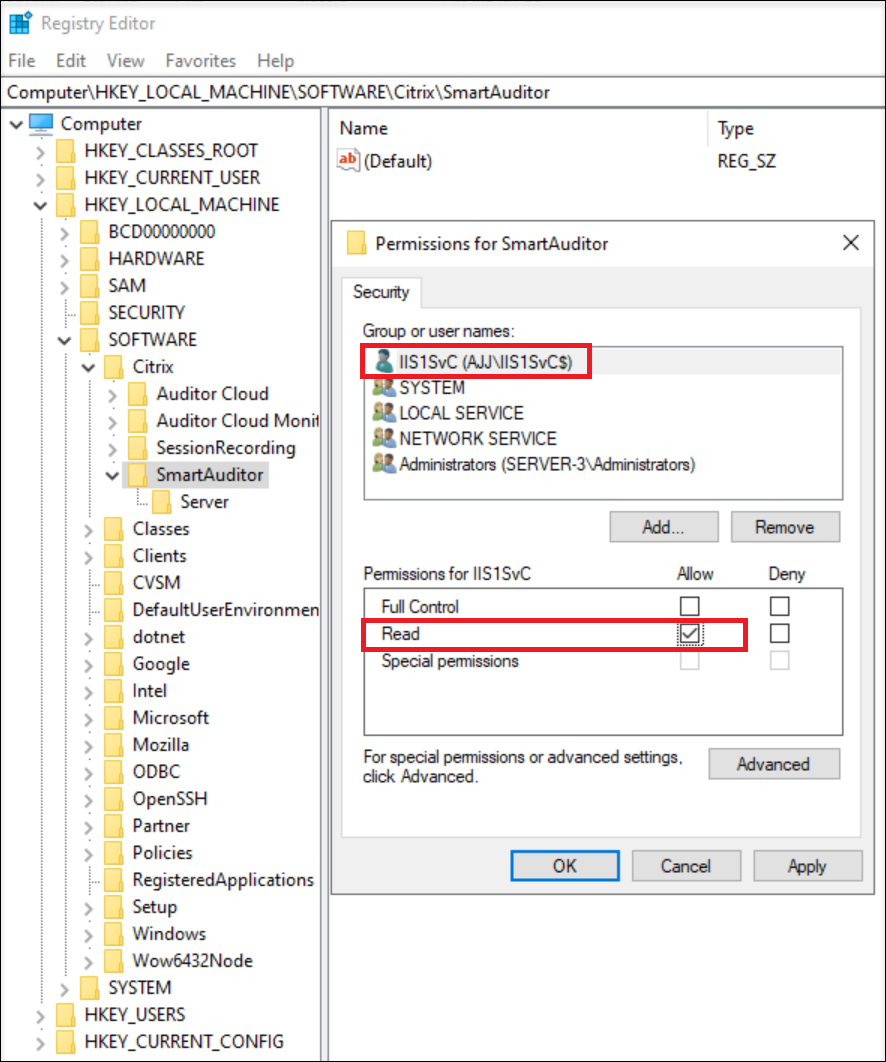
Note:
Alternatively, you can use a script similar to the following to grant Read permission on the Session Recording server to a gMSA:
$RegistryKey = "HKLM:\SOFTWARE\Citrix\SmartAuditor" $NewAcl = Get-Acl -Path $RegistryKey $identity = "pahl6\IIS1SvC$" $RegistryKeyRights = "ReadPermissions" $type = "Allow" $RegistryKeyAccessRuleArgumentList = $identity, $RegistryKeyRights, $type $RegistryKeyAccessRule = New-Object System.Security.AccessControl.RegistryAccessRule -ArgumentList $RegistryKeyAccessRuleArgumentList $NewAcl.SetAccessRule($RegistryKeyAccessRule) Set-Acl -Path $RegistryKey -AclObject $NewAcl <!--NeedCopy--> -
-
Add the gMSA to the Session recording storage folder and grant it Read and Write permissions on the folder. After that, enable inheritance and select Replace all child object permission entries with inheritable permission entries from this object.
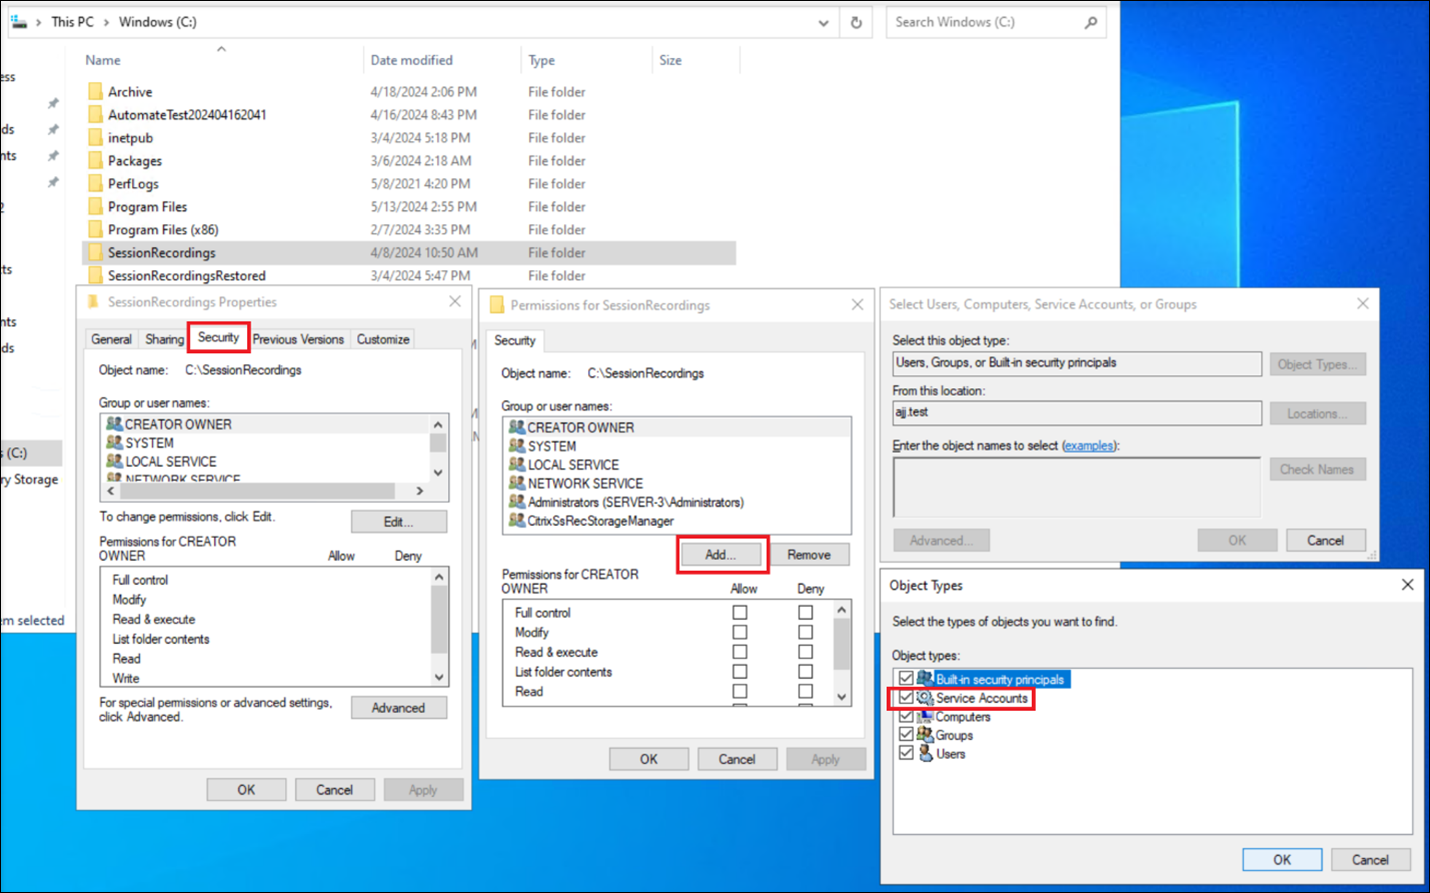
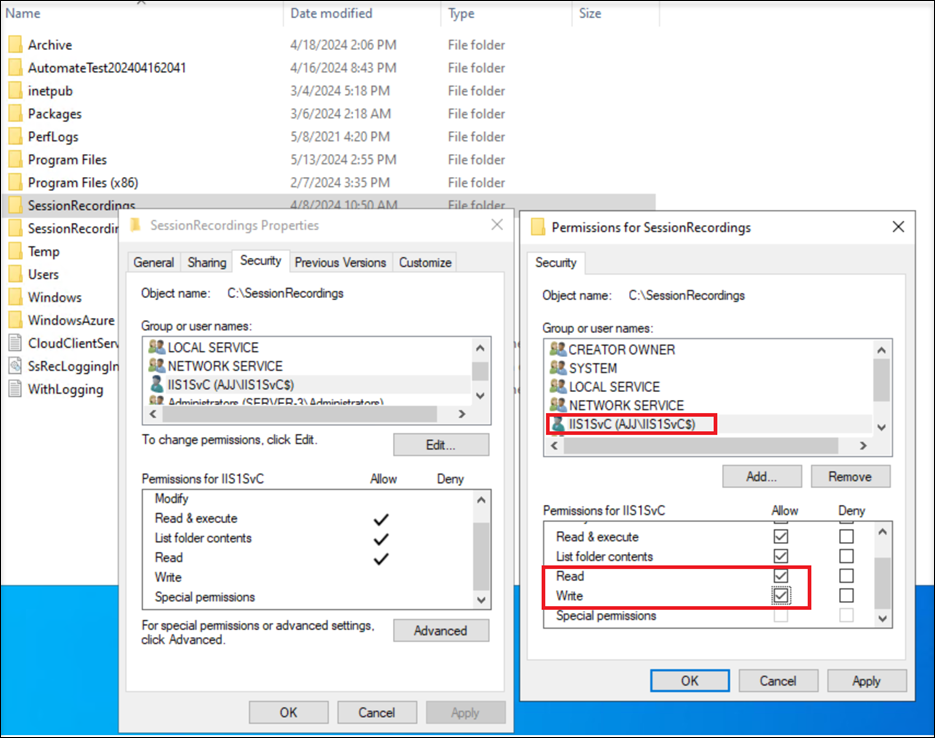
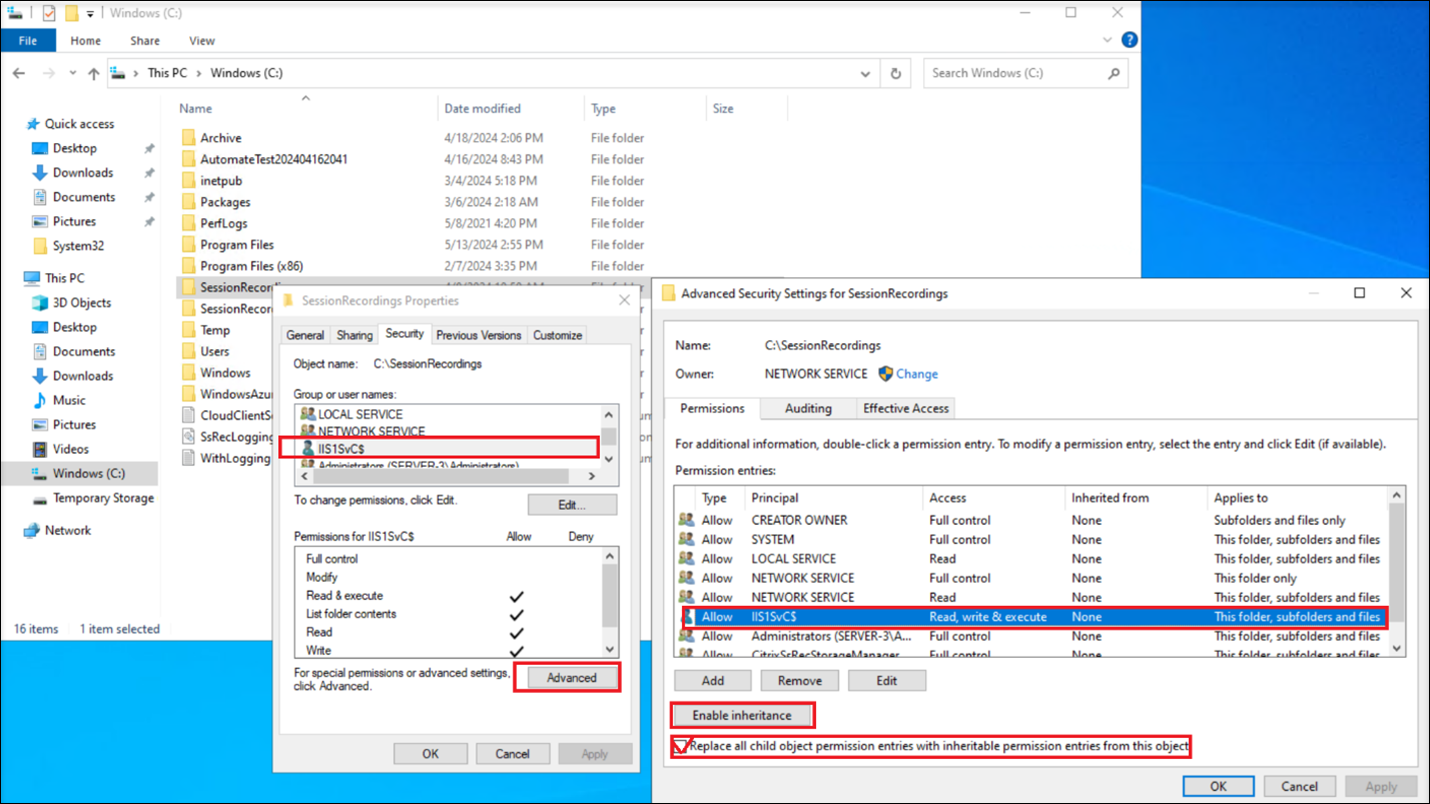
Note:
Alternatively, you can use a script similar to the following to grant Read and Write permissions on the Session recording storage folder to a gMSA and to enable inheritance:
$path = "C:\SessionRecordings" $NewAcl = Get-Acl $path # Set properties $identity = "pahl6\IIS1SvC$" $fileSystemRights = "Modify" $type = "Allow" # Create new rule $fileSystemAccessRuleArgumentList = $identity, $fileSystemRights, $type $fileSystemAccessRule = New-Object -TypeName System.Security.AccessControl.FileSystemAccessRule $fileSystemAccessRuleArgumentList # Apply new rule $NewAcl.SetAccessRule($fileSystemAccessRule) # enable inherit $isProtected = $false $preserveInheritance = $false $NewAcl.SetAccessRuleProtection($isProtected, $preserveInheritance) Set-Acl -Path $path -AclObject $NewAcl <!--NeedCopy--> -
Add the gMSA to the Session Recording Authorization Console.
-
Find the Security Identifier (SID) for the gMSA.
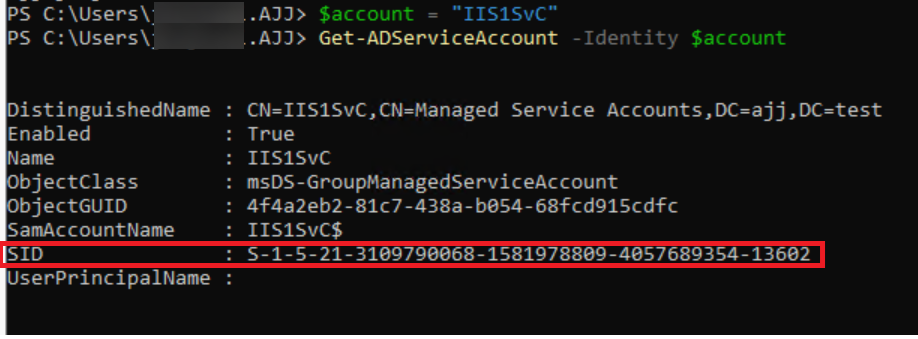
-
Write the SID to the SessionRecordingAzManStore file under <Session Recording server installation path>\App_Data.
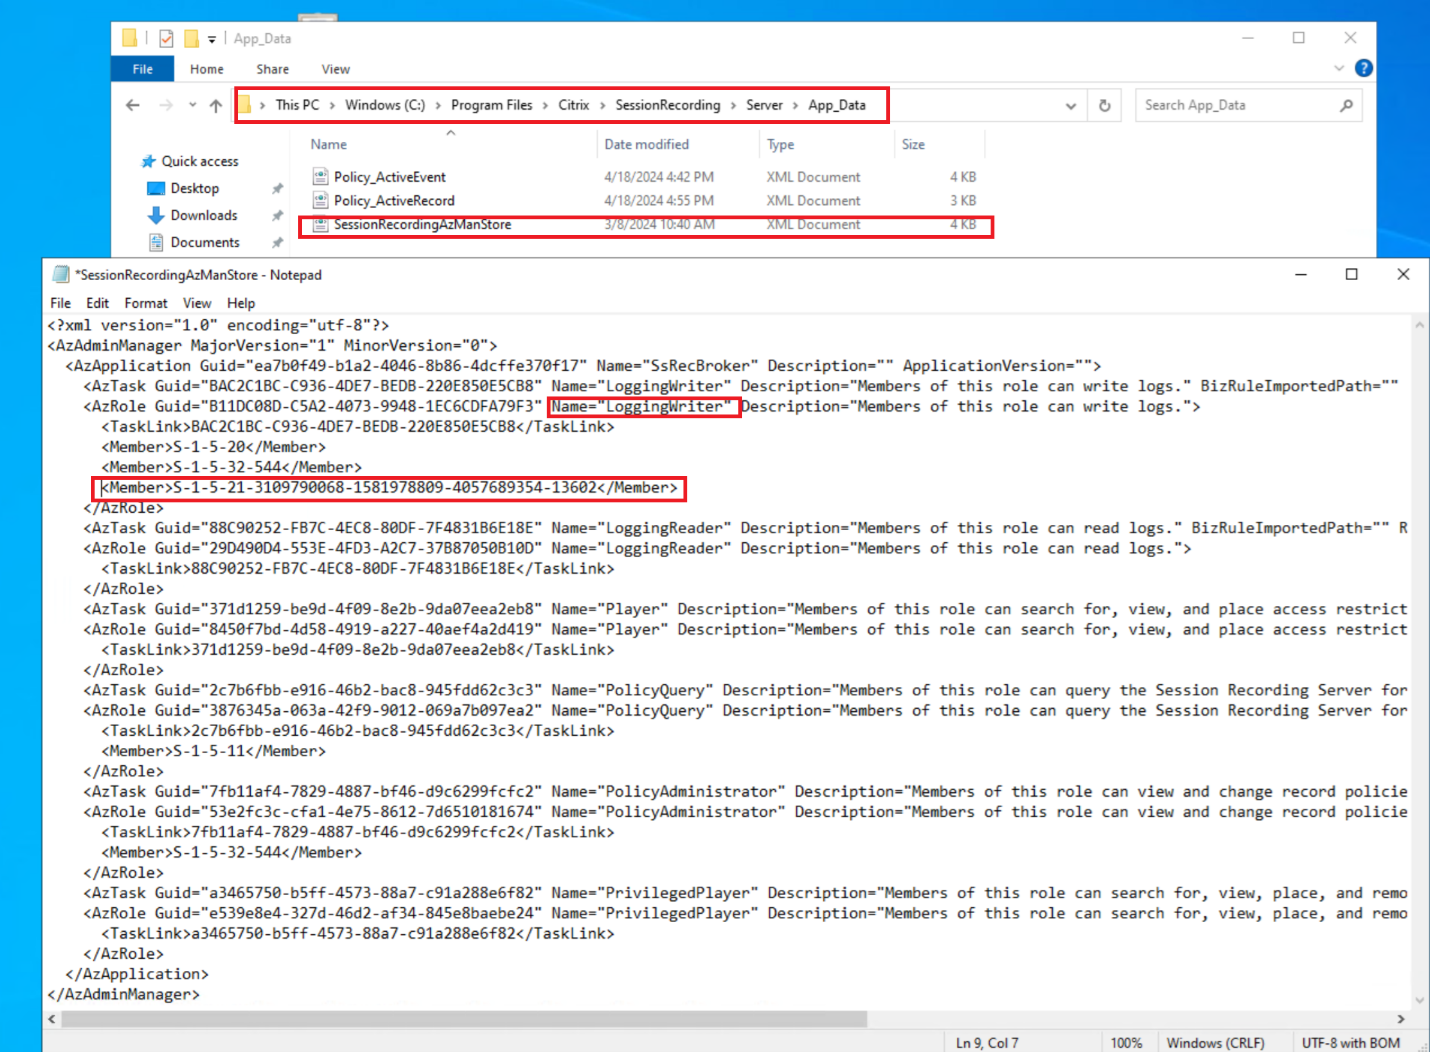
-
Grant full control permission on the App-Data folder to the gMSA.
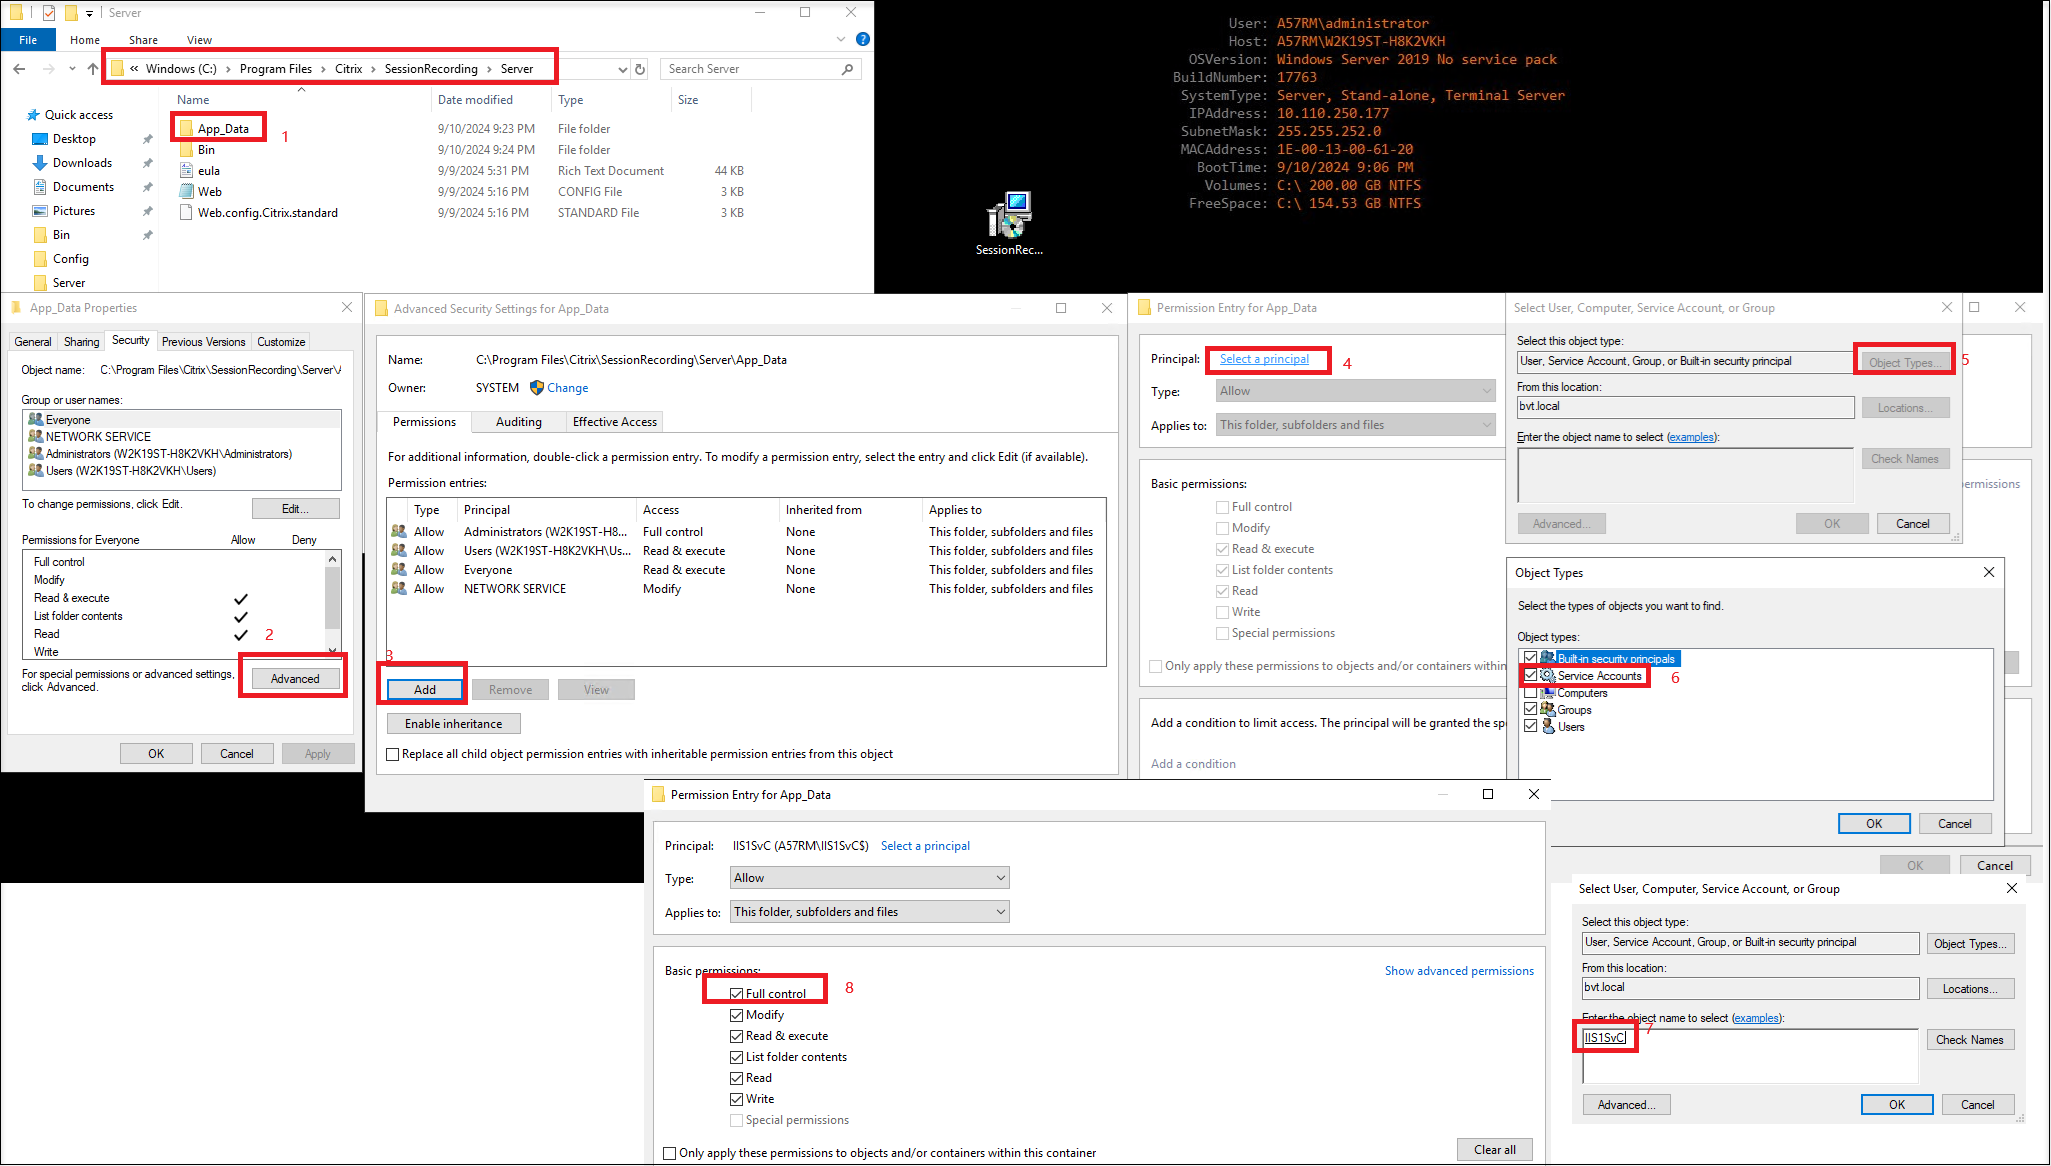
-
Verify that the gMSA is successfully added to the Session Recording Authorization Console.
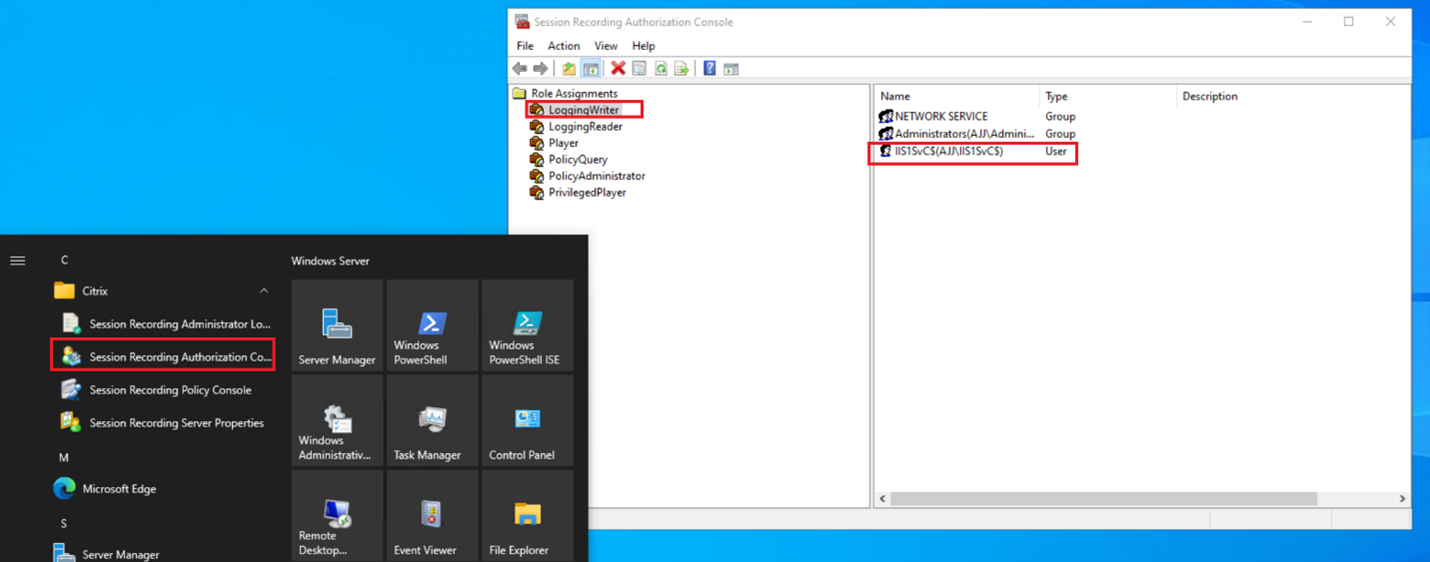
Note:
Alternatively, you can use a script similar to the following to add a gMSA to the Session Recording Authorization Console:
$account = "IIS1SvC" $AccountDetail = Get-ADServiceAccount -Identity $account $accountSid = $AccountDetail.SID.Value write-host $accountSid $path = "C:\Program Files\Citrix\SessionRecording\Server\App_Data\SessionRecordingAzManStore.xml" $doc = [xml](Get-Content $path) $node = $doc.AzAdminManager.AzApplication.AzRole | Where-Object {$_.Name -eq "LoggingWriter"} $element = $doc.CreateElement("Member") $element.InnerText = $accountSid $node.AppendChild($element) $doc.Save($path) <!--NeedCopy--> -