PoC Guide: URL Redirection with Secure Browser and Citrix ADC in Azure
Overview
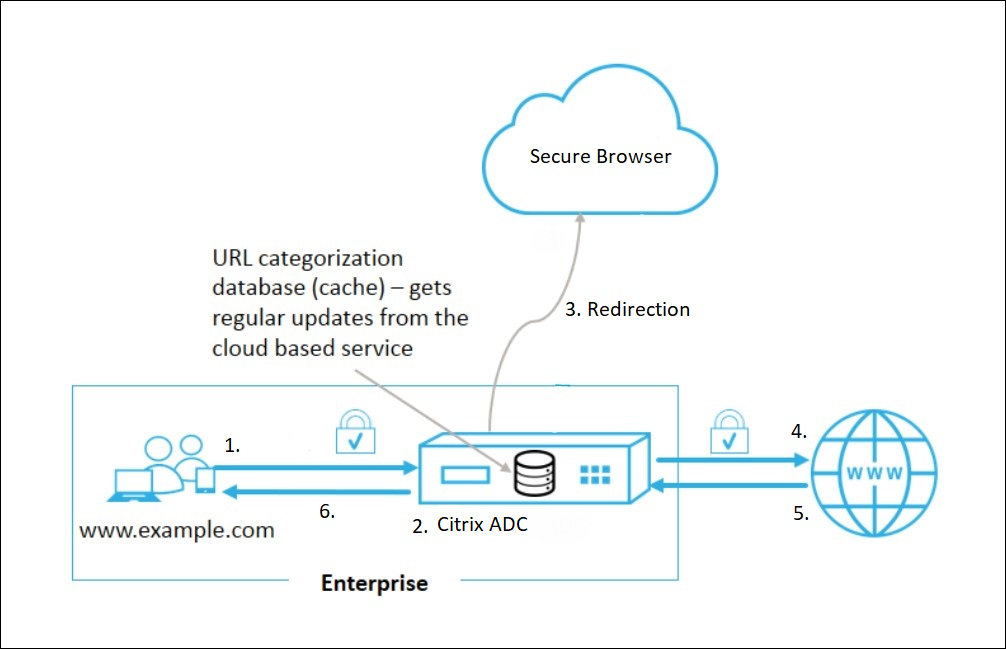
Here are the configuration steps for setting up an ADC, configuring SSL Forward Proxy, and SSL Interception using the latest Citrix ADC marketplace template. The URL Redirection to Secure Browser capability of the ADC enables administrators to define specific website categories to be redirected from the local browser to Secure Browser automatically. The Citrix ADC acts as an intermediate proxy to do the interception between local browsing and the internet, thus achieving web isolation and protecting the corporate network. This capability increases security without compromising user experience.
Conceptual Architecture
Scope
This proof-of-concept guide describes the following:
- Obtain Secure Browser Trial Account
- Set up ADC in Azure
- Set up Citrix ADC appliance as proxy
- Set up SSL Interception
- Set up Rewrite Policy and Actions
Deployment Steps
Section 1: Obtain Secure Browser Trial Account
[Reference doc for Remote Browser Isolation service]/en-us/citrix-remote-browser-isolation)
Request a Secure Browser trial
-
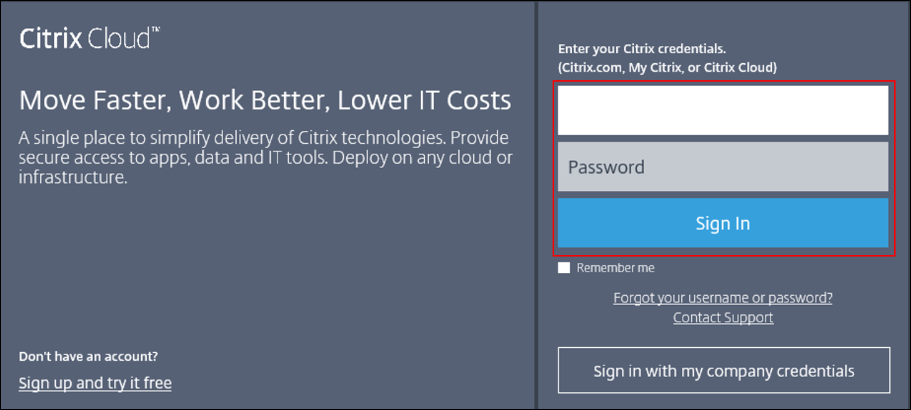
Navigate to your Citrix Cloud™ account and enter user name and password
-
Click Sign In. If your account manages more than one customer select the appropriate one
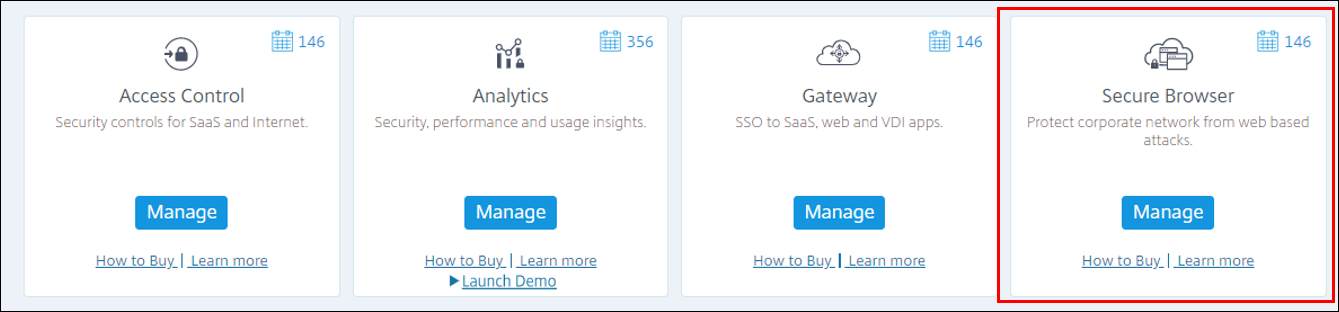
-
Double-click the Secure Browser Tile.
-
If you know who your account team is, then reach out to them to get the trial approved. If you are unsure who your account team is, then continue to the next step.
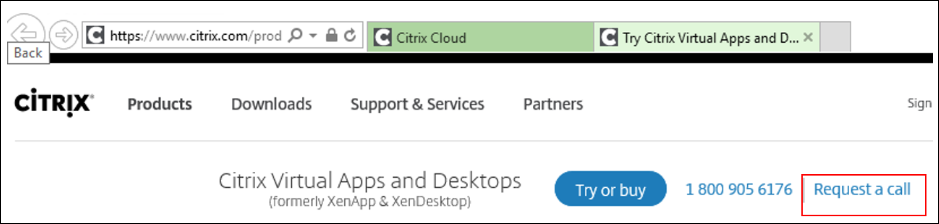
-
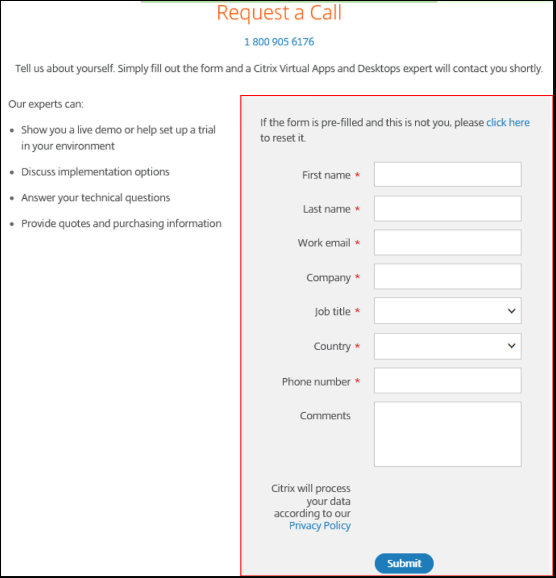
Click Request a Call
-
Enter your details and in the Comments section specify “Remote Browser Isolation service trial.”
-
Click Submit.
Note:
Citrix Sales will contact you to give you access to the service. This is not immediate, a Citrix sales rep will reach out
-
Once you have the Secure Browser trial approved, refer to the Publish a Secure Browser section of the Citrix Doc to publish a Secure Browser app.
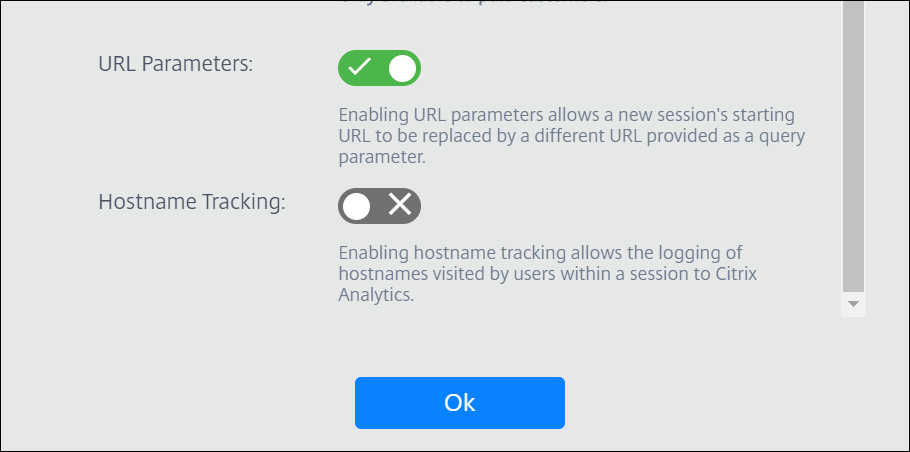
Enable URL Parameters
-
In your Citrix Cloud subscription, double-click the Secure Browser tile
-
On your published browser, called “browser” in this example, click the three dots and select Policies

-
Enable URL Parameters policy on your published browser
Section 2: Set up ADC in Azure
The ADC can be set up in any cloud of choice. In this example Azure is our Cloud of choice.
Configure an ADC instance
-
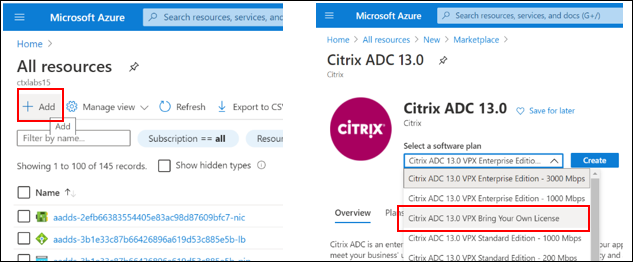
Navigate to All Resources and click + Add button, search for Citrix ADC
-
Select Citrix ADC template
-
Select the software plan according to your requirements (in this example Bring Your Own License)
-
Click Create
Configure NIC Card
-
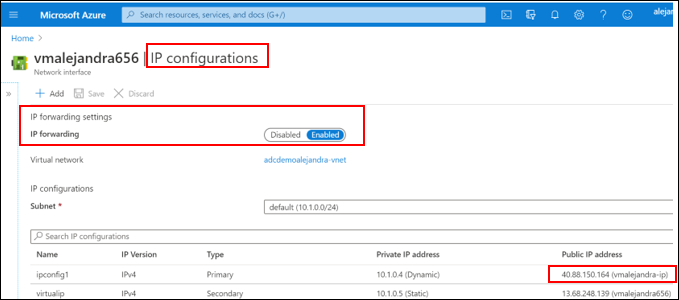
Navigate to All Resources and select the NIC card for the ADC instance
-
Select IP Configurations, make a note of the ADC management address
-
Enable IP Forwarding Settings, save the changes.
Configure Virtual IP
-
Click Add, set
virtualipas the name of the new config -
Select Static and add new IP address after the management address
-
Enable Public address option and create a new public IP address
-
Save the changes

Set up the FQDN on the client
-
Navigate to the Public IP address resource created for the
virtualipconfiguration -
Click Configuration, and add a DNS label (in this example,
urlredirection.eastus.cloudapp.azure.com)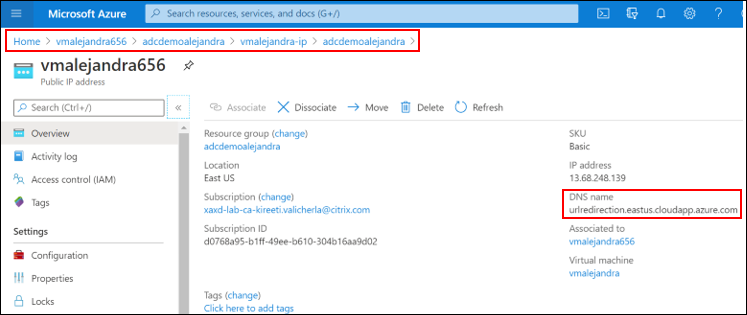
Set up Networking rules
-
Add the following Networking rules
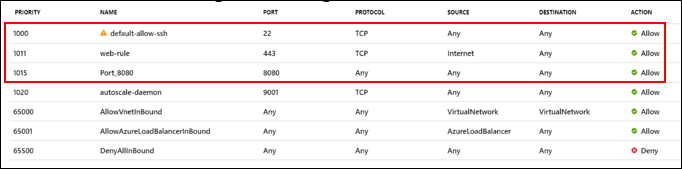
Note:
You may choose to close the ports 22 and 443 after the configuration is done, as those ports are only needed for logging into management console for configuration purposes.
-
At this point the ADC instance in Azure is set up
Section 3: Set up Citrix ADC appliance as proxy
Set up the ADC as a proxy to route the traffic from the client browser to the Internet.
Log in to ADC management console
-
Navigate to the Citrix ADC management console by inputting the instance’s public IP address in the search bar of your browser
Note:
Use the IP address of the machine you provisioned in the previous steps, in this example
https://40.88.150.164/ -
Log in to the console by inputting the user name and password you set up in the previous steps
-
From the initial configuration screen, click Continue
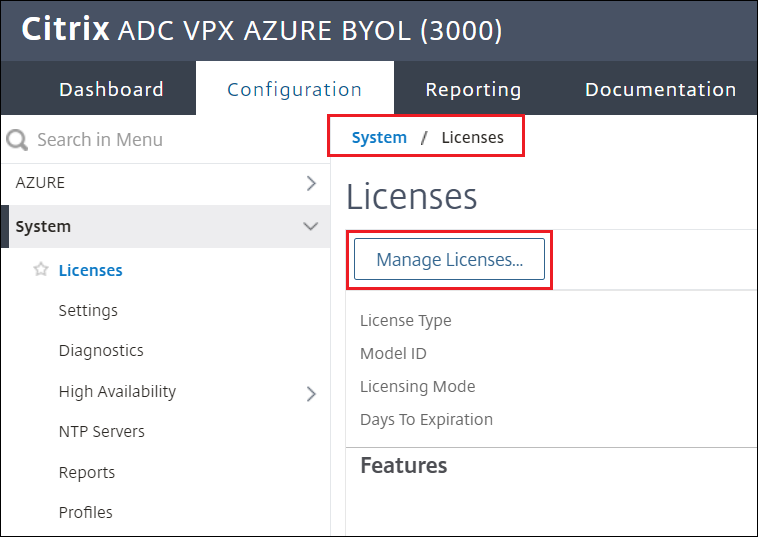
Upload the licenses
-
Navigate to System > Licenses > Manage Licenses
-
Upload the necessary licenses for ADC.
Note:
The licenses you bring must support the features highlighted in the steps 11 and 13 under Configure Basic Features and Configure Advanced Features (e.g CNS_V3000_SERVER_PLT_Retail.lic, and CNS_WEBF_SSERVER_Retail.lic)
-
Reboot the server after uploading both licenses.
-
After reboot, log in to the management again
-
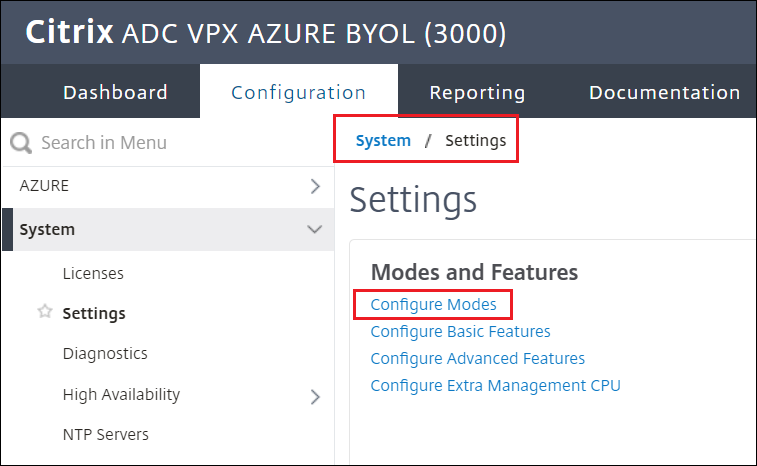
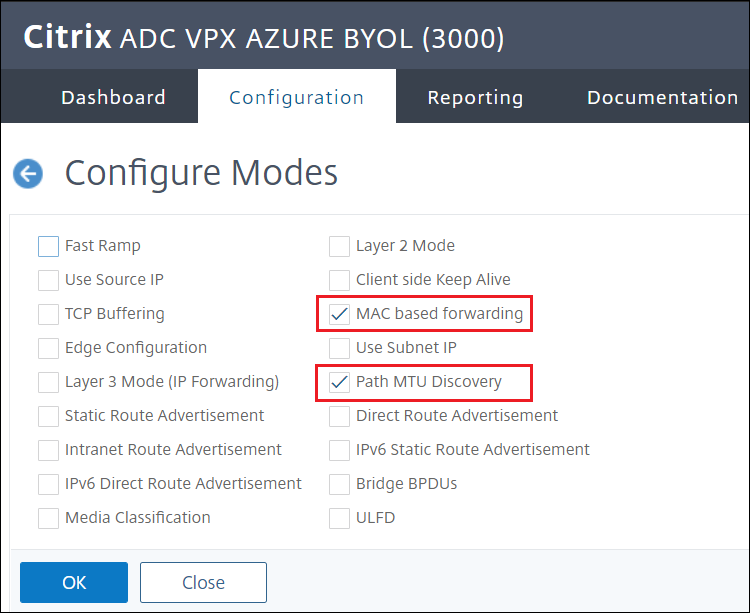
Navigate to System > Settings > Configure Modes
-
Only two options must be enabled Mac based forwarding and Path MTU Discovery
-
Navigate to System > Settings > Configure Basic Features
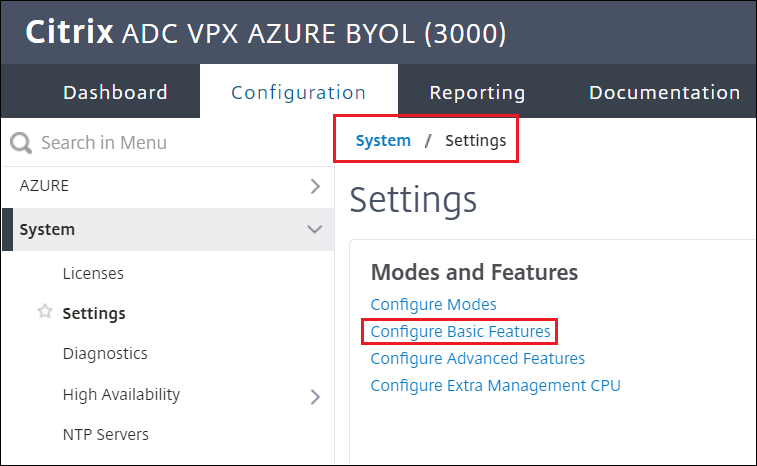
-
Select:
SSL Offloading,Load Balancing,Rewrite,Authentication, Authorization, and Auditing,Content Switching, andIntegrated Caching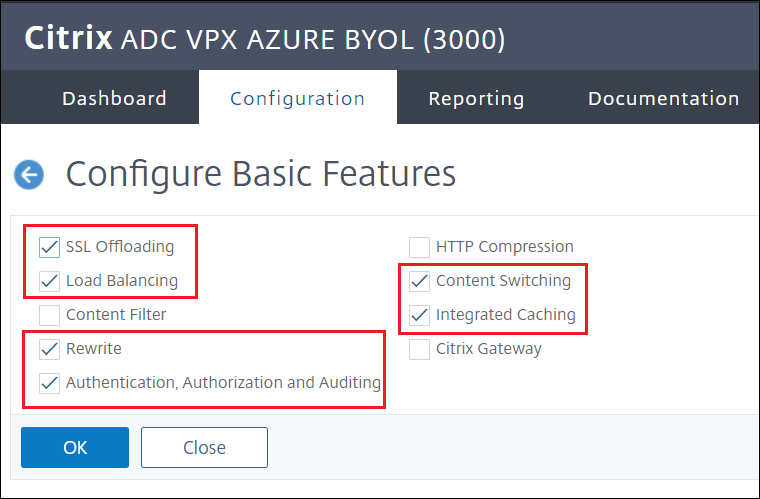
-
Navigate to System > Settings > Configure Advanced Features
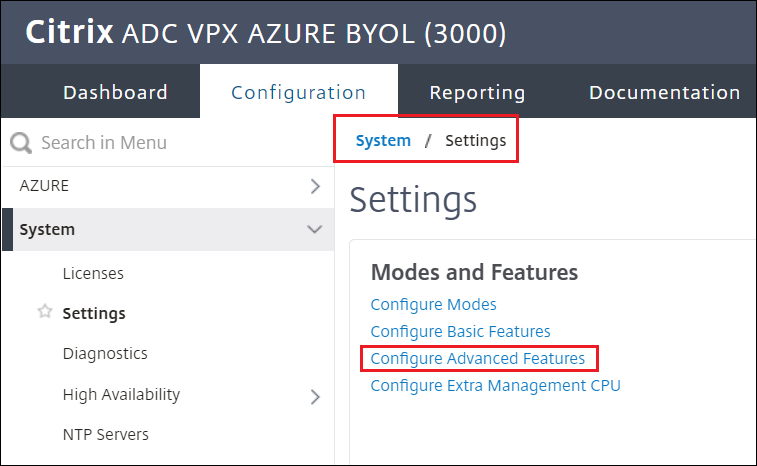
-
Select:
Cache Redirection,IPv6 Protocol Translation,AppFlow,Reputation,Forward Proxy,Content Inspection,Responder,URL Filtering, andSSL Interception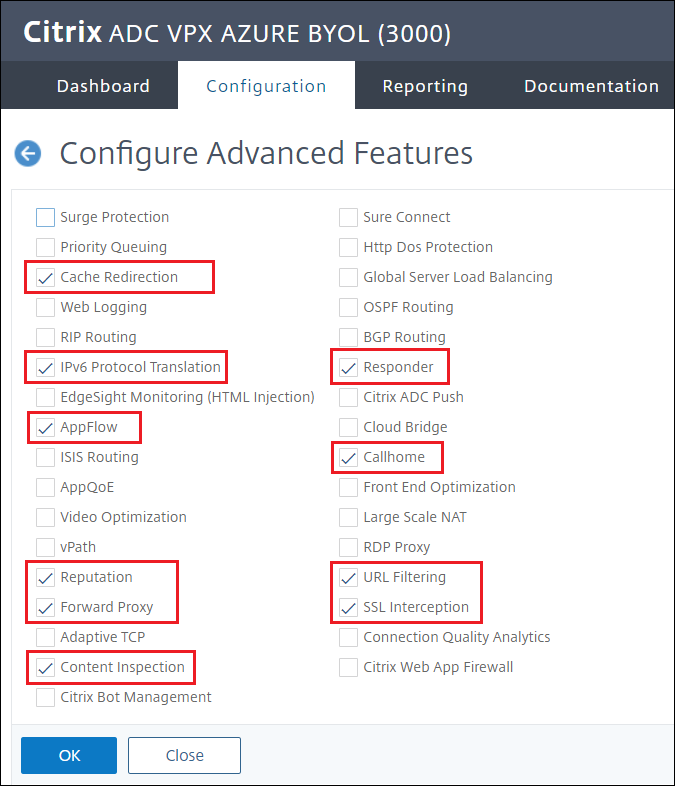
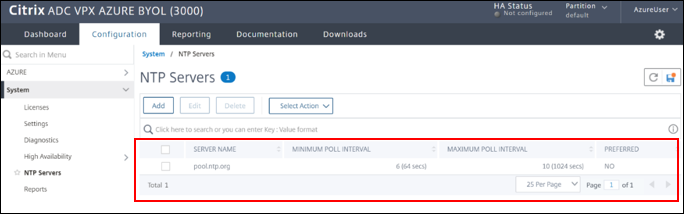
Set up the NTP Server
-
Navigate to System > NTP Servers > Add
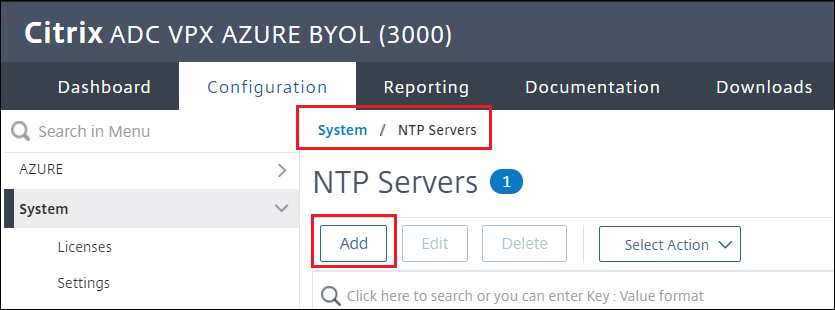
-
Create a server for example
pool.ntp.org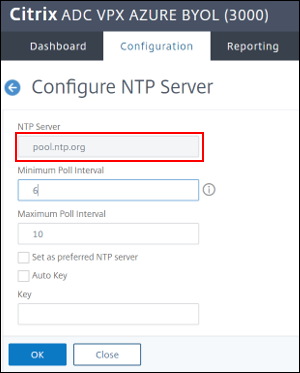
-
Enable NTP when prompted and set server to enabled
-
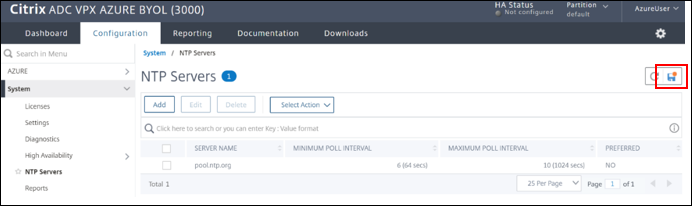
Save the Configuration from the management portal save action
-
Open SSH Session to ADC management address, log in with credentials you used while provisioning the ADC from Azure
Set up TCP Profile and vServer
-
Get the
virtualipfrom the steps in Section 2 and input in the command (in this example 10.1.0.5) -
Run the following commands with the
sslproxyaddress for example,virtualip: -
To add TCP profile:
add ns tcpProfile proxy-tcpprofile01 -dynamicReceiveBuffering ENABLED -KA ENABLED -mptcp ENABLED -mptcpDropDataOnPreEstSF ENABLED -mptcpSessionTimeout 360 -builtin MODIFIABLE <!--NeedCopy--> -
To add virtual server
add cs vserver sslproxy01 PROXY 10.1.0.5 8080 -cltTimeout 360 -tcpProfileName proxy-tcpprofile01 -persistenceType NONE bind cs vserver sslproxy01 -lbvserver azurelbdnsvserver add netProfile proxy-netprofile01 -srcIP 10.1.0.5 -srcippersistency ENABLED -MBF ENABLED -proxyProtocol ENABLED -proxyProtocoltxversion V2 set cs vserver sslproxy01 -netProfile proxy-netprofile01 set ssl vserver sslproxy01 -sslProfile ns_default_ssl_profile_frontend save ns config <!--NeedCopy--> -
To change the Cache settings go back to management session on browser
-
Navigate to Optimization > Integrated Caching
-
Navigate to Settings > Change cache settings

-
Set Memory Usage Limit to
250 MBand click OK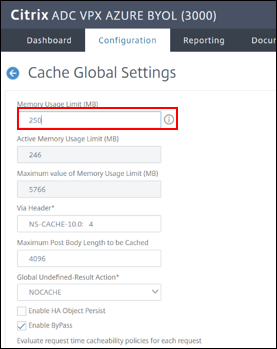
Set up the client for URL Redirection
-
On a client, for example Firefox
-
Configure your browser proxy to
virtualip, Public IP, or FQDN: 8080 that you configured in Section 2 (for example,urlredirection.eastus.cloudapp.azure.com:8080)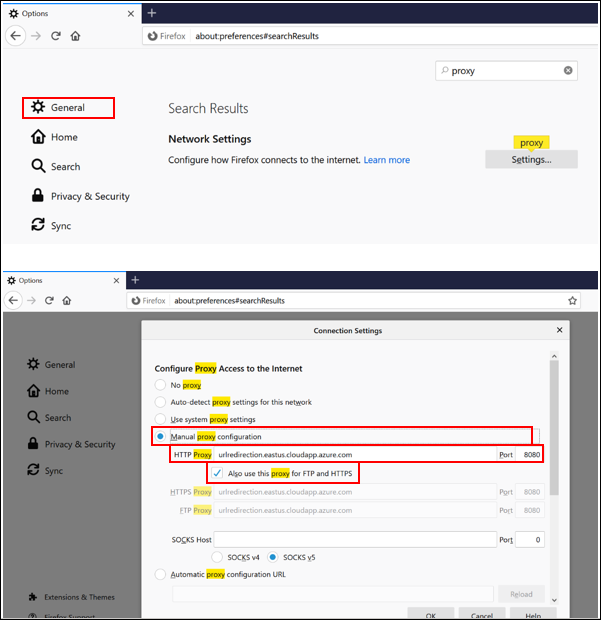
-
Now that we have an ADC set up, test for any website connectivity from the browser with the ADC acting as a proxy.
Section 4: Set up SSL Interception
SSL interception uses a policy that specifies which traffic to intercept, block, or allow. Citrix recommends that you configure one generic policy to intercept traffic and more specific policies to bypass some traffic.
References:
Video example of configuration
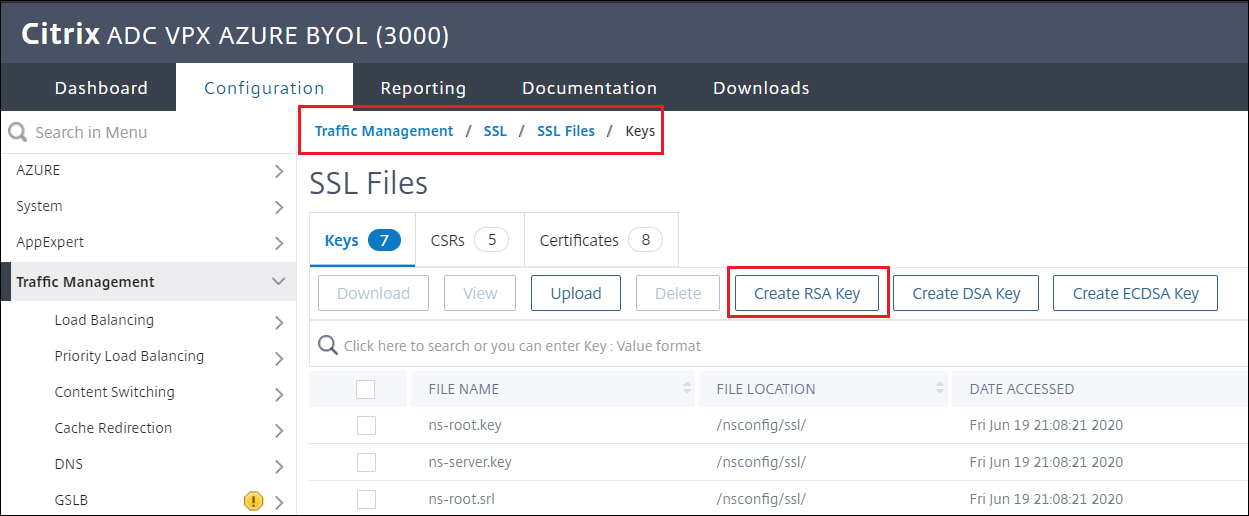
Create an RSA Key
-
Navigate to Traffic management > SSL > SSL Files > Keys
-
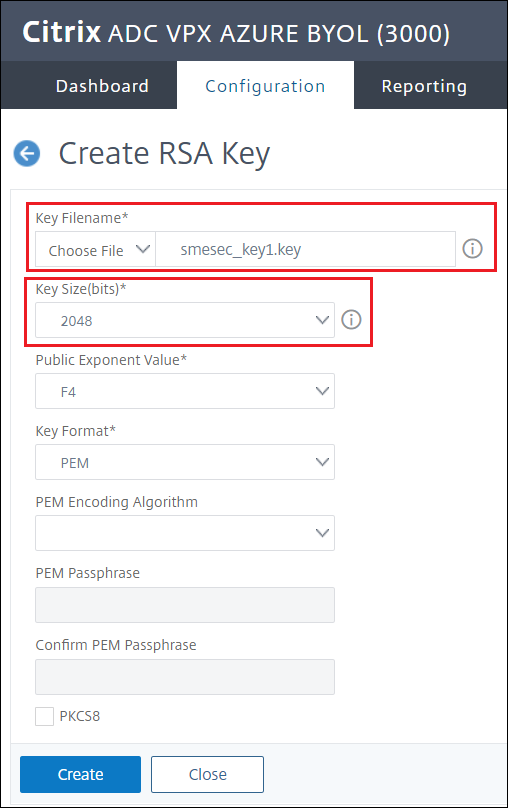
Select Create RSA Key
-
Select the key file name and required key size
-
Once the key is created, download the
.keyfile for later use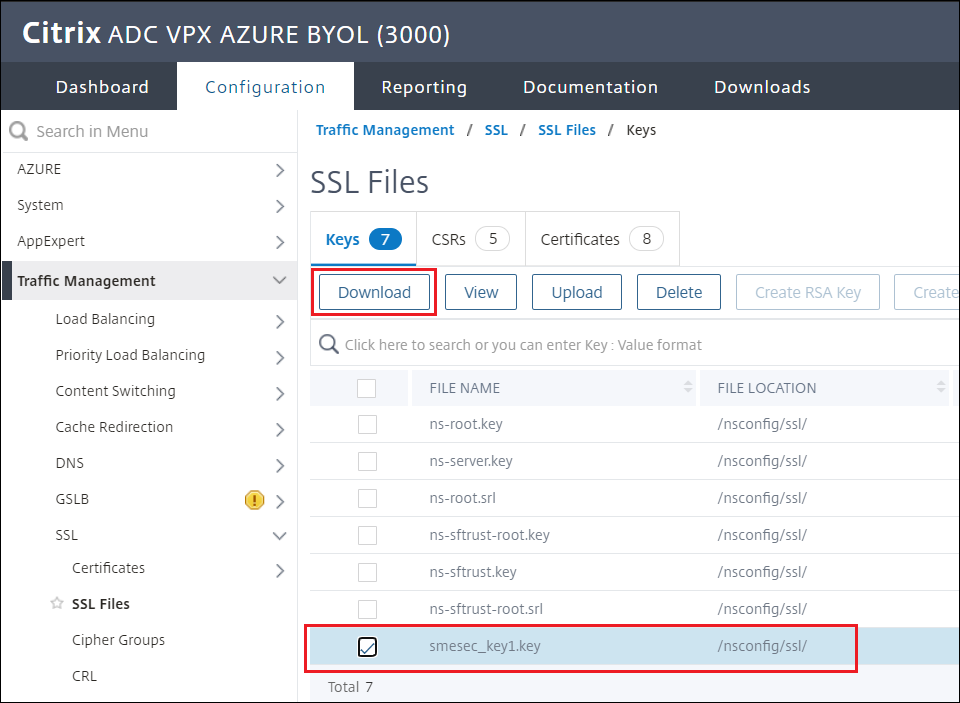
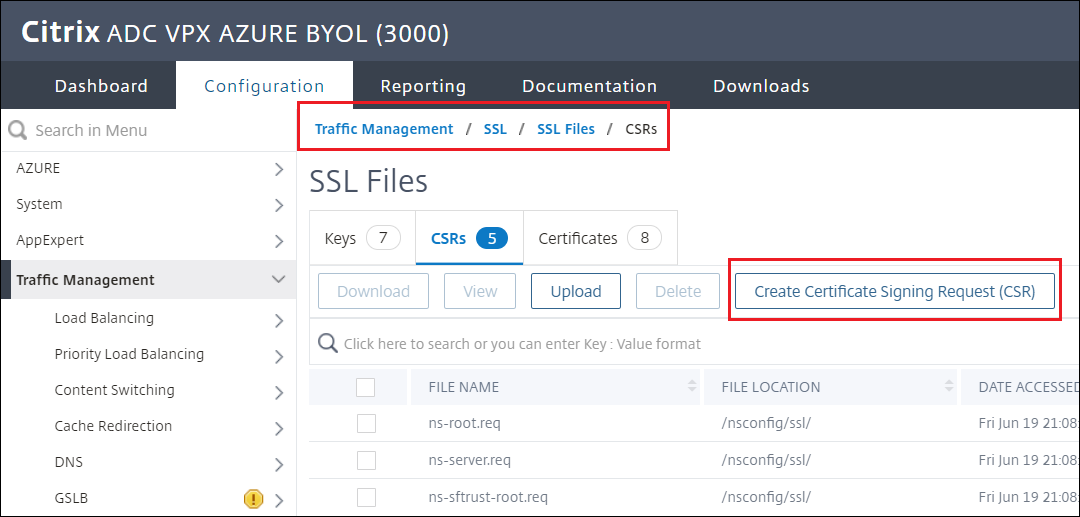
Create a Certificate Signing Request (CSR)
-
Navigate to Traffic management > SSL > SSL Files > CSRs > Create Certificate Signing Request (CSR)
-
Name the request file, for example
semesec_req1.req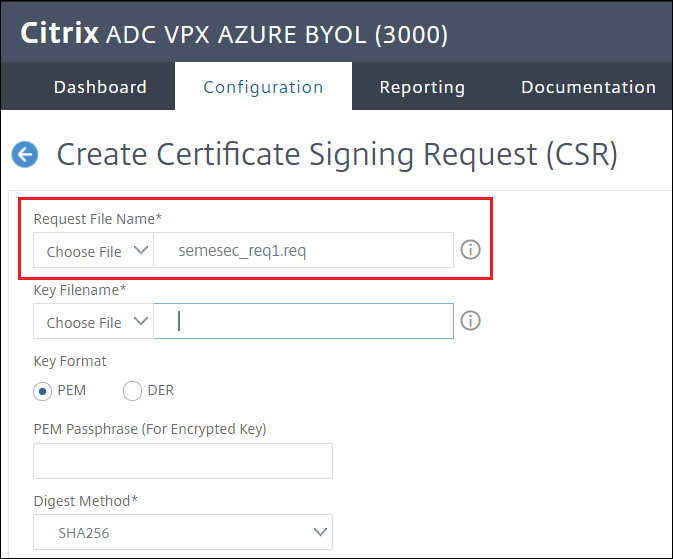
-
Click Key Filename > Appliace the key file name is the one created in the previous step, in this example
smesec_key1.key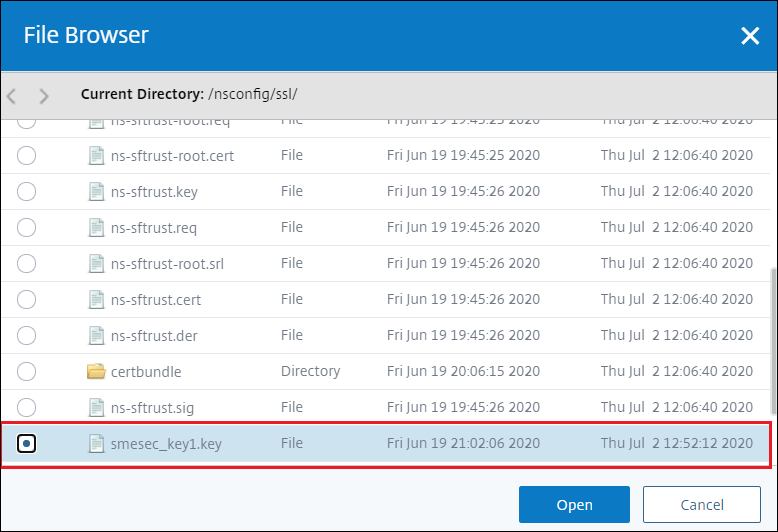
-
After selecting the Key continue to fill in the blanks required: Common Name, Organization Name, and State or Province
-
Click Create
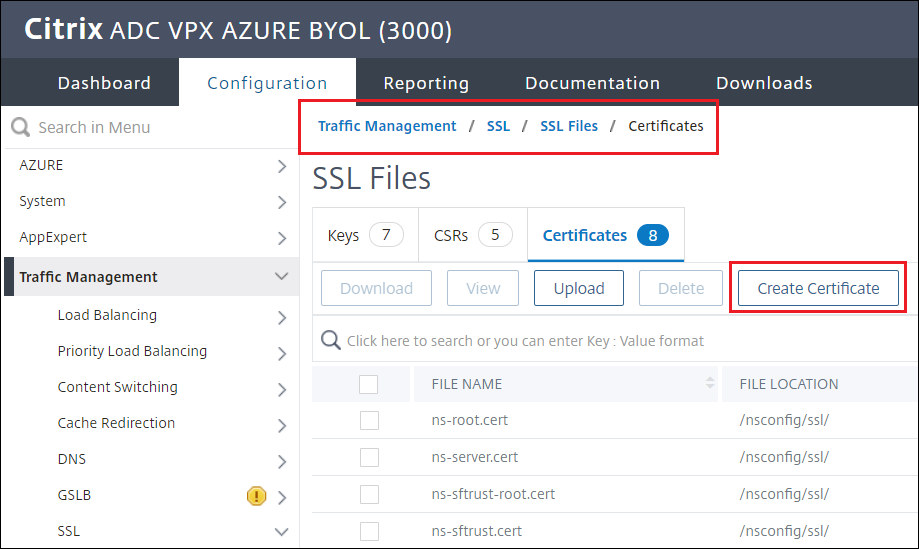
Create a Certificate
-
Navigate to Traffic management > SSL > SSL Files > Certificates > Create Certificate
-
Give the certificate a name and choose both the Certificate Request File (
.req) and the Key File name (.key) created in the previous steps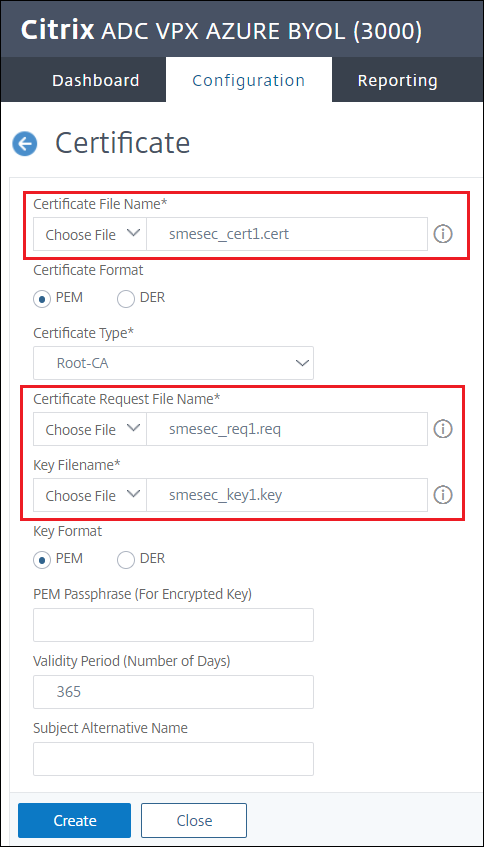
-
Click Create
-
Once the certificate is created, download the
.certfile for later use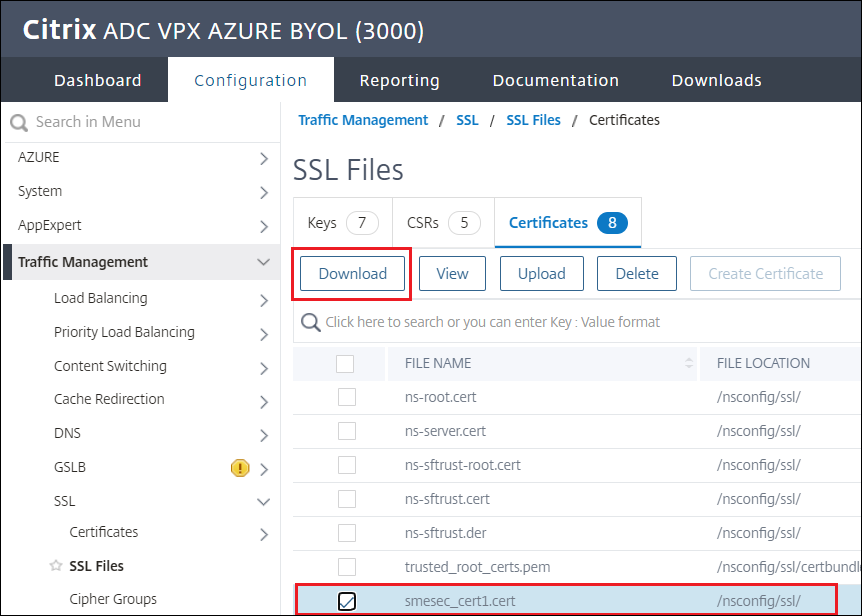
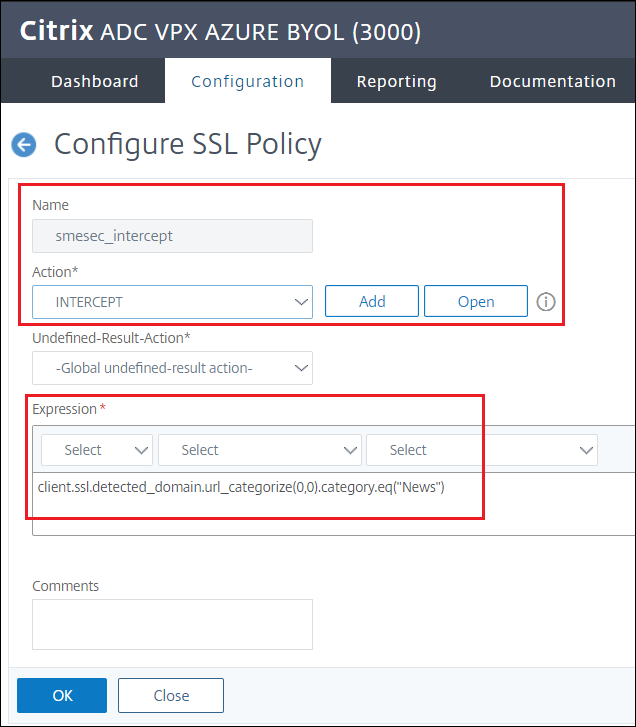
Create SSL INTERCEPT policy
-
Navigate to Traffic management > SSL > Policies
-
Click Add

-
Give the policy a name and select the INTERCEPT action
-
Expression to intercept news:
client.ssl.detected_domain.url_categorize(0,0).category.eq("News") -
Click Create
-
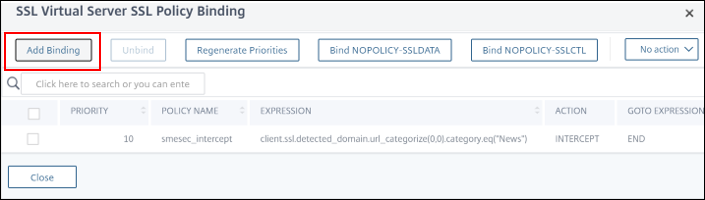
To bind the Intercept policy to the virtual server navigate to Security > SSL Forward Proxy > Proxy Virtual Servers
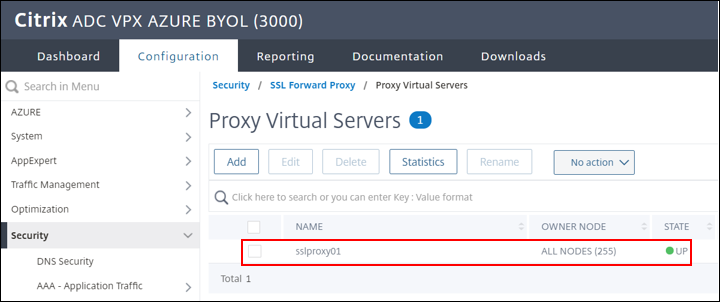
-
Select the virtual server, in this example
sslproxy01 -
Select add SSL Policies and click No SSL Policy Binding
-
Bind the intercept policy:
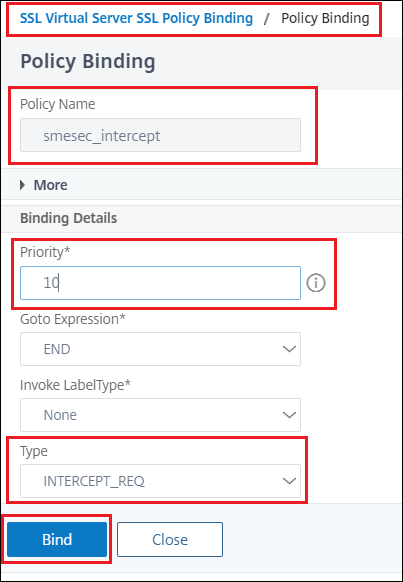
Create SSL BYPASS policy
-
Navigate to Traffic management > SSL > Policies
-
Click Add
-
Give the policy a name and select the NOOP action - there is no BYPASS option, see next step
-
Expression to bypass policy:
CLIENT.SSL.DETECTED_DOMAIN.CONTAINS("cloud")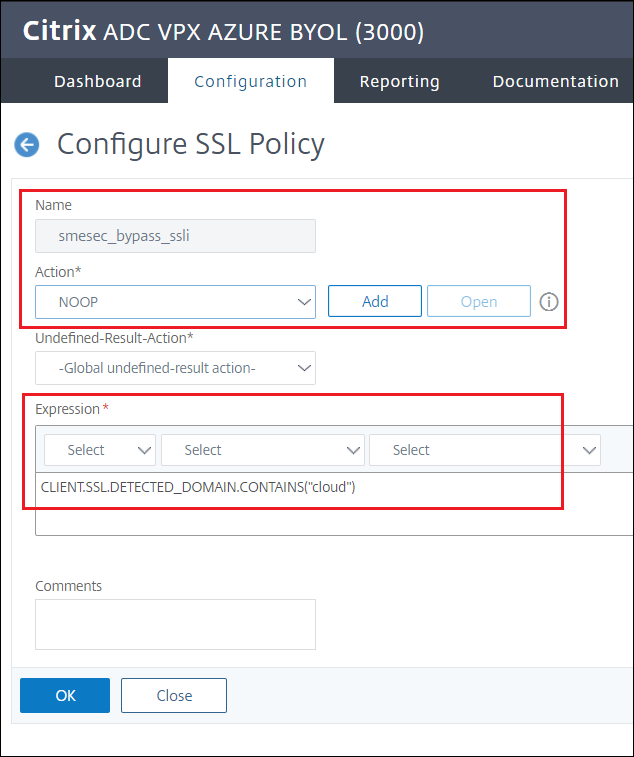
-
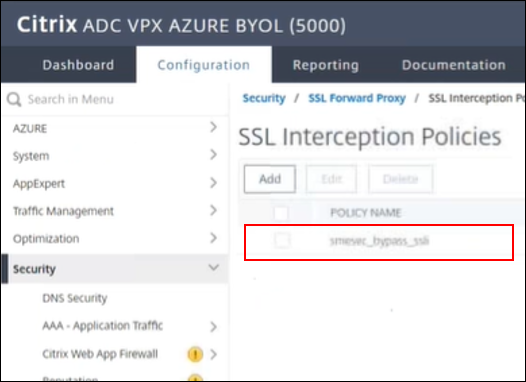
Navigate to Security > SSL Forward Proxy > SSL Interception Policies
-
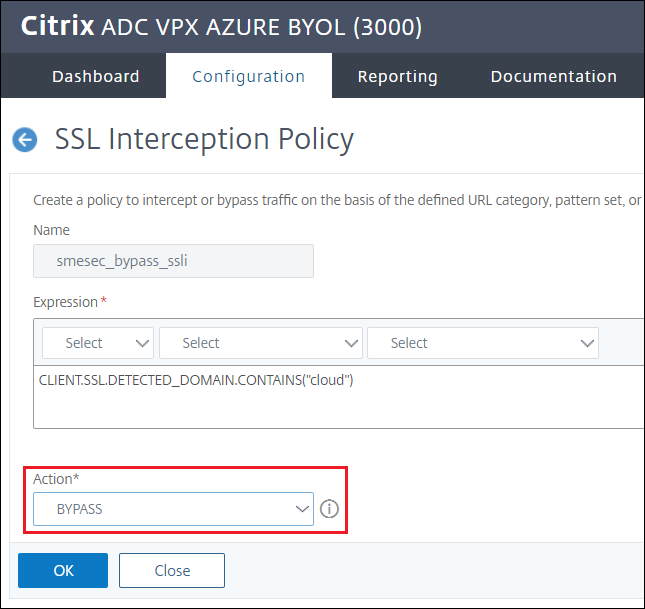
Select the policy to edit it
-
Change Action from NOOP to BYPASS
-
Click OK
-
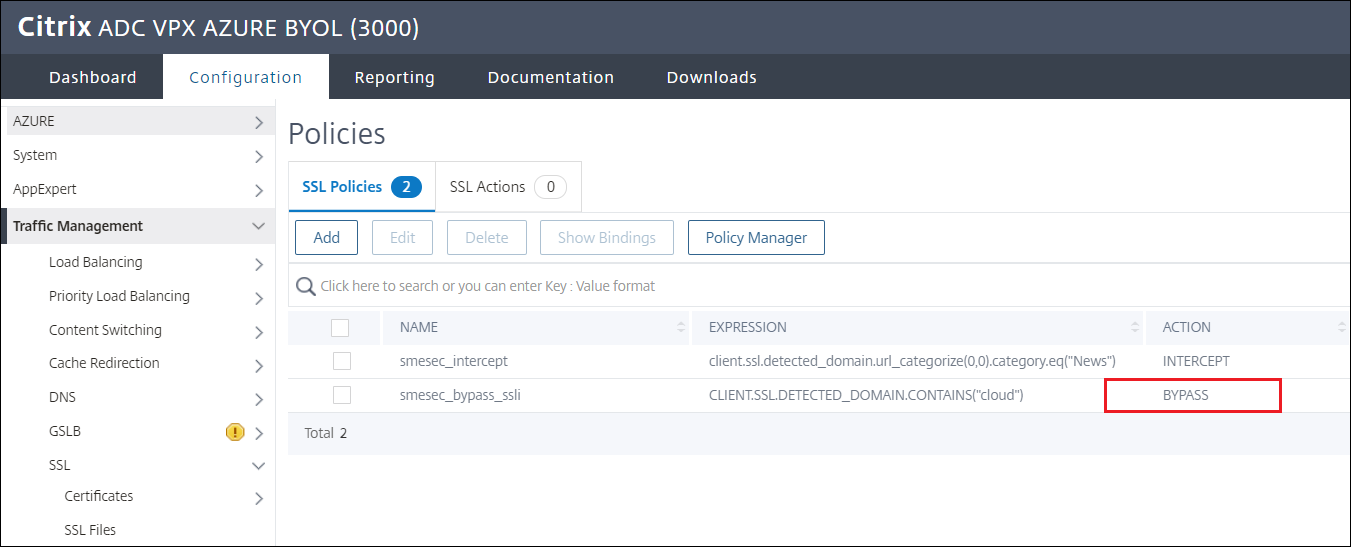
Double check that the Action is now BYPASS
-
Go back to Traffic management > SSL > Policies to double check the change
-
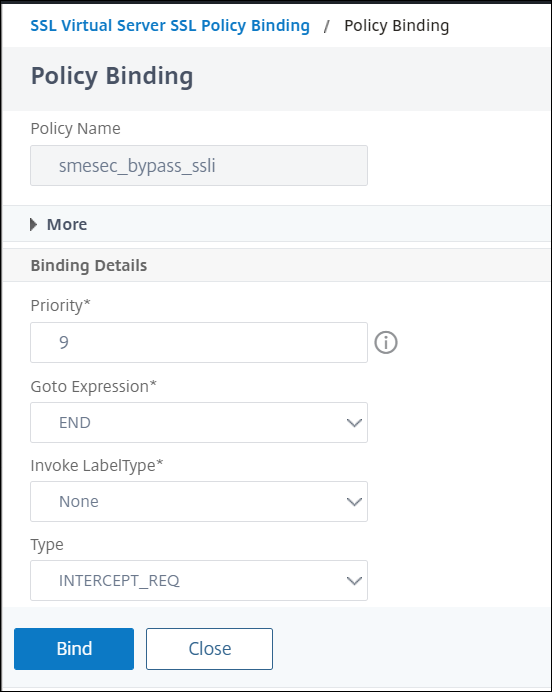
To bind the Bypass policy to the virtual server navigate to Security > SSL Forward Proxy > Proxy Virtual Servers
-
Double-click the virtual server, in this example
sslproxy01 -
Select add SSL Policies and click SSL Policy Binding
-
Bind the bypass policy > Add
-
Click Bind
Note:
This policy is created to bypass the ADC interception for traffic going to secure browser
launch.cloud.com
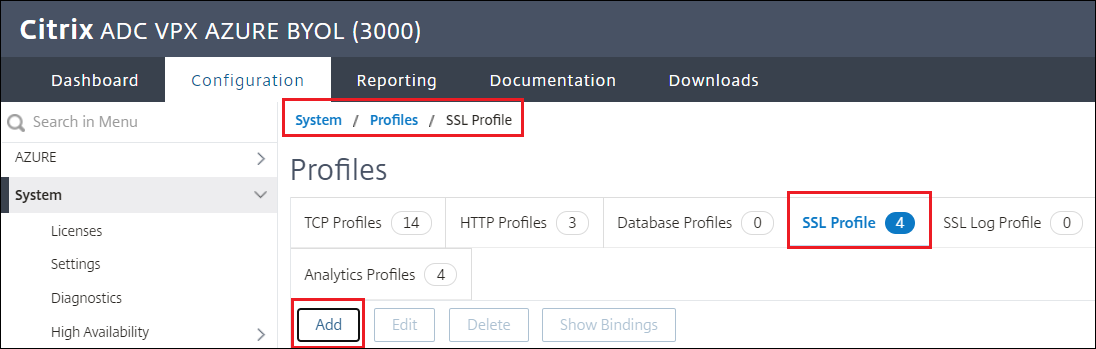
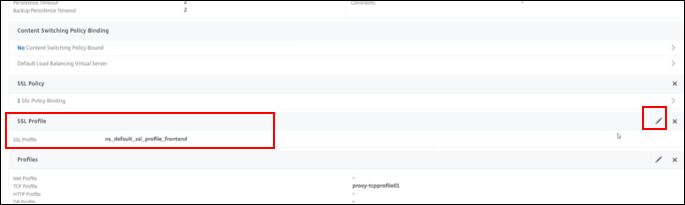
Create SSL Profile
-
Navigate to System > Profiles > SSL Profile > Add
-
Create the profile by giving it a name, in this example
smesec_swg_sslprofile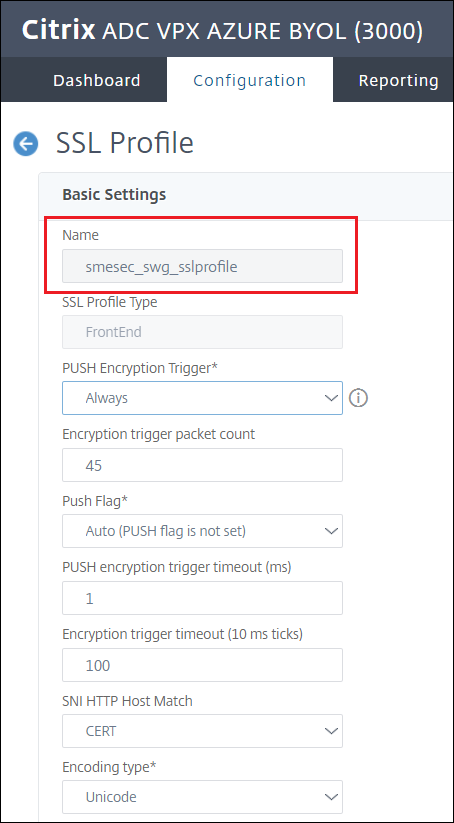
-
Check the box to enable SSL Sessions Interception, then click OK
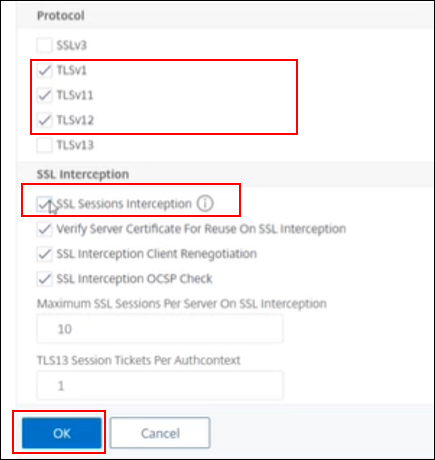
-
Click OK to create SSL Profile
-
Must install the cert-key pair
-
Make sure you have a
.pfxformat of the cert-key pair before. See the following step for guidance on how to generate a.pfxfile from the.certand.keyfiles that you previously downloaded.
Prepare cert-key pair
-
Start by installing the SSL tool
-
Add the
opensslinstallation path to the system environment variables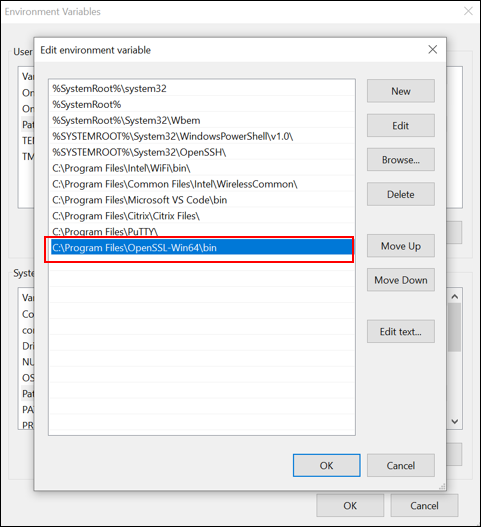
-
From PowerShell, run the command:
openssl pkcs12 -export -out smesec_cert1.pfx -inkey smesec.key1.key -in smesec.cert1.cert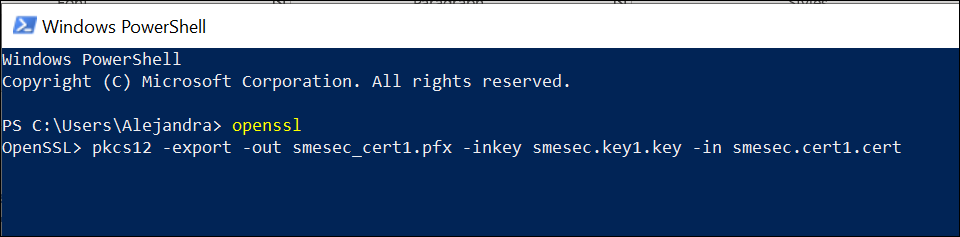
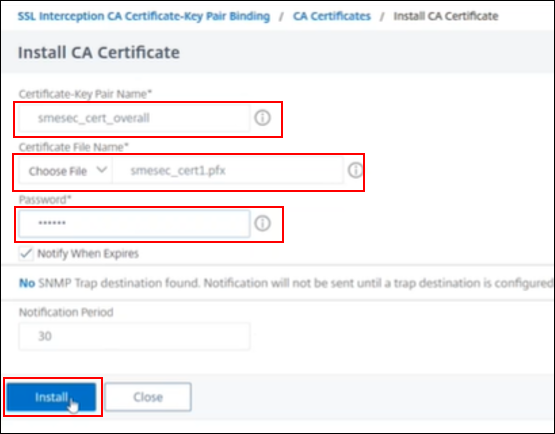
Bind an SSL Interception CA Certificate to the SSL Profile
-
Navigate to System > Profiles > SSL Profile
-
Select the profile created previously
-
Click + Certificate Key
-
Click Install
-
Choose the .pfx file prepared previously
-
Create a password (you need it later)
-
Click Install
Bind the SSL Profile to the virtual server
-
Navigate to Security > SSL Forward Proxy > Proxy Virtual Servers
-
Select the virtual server, in this example
sslproxy01 -
Click to edit SSL Profile
-
Choose the SSL profile created in previously, in this example
smesec_swg_sslprofile -
Done
Section 5: Set up Rewrite Policies and Actions
A rewrite policy consists of a rule and action. The rule determines the traffic on which rewrite is applied and the action determines the action to be taken by the Citrix ADC. The rewrite policy is necessary for URL redirection to happen to Secure Browser based on the category of the URL entered in the browser, in this example “News”.
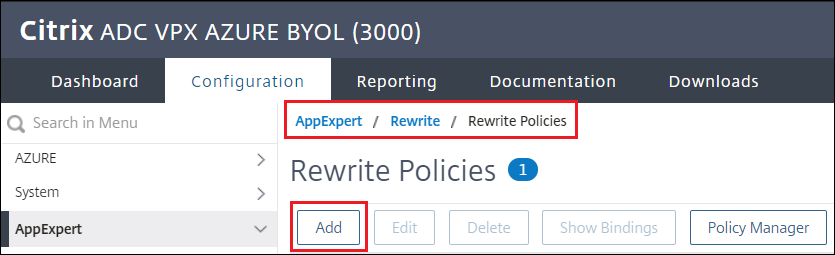
Create rewrite policy and action
-
Navigate to AppExpert > Rewrite > Policy
-
Click Add
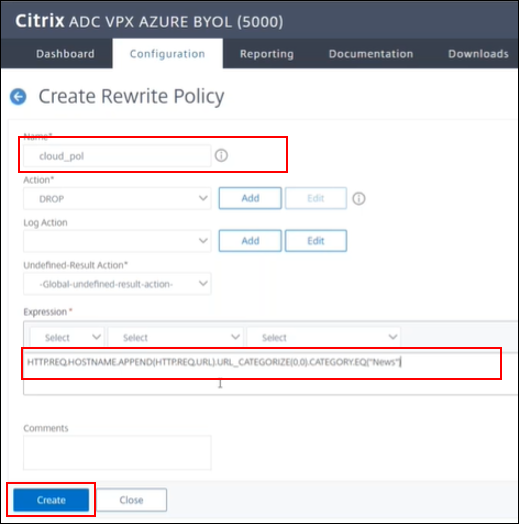
-
Create the policy by naming it, cloud_pol in this example and use the expression:
HTTP.REQ.HOSTNAME.APPEND(HTTP.REQ.URL).URL_CATEGORIZE(0,0).CATEGORY.EQ("News") -
Click create
-
Create the Action in PuTTy
-
Run the following command:
add rewrite action cloud_act REPLACE_HTTP_RES q{"HTTP/1.1 302 Found" + "\r\n" + "Location: https://launch.cloud.com/<customername>/<appname>?url=https://" + HTTP.REQ.HOSTNAME.APPEND(HTTP.REQ.URL.PATH) + "\r\n\r\n\" "}Note:
In the command replace
<customername>with your Citrix Cloud customer account name and replace<appname>with the Secure Browser published app name for which the URL parameters policy is enabled. Referring to the published app you created in Section 1.
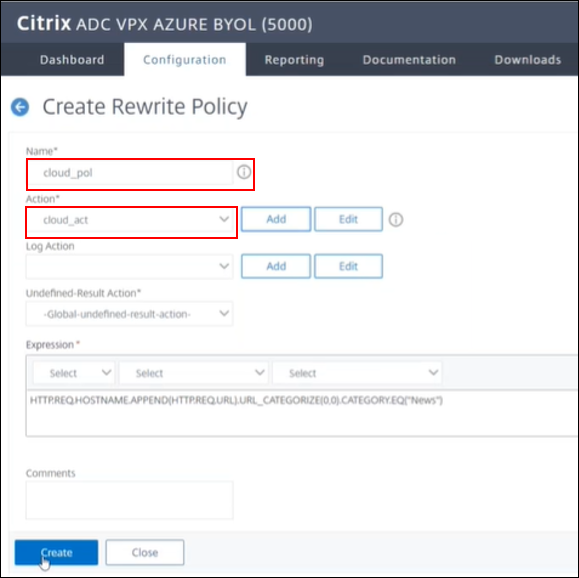
Bind rewrite policy to virtual server
-
Back to the ADC management console
-
Navigate to AppExpert > Rewrite > Policy
-
Go to the policy cloud_pol and change the action to cloud_act (the one created previously)
-
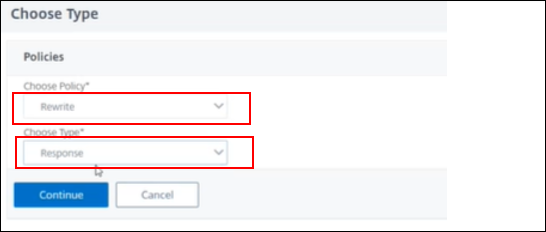
To choose the type of the rewrite policy navigate to Security > SSL Forward Proxy > Proxy Virtual Servers
-
Select “+ Policies”
-
Policy: Rewrite
-
Type: Response
-
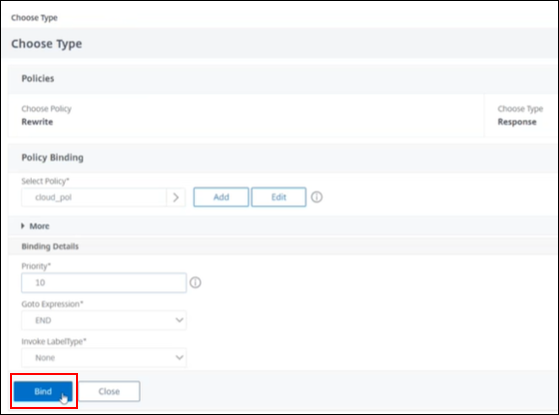
Select the policy created, in this example
cloud_pol -
Priority: 10
-
Bind
-
Click done
-
Save configuration
Bind Certificate key to Profile
-
Navigate to System > Profiles > SSL Profile
-
Select the profile created, for example
smesec_swg_sslprofile -
Double-click + Certificate Key
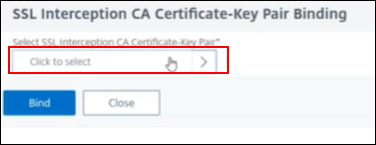
-
Select the certificate key, for example
smesec_cert_overall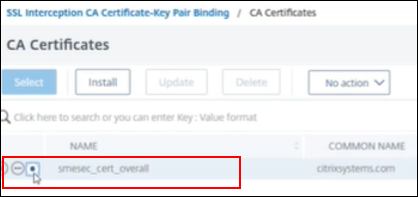
- Click Select
- Click Bind
- Click Done
- Save configuration
Import the certificate file to the browser
-
Upload the certificate into firefox (per our example with News category websites)
-
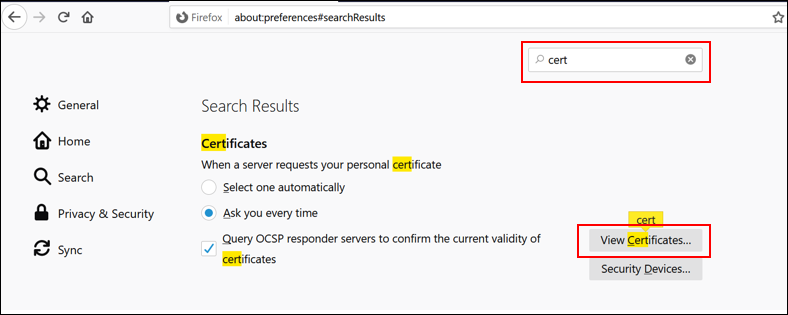
Go to Options in your browser of choice, Firefox in this example
-
Search “certs” > click “View Certificates”
-
In the Certificate Manager window click “Import…”

-
Browse for your cert and click open,
smesec_cert1.certin this example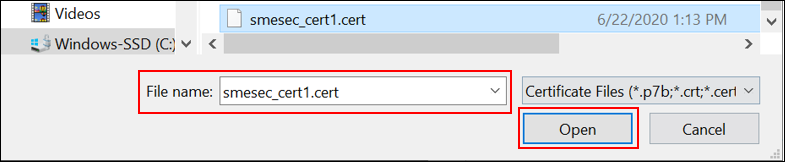
-
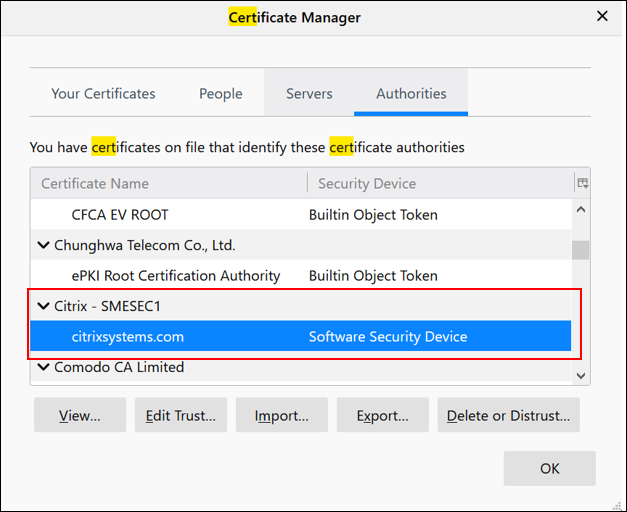
Input the password you created when making the certificate
-
Your certificate authority must be installed properly
Demo
News websites from the local browser are redirected to Secure Browser automatically. See the following demo
Summary
In this PoC guide, you have learned how to set up Citrix ADC in Azure and Configure SSL Forward Proxy and SSL Interception. This integration allows the dynamic delivery of resources by redirecting browsing to Remote Browser Isolation service. Thus, protecting the company network without sacrificing user experience.