PoC Guide - ZTNA - Adaptive Authentication - Internal Employee vs External Employee
Overview
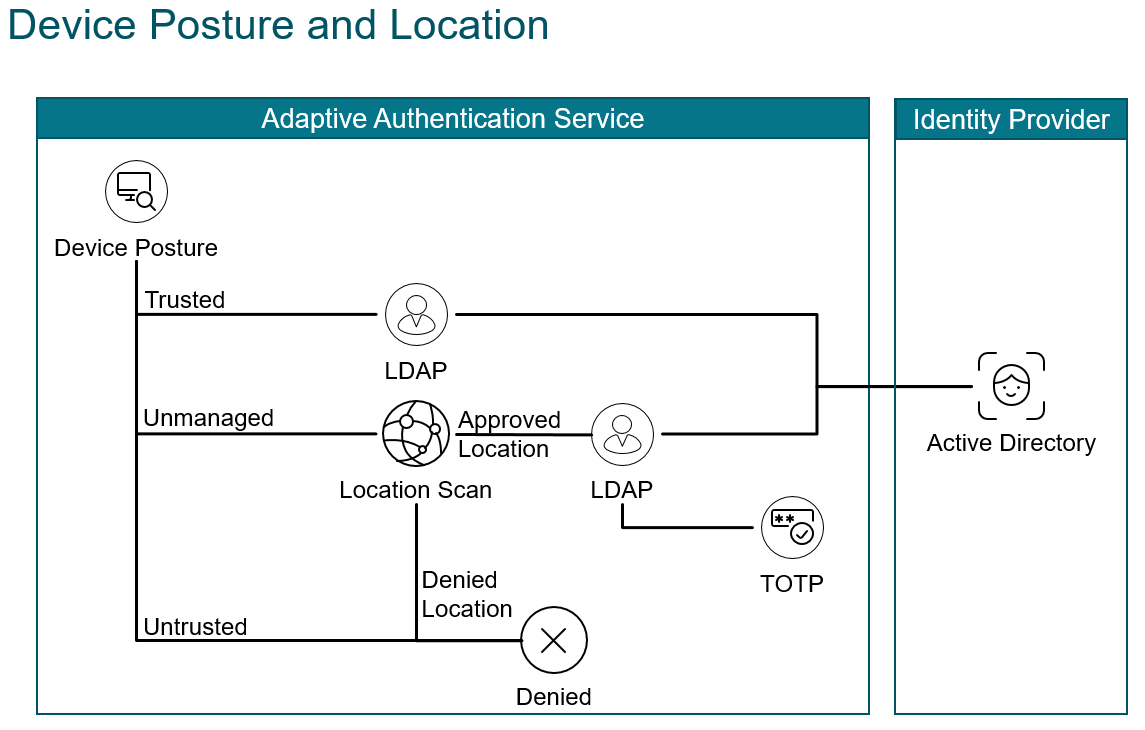
With the hybrid workforce company’s need to identify whether employees are accessing their application from a corporate office or over the internet. With many companies adopting Zero Trust the focus on employee location is less significant. Never the less identifying employee access locations gives companies an opportunity to lower authentication requirements, reduce friction, and thereby improve user experience. Employees in an internal location behind a secure perimeter may only require two authentication factors, whereas those in an external location may require three, to confidently verify their identify and establish trust.
Implementing multifactor authentication is one of the best ways to verify identity, and improve security posture. LDAP is a command method to verify domain username and password. Native (time-based) One Time Password (OTP) is a convenient way to implement another factor using readily available authenticator applications. It allows users to enter validation codes from their authenticator application, into a gateway form, to authenticate.
Citrix Adaptive Authentication supports LDAP, and Native OTP authentication, and they can provide authentication for various services including Citrix Secure Private Access and Citrix Virtual Apps and Desktops™ service. In this POC Guide we demonstrate using them for authentication.
Introduction
The animation below shows an endpoint that passes a device posture check and the user is challenged for domain credentials. Next an endpoint fails a device posture check and the user is challenged for domain credentials and a native otp passcode.

It makes assumptions about the completed installation, and configuration of the following components:
- Citrix ADC installed, licensed, and configured with an externally reachable AA virtual server bound to a wildcard certificate
- Citrix ADC integrated with Citrix Cloud using Oauth
- Endpoint with Citrix Workspace™ app installed
- A supported Authenticator app, that supports Time Based OTP, installed (including Microsoft Authenticator, Google Authenticator, or Citrix SSO)
- Active Directory (AD) is reachable via a Citrix Connector™ Appliance
Refer to Citrix Documentation for the latest product version, and license requirements: Native OTP Authentication
Configuration
This proof of concept guide demonstrates how to:
- Configure Citrix Cloud
- Configure Adaptive Authentication Policies - CLI
- Configure Adaptive Authentication Policies - GUI
- Configure SPA and CVADs to use SmartTags
- Validate User Endpoint Authentication
Configure Citrix Cloud
- Connect to Citrix cloud and log in as your administrator account
- Within Citrix Workspace, access Identity and Access Management from the upper-left menu
- Configure Citrix Gateway - Adaptive Authentication as an authentication method for the Workspace.

Configure Adaptive Authentication Policies - CLI
First, we log in to the CLI on our Citrix ADC and enter the authentication actions and associated policies for EPA and LDAP respectively along with the login schema. Then we log in to our GUI to build apply our policies and complete the multifactor authentication configuration.
Ldap Polices
For LDAP Actions populate the required fields to create the LDAP action in a string and paste it into the CLI:
-
ldapAction- enter the action name. -
serverIP- enter the domain server/s FQDN or IP address. -
serverPort- enter the LDAP port. -
ldapBase- enter the string of domain objects and containers where pertinent users are stored in your directory. -
ldapBindDn- enter the service account used to query domain users. -
ldapBindDnPassword- enter your service account password. -
ldapLoginName- enter the user object type. -
groupAttrName- enter the group attribute name. -
subAttributeName- enter the sub attribute name. -
secType- enter the security type. -
ssoNameAttribute- enter the single sign-on name attribute.
For LDAP Policies populate the required fields to reference the LDAP Action in a string and paste it into the CLI:
-
Policy- enter the policy name. -
action- enter the name of the Email action we created above.
For more information see LDAP authentication policies
- First connect to the CLI by opening an SSH session to the NSIP address of the Citrix ADC and log in as the admin user.
ldapupnmanage
This action & policy matches requests to the site fqdn adaptiveauth.wwco.net with /manageotp appended to the url and allows them to enroll in native OTP with their authenticator app
Update the following fields for your environment and copy and paste the string into the CLI:
add authentication ldapAction authact_ldapupnmanage -serverIP 10.53.8.10 -serverPort 636 -authTimeout 3600 -ldapBase "DC=wwco,DC=net" -ldapBindDn s_adc@yourdomain.com -ldapBindDnPassword abc123 -encrypted -encryptmethod ENCMTHD_3 -kek -suffix 2022_02_02_16_16_21 -ldapLoginName userPrincipalName -groupAttrName memberOf -subAttributeName cn -secType SSL -ssoNameAttribute UserPrincipalName -nestedGroupExtraction ON -maxNestingLevel 3 -groupNameIdentifier userPrincipalName -groupSearchAttribute userPrincipalName -groupSearchSubAttribute userPrincipalName
add authentication Policy authpol_ldapupnmanage -rule "http.req.cookie.value(\"NSC_TASS\").eq(\"manageotp\")" -action authact_ldapupnmanage
workspaceoauth
This action & policy establishes secure oauth communication with Citrix cloud for the primary Workspace URL.
Update the following fields for your environment and copy and paste the string into the CLI:
add authentication OAuthIDPProfile authact_workspaceoauth -clientID xyz1 -clientSecret abc123 -encrypted -encryptmethod ENCMTHD_3 -kek -suffix 2022_02_02_16_16_21 -redirectURL "https://accounts.cloud.com/core/login-cip" -issuer "https://adaptiveauth.yourdomain.com" -audience xyz2 -sendPassword ON
add authentication OAuthIdPPolicy authpol_workspaceoauth -rule true -action authact_workspaceoauth
workspaceoauth2
This action & policy establishes secure oauth communication with Citrix cloud for the custom Workspace URL.
Update the following fields for your environment and copy and paste the string into the CLI:
add authentication OAuthIDPProfile authact_workspaceoauth2 -clientID xyz11 -clientSecret abc123 -encrypted -encryptmethod ENCMTHD_3 -kek -suffix 2022_02_02_16_16_21 -redirectURL "https://workspace.yourdomain.com/core/login-cip" -issuer "https://adaptiveauth.yourdomain.com" -audience xyz22 -sendPassword ON
add authentication OAuthIdPPolicy authpol_workspaceoauth2 -rule true -action authact_workspaceoauth2
ldapupn
This action & policy does ldap authentication with the domain directory using UserPrincipalName.
Update the following fields for your environment and copy and paste the string into the CLI:
add authentication ldapAction authact_ldapupn -serverIP 10.53.8.10 -serverPort 636 -authTimeout 3600 -ldapBase "DC=yourdomain,DC=com" -ldapBindDn s_adc@yourdomain.com -ldapBindDnPassword abc123 -encrypted -encryptmethod ENCMTHD_3 -kek -suffix 2022_02_02_16_16_21 -ldapLoginName userPrincipalName -groupAttrName memberOf -subAttributeName cn -secType SSL -ssoNameAttribute UserPrincipalName -nestedGroupExtraction ON -maxNestingLevel 3 -groupNameIdentifier userPrincipalName -groupSearchAttribute userPrincipalName -groupSearchSubAttribute userPrincipalName
add authentication Policy authpol_ldapupn -rule true -action authact_ldapupn
ldapsam
This action & policy does ldap authentication with the domain directory using SamAccountName.
Update the following fields for your environment and copy and paste the string into the CLI:
add authentication ldapAction authact_ldapsam -serverIP 10.53.8.10 -serverPort 636 -authTimeout 3600 -ldapBase "DC=yourdomain,DC=com" -ldapBindDn s_adc@yourdomain.com -ldapBindDnPassword abc123 -encrypted -encryptmethod ENCMTHD_3 -kek -suffix 2022_02_02_16_16_21 -ldapLoginName samAccountName -groupAttrName memberOf -subAttributeName cn -secType SSL -ssoNameAttribute sAMAccountName -nestedGroupExtraction ON -maxNestingLevel 3 -groupNameIdentifier sAMAccountName -groupSearchAttribute sAMAccountName -groupSearchSubAttribute sAMAccountName
add authentication Policy authpol_ldapsam -rule true -action authact_ldapsam
ldapupn_otp
This action & policy does native otp authentication.
Update the following fields for your environment and copy and paste the string into the CLI:
add authentication ldapAction authact_ldapupn_otp -serverIP 10.53.8.10 -serverPort 636 -authTimeout 3600 -ldapBase "DC=yourdomain,DC=com" -ldapBindDn s_adc@yourdomain.com -ldapBindDnPassword abc123 -encrypted -encryptmethod ENCMTHD_3 -kek -suffix 2022_02_02_16_16_21 -ldapLoginName userPrincipalName -groupAttrName memberOf -subAttributeName cn -secType SSL -ssoNameAttribute UserPrincipalName -authentication DISABLED -nested GroupExtraction ON -maxNestingLevel 3 -groupNameIdentifier userPrincipalName -groupSearchAttribute userPrincipalName -groupSearchSubAttribute userPrincipalName -OTPSecret userParameters
add authentication Policy authpol_ldapupn_otp -rule true -action authact_ldapupn_otp
EPA_internal_cert_domain
This determines whether the client is attempting authentication from a valid Enterprise public IP address (this would correspond to the Network Address Translation ranges used on external firewalls and routers). It also verifies the country. It also verifies a valid enterprise device certificate. It also verifies the device is joined to the enterprise domain.
Update the following fields for your environment and copy and paste the string into the CLI:
add authentication epaAction authact_EPA_internal_cert_domain -csecexpr "sys.client_expr(\"device-cert_0_0\") && sys.client_expr("sys_0_DOMAIN_yourdomain.com")" -defaultEPAGroup VALIDINTERNALCERTDOMAIN -quarantineGroup NOVALIDINTERNALCERTDOMAIN
add authentication Policy authpol_EPA_internal_cert_domain -rule "CLIENT.IP.SRC.IN_SUBNET(1.0.0.0/8) && CLIENT.IP.SRC.MATCHES_LOCATION(\"*.US.*.*.*.*\")" -action authact_EPA_internal_cert_domain
noauthn
This action & policy is a place holder for no authentication commonly used as a placeholder for a next policylabel to evaluate when previous policies in the current policylabel fail.
Update the following fields for your environment and copy and paste the string into the CLI:
add authentication noAuthAction authact_noauthn
add authentication Policy authpol_noauthn -rule true -action authact_noauthn
Login Schema
Next we create Login Schemas used with each factor.
lspol_singlemanage
This login schema is used for Native OTP registration.
Update the following fields for your environment and copy and paste the string into the CLI:
add authentication loginSchema lsact_singlemanage -authenticationSchema "/nsconfig/loginschema/LoginSchema/SingleAuthManageOTP.xml"
add authentication loginSchemaPolicy lspol_singlemanage -rule "http.req.cookie.value(\"NSC_TASS\").eq(\"manageotp\")" -action lsact_singlemanage
lspol_singleauth
This login schema is used for LDAP username and password authentication.
Update the following fields for your environment and copy and paste the string into the CLI:
add authentication loginSchema lsact_singleauth -authenticationSchema "/nsconfig/loginschema/LoginSchema/SingleAuth.xml"
add authentication loginSchemaPolicy lspol_singleauth -rule true -action lsact_singleauth
lspol_dualauthotp
This login schema is used for Native OTP authentication.
Update the following fields for your environment and copy and paste the string into the CLI:
add authentication loginSchema lsact_dualauthotp -authenticationSchema "/nsconfig/loginschema/LoginSchema/DualAuth.xml"
add authentication loginSchemaPolicy lspol_dualauthotp -rule true -action lsact_dualauthotp
Smart Tags
Next we create Smart Tags that will relay device posture check results back to Citrix Cloud services.
lspol_singlemanage
This login schema is used for Native OTP registration.
Update the following fields for your environment and copy and paste the string into the CLI:
add authentication loginSchema lsact_singlemanage -authenticationSchema "/nsconfig/loginschema/LoginSchema/SingleAuthManageOTP.xml"
add authentication loginSchemaPolicy lspol_singlemanage -rule "http.req.cookie.value(\"NSC_TASS\").eq(\"manageotp\")" -action lsact_singlemanage
Certificates
Domain Certificate
In this POC we used a wildcard certificate corresponding to our Active Directory domain and it also corresponds to the fully qualified domain name we use to access to the Gateway virtual server (adaptiveauth.yourdomain.com)
- Log in to the Citrix ADC GUI
- Navigate to Traffic Management > SSL> Certificates > All Certificates to verify you have your domain certificate and CAs installed and linked. See Citrix ADC SSL certificates for more information.
Device Certificate
There are many systems and options for user and device certificate management. In this POC we use the Microsoft Certificate Authority installed on our Active Directory server. We also have our Windows 10 endpoint joined to the domain.
- From the start menu on our domain joined Windows 10 endpoint we enter
mmc, right-click and run as administrator - Select File > Add/Remove, select Certificates, select the arrow to move it to the Selected snap-in pane, select Computer account, Next, Local computer, Finish and, click OK
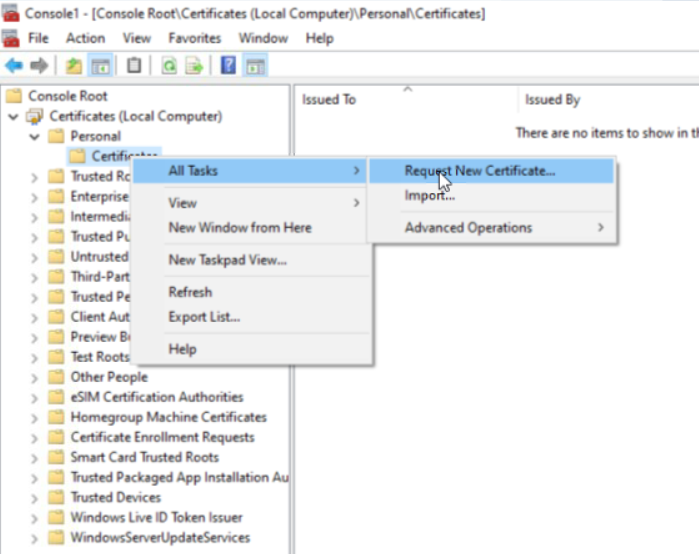
- Open the Personal folder, right-click the Certificates folder > All Tasks > Request New Certificate
- Click next until you are offered certificate types, select Computer, and click Enroll, followed by Finish
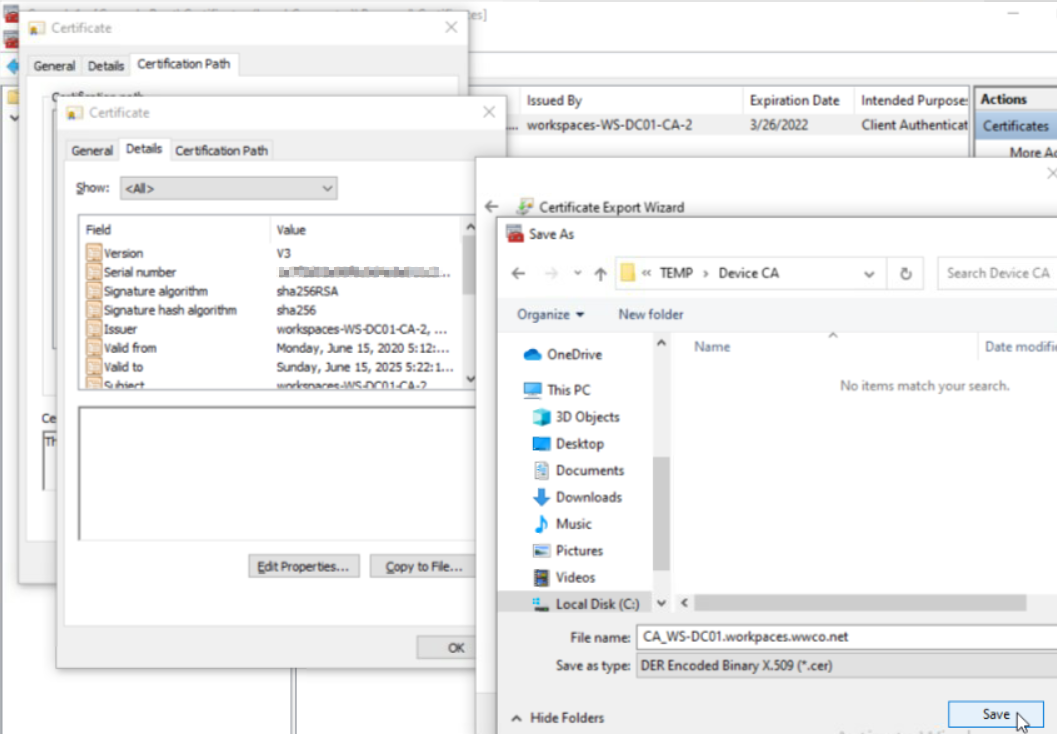
- Double-click the certificate it installed, select the Certification Path tab, select the root CA on the top, and click View Certificate. (Note: We can export the CA from the Active Directory server, yet for the POC we can eliminate steps by doing it here)
- In the popup select the Details tab, select Copy to File, click Next, click Next (to accept DER encoding)
- Select browse, and enter a file name, select save, select next, and select finish to store the CA certificate file.
- Now we will import it into the ADC by navigating to **Traffic Management > SSL> Certificates > CA Certificates
- Click Install, we enter the name
DeviceCertificateCA, select Chose File, Local, and select the file, Open and click Install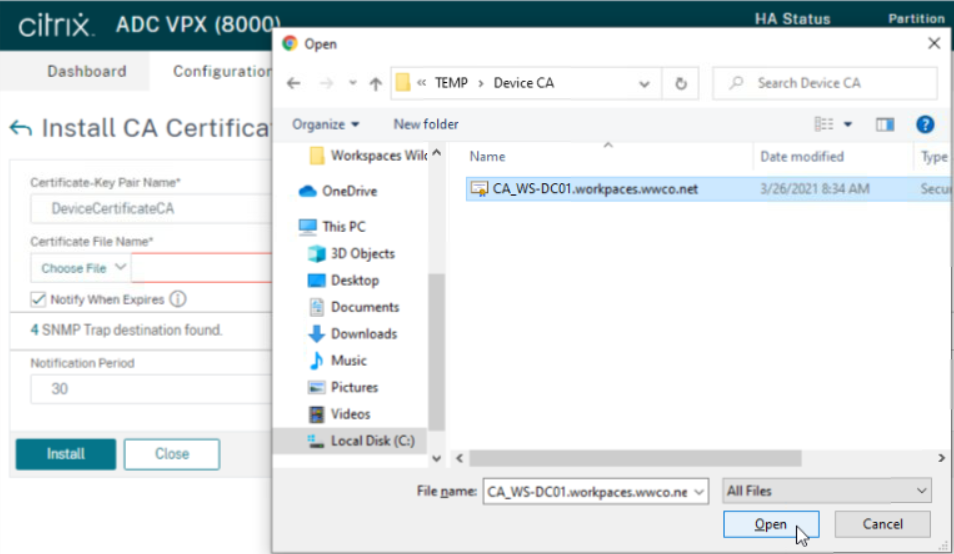
For more information see LDAP authentication policies
Configure Adaptive Authentication Policies - GUI
Now we will create an AAA Virtual Server and bind certificates, policies, and schema with the appropriate priority.
Certificates
- Navigate to Traffic Management > SSL> Certificates > All Certificates to verify you have your domain certificate installed. In this POC example we used a wildcard certificate corresponding to our Active Directory domain. See Citrix ADC SSL certificates for more information.
- Next navigate to
Security > AAA - Application Traffic > Virtual Servers, and select Add - Enter the following fields:
- Name - a unique value. We enter
nativeotp_authvserver - IP Address Type -
Non Addressable
- Name - a unique value. We enter
- Click
Ok - Select No Server Certificate, select the arrow under
Select Server Certificate, select the domain certificate, click Select, Bind, and Continue - Under
Advanced Authentication Policies, selectNo Nfactor Flow - Select the right arrow under
Select nFactor Flow, selectfactor0_notp, clickSelect, clickBind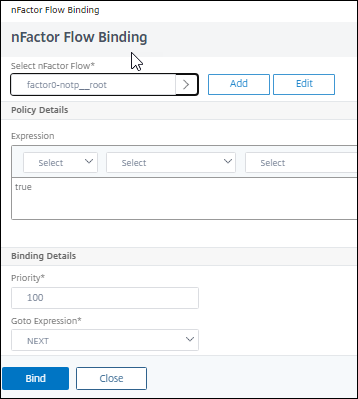
- Click
Continue, followed byDone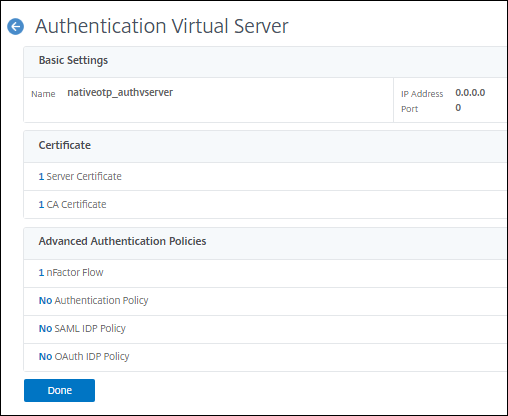
Authentication Policies
Login Schema
Traffic Policy
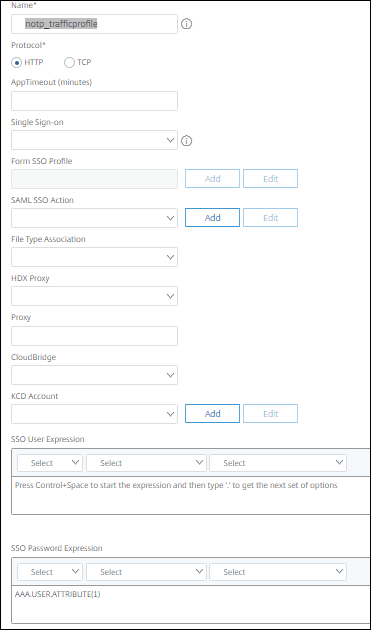
Now we create a traffic policy to relay the LDAP password to StoreFront™, instead of the OTP passcode.
- Navigate to Citrix Gateway > Virtual Servers > Policies > Traffic
- Select the
Traffic ProfilesTab, and click Add - Enter the name
notp_trafficprofile - Select
HTTP - In the SSO Password Expression enter
http.REQ.USER.ATTRIBUTE(1) - Click Create
- Now click the Traffic Policies Tab
- In the Request Profile field, select the
notp_trafficprofileTraffic Profile you just created. - Enter the name
nOTP_TrafficPolicy - In the Express box enter
true - Click
Create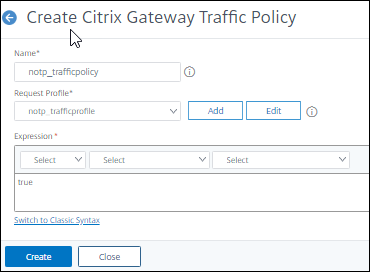
Validate User Endpoint
Now we test Native OTP by authenticating into our Citrix Virtual Apps and Desktops environment.
Registration with Citrix SSO app
First the user registers their device for Native OTP using the Citrix SSO app.
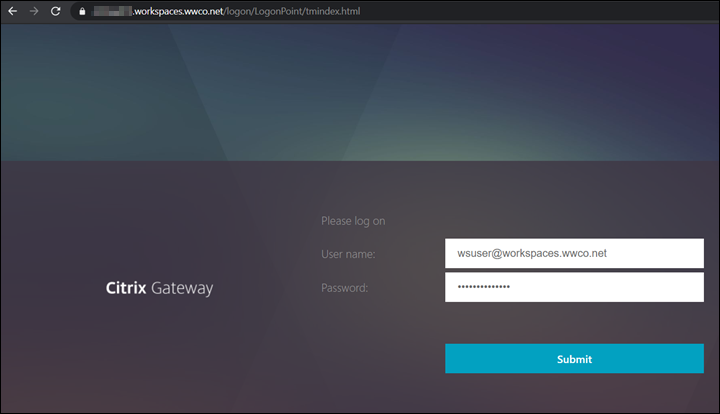
- Open a browser, and navigate to the domain FQDN managed by the Citrix Gateway with
/manageotpappended to the end of the FQDN. We usehttps://adaptiveauth.yourdomain.com/manageotp - After your browser is redirected to a login screen enter user UPN, and password
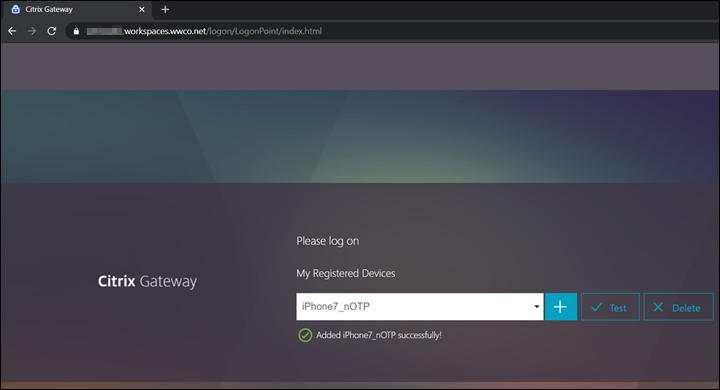
- On the next screen select Add Device, enter a name. We use
iPhone7_nOTP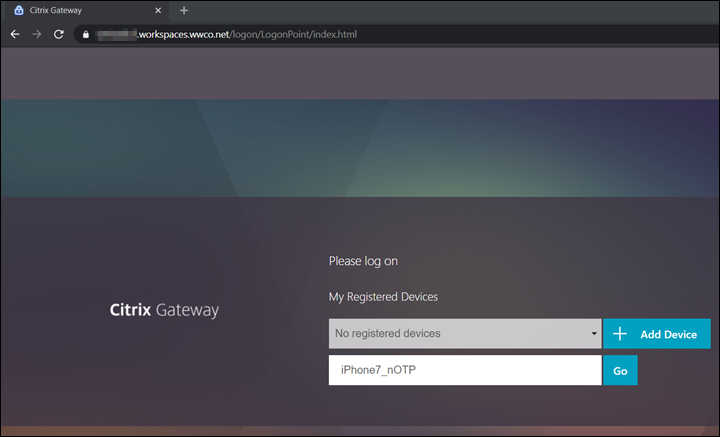
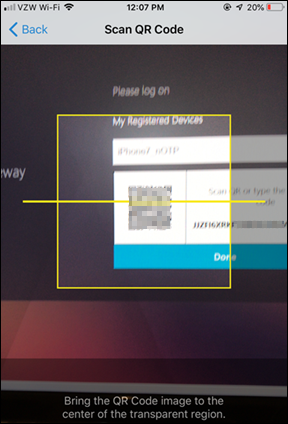
- Select Go, and a QR code appears
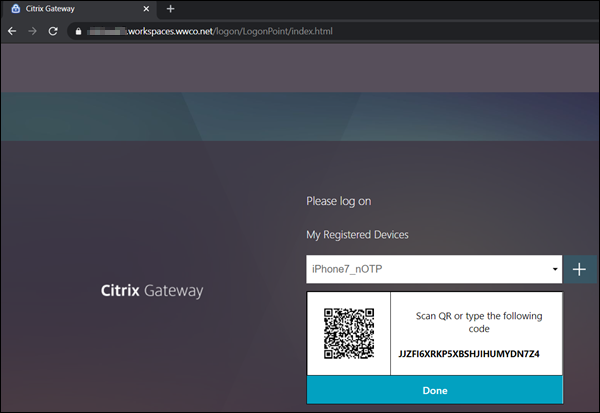
- On your mobile device open your Citrix SSO app or other authenticator app such as Microsoft or Google’s (available for download from app stores)
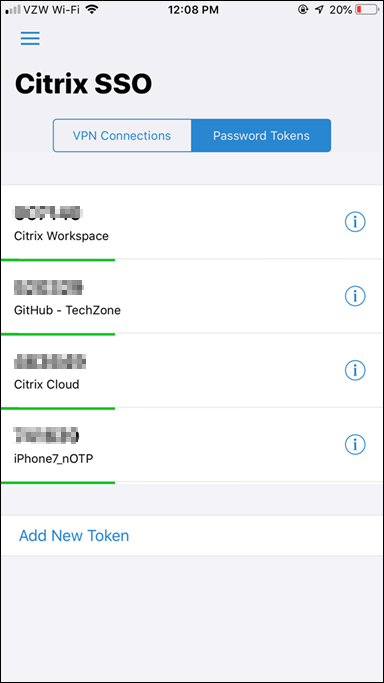
- Select Add New Token
- Select Scan QR Code
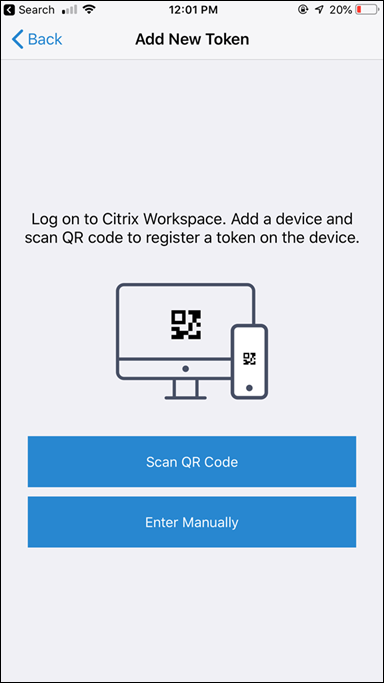
- Select Aim your camera at the QR Code, and once it`s captured select Add
- Select Save to store the token
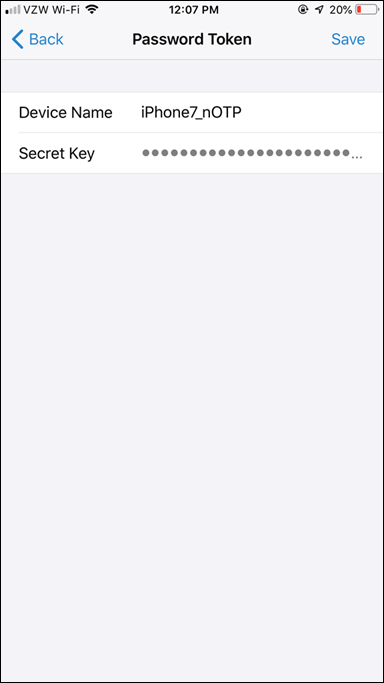
- The Token is now active, and begins displaying OTP codes at 30 second intervals
- Select Done and you see confirmation that the device was added successfully
Login to Citrix Cloud Services
Then the user enters their UserPrincipalName, Password, and the OTP Passcode from the Citrix SSO app to access their virtual apps, and desktops.
- Open a browser (or Citrix Workspace app), and navigate to your Workspace FQDN (found in Citrix Cloud under Workspace Configuration). We use
https://adaptiveauth.yourdomain.com
Trusted Scenario
- Ensure that the device is domain joined, and has an Enterprise device certificate installed, and or is inside the configured “internal” location range.
- After your browser is redirected to a login screen enter user UserPrincipalName, and password
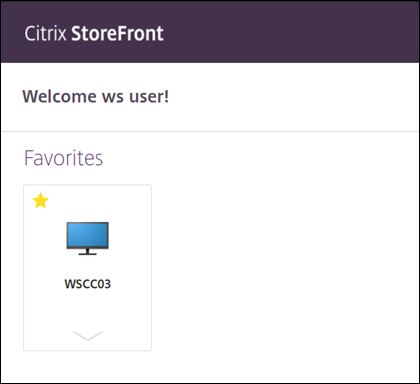
- Verify the users Secure Private Access apps and Citrix Virtual Apps and Desktops are displayed
UnTrusted Scenario
- Ensure that the device is not domain joined, and or missing the Enterprise device certificate, and or outside of the configured “internal” location range.
- After your browser is redirected to a login screen enter user UserPrincipalName, and password
- Open the Citrix SSO app enter the OTP code in the passcode field for the
iPhone7_nOTPdevice entry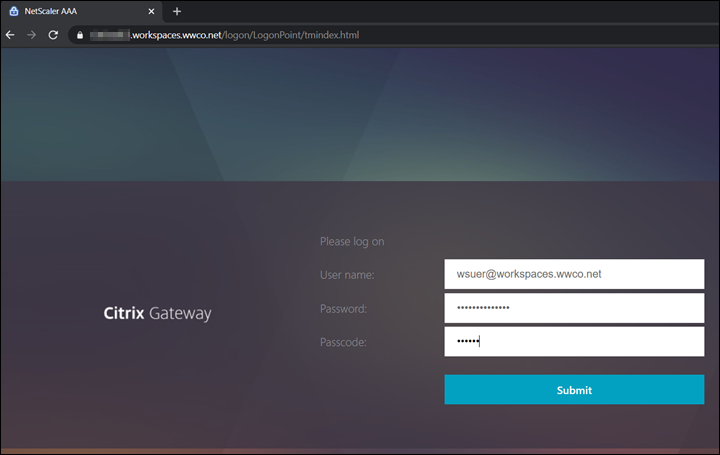
- Verify the users Secure Private Access apps and Citrix Virtual Apps and Desktops are displayed
Troubleshooting
Here we look at a couple common troubleshooting areas for Native OTP.
NTP Errors
Upon login with your OTP code the page may post a message advising you to verify NTP synchronization. The Citrix ADC’s time must be sync in order to generate the correct time based OTP. If you have not implemented NTP follow these steps:
- Set the time manually on your Citrix ADC to the current time. This will speed up the synchronization that would otherwise take a longer period time
- Add NTP Server/s
- If you still get an NTP error upon submitting the OTP code see Time Display on NetScaler Does Not Sync Using NTP
Authentication Errors
-
Cannot complete your request.- if this error message occurs after successful authentication it likely indicates an error passing user credentials to StoreFront. Verify the Dual Authentication schema and Traffic Policy settings.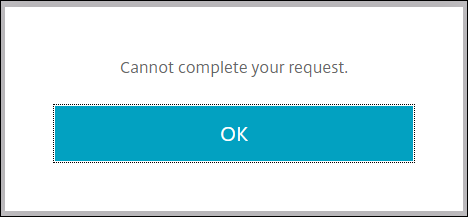
-
Try again or contact your help desk- this error message often indicates a LDAP login failure.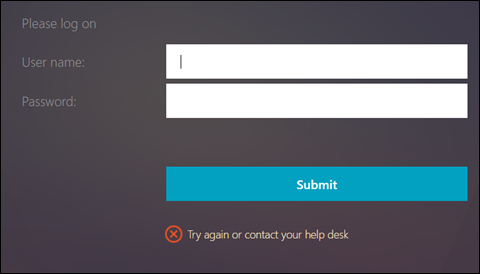 If you have verified the password is correct verify the Administrator bind password has been set. You may have had an existing LDAP authentication policy, and created the manage policy by selecting it, followed by selecting add. This step saves time by populating existing settings like the
 Base DN, and you may see the Administrator password field appears to be populated, but you MUST reenter the password.
Summary
Identifying employee access locations gives companies an opportunity to lower authentication requirements, reduce friction, and thereby improve user experience. Employees in an internal location behind a secure perimeter may only require two authentication factors, whereas those in an external location may require three, to confidently verify their identify and establish trust.
References
For more information refer to:
Native OTP Authentication – find more details regarding Native OTP implementation, and use cases.