Changing XenCenter Options
Note:
XenCenter YYYY.x.x is not yet supported for use with Citrix Hypervisor 8.2 CU1 in production environments. To manage your Citrix Hypervisor 8.2 CU1 production environment, use XenCenter 8.2.7. For more information, see the XenCenter 8.2.7 documentation.
You can install XenCenter 8.2.7 and XenCenter YYYY.x.x on the same system. Installing XenCenter YYYY.x.x does not overwrite your XenCenter 8.2.7 installation.
You can change various settings that affect your XenCenter working environment. On the Tools menu, click Options, click a tab and change the setting, and then click OK to save your changes.
Security settings
| Option | Description | Default |
|---|---|---|
| Warn me when a new SSL certificate is found | Select this check box to have XenCenter display a warning whenever a new TLS security certificate is found on a managed server. Clear the check box if you do not want to see warnings about new certificates found on your managed servers when connecting to them. | Off |
| Warn me when an SSL certificate changes | Clear this check box if you do not want to see warnings about modified certificates found on your managed servers when connecting to them. Select the check box to have XenCenter display a warning whenever a modified certificate is found on a managed server. | On |
See also: Connecting and disconnecting servers.
Update settings
| Option | Description | Default |
|---|---|---|
| Check for new versions of XenServer | Select this check box to have XenCenter periodically check and notify you when new versions of XenServer are available. Clear the check box to disable the periodic check. | On |
| Check for XenServer updates | Select this check box to have XenCenter periodically check and notify you when updates are available for your XenServer server. Clear the check box to disable the periodic check. | On |
| Check for new XenCenter versions | Select this check box to have XenCenter periodically check and notify you when a new version of XenCenter is available. Clear the check box to disable the periodic check. | On |
See also:
Display settings
This tab enables you to configure how graphs are displayed in the Performance tab.
| Option | Description |
|---|---|
| Area graph | Choose this radio button if you want to view the performance data shown on the Performance tab as area charts. For example: 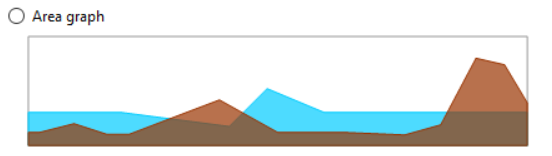
|
| Line graph | Choose this radio button if you want to view the performance data shown on the Performance tab as line charts. For example: 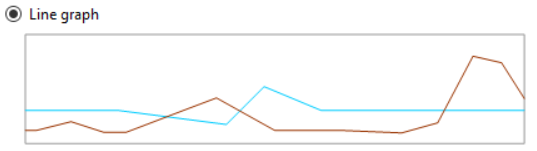
|
See also: Monitoring system performance.
You can also use this tab to configure whether XenCenter remembers the last selected tab for a resource.
Console settings
| Option | Description | Default |
|---|---|---|
| Share clipboard contents with remote console | Select this check box to share your local text clipboard contents with the remote console. Items cut or copied are placed on the clipboard and made available for pasting on either your local computer or on the remote console. | On |
| Full-screen mode | The keyboard shortcut to switch the console to and from full-screen mode. | Ctrl+Enter |
| Dock/Undock | The keyboard shortcut to undock the Console tab from the XenCenter window and to redock it. | Alt+Shift+U |
| Release keyboard and mouse | When the operating system on a VM captures your keyboard and mouse cursor for use within the guest OS. All the keystrokes, mouse moves, and button clicks that you make go to the VM. To return ownership of the keyboard and mouse to your host operating system, XenCenter reserves a special key on your keyboard: this key is the host key. By default, the host key is the right Ctrl key on your keyboard. You can change this default here. | Right Ctrl |
| Preserve current scale setting when console is undocked | Select this check box to use the same console scale setting when the console is docked and when it is undocked. | On |
| Preserve current scale setting when switching back to the default console | Select this check box to keep the same console scale setting when switching between console types (for example, VNC/text console). | On |
| Send Windows Key combinations to the Remote Desktop console | Select this check box to have XenCenter send any Windows Key combinations entered on your keyboard to the Remote Desktop console. | On |
| Receive sound from the Remote Desktop console | Select this check box to have XenCenter play sounds from applications running on the Remote Desktop console on your local computer (the computer where you run XenCenter). | On |
| Automatically switch to the Remote Desktop console when it becomes available | Select this check box to have XenCenter automatically switch from using the standard graphical console to using the Remote Desktop console whenever it is available. | On |
| Connect directly to the server’s console session | Select this check box to have XenCenter connect to the existing console session on the remote server. When opening a Remote Desktop console session, XenCenter uses this session instead of creating a new virtual console session. | On |
| Enable Remote Desktop console scanning | Select this check box to have XenCenter automatically scan for an RDP connection. Clear the check box to prevent XenCenter from automatically scanning (polling) the RDP port, for example, if you have a firewall that blocks RDP traffic. When this option is enabled, XenCenter continues to scan the RDP port even if the Automatically switch to Remote Desktop option is turned off. You can switch to RDP when it becomes available. | On |
Any changes you make to the Windows Remote Desktop console settings apply when you restart XenCenter.
See also: Run a remote console session.
Connection settings
Proxy server
XenCenter can be configured to connect directly to your managed servers or to use a proxy server. You can use your Internet Explorer proxy server settings, or you can specify a proxy server.
- Select Don’t use a proxy server to have XenCenter connect directly to managed servers without using a proxy server.
- Select Use proxy server settings from Internet Explorer to use the same proxy settings as Internet Explorer.
- Select Use this proxy server if you want XenCenter to connect to the specified proxy server. Use HTTP CONNECT to establish a secure TLS tunnel to your servers. Enter the address of the proxy server and the port number to use.
To have XenServer connection requests made directly and not through the proxy server, select the Bypass proxy server for XenServer connections check box. To have all connection requests made through the proxy server, clear the check box.
XenServer connection is any connection which provides communication between XenCenter and the XenServer system, such as sending commands and using the console. A non-XenServer connection is something such as checking for updates.
Select the Provide credentials check box and enter the Username and Password that corresponds to a user account that is set up on the specified proxy server.
Select the desired authentication method: Basic or Digest (default).
Authentication method is used to authenticate to the proxy server. Select the same authentication method as the one the proxy server is set for.
For example, if the proxy server requests XenCenter to authenticate using Digest, then XenCenter fails to authenticate if the Basic authentication method is selected.
Default: Don’t use a proxy server
Connection timeout
You can specify how long to wait when establishing a connection with a managed server by adjusting the number of seconds to wait for a connection timeout. Do not set this value too low if you don’t want to receive many false alerts due to network-related problems.
Default: 20 seconds
See also: Connecting and disconnecting servers.
Save and restore settings
Use the settings on this tab to specify whether to store your login credentials for managed servers. Stored login credentials can be used to reconnect automatically to all your managed servers at the start of each XenCenter session. You can also set a main password here to protect your stored login credentials.
| Option | Description | Default |
|---|---|---|
| Save and restore server connection state on startup | Login credentials - your user name and password - for all your managed servers can be stored between XenCenter. These credentials are used to automatically reconnect to them at the start of each new XenCenter session. When this check box is selected, XenCenter remembers the connection state of all your managed servers at the end of each session. XenCenter attempts to restore these servers at the start of your next session. | Off |
| Require a main password | When Save and restore server connection state on startup is enabled, you can protect your stored login credentials with a main password to ensure they remain secure. At the start of each session, you are prompted to enter this main password before connections to your managed servers are automatically restored. | Off |
| Change main password | Select to change the current main password. You are prompted to enter the current password then to enter and confirm the new main password. |
Plug-ins settings
Plug-ins are optional components that you can add to XenCenter to extend its functionality. You can add custom menu items or even whole tabs to the main window using the XenCenter plug-in. For example, you might do this action as an ISV to integrate your own product with XenCenter, or as an end-user to integrate with your company’s existing inventory management. A menu item can run a Microsoft PowerShell script or even an arbitrary executable on the client machine. Tabs are populated with a webpage, and can call out to other services on your network or to your VMs.
Plug-in components
XenCenter plug-in consists of the following components:
- An XML configuration file.
- A resource DLL for each supported locale.
- The application and any resources it requires.
Place the plug-in components into a plug-ins subfolder in your XenCenter installation folder. The components are loaded when XenCenter starts. For example, in a default installation of XenCenter, your plug-ins would be located here:
C:\Program Files (x86)\XenServer\XenCenter\plugins \<your_organization_name>\<your_plugin_name>
<!--NeedCopy-->
Default: Off
View available plug-ins
To see a list of plug-ins currently available in XenCenter, and to enable or disable individual plug-ins, on the Tools menu, select Options. The Options dialog box is displayed. From the list of options on the left pane, select Plugins.
Default: On
Creating plug-ins
To learn how to create plug-ins for XenCenter, see the samples and accompanying documentation in the XenCenter Plug-in Specification and Examples repository. You can access this webpage anytime from XenCenter by clicking XenCenter Plugins online on the Help menu.
For more information, see the XenCenter Plug-in Specification Guide](/en-us/xenserver/8/developer/xencenter-plugin-specification.html).
Confirmations settings
Use the settings on this tab to configure whether to display a confirmation dialog in the following cases:
- When you dismiss an alert
- When you dismiss an update
- When you dismiss an event