保护 Web Studio 部署的安全(可选)
在随 Delivery Controller 安装 Web Studio 时,安装程序会创建绑定到当前服务器的 443 端口的自签名证书。Web Studio 和 Delivery Controller 将使用该证书作为 TLS 证书。从另一台计算机访问时,您可能无法访问 Web Studio,或者可能会在 Web Studio 登录屏幕中看到错误。
如果要从另一台计算机访问 Web Studio,可以执行以下操作:
-
从 Delivery Controller 中导出自签名证书。
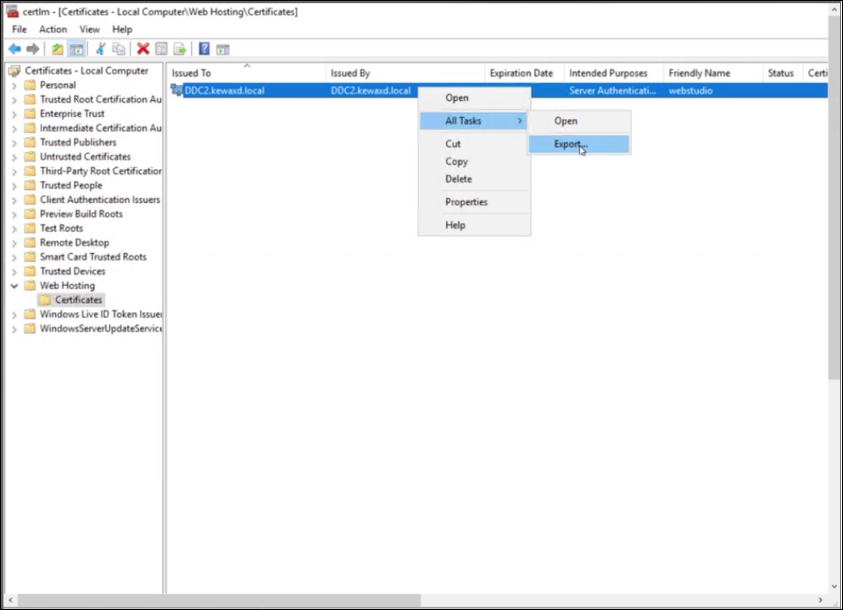
-
对于 Export Private Key(导出私钥),请选择 No, do not export the private key(否,不导出私钥)。
-
对于 Export File Format(导出文件格式),请选择 DER encoded binary X.509 (.CER)(DER 编码的二进制 X.509 (.CER))。
-
-
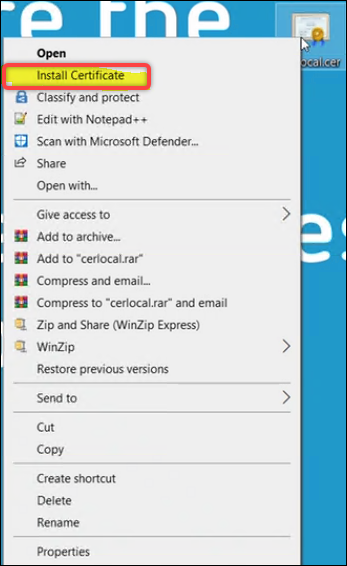
转到要访问 Web Studio 的计算机,然后安装证书。
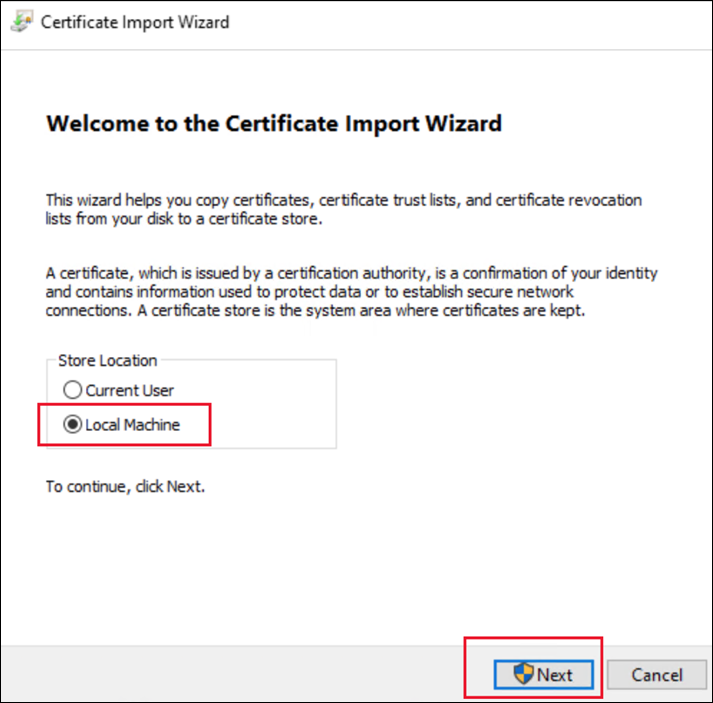
- 对于 Store Location(存储位置),请选择 Local Machine(本地计算机)。
如果您选择在远离 Delivery Controller 的专用服务器上安装 Web Studio,则需要执行两项任务:
-
任务 1:分别从 Web Studio 服务器和 Delivery Controller 中导出证书。
-
任务 2:在要访问 Web Studio 的计算机上安装两个证书。
注意:
作为最佳实践,我们建议您使用来自企业 CA 的外部公共信任证书或证书来保护 Web Studio 部署。
使用外部公共信任证书
可以使用以下三种方法中的任何一种将外部公共信任证书导入 Web Studio 服务器:
-
安装 PFX 文件。
-
双击 PFX 文件。
-
对于 Store Location(存储位置),请选择 Local Machine(本地计算机)。
-
如果需要,请输入密码。

-
对于证书存储,请选择个人。
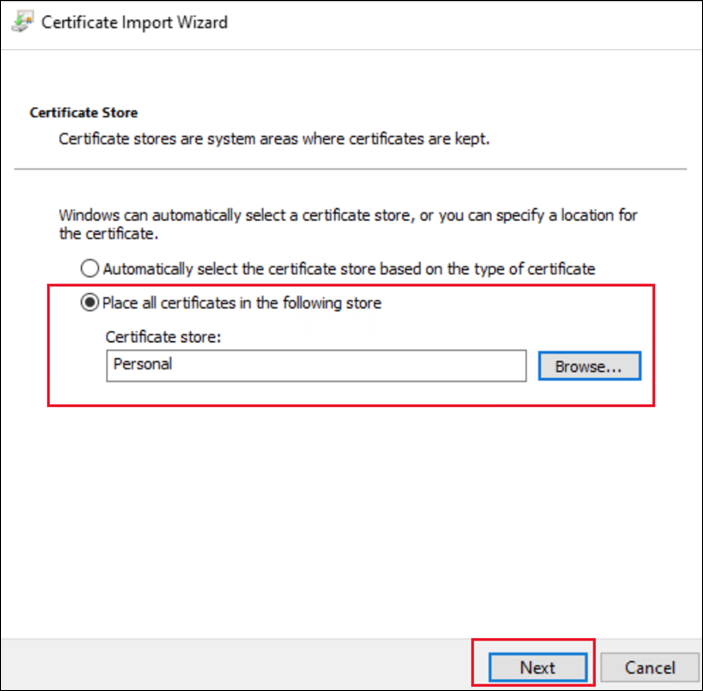
-
-
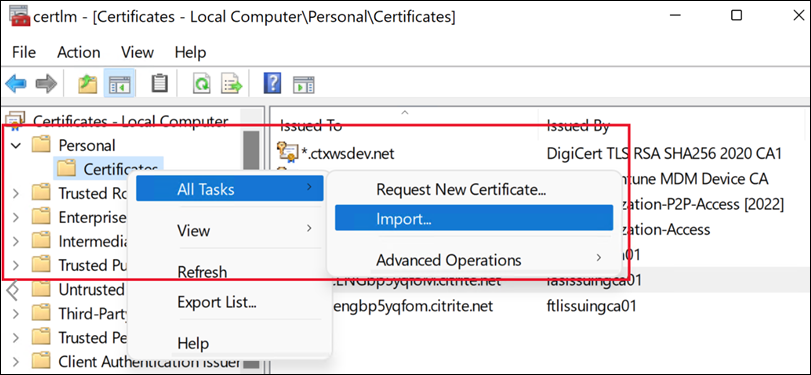
使用“管理计算机证书”控制台。
-
打开“管理计算机证书”控制台,然后转到个人 > 证书 > 所有任务 > 导入。
-
选择 PFX 文件并根据需要输入密码。
-
-
使用 PowerShell。
Import-PfxCertificate -Password $(ConvertTo-SecureString -String "123456" -AsPlainText -Force) -CertStoreLocation Cert:\LocalMachine\My\ -FilePath .\Desktop\certificate.pfx
然后,您将证书绑定到 443 端口。可以在安装或升级之前,也可以在安装或升级之后执行此操作。如果为 443 端口配置了证书绑定,安装程序不会执行任何操作。有关详细信息,请参阅安装或升级之前。
使用企业 CA 颁发的证书
在开始之前,请确保在您的域中部署了企业证书颁发机构 (CA) 服务器。
要申请证书,请执行以下步骤:
-
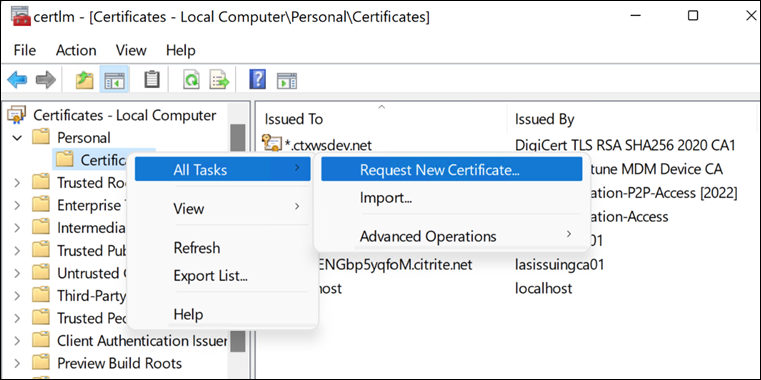
在服务器上,打开“管理计算机证书”控制台。
-
转至个人 > 证书 > 所有任务 > 申请新证书。
-
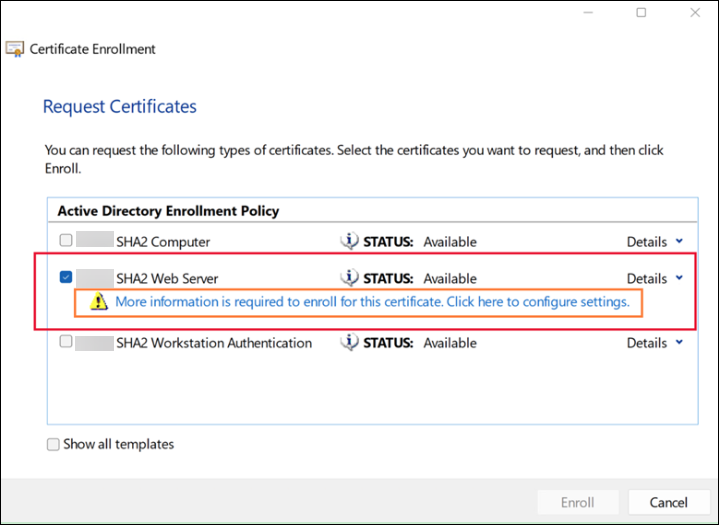
转到证书注册,选择 Web 服务器,然后单击警告消息以填写必要的信息。
-
选择公用名作为使用者名称类型,然后输入您的 FQDN 或 DNS。另外,请输入备用名称。
注意:
如果您需要通配符证书,则可以输入
CN=*.bvttree.local作为使用名称,和输入*.bvttree.local and bvttree.local作为备用 DNS 名称。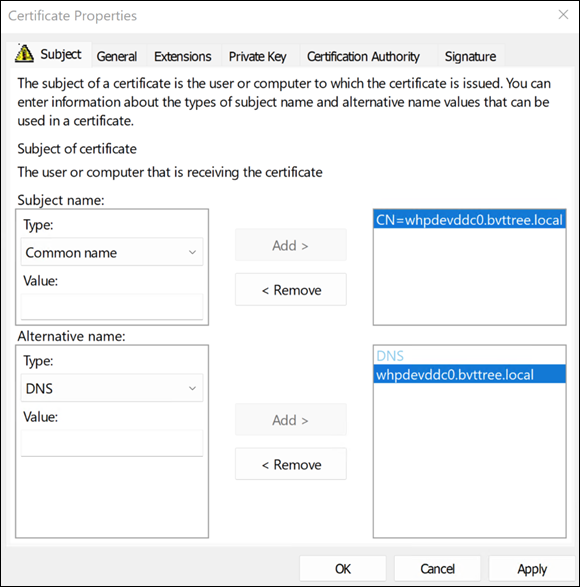
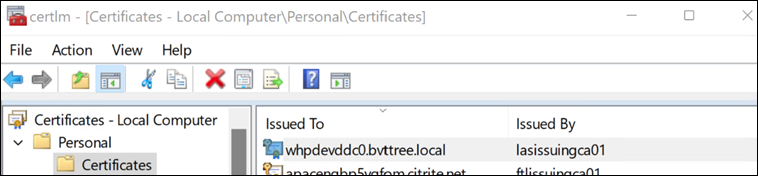
该证书可在个人 > 证书下找到。
然后,您将证书绑定到 443 端口。可以在安装或升级之前,也可以在安装或升级之后执行此操作。如果为 443 端口配置了证书绑定,安装程序不会执行任何操作。
安装或升级之前
要将证书绑定到 443 端口,请执行以下步骤(前提是尚未为 443 配置证书绑定,并且服务器上已启用 IIS):
-
以管理员身份登录 Web Studio 服务器。
-
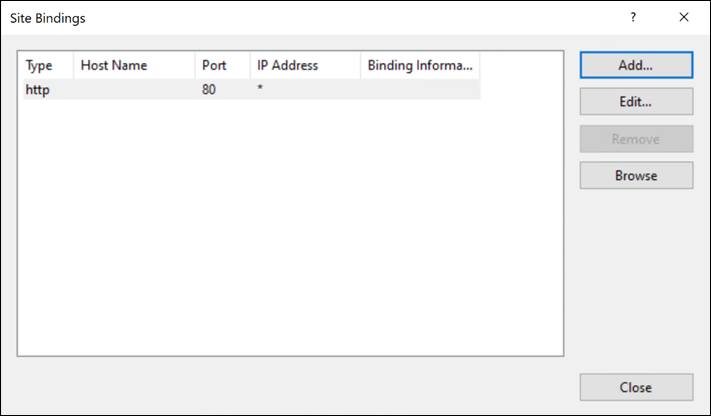
打开 IIS 管理器,浏览到站点 > 默认网站 > 绑定。
-
在站点绑定中,单击添加。
-
在添加站点绑定中,将类型设置为
https,将端口设置为 443,选择您从 CA 请求的 SSL 证书,然后单击确定。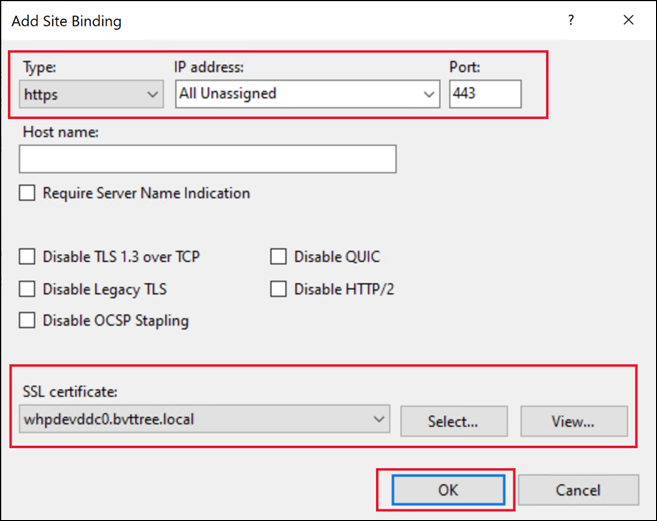
安装 Web Studio 后,Web Studio 和 Delivery Controller 会自动配置为使用证书来保护连接。
或者,您可以使用 PowerShell 更改证书。
$certSName = 'CN=whpdevddc0.bvttree.local'  # The subject name of the certificate
$certificate = Get-ChildItem -Path Cert:\LocalMachine\My\ | ? {$_.Subject -eq $certSName}
netsh http add sslcert ipport=0.0.0.0:443 certhash=$($certificate.Thumbprint) certstorename=My appid="$($(New-Guid).ToString("B"))"
安装或升级之后
转到 Web Studio 服务器并使用 IIS 管理器更改证书。 或者,您可以使用 PowerShell 更改证书。
$certSName = 'CN=whpdevddc0.bvttree.local' # The Enterprise CA certificate subject.
$certificate = Get-ChildItem -Path Cert:\LocalMachine\My\ | ? {$_.Subject -eq $certSName}
netsh http update sslcert ipport=0.0.0.0:443 certhash=$($certificate.Thumbprint)
使用新的自签名证书
可以生成新的自签名证书并使用它来替换现有证书。请执行以下步骤:
-
以管理员身份登录 Web Studio 服务器。
-
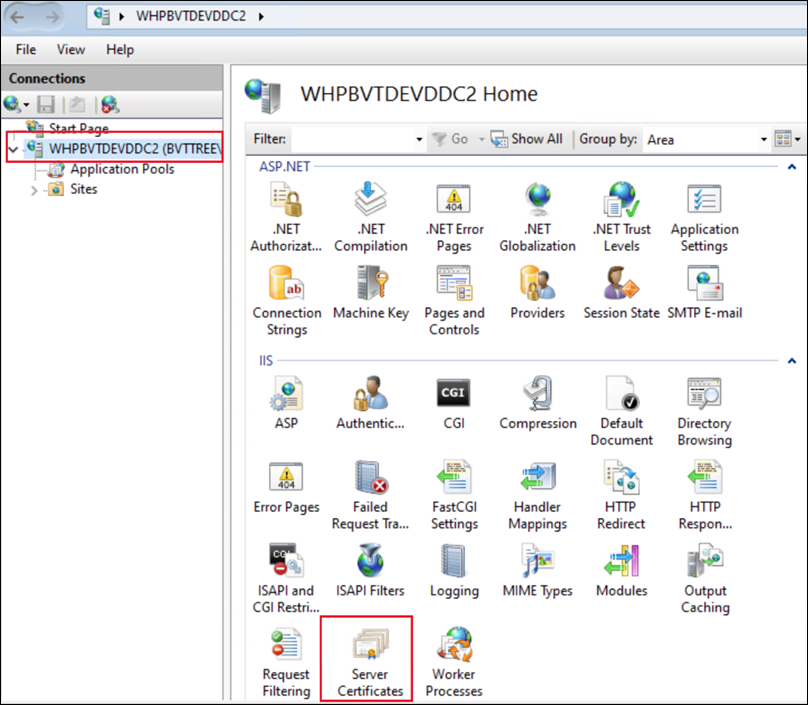
打开 IIS 管理器,浏览到服务器证书,然后在操作窗格中选择创建自签名证书。
-
在创建自签名证书中,输入证书的名称,然后单击确定。然后创建自签名证书。

-
浏览到站点 > 默认网站,在操作窗格中选择绑定,选择
https条目,然后选择编辑。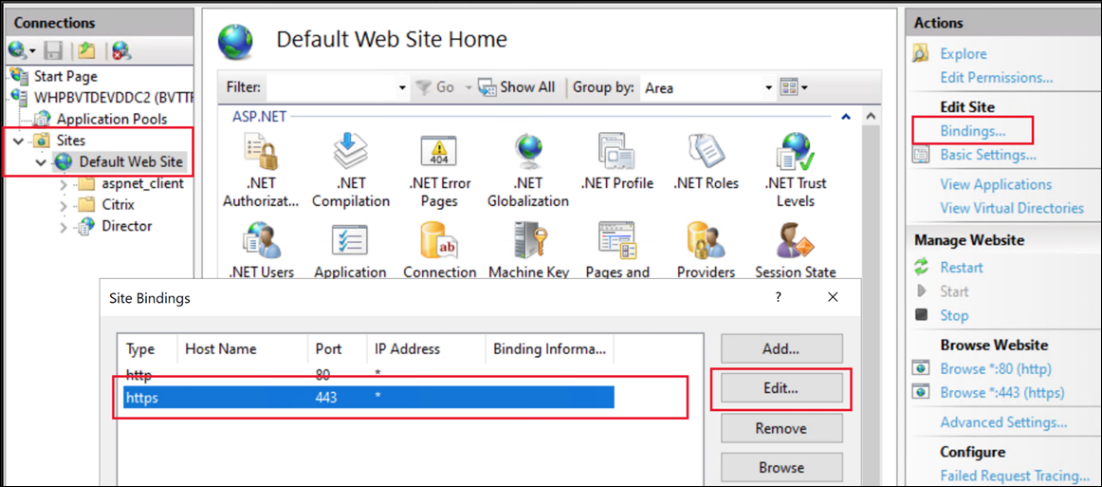
-
在编辑站点绑定中,从列表中选择证书,然后单击 确定。

这样就完成了证书的更改。
或者,您可以使用 PowerShell 更改证书。
$certSubject = "CN=WHPBVTDEVDDC2.BVTTREE.LOCAL" # The FQDN of the server.
$frindlyName = "Self-Signed-3"
$expireYears = 5

## new self-signed certificate under LocalMachine\My
$certificate = New-SelfSignedCertificate -Subject $certSubject -CertStoreLocation "Cert:\LocalMachine\My" -KeyExportPolicy Exportable -KeySpec Signature -KeyLength 2048 -KeyAlgorithm RSA -HashAlgorithm SHA256 -FriendlyName $frindlyName -NotAfter $([System.DateTime]::Now.AddYears($expireYears))
Remove-Item -Path $Env:TEMP\tempCertificate.cer -Force -ErrorAction SilentlyContinue

## Import this certificate into LocalMachine\Root to let this OS trust this certificate
Export-Certificate -Type CERT -Force -Cert $certificate -FilePath $Env:TEMP\tempCertificate.cer -NoClobber
Import-Certificate -FilePath $Env:TEMP\tempCertificate.cer -CertStoreLocation "Cert:\LocalMachine\Root"

## Update bind the 0.0.0.0:443 with this certificate
Invoke-Command -ScriptBlock { Param ($param1) netsh http update sslcert ipport=0.0.0.0:443 certhash=$param1 } -ArgumentList @($certificate.Thumbprint)